
Tulip bulbs can transform any garden into a colorful spring display. But many gardeners struggle with planting them correctly.
They wonder about the right depth, spacing, and timing. Some bulbs fail to bloom, and others produce weak flowers.
Planting tulip bulbs doesn’t have to be complicated. With the right approach, anyone can grow stunning tulips. This guide breaks down the process into simple steps.
Readers will learn exactly what to do, from choosing bulbs to watching them bloom. The result? A garden full of vibrant tulips next spring.
When is the Best Time to Plant Tulip Bulbs?
Timing matters when planting tulip bulbs. Plant them too early, and they might sprout before winter. Too late, and they won’t develop strong roots. The ideal window is narrow but crucial for success.
Fall is the sweet spot for most gardeners.
Specifically, bulbs should go into the ground when soil temperatures drop to around 60°F. This typically occurs 6 to 8 weeks before the first hard frost.
In northern regions, that means late September through October. Southern gardeners can wait until November or even early December.
Cold weather is actually helpful. Tulip bulbs need a chilling period to bloom properly in spring.
Tulip Varieties Best Suited for Different Climates
Different tulip varieties thrive in different climates. Some love cold winters, while others tolerate warmer zones. Choosing the right type ensures beautiful blooms year after year.
| Climate Zone | Best Tulip Varieties | Key Features |
|---|---|---|
| Cold Climates (Zones 3-5) | Darwin Hybrids, Triumph Tulips, Species Tulips | Handle harsh winters well, return reliably each spring |
| Moderate Climates (Zones 6-7) | Fosteriana, Kaufmanniana, Greigii | Balanced cold tolerance, strong bloomers |
| Warm Climates (Zones 8-9) | Species Tulips, Pre-chilled bulbs | Need refrigeration before planting, treat as annuals |
| Hot Climates (Zones 10+) | Not recommended | Tulips require a cold period, won’t bloom reliably |
Essential Preparations Needed to Plant Tulip Bulbs
Getting the bulbs, location, and soil right from the start makes all the difference. These steps ensure strong growth and vibrant blooms.
- Bulb Selection: Choose firm, large bulbs (at least 2 inches in diameter) with no soft spots, mold, or damage. Bigger bulbs produce bigger flowers.
- Sunlight Needs: Pick a spot with 6-8 hours of direct sunlight daily. Tulips bloom best in full sun, though partial shade works in warmer climates.
- Soil Drainage: Ensure excellent drainage to prevent bulb rot. Water should never pool or sit around the bulbs after rain or watering.
- Soil Quality: Use loose, fertile soil with a pH of 6.0-7.0. Mix in compost or organic matter to improve nutrients and texture.
- Air Circulation: Choose locations with good airflow to reduce disease risk and promote healthy growth throughout the season.
Tools & Materials Needed
| Item | Purpose |
|---|---|
| Tulip bulbs | The primary planting material: choose healthy, firm bulbs |
| Garden trowel/shovel | For digging planting holes |
| Compost (optional) | Improves soil nutrients and texture |
| Bulb-tone fertilizer (optional) | Provides nutrients for stronger growth |
| Bone meal (optional – do not use with bulb-tone) |
Alternative nutrient source |
| Mulch (optional) | Light covering to protect bulbs |
| Watering can / hose | For initial watering after planting |
| Gloves | Protect hands while working in soil |
Step-by-Step Instructions on Tulip Bulb Planting
Following these straightforward steps makes the process simple. Even beginners can achieve professional results with proper technique and care.
Step 1: Choose the Perfect Planting Time
Begin by selecting the correct time of year to plant your tulip bulbs, as timing is crucial for successful growth. Tulips need cold soil to begin their rooting process, which means you should plant them about six weeks before the ground freezes.
Light frost doesn’t count; the soil must remain around 32°F for several consecutive days to be considered frozen. Ideal nighttime temperatures should be in the 40–50°F range to prevent premature sprouting.
Plant too early and warm soil may trigger fall growth; plant too late and bulbs won’t establish roots before winter.
Step 2: Select a Sunny Planting Location
Choose a spot that receives full sun, preferably six to eight hours of sunlight per day, as tulips thrive in bright conditions.
A sunny location helps bulbs produce stronger stems and vibrant spring blooms. Avoid areas heavily shaded by trees or structures, as low light leads to weak, droopy flowers.
Before planting, observe your garden’s sun pattern throughout the day to ensure the chosen location consistently gets enough sunlight for tulips to flourish.
Step 3: Prepare the Soil Properly
Loosen the soil thoroughly, digging down several inches so the bulbs can establish roots easily. If your soil is naturally rich and drains well, you may not need to amend it.
However, if your soil is heavy, compacted, or lacking nutrients, mix in compost to improve texture and fertility.
Some gardeners also add bulb-tone fertilizer or bone meal, but avoid using both together since bulb-tone already contains bone meal.
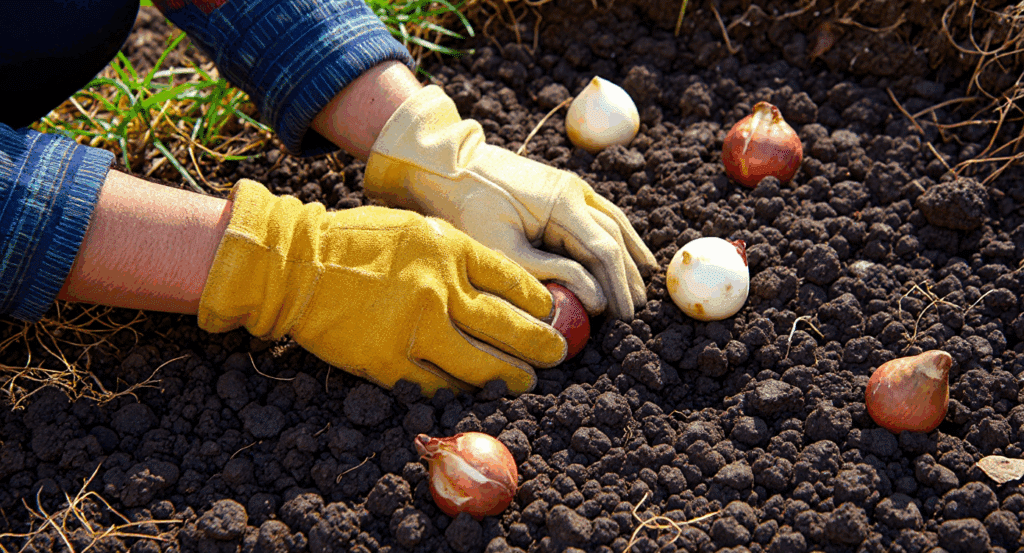
Step 4: Plant the Tulip Bulbs Correctly
Dig a hole that’s two to three times the height of the bulb. Place the bulb in the hole, pointy side up and rounded side down; the pointed end is where the stem emerges.
Even if you accidentally plant some upside down, they will likely still grow, but with shorter stems and less vigor.
Space each bulb about four inches apart. Odd-number groupings (7, 15, 25) create the most appealing natural look. Once placed, cover the bulbs with soil and lightly press to remove air pockets.
Step 5: Water and Mulch the Area Lightly
After covering the bulbs, water the area thoroughly to help them settle and begin their rooting process.
Tulips don’t need constant watering afterward, but they do need that initial soak, especially if rainfall is not expected within the next day or two.
If desired, add a light layer of mulch, but avoid heavy mulching, as it can trap too much moisture.
Mulch helps regulate soil temperature and discourages weeds, but keeping the layer thin ensures your bulbs won’t rot. Once watered and lightly mulched, the bulbs can safely rest until spring.
For more detailed instructions on how to plant tulip bulbs, check out the video given below:
Post-Planting Care and Maintenance
Tulip bulbs need attention after planting to thrive through winter and bloom in spring. Proper care during this period determines the quality and longevity of the flowers ahead.
- Water Wisely: Water bulbs immediately after planting, then only when the soil feels dry. Avoid overwatering, which causes rot.
- Mulch for Protection: Apply 2-3 inches of mulch over the planting area to insulate bulbs and regulate soil temperature during winter.
- Watch for Pests: Check regularly for signs of squirrels, voles, or rodents digging up bulbs. Use wire mesh if needed.
- Spring Fertilizing: Feed with bulb fertilizer when shoots emerge in spring to support strong growth and vibrant blooms.
- Deadhead Spent Blooms: Remove faded flowers but leave foliage intact until it yellows naturally. This feeds the bulb for next year.
Conclusion
Planting tulip bulbs successfully comes down to timing, preparation, and care.
Gardeners who follow these steps will see their efforts rewarded each spring. The process isn’t difficult once the basics are understood.
Remember to plant in the fall when temperatures drop. Choose quality bulbs and a sunny spot with good drainage.
Spring will bring colorful blooms that brighten any garden space. The wait through winter makes those first flowers even more satisfying.