
When it comes to transforming a kitchen or bathroom, one of the most cost-effective and impactful ways to do so is through cabinet painting. But as many homeowners and DIY enthusiasts quickly discover, painting cabinets is more than just slapping on a coat of paint. To get that professional, long-lasting finish, expert advice is essential.
Amanda Bryant, a Color Pro at TheUrbanPainter.com, has years of experience in the art of cabinet painting. Known for her eye for detail and precision, Amanda shares her expert advice to help homeowners and professionals alike achieve flawless results. Whether you’re planning to update your kitchen or revamp a bathroom, her tips will ensure your cabinets look stunning for years to come.
Preparation is Key
One of the biggest mistakes many people make when painting cabinets is rushing the preparation phase. “Proper preparation is the foundation for a successful paint job,” Amanda says. “Skipping steps or cutting corners during prep will result in peeling, chipping, or uneven coverage.”
The first step in preparing your cabinets for painting is to remove all doors, drawers, and hardware. This includes handles, knobs, and hinges. By removing these components, you eliminate the risk of accidentally painting over them, plus it gives you better access to the surfaces you’ll be painting.
Next, clean all surfaces thoroughly. Cabinets accumulate grease, grime, and dust over time, and it’s crucial to remove this debris before painting. Amanda recommends using a degreaser or a mixture of warm water and TSP (trisodium phosphate) to scrub the surfaces. “This will ensure the paint adheres properly,” she explains.
Once cleaned, sanding is essential. Even if your cabinets appear smooth, sanding them will create a better surface for the paint to bond to. Amanda suggests starting with a medium-grit sandpaper (around 120-grit) and finishing with fine-grit paper (around 220-grit) for a smooth finish. “This step is often overlooked but is so important for a durable finish,” she stresses.
Choose the Right Paint and Tools
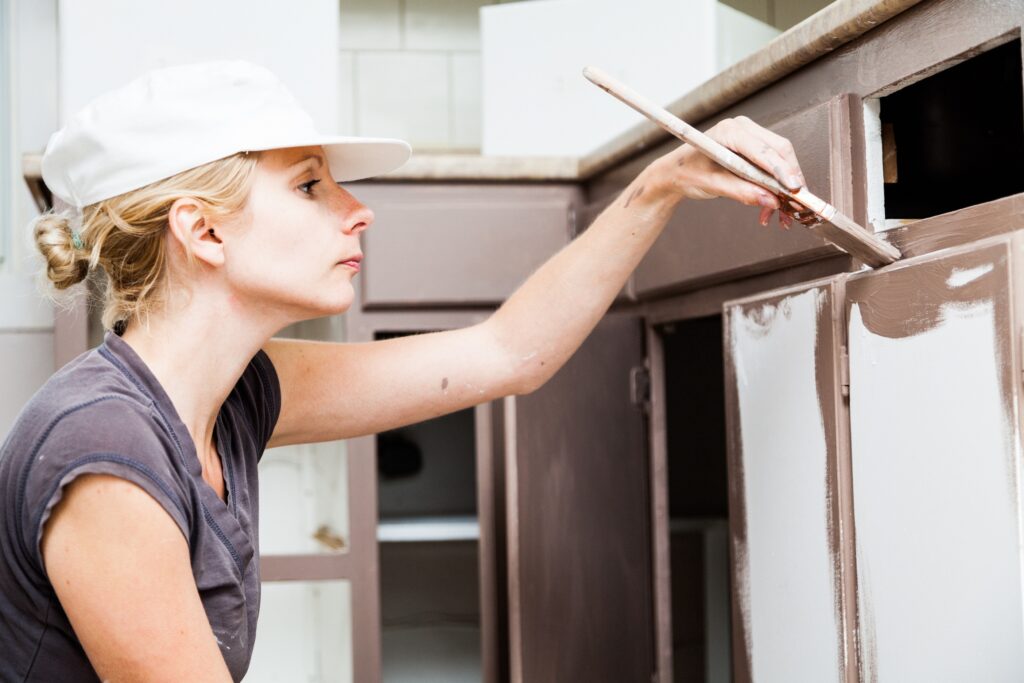
The next crucial step is selecting the right paint and tools. “Not all paints are created equal, especially when it comes to cabinets,” Amanda explains. She recommends using a high-quality paint specifically designed for cabinetry, such as an acrylic or alkyd-based paint, which is durable and provides a smooth finish.
When it comes to color, Amanda advises homeowners to choose a shade that complements the overall style of their home. For kitchens, lighter colors like whites, grays, and soft blues can make the space feel brighter and more open. If you want something bolder, deep navy, emerald, or charcoal gray can add sophistication and elegance.
As for tools, Amanda recommends using a high-quality brush for the edges and a small foam roller for flat surfaces. “Foam rollers create a smooth, bubble-free finish, which is essential for cabinets,” she says. When brushing, be sure to use long, even strokes to avoid brush marks.
The Painting Process
Now that your cabinets are prepped and you have the right paint, it’s time to start painting. Amanda’s number one rule is to apply thin, even coats of paint. “It’s always better to apply multiple thin layers rather than one thick coat,” she explains. “Thicker coats are more prone to dripping and uneven drying.”
For best results, allow each coat of paint to dry fully before applying the next. Amanda recommends letting the first coat dry for at least 2-4 hours, depending on the paint you’re using, and lightly sanding between coats. “This sanding step, known as ‘scuff sanding,’ helps the subsequent coat adhere better,” she adds.
If you’re painting multiple cabinet doors, it’s important to paint both the front and back of each one. Start by painting the back of the doors first, as this side is less visible. Once the backs are dry, flip the doors over and paint the front. This helps to prevent drips or smudges on the visible side of the door.
Finishing Touches
Once the final coat of paint is applied and dried, it’s time for the finishing touches. Reattach the hardware, making sure all screws are tightened securely. If your cabinet hardware is outdated, consider replacing it with something new to complement your freshly painted cabinets.
One of Amanda’s secret tips for a professional-looking finish is to apply a clear polyurethane topcoat to the painted cabinets. “This adds an extra layer of protection, especially in high-traffic areas like the kitchen,” she explains. The topcoat will help prevent scratches, scuffs, and general wear-and-tear.
Patience and Maintenance
The key to a beautiful, long-lasting cabinet paint job is patience. “Rushing through the process or skipping steps will lead to frustration down the line,” Amanda warns. It’s also important to maintain your cabinets once they’ve been painted. Avoid harsh chemicals or abrasive cleaners, and instead use a mild soap solution for regular cleaning.
Lastly, Amanda advises homeowners to give their newly painted cabinets a few days to cure fully before using them. “This will ensure the paint is completely dry and set, allowing for maximum durability,” she adds.
Painting cabinets may seem like a daunting task, but with the right preparation, tools, and patience, it’s possible to achieve professional-quality results. Thanks to Amanda Bryant’s expert advice, you now have the knowledge and confidence to tackle your cabinet painting project with ease. Whether you’re freshening up your kitchen or adding a bold new look to your bathroom, these tips will ensure your cabinets look flawless for years to come.