
I tried the German smear look on my brick wall. At first, I thought it would be easy. Just smear on some mortar, right? But things didn’t go as planned. The color looked off. Some spots were too thick. Others had almost no mortar at all. I started to worry I had ruined my wall.
If you’re in the same boat, don’t stress. I’ve been there, and I found ways to fix it. You don’t need to start over. With a few simple steps, you can turn a bad smear job into something you’ll actually like.
In this post, I’ll walk you through what went wrong and how to fix it. It’s not as hard as it seems. You just need a little time and some patience. Let’s talk about how to clean up the mess and get that nice, rustic look back.
What Is German Smear?
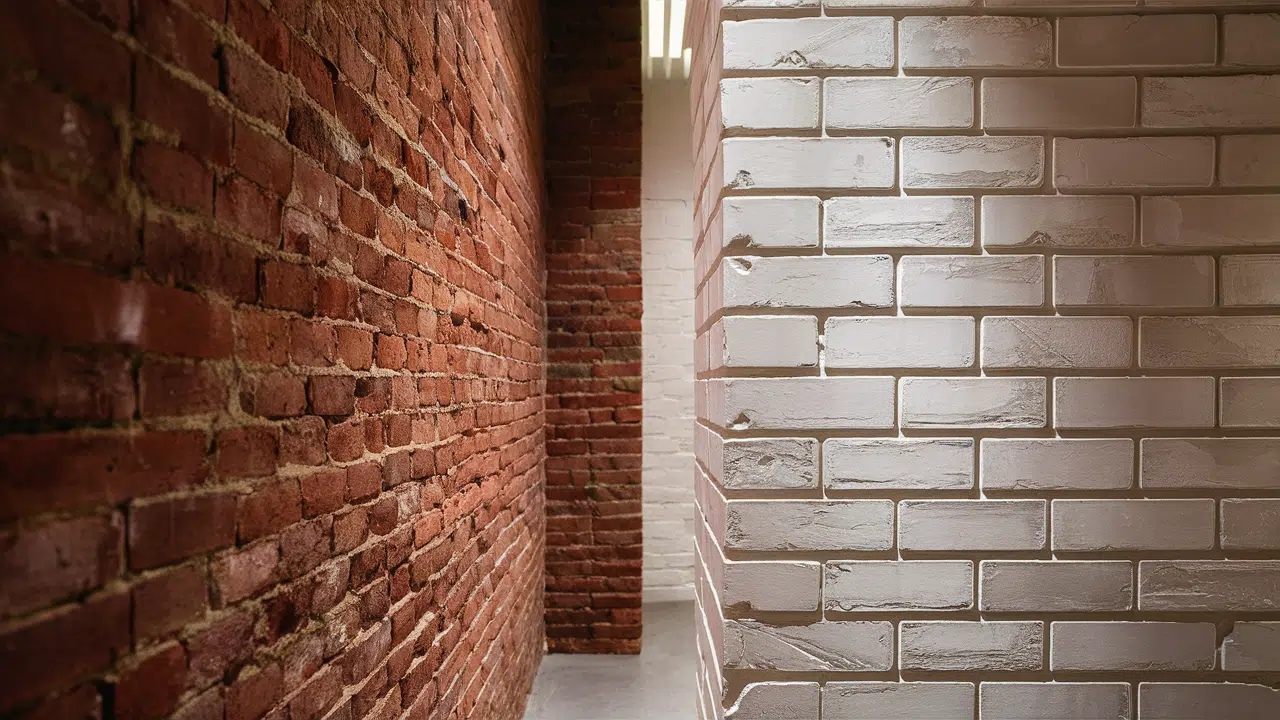
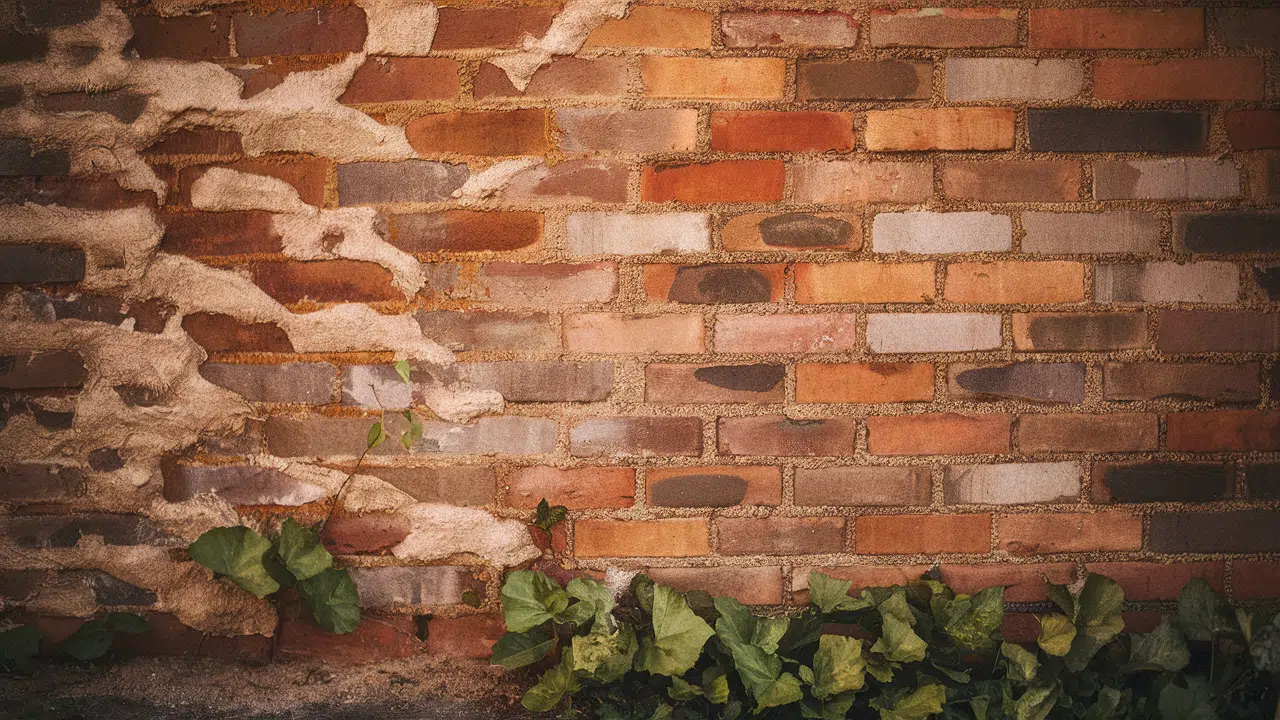
German Smear is a way to give brick a whitewashed, rustic look. You smear wet mortar over the brick and let some of the red or brown brick show through. It’s popular on fireplaces, outside walls, and accent walls inside the home.
When done right, it gives a soft, old-world feel. But when it goes wrong, it can look messy, too thick, or just plain off. The good news? You can fix it.
How German Smear Can Go Wrong?
German smear is a fun way to give your brick a fresh, old-time look. But it’s easy to make mistakes, especially if it’s your first time.
- Too Much Mortar: When you use too much mortar, it covers the whole brick. You lose the natural color and shape. It ends up looking more like a white wall than brick.
- Too Little Mortar: If you don’t use enough mortar, it might not look like anything changed. You won’t get that whitewashed or aged look.
- Drying Too Fast: Mortar dries quickly, especially in the sun or wind. If it dries before you wipe or spread it, it becomes hard to shape or fix. This can lead to clumps or rough spots.
- Uneven Smear: Some areas might look perfect, while others look patchy. That can happen if you work in large sections or rush through it.
- Bad Color: Mortar can dry in a different shade than you expected. Too white, too gray, or too dull can make your wall look off. This usually happens from mixing errors or using the wrong type of mortar.
- Dirty Brick: If you don’t clean the brick first, dust and dirt can stop the mortar from sticking. That can cause peeling, cracking, or a weak hold.
Can You Fix a Bad German Smear?
Yes! You can almost always fix a bad German smear job. You don’t have to tear it all down or start from scratch.
Some fixes are fast and easy. Others take more time. It depends on the size of the wall and how bad the problem is. But in most cases, all you need are some basic tools, a bit of mortar, and some time.
Here’s the good news: German smear is meant to look imperfect. So even if it’s not perfect, it can still look great. Small fixes can make a big difference.
We’ll go over how to fix different issues next.
Tools and Materials You May Need
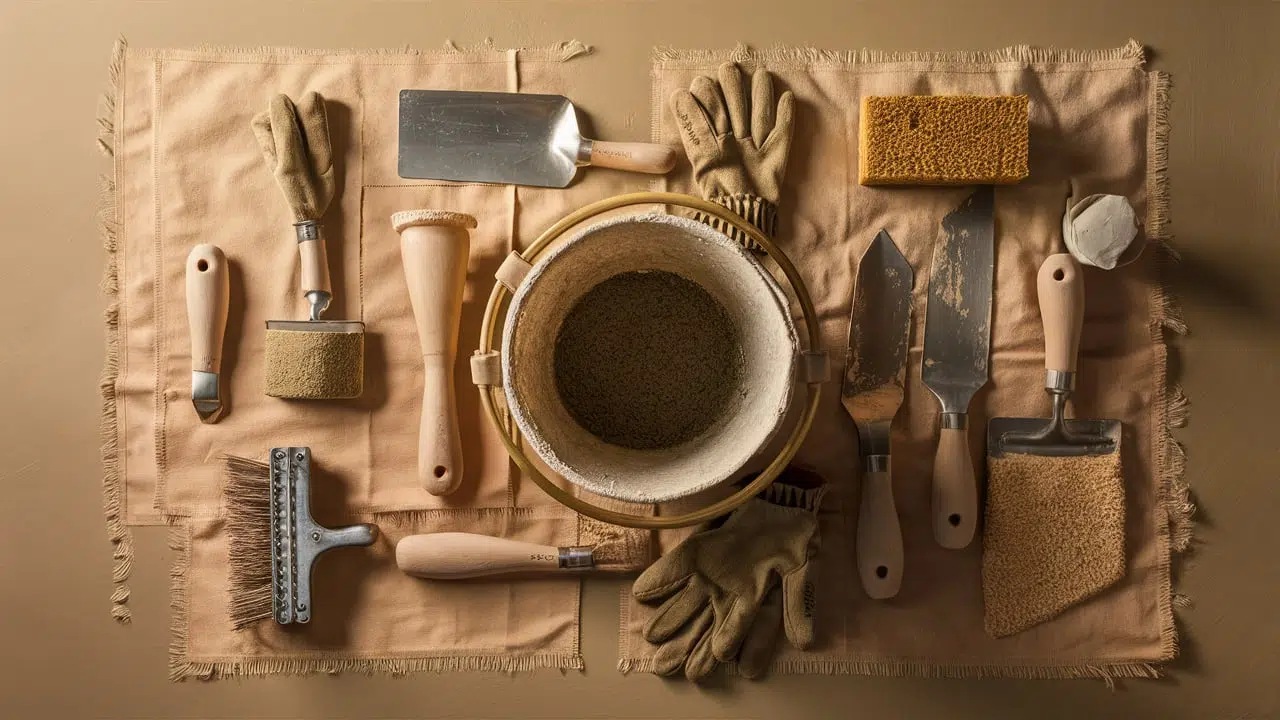
You may already have some of these. Gather them before you start:
-
Bucket of water
-
Sponge or rags
-
Wire brush
-
Trowel or putty knife
-
Sandpaper or sanding block
-
Spray bottle
-
White mortar mix
-
Drop cloths
-
Masking tape
-
Gloves and safety glasses
Step-by-Step: How to Fix Common German Smear Problems
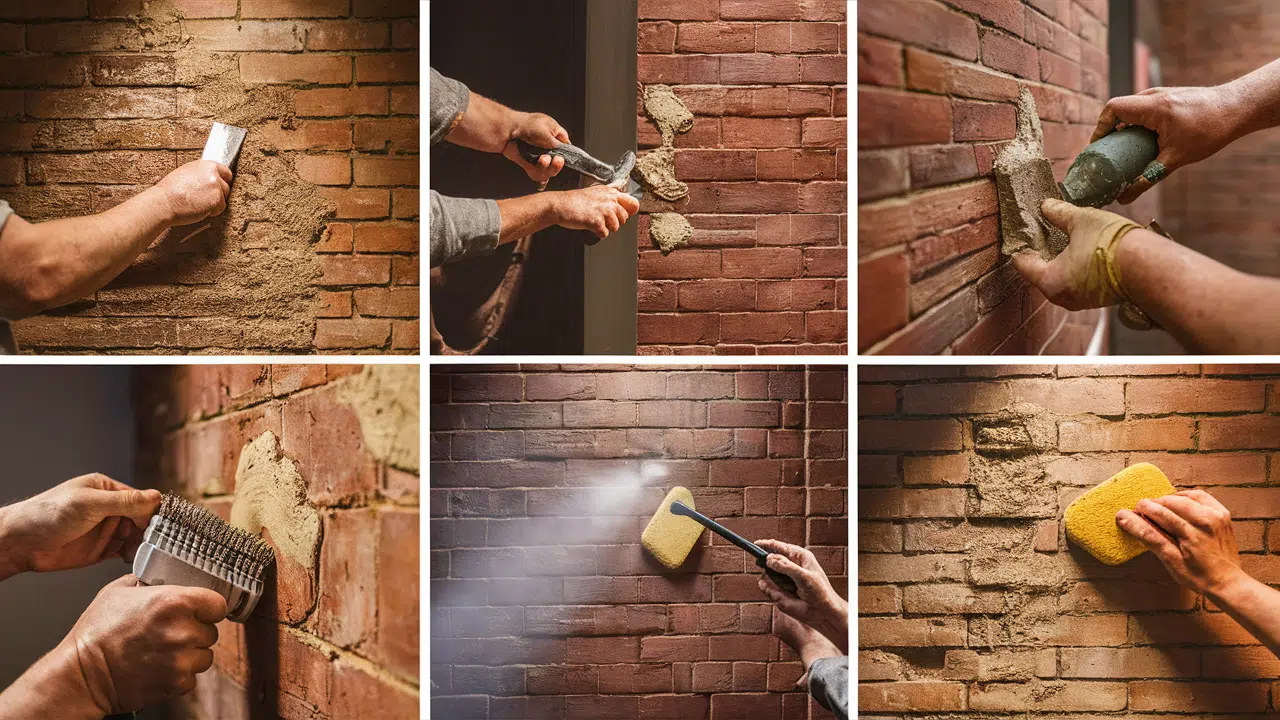
Problem #1: Mortar Is Too Thick
What to do:
If too much mortar covers the brick, you can remove some to let more brick show.
How to fix it:
-
Wet the wall – Use a spray bottle or sponge to wet the area. This helps soften the mortar.
-
Scrape gently – Use a trowel or putty knife to scrape off some mortar. Be careful not to gouge the brick.
-
Use a wire brush – Scrub gently to remove more mortar and expose the brick underneath.
-
Blend the area – Feather the edges so the changes don’t look too harsh.
Problem #2: Mortar Is Too Thin
What to do:
You can go back and add another thin layer.
How to fix it:
-
Mix new mortar – Follow the same mix you used before.
-
Dampen the wall – Lightly wet the surface so the new mortar sticks.
-
Apply thinly – Use a trowel or gloved hand to add a thin layer. Let some brick show through.
-
Wipe off areas – Before it dries, use a sponge or rag to wipe off parts of the mortar and give it that aged look.
Problem #3: Uneven Coverage
What to do:
This means fixing high spots and low spots.
How to fix it:
-
Scrape down thick spots – Use a putty knife or sanding block.
-
Fill thin spots – Apply more mortar with your hand or a trowel.
-
Blend well – Use a damp sponge or rag to smooth the new and old areas together.
-
Step back often – Check your work from a distance to make sure it looks even.
Problem #4: Mortar Dried Too Fast
What to do:
This often happens on hot days or when you’re working too slowly.
How to fix it:
-
Soften with water – Spray or sponge water onto the wall.
-
Try sanding – Use a sanding block or wire brush to smooth out clumps.
-
Add a new layer – If the old layer is too hard to work with, apply a thin coat of fresh mortar to even things out.
-
Work in smaller areas – Next time, do one small section at a time.
Problem #5: Mortar Color Looks Off
What to do:
If it’s too white or too gray, you can tint it or add another layer.
How to fix it:
-
Try a mortar tint – These are made for changing the color of dried mortar. Follow the instructions on the bottle.
-
Water it down – Mix a thinner layer of mortar and apply it as a wash to tone the color.
-
Use paint – As a last resort, dry brush some paint over the surface. This can help blend and even the tone.
Problem #6: Dirty Brick Underneath
What to do:
This can cause cracking or peeling later.
How to fix it:
-
Scrape off the mortar – This may be a lot of work, but it’s best to remove it fully.
-
Clean the brick – Use warm water and a scrub brush. Let it dry fully.
-
Apply fresh mortar – Once clean, you can start over with better results.
Tips for Blending Old and New Areas
When you’re only fixing part of the wall, blending is very important. You don’t want the fixed area to stand out too much.
- Feather the Edges: Don’t leave a hard line where the new mortar stops. Use your sponge or hand to make it fade into the old part.
- Match the Mix: Use the same mortar mix you used the first time. Try to match the thickness and texture, too.
- Keep the Same Style: If you wiped off a lot of mortar before, do the same now. If you left it thicker, do that again.
- Step Back Often: Take a few steps back and look at the wall as a whole. From a distance, it’s easier to spot areas that need more work.
How Long Does It Take to Fix?
The time it takes depends on the size of your wall and what kind of fix you’re doing.
- Small Fixes: For one or two bricks, you may only need 30 minutes to an hour.
- Medium Fixes: If you’re fixing a section, it might take 2–4 hours.
- Full Wall: If you’re redoing a whole wall, plan for at least a full day—maybe more, especially if you’re letting layers dry between steps.
- Drying Time: Mortar usually needs 24–48 hours to dry fully. Don’t touch or wash it during this time.
Can You Paint Over a Bad German Smear?
Yes, you can. But keep in mind:
-
Paint hides the brick – You lose the look of exposed brick.
-
It’s permanent – Once painted, it’s hard to go back.
-
Use masonry paint – Regular wall paint won’t stick well.
If you’re really unhappy with the smear, painting is one option. But most people try to fix the smear first.
Preventing Future Mistakes
Here are a few tips to avoid problems next time:
-
Test a small spot first – Try your mix on a sample brick or a hidden corner.
-
Use drop cloths – This keeps the area clean and makes cleanup easy.
-
Work fast but small – Do small sections at a time so the mortar stays wet.
-
Watch the weather – Don’t do this on very hot or windy days.
-
Mix carefully – Follow directions and keep track of your water-to-mix ratio.
Conclusion
Fixing a bad German smear job can feel frustrating. You may look at your wall and think you messed it all up. But the truth is, most problems can be fixed. You don’t need to start over. You need to take it one step at a time.
Maybe the mortar is too thick. Perhaps it’s too thin or patchy. The color might be off, or it might have dried too fast. These are all common problems. And they all have simple fixes. You don’t need fancy tools or expert skills: just some time, patience, and a few basic materials.
Take breaks when you need to. Step back and look at your progress. It doesn’t have to be perfect to look great. In fact, the charm of a German smear is in its rough, natural look.
Don’t give up. With a little care, you can turn a messy wall into something you’ll be proud of. You’ve got this!
Frequently Asked Questions
Can I use German smear on painted brick?
No mortar won’t stick well to painted brick. The paint blocks the mortar from bonding to the surface. You’ll need to remove the paint first for best results.
Does German smear work on interior walls?
Yes, it works well inside your home on brick walls or fireplaces. Just cover your floors and nearby furniture before you begin. It can add a cozy, rustic look to any room.
Is German smear waterproof?
German smear is not fully waterproof on its own. If you’re using it outside, you should seal it after it dries. This helps protect it from rain, snow, and moisture damage.
Can I do a German smear over fake brick panels?
It’s not the best idea since fake brick is often too smooth. The mortar may not stick or may flake off over time. Try a test spot first to see how it holds up.