
Have you been staring at your plain walls, thinking it’s time for a change?
Maybe you’ve already picked out the perfect color but are wondering, “How long does it take to paint a 12×12 room?”
You’re not alone. I remember the first time I painted my guest room, which was a 12×12 space.
I thought it would be a quick job, but I soon realized there are several steps involved that affect how long it really takes.
Timing can vary a lot from prepping the space to waiting for paint to dry. In this blog, I’ll explain everything you need to know to estimate your painting time more accurately, so let’s get started!
How Long Does It Take to Paint a 12×12 Room?
The average time it takes to paint a 12×12 room is 5 to 9 hours from start to finish. This includes preparation, priming (if needed), painting, and cleanup.
1. Preparation Time
Before you even dip your brush into the paint, it’s important to prepare the room properly.
Start by moving furniture out of the way or to the center of the room. Next, clean the walls to remove dust, cobwebs, or any grease, as these can prevent the paint from sticking well.
Use painter’s tape to cover the edges around windows, doors, and trim, ensuring clean lines. Lay down drop cloths to protect your floors from drips and spills.
If the walls have holes or bumps, you’ll need to fill them and sand the area smooth, which may take an extra 15 to 30 minutes.
Forum Tip: Many DIYers on Reddit and Houzz agree that skipping prep is the biggest mistake. “I rushed through prepping once and regretted it when the paint peeled off a year later,” one user noted.
2. Priming the Walls
Priming the walls isn’t always necessary, but in some cases, it can make a big difference.
Applying a primer is a smart step if you’re painting over a dark color with a much lighter one, if the walls have stains or marks, or if you’re using a low-sheen paint like matte or flat.
Primer helps the paint stick better, provides a uniform surface, and can reduce the number of coats needed.
Applying the primer usually takes about one hour, followed by another hour for it to dry before you can begin painting.
Pro Advice: A professional painter on Quora said, “Priming saves time in the long run. It improves coverage and helps avoid doing three coats of color.”
3. Cutting In
Cutting in is the process of carefully painting around the edges of the room, such as along the ceiling line, around doors and windows, and at the baseboards.
This step is done with a brush rather than a roller and often takes more time because it requires precision.
While it can be slow, especially for beginners, cutting in is important for achieving a clean, professional-looking finish.
Taking your time during this stage helps prevent paint from getting on surfaces you didn’t intend to paint and ensures that the final result looks neat and well-done.
Beginner Tip: If you’re not steady-handed, go slow. It’s better to take your time than to accidentally paint the ceiling!
4. Rolling the First Coat
Rolling on the first coat of paint is often the most satisfying part of the job. For a 12×12 room, this step typically takes about 1 to 1.5 hours.
It’s best to work in small sections and use a “W” pattern with the roller to spread the paint evenly across the wall.
Be sure to keep a wet edge while working; this means overlapping your strokes before the paint dries to avoid streaks, roller marks, or uneven patches.
Taking your time here helps lay a smooth foundation for the second coat.
Pro Insight: A professional painter in a Home Depot tutorial said, “Don’t overload your roller. Too much paint causes drips and uneven layers.”
5. Drying Time
Before applying a second coat of paint, it’s important to let the first coat dry properly.
Most latex paints dry to the touch within 30 minutes to 1 hour, but drying times can vary depending on the brand and room conditions.
Always check the instructions on the paint can for the recommended drying time.
To help the paint dry faster and more evenly, keep the room well-ventilated by opening windows or using fans.
Proper drying between coats helps prevent smudging, uneven texture, and peeling later on.
Forum Tip: Some users on DIY Stack Exchange recommend painting one coat in the morning and the second after lunch.
6. Rolling the Second Coat
Applying a second coat of paint is usually necessary to achieve even, full coverage and a rich finish.
The second coat often goes a bit faster than the first because you’re already familiar with the wall layout and have developed a rhythm.
Even so, it’s important to take your time and use the same careful method, rolling in sections, maintaining a wet edge, and working in a consistent pattern.
A well-applied second coat helps cover any thin spots and adds to the durability and appearance of your paint job.
Pro Tip: Don’t skip the second coat, even if the first one looks good. It helps with durability and touch-up ease later on.
7. Touch-ups and Cleanup
After the second coat has dried, it’s time to check the walls for any missed spots or thin areas. Use a small brush to touch up these areas for a smooth, even look.
Carefully remove the painter’s tape to avoid peeling any fresh paint along with it.
If you plan to reuse your painting tools, clean your brushes and rollers right away to keep them in good condition.
Finally, fold up the drop cloths, put the furniture back in place, and give the room a quick once-over.
This final step usually takes about 30 to 60 minutes and leaves your freshly painted room looking neat and complete.
User Insight: One forum user shared, “The painting took 6 hours, but cleaning up made the whole thing stretch into 8. I didn’t think cleanup would take that long.”
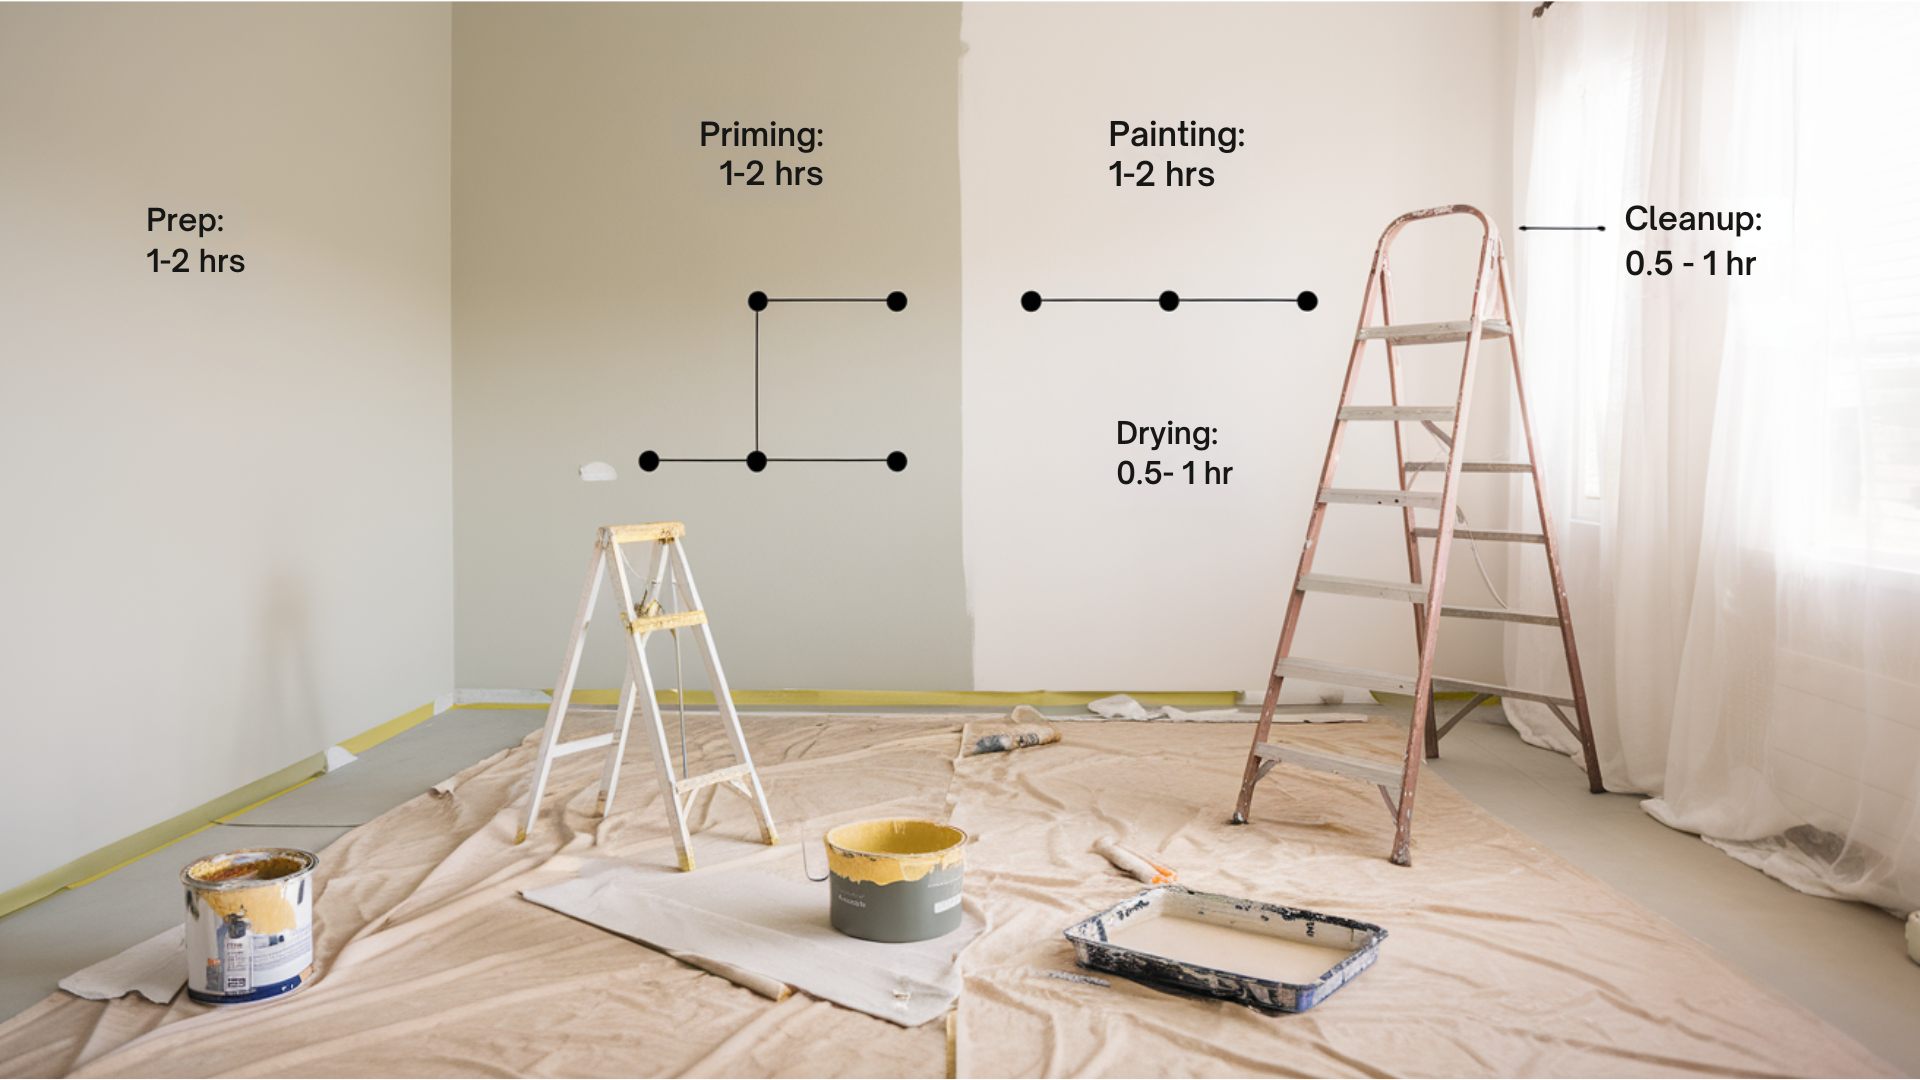
Total Time Summary
This chart shows the average time needed for each step when painting a 12×12 room.
From preparation to final touch-ups, the visual helps you understand how your time might be spent throughout the project.

Each bar includes a clear time estimate, making it easy to plan your painting day more effectively.
What Affects the Painting Time?
The time it takes to paint a 12×12 room can vary quite a bit depending on several key factors. Knowing what can slow you down or help speed things up makes planning much easier.
1. Experience Level
If you’re painting for the first time, it’s natural for the process to take longer.
Beginners usually work more slowly to avoid making mistakes, especially when cutting in around edges or trying to roll evenly without streaks or drips.
They may also spend more time reading instructions, watching tutorials, or second-guessing their steps.
Expert Opinion: Professional painters often stress that speed comes with practice.
As one contractor shared on a Sherwin-Williams blog, “A first-timer can easily take twice as long as a professional, not because they’re doing anything wrong, but because they’re being cautious, which is good.”
2. Tools You Use
The quality and type of tools you use can significantly impact your painting speed and results.
A high-quality roller will hold more paint and spread it more evenly, reducing the number of strokes and time spent going back over spots.
Angled brushes help with smoother edges during cutting in. Paint trays with liners save cleaning time. Extension poles eliminate the need for constant ladder use, speeding things up.
Professional Advice: According to experts on the Home Depot website, using a paint sprayer can dramatically reduce application time, sometimes cutting it in half.
3. Room Condition
The condition of your walls is a big time factor. If the walls are clean, smooth, and in good shape, you’ll move through the process faster.
But if there are holes, dents, peeling paint, or wallpaper to remove, that could add hours to your prep work.
Filling, sanding, and cleaning all take time, and you can’t skip these steps if you want a lasting finish.
Forum Insight: Many users on DIY forums like Houzz and Reddit say that wall prep is where they underestimated the most.
4. Paint Type and Color
Different paints behave in various ways. Some are thicker and offer better coverage with fewer coats, while others are more watery and may need multiple applications.
In general, paint that includes primer can save time. However, it might be harder for beginners to apply evenly.
Color choice also plays a role. Bright colors like red, yellow, or vibrant blue often need three or more coats to look even, especially if you’re painting over a lighter or darker base.
Pro Insight: According to a Behr paint specialist, “Always check the label for coverage details.
5. Humidity and Temperature
Weather conditions, especially humidity and temperature, affect how fast paint dries.
In humid or rainy conditions, water-based (latex) paints take longer to dry.
That means you’ll have to wait more time between coats, extending the total project time.
Similarly, painting in very cold temperatures, below 50°F (10°C), can make paint tacky and slow down drying even more.
Expert Recommendation: According to painting pros on This Old House, it’s best to paint in temperatures between 60°F and 80°F (15°C to 27°C) with low to moderate humidity.
Expert and Forum Insights
This section shares helpful tips and time estimates from professional painters and real forum users to give you a clearer idea of what to expect.
- Reddit r/HomeImprovement: Users often say to plan a full day, even for a small room. “I blocked off my Saturday and still finished just before dinner,” shared one user.
- Quora Experts: Professional painters often quote 5-7 hours total for a 12×12 room, assuming walls are in good shape and only one color is being used.
- HomeAdvisor Guides: They recommend painting in daylight hours and not rushing to avoid mistakes. A rushed job leads to touch-ups later, costing more time overall.
- Paint Brand Help Desks (like Behr or Sherwin-Williams): For best results, their customer service often advises letting paint dry for at least one hour and not painting in extreme temperatures.
When Should You Call a Professional?
Painting a 12×12 room is a manageable task for many homeowners, but it’s not always the right choice for everyone.
Doing it yourself can save money, be enjoyable, and is made easier with online tutorials.
However, it also takes more time, can lead to mistakes, and is physically tiring, especially if you’re new to painting.
Hiring a professional is a better option if you want a faster job with a smooth, clean finish and less hassle.
Pros bring experience, high-quality tools, and efficiency, though this comes at a higher cost and may require working around their schedule.
If your walls need repairs, the color change is drastic, or you don’t have the time, calling a professional can save you stress and ensure better results.
Conclusion
So, how long does it take to paint a 12×12 room?
On average, set aside 5 to 9 hours, depending on your experience, the condition of the room, and whether you need primer.
It may take just one day if you’re well-prepared and focused, or it might stretch into two if you’re going at a relaxed pace.
I hope this guide gave you a realistic idea of the time needed, with practical tips from both pros and real people who’ve done it before.
As someone who has painted more than one room in their home, I can tell you: the satisfaction of seeing fresh, clean walls is totally worth the time you put in.
If you found this helpful, share it with a friend who’s planning a painting project.
And if you’ve got a painting tip or time-saving trick, drop it in the comments. Let’s help each other make home projects easier and more enjoyable.