
Grass may look fine from a distance, but what’s happening under the surface matters most. When soil gets too tight, air, water, and nutrients can’t move as they should.
That’s when lawns start to lose their color and strength. Aerating helps fix this by opening up the ground so roots can grow deeper and stronger.
It might seem like a job for a pro, but it’s not. With a little planning and the right approach, it’s easy to do at home.
This guide breaks down how to aerate a lawn the right way, and why it’s one of the best things you can do for your yard.
What is Lawn Aeration and Why is it Important?
Lawn aeration is the process of making small holes in the soil to help air, water, and nutrients reach the roots of the grass.
These holes give roots more room to grow deep and strong. When soil becomes packed down, roots can’t take in what they need. This can lead to weak, thin, or unhealthy grass.
Aerating your lawn helps solve this problem. It breaks up hard soil, lets water soak in better, and brings oxygen to the roots.
It also helps fertilizer work more effectively, speeds up new grass growth, and keeps the lawn from forming puddles after rain. Overall, it leads to a thicker, greener, and healthier lawn.
Signs That Your Lawn Needs Aeration
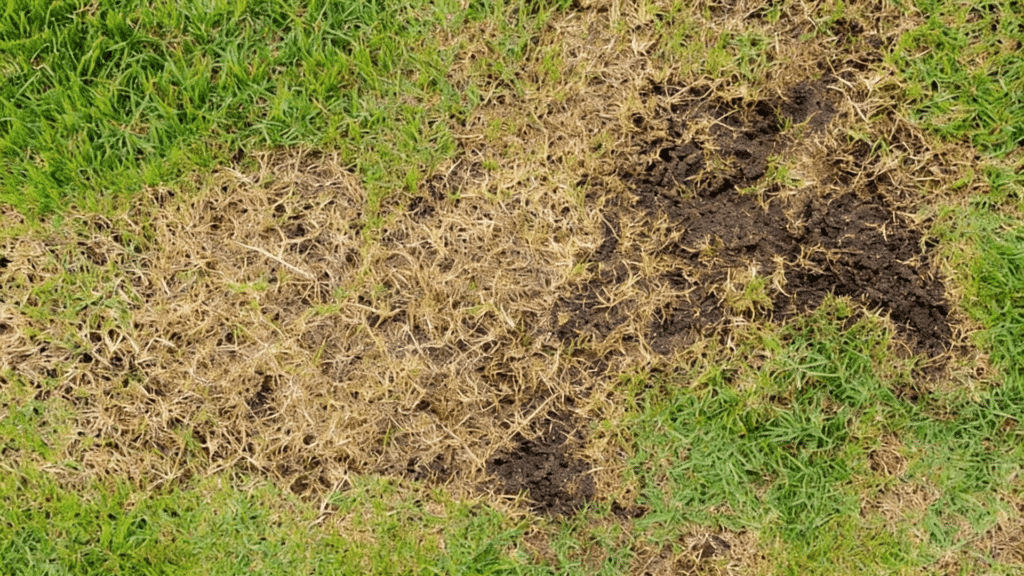
You don’t have to guess if your lawn needs aeration. Look for these signs:
- Water stays on the surface after rain or watering
- Grass looks thin or weak, even with good care
- The soil feels hard when you step on it
- You notice bare spots or patches
- There’s a layer of thatch thicker than half an inch
- Grass turns brown quickly during hot weather
- Heavy foot traffic areas grow poorly
If you notice two or more of these problems, it’s a good time to aerate.
Best Time to Aerate Your Lawn
The best time to aerate depends on the type of grass in your yard. You should always aerate during the growing season so the grass can recover quickly. Use the table below to choose the right time for your lawn.
| Grass Type | Growth Season | Best Time to Aerate | Notes |
|---|---|---|---|
| Cool-season grasses | Spring and Fall | Early spring or early fall | Aerate after thawing in spring or before frost in fall |
| Warm-season grasses | Late Spring to Summer | Late spring to early summer | Wait until the grass is actively growing and the soil is warm |
Make sure the soil is moist before you start, and avoid aerating during extreme heat or cold.
How Often Should You Aerate?
How often you should aerate depends on your soil type, lawn use, and how healthy the grass looks.
- Once a year is good for most lawns
- Twice a year is better for:
- Clay soil that compacts easily
- Lawns with lots of foot traffic or pets
- Lawns with poor growth or drainage problems
If your lawn grows well and doesn’t show signs of compaction, once every two or three years may be enough.
Tools for Lawn Aeration
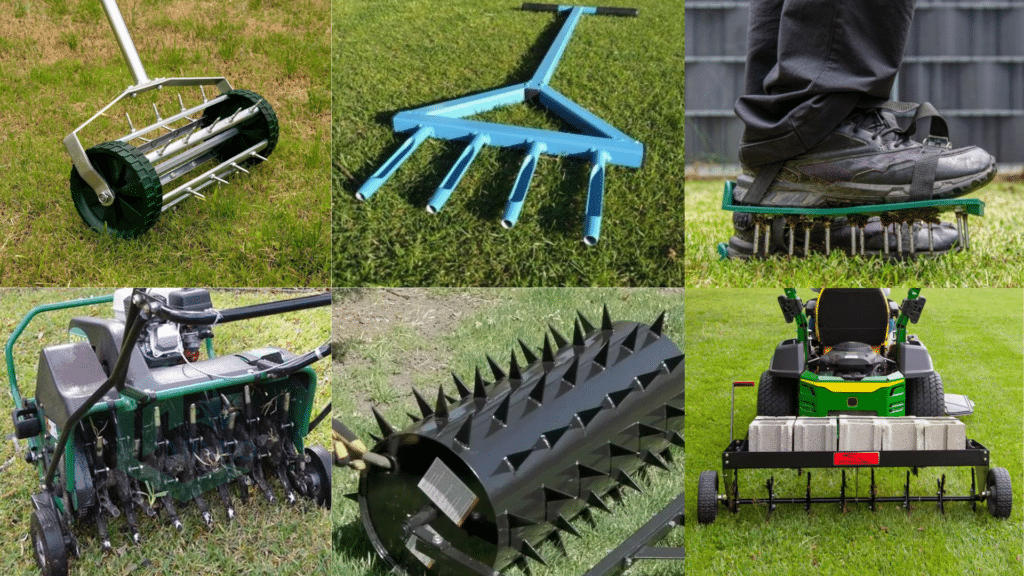
There are different tools you can use to aerate a lawn, depending on the size of your yard, soil type, and how much time or effort you want to spend. The table below explains the main options:
| Tool Type | Description | Best For | Pros | Cons |
|---|---|---|---|---|
| Manual Core Aerator | Hand tool with hollow spikes that pull soil plugs | Small yards or spot treatment | Inexpensive, easy to control | Time-consuming, labor-heavy |
| Spike Aerator | Solid spikes that poke holes in soil (push or step on) | Light soil, small to medium yards | Affordable, simple to use | Doesn’t remove soil, less effective on clay |
| Aerator Shoes | Shoes with spikes are worn while walking | Very small areas, light touch-up | Cheap, easy to use | Shallow depth, uneven results |
| Rolling Spike Aerator | The spiked drum was pushed across the lawn manually | Medium-sized yards with soft soil | Covers more area quickly | May compact soil further in some cases |
| Gas-Powered Plug Aerator | A machine that removes deep soil plugs across a large area | Large lawns, compacted soil | Deep, effective aeration | Expensive to rent or buy, heavy |
| Tow-Behind Plug Aerator | Attaches to a riding mower or tractor | Very large lawns | Efficient for big areas | Requires mower or tractor, less control |
Tip: Plug or core aerators are best for relieving compacted soil, while spike tools work better for light aeration or sandy soil.
How to Aerate Lawn: Step-by-Step Guide
Aerating a lawn is not hard if you follow a clear plan. The steps below include everything you need, from preparing the yard to doing the actual aeration.
Step 1: Water the Lawn the Day Before
Water your lawn thoroughly the day before aerating. This helps soften the soil so the aerator can go deeper with less effort. Dry soil is too hard and makes it difficult for spikes or plugs to enter.
However, don’t water so much that the lawn becomes muddy. Watering for 20–30 minutes is usually enough, depending on the weather and soil type.
Step 2: Mow the Grass Short
Mow the lawn to a shorter height than usual, but don’t scalp it. Cutting the grass helps expose the soil surface, making it easier for the aerator to reach deeper.
For most grass types, a mowing height of about 1.5 to 2 inches is good before aeration. Make sure to bag or rake up clippings so they don’t get in the way during the process.
Step 3: Mark All Underground Hazards
Before you begin aerating, walk your lawn and mark anything hidden that you want to avoid. Use flags, garden stakes, or brightly colored string to mark:
- Sprinkler heads
- Invisible dog fences
- Cable or internet boxes
- Tree roots or buried wires
- Lawn lighting systems
This step keeps you and your tools safe. It only takes a few minutes, but it can prevent serious damage or costly repairs.
Step 4: Choose the Right Day for the Job
Timing is key. Pick a day when the weather is mild and the soil is neither too dry nor too wet. Avoid aerating right after heavy rain or during drought conditions.
The ideal day is when the soil is moist from watering (or natural rain), but not soggy. Also, check the weather forecast and choose a time when no major storms or heatwaves are expected in the next few days.
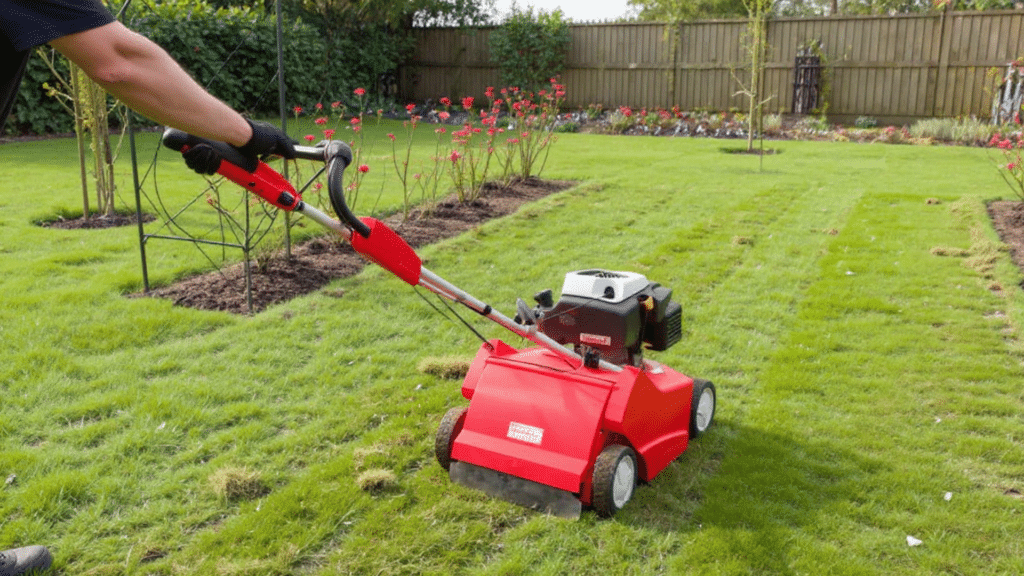
Step 5: Begin in Straight Lines
Start in one corner of your lawn and work in straight, even lines, just like when mowing. Overlap your passes slightly so you don’t miss any sections.
If you’re using a manual core aerator, go slowly and apply steady pressure. For larger lawns with a rolling or powered aerator, make sure the machine is set to the proper depth, usually about 2 to 3 inches.
Step 6: Cover the Whole Lawn Thoroughly
Make sure to cover the entire surface of your lawn. Move row by row and be patient. In areas that get a lot of foot traffic, like along walkways, near patios, or where kids play, go a little slower and ensure good hole coverage.
Uniform coverage gives the roots the best chance to get air, water, and nutrients evenly across the yard.
Step 7: Make a Second Pass if Needed
If your lawn has very hard soil or hasn’t been aerated in years, make a second pass. This time, move in a direction that crosses the first one, such as left to right if you first went up and down.
This “crosshatch” pattern improves coverage and increases the number of holes per square foot. It’s especially helpful in clay-heavy soils or lawns with serious drainage or growth problems.
Step 8: Leave the Soil Plugs in Place
If you used a plug or core aerator, you’ll see small soil cylinders all over the grass. Don’t rake or remove them. These plugs are full of nutrients and will break down on their own within 1 to 2 weeks.
As they crumble, they return helpful microbes and organic matter to the lawn. It may not look pretty right away, but it’s a normal part of the process and helps your lawn improve over time.
What to Do After Aerating
Aeration opens the soil and gives you a chance to improve the lawn even more. Here’s what to do next:
- Water the Lawn: Lightly water the lawn after aerating. This helps the soil settle and supports root growth. If you added seed or fertilizer, watering is even more important.
- Add Grass Seed: Aeration creates the perfect place for new grass to grow. Spread grass seed over thin or bare areas. The holes help the seed stay in place and reach deeper into the soil.
- Fertilize the Lawn: Fertilizer can now reach the roots more directly. Use a slow-release fertilizer suited to your grass type. Follow the instructions on the label and apply right after aerating.
- Add Compost or Topsoil (Optional): Spreading a thin layer of compost or topsoil over the lawn can add nutrients and help fill in holes. Use a rake to spread it evenly across the surface.
Can You Aerate without Machines?
Yes, you can aerate a lawn without using machines, especially if your yard is small or you only need to treat certain areas.
A common method is using a garden fork, push the tines into the soil about 2 to 3 inches deep, then rock it back and forth to loosen the ground. Repeat this across the lawn every few inches.
You can also use manual spike or core aerators, which you step on or push by hand. Another option is wearing aerator shoes with built-in spikes; these work best for light maintenance, not deep aeration.
While these methods take more time and effort, they are effective for basic lawn care and don’t require special equipment.
Tips for Keeping an Aerated Lawn Healthy
After you’ve learned how to aerate the lawn correctly, you’ll want to keep it in top shape. These tips help with ongoing care:
- Avoid walking on the lawn for a few days after aerating
- Keep the lawn moist but not soaked for about a week
- Don’t mow for at least 5 to 7 days after aeration
- Wait to apply weed control until the grass has recovered, especially if you added seed
To Conclude
Aerating your lawn helps roots grow deep and strong. It lets air, water, and nutrients move into the soil more easily. With the right tools and a little time, you can do the job yourself.
There’s no need to hire a pro. Just follow the steps, and your lawn will grow thicker, greener, and healthier over time.
Make sure to prepare well, cover all areas, and care for your lawn afterward. One small task each year can make a big difference.
Don’t wait until your lawn looks dry or patchy. Start planning your next aeration today and help your grass grow its best.