
A stainless steel sink can go from spotless to streaky faster than you’d think. Water spots and smudges can appear almost immediately without regular cleaning.
Water spots, grease, and soap residue build up quickly, and scrubbing harder doesn’t always help.
I’ve cleaned more sinks than I can count, and the biggest lesson I learned is that the right method matters more than the effort you put in.
Once I figured that out, the whole process became much quicker and easier. In this guide, I’ll show you exactly how to clean a stainless steel sink using simple items you already have at home today.
You’ll learn the step-by-step method, the best products to use, what to avoid, and how to keep your sink looking good every day with ease.
What You Need to Clean a Stainless Steel Sink?
Before you start, gather a few basic items to make cleaning quick and easy. Most are common household supplies you likely already have. Having them ready will save time and make each step smoother. This is what you need:
How to Clean a Stainless Steel Sink?
Start by removing dishes and debris from the sink. I make sure the surface is clear so I can clean every corner properly without any mess getting in the way.
Step 1: Clear the Sink
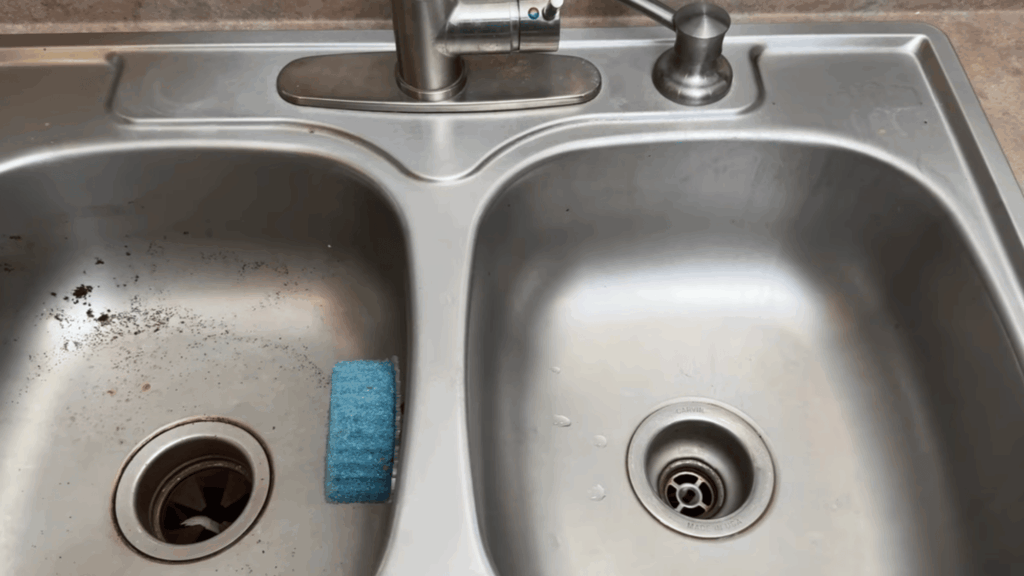
Before you start cleaning, take everything out of the sink. Remove sponges, dishes, soap dispensers, and any tools sitting inside or on the edges.
You want the full surface open and easy to reach.
It sounds like a small step, but it makes a real difference every single time.
When the sink is clear, you can scrub every corner without having to work around things. It takes less than a minute and sets you up for a much better clean.
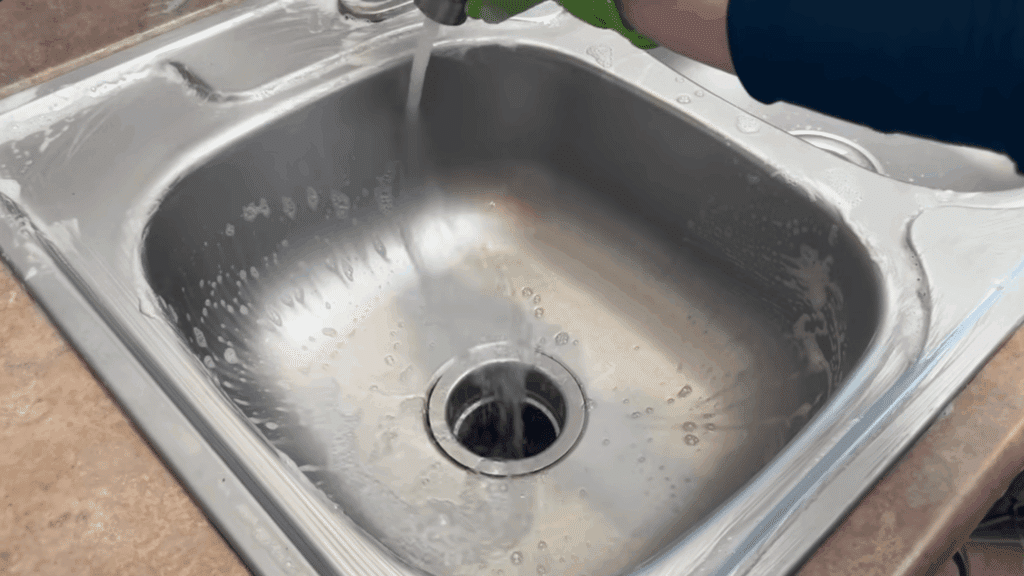
Step 2: Rinse with Water
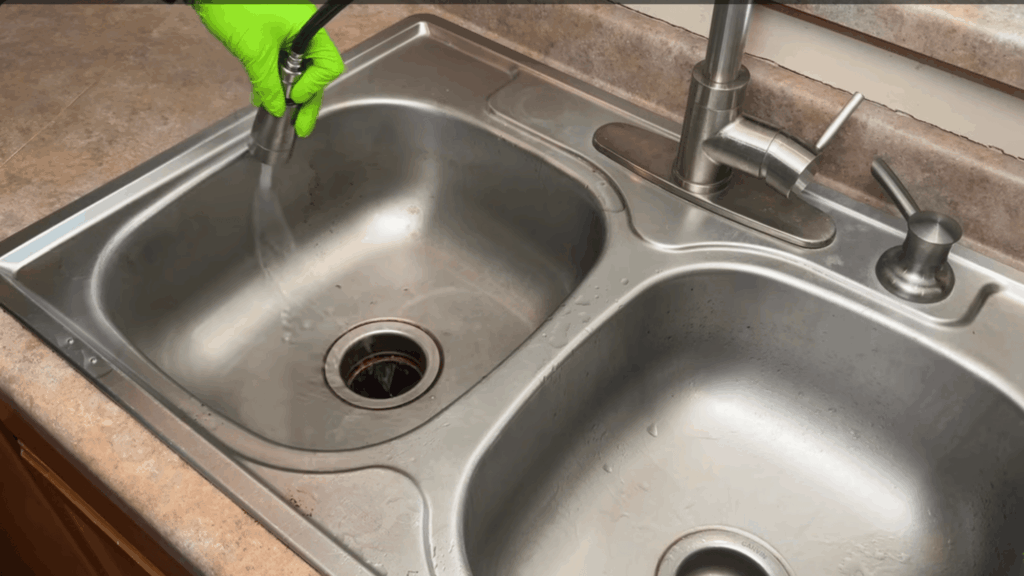
Once the sink is clear, give it a good rinse with warm water.
This washes away loose debris, such as food particles, coffee grounds, and dust, settled on the surface.
Don’t skip this step. If you start scrubbing without rinsing first, you risk scratching the steel due to loose grit and debris buildup.
A quick 10-second rinse clears the surface and gets it ready for the next step. Warm water works better than cold for loosening residue sitting in the basin.
Step 3: Degrease and Scrub
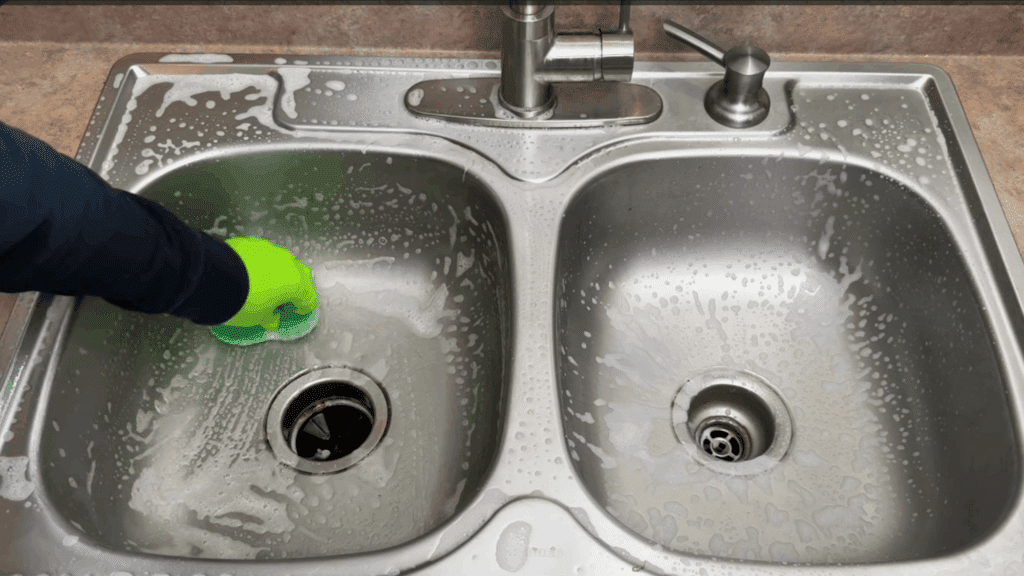
Spray a small amount of dish soap or a mild dishwashing detergent onto the sink surface. Use a non-scratch sponge to scrub the entire basin in firm, even strokes.
Pay extra attention to the drain edges, where grease and grime tend to build up the most.
Always scrub along the grain of the steel, not against it.
Scrubbing the wrong way can leave small scratches that dull the surface over time. Work around the entire sink before rinsing it thoroughly afterward.
Step 4: Deep Clean with Bar Keepers Friend
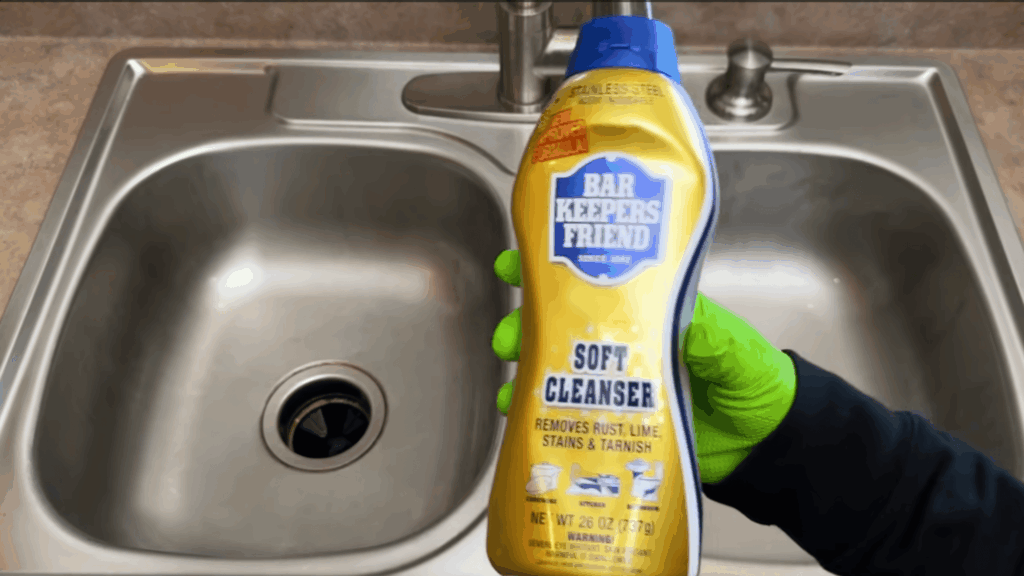
For tougher stains and built-up residue, Bar Keepers Friend is the best option available. Sprinkle an amount onto the wet sink surface and let it sit for 60 seconds.
Then scrub with a non-scratch sponge, focusing on areas and spots with buildup.
It cuts through rust, hard-water stains, and grease without scratching steel. Rinse the sink thoroughly after scrubbing to remove all the product.
Make sure no residue is left behind, as it can cause streaks or dull spots over time.
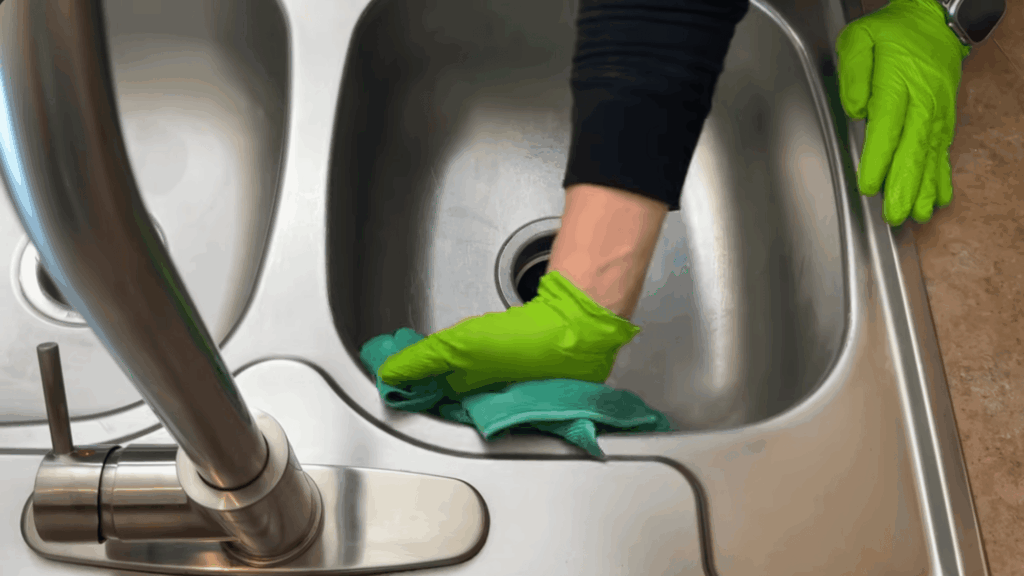
Step 5: Clean the Faucet and Disposal

Don’t forget the faucet and garbage disposal area while you’re cleaning. These spots collect buildup fast and are easy to overlook during routine cleaning.
Apply a little dish soap to an old toothbrush, then scrub thoroughly around the base of the faucet, the handle joints, and the edges of the disposal opening.
The small bristles reach tight spots that a sponge can’t reach.
Rinse everything thoroughly once you’re done to wash away all loosened grime and soap residue.
Step 6: Rinse Thoroughly
Once you’ve finished scrubbing, rinse the entire sink with warm water. Make sure you wash away every trace of soap, Bar Keepers Friend, and any other cleaner you used.
Leftover product residue can leave streaks or dull the surface over time.
Run water over the faucet base and disposal edges too, not just the basin. Take your time with this step.
A thorough rinse prepares the sink for a clean, spot-free finish once it dries properly, without leaving any residue behind.
Step 7: Final Polish
Drying your sink is just as important as cleaning it. Use a clean microfiber cloth to dry the entire surface immediately after rinsing thoroughly.
This prevents water spots from forming as the sink air dries.
Once it’s dry, add 2 or 3 drops of olive oil to the cloth, then buff it across the steel in small circles.
The oil brings out a natural shine and leaves a light protective layer. Your sink will look noticeably cleaner and brighter when you’re done.
This tutorial is based on a helpful video by Clean That Up. You can check out the original video on their YouTube channel here or watch it below.
Common Stainless Steel Sink Cleaning Mistakes
These are some of the most common cleaning mistakes people make and why they matter.
- Wrong Scrubbing Direction: Always scrub along the grain of the steel, never against it. Going the wrong way leaves small scratches that accumulate and dull the surface over time.
- Air Drying: Leaving your sink to air dry after rinsing is one of the quickest ways to get water spots. Always wipe it down with a dry microfiber cloth right after rinsing.
- Too Much Product: Using too much soap or cleaner doesn’t make the sink cleaner. It just leaves behind more residue that’s harder to rinse off and can streak the surface.
- Using Harsh Scrubbers: Steel wool and rough scrubbing pads feel like they’re doing a better job, but they’re not. They leave fine scratches that permanently damage your sink.
- Leaving Chemicals Sitting: Bleach and strong cleaners should not be left on stainless steel. Even short contact can cause discoloration and permanent damage.
- Ignoring the Drain Area: Most people scrub the basin but forget the drain edges and the surrounding area. That’s where grease, soap scum, and residue build up fast and cause odor.
Natural vs Store-Bought Cleaners: Which is Better?
Choosing between natural and store-bought cleaners depends on your needs and the severity of the stains. Both options can work well, but each has its own benefits and limits.
| Aspect | Natural Cleaners (Baking Soda, Vinegar, Lemon) | Store-Bought Cleaners |
| Cost | Very low cost since items are already in most kitchens | Medium to high cost depending on brand |
| Availability | Easily available at home anytime | Requires purchase from a store or online |
| Safety for Skin | Very safe, gentle on hands, no harsh chemicals | May cause irritation; gloves are often recommended |
| Environmental Impact | Eco-friendly and non-toxic | May contain chemicals that affect the environment |
| Cleaning Power | Mild to moderate; good for daily dirt and grease | Strong; removes tough stains, buildup, and water spots |
| Ease of Use | Simple but may need more scrubbing | Quick and easy; less effort needed |
| Best Use Case | Daily cleaning and light maintenance | Deep cleaning and heavy stain removal |
| Effect on Sink Surface | Very gentle; low risk of damage | Can damage the finish if overused or too harsh |
|
Smell |
Light, fresh, and natural scent | Can have a strong or chemical smell |
Natural cleaners are gentle and safe for daily use, while store-bought products are stronger and faster on buildup. The best choice depends on how often you clean and the level of dirt.
How Often Should You Clean Your Stainless Steel Sink?
You should clean your stainless steel sink every day to keep it neat and safe. I usually give it a quick rinse and wipe after each use to stop stains from forming.
Daily cleaning helps remove food bits and water spots before they stick.
Once a week, I do a deeper clean using baking soda or a mild cleaner. Weekly cleaning helps bring back the shine and removes hidden dirt.
If you cook a lot, you may need to clean it more often during the day.
Pay close attention to the drain area and edges, as dirt builds up there fast. Try not to leave dirty dishes sitting for long.
A simple routine like this keeps your sink clean without taking much time.
Conclusion
Cleaning a stainless steel sink is quick and easy. With a simple routine, you can keep it clean and shiny every day.
A little dish soap, baking soda, and vinegar are all you really need to keep it looking its best. Stay consistent. A quick rinse and dry after each use prevents most stains.
Weekly scrubbing and a monthly deep clean take care of the rest.
Once I follow a simple routine, keeping the sink clean feels easy. It only takes a few minutes, and it’s always worth it.
So start small. Pick one habit today, like drying your sink after use, and build from there. Have a tip that works for you? Drop it in the comments below!
Ready to get started? Grab your sponge and give your sink the clean it deserves today.