
Want to give a plain wall new life? A painted arch might be the answer. A well-placed arch draws the eye and makes any room feel more special.
Before you pick up a brush, here’s what makes a good intro work: it shows you what to expect, gets you interested, and tells you what comes next.
This guide provides all the steps to paint your own arch. You’ll learn how to plan the shape, pick colors, and create clean lines. We’ll also share tips to help your arch look perfect.
Whether you’re planning a work corner or want to brighten up your living space, an arch can fit right in. Ready to make your wall stand out?
Let’s start with the basics and create something you’ll love to see daily.
Choosing the Right Paint Color for Your Arch
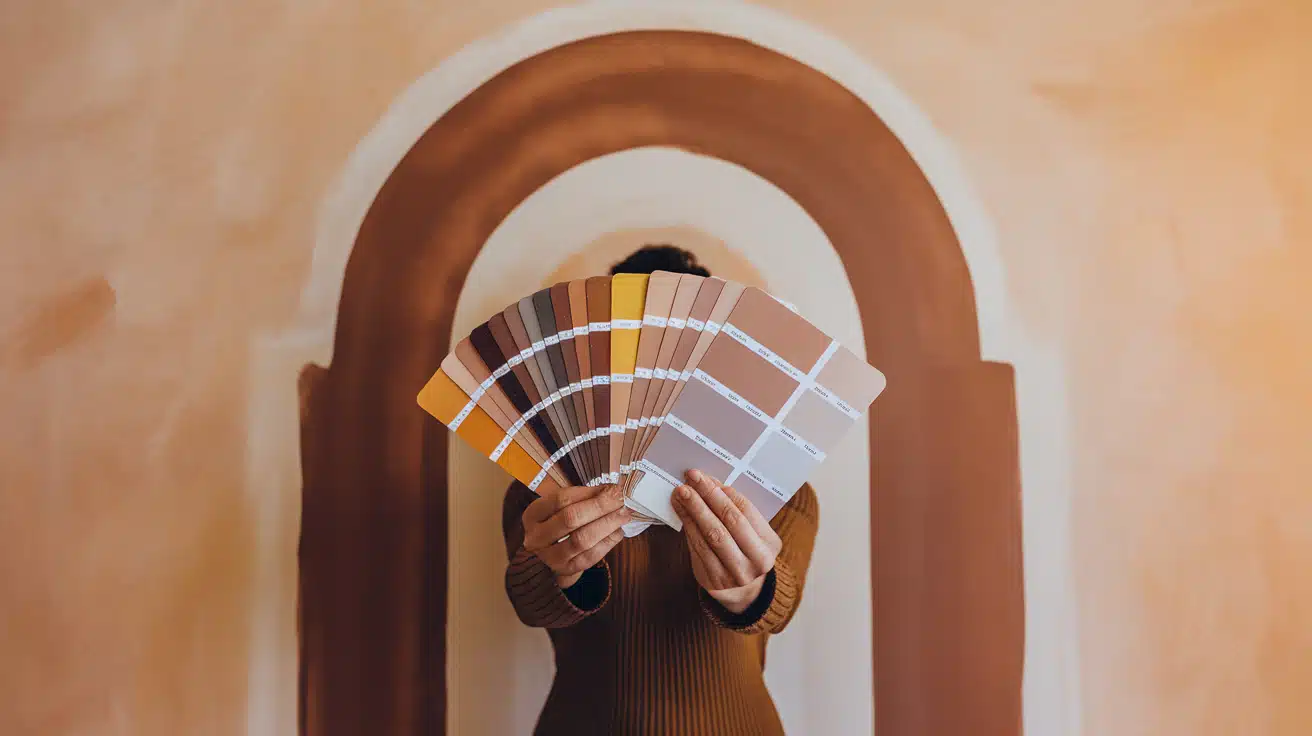
Paint color sets the mood for your arch feature. A well-picked shade turns your wall into a focal point that ties the whole room together. Let’s look at how to select the perfect color for your space.
Finding the Perfect Accent Color
Your room’s current colors guide your choice. Look at your walls, furniture, and decor pieces. Pick a shade that works well with what you already have. Soft browns add warmth to light spaces. Blues create calm feelings. Greens bring nature indoors.
For light-colored walls, try darker shades to make your arch stand out. If your walls are dark, lighter tones help the arch pop. Test paint samples on your wall first. Watch how they look as light changes through the day.
Consider your room’s purpose, too. A home office might need softer tones to help you focus, while living rooms can handle bolder colors that spark conversation.
Popular Color Trends for Painted Arches
Current trends favor natural, soothing shades. Warm browns like rust and clay make spaces feel cozy. Soft pinks and peaches add gentle color without being too bright. Forest and sage greens bring outdoor freshness inside.
Neutral lovers often choose tan or gray tones. These colors last through changing trends, match most decor styles and furniture pieces, and make great backgrounds for art or shelving.
Some people choose darker colors, like navy or charcoal. These bold choices create strong statements and work well in rooms with lots of natural light.
Test your top three color picks before making the final choice. Paint small sections and live with them for a few days. This helps you see how the colors feel in your space at different times.
Remember, your arch color should make you happy when you see it. Pick something that fits your style and makes your room feel complete.
How to Paint an Arch Accent Wall: Step-by-Step Guide
Want to add a special touch to your room? A painted arch can turn a basic wall into something special. This guide walks you through creating your wall arch, which is perfect for beginners and simple to complete daily.
Tools and Material
| Tools | Materials |
|---|---|
| Spirit level | Painter’s tape (high-quality) |
| Measuring tape | Wall paint (accent color) |
| Pencil | Primer (if needed) |
| String (for drawing the curve) | Paintbrush (for edges) |
| Small nail | Paint roller (for large areas) |
| Masking tape (thin, for curve) | Putty (for filling holes) |
| Paint tray | Sandpaper (for smoothing) |
| Step ladder (if needed) | Wall cleaner (for prepping surface) |
| Drop cloth or plastic sheet | Protective painter’s tape (for base and outlets) |
1. Plan and Position the Arch
Getting the position right makes all the difference. Start by picking the perfect wall for your arch. If you plan to place furniture like a desk against it, mark the size of the furniture on the floor with masking tape.
This helps you see how the arch will frame your space. Make your arch slightly wider than the furniture to create balance.
2. Mark the Sides of the Arch
Good preparation leads to better results. Take out your spirit level – it’s the best tool for marking straight sides. Draw light pencil marks for your vertical lines. Place painter’s tape along these marks, setting it slightly to the side. This offset helps you cover the pencil marks when painting.
3. Tape Off the Base and Protect the Surroundings
Protection saves time on cleanup later. Cover your baseboards with painter’s tape. Don’t forget outlets and switches – they need protection too. Press down all tape edges firmly. Double-check that everything you want to keep paint-free is well covered.
4. Draw the Top Curve
The curve needs careful planning. Find the center point between your vertical lines. Test different heights with a string to see what looks best. Mark your chosen peak point. Make sure the curve will reach both sides evenly.
5. Create the Perfect Curve
Put a small nail at your center mark. Tie string to the nail, then attach a pencil to the other end. This makes a simple tool like a compass. Pull the string tight and draw your curve slowly. Take your time – this step shapes your whole design.
6. Fill and Sand the Wall
Take out the nail and fill the hole with wall putty. Let it dry completely. Sand the spot with fine sandpaper until it feels smooth. Good preparation here means better paint results later.
7. Apply the Arch Tape
Use thin masking tape for the curve. The narrow width helps it bend smoothly without folds. Place it carefully along your pencil line. Work slowly – speed leads to mistakes. Press the edges down well to stop paint from getting under them.
8. Paint Your Arch
Start with the edges using a small brush. This gives you better control. Fill the middle with a roller, working in small sections. Keep your technique steady for an even finish. Make each stroke count.
9. Create Clean Lines
Try this painting tip: Paint the tape edges with your wall’s current color first. Let it dry. This stops your new color from seeping under the tape. Then, add your chosen arch color. The result? Sharp, clean lines.
10. Two Coats for Success
Put on your first coat of paint and wait two hours for it to dry completely. Then, using the same careful method, add a second coat. The second layer makes the color look rich and full. Let this coat dry fully, too.
11. Remove the Tape
Now comes the big reveal. Pull the tape off at an angle, moving slowly. If it sticks, use a putty knife to help ease it away. Careful removal keeps your lines neat and sharp.
12. Final Touches
Look at your work from across the room. Step back to see the full effect. Your arch should look balanced and clean. Small details blend into the bigger picture. You’ve just made a beautiful new feature for your room.
This project takes patience but gives great results. Each step builds on the last, creating something you’ll enjoy looking at daily. With the right tools and careful work, you can make a wall arch that looks professionally done.
Video Tutorial
Watch the full YouTube video on how to paint an arch on a wall.
Maintenance and Care for Your Painted Arch
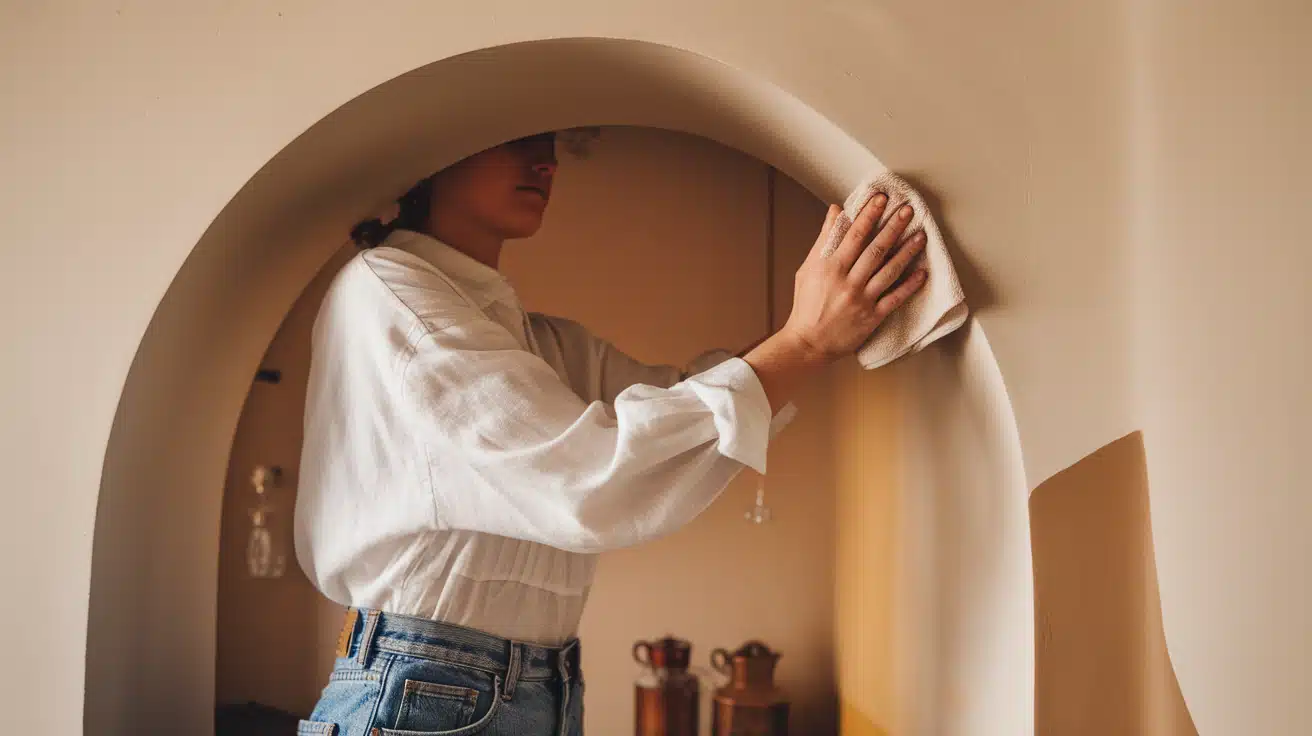
Proper care can keep your painted arch fresh and sharp. Simple maintenance keeps your wall feature looking just as good as day one. Here’s how to keep it looking its best.
Cleaning and Touch-ups
Keep your arch clean with gentle methods. Dust the surface weekly with a soft, dry cloth. For marks or smudges, try a slightly damp cloth with mild soap. Pat the area dry right after cleaning to prevent water spots.
Spot cleaning works best for small marks. Press lightly when cleaning—hard scrubbing might remove paint. To prevent wear, keep kids’ hands and furniture from rubbing against the arch.
Save some of your paint for touch-ups. Store it in a sealed container in a cool place. Label it with the color name and date. When you spot a chip, clean the area first. Use a small brush to add paint just where needed.
Watch for early signs of wear. Fix small problems before they grow bigger. Check the arch every few months for spots that need attention. Quick fixes keep your arch looking fresh longer.
How to Maintain Sharp Edges
Sharp edges make your arch look clean and fresh. Check the edges often for any peeling or damage. Press down loose tape right away if you spot it during the first few days after painting.
If edges blur, use painter’s tape to make them sharp again. First, clean the edge area. Let it dry fully. Carefully place your tape and paint a thin new line. Remove the tape while the paint is still slightly wet.
Your arch might need a full refresh every few years. Signs it’s time include:
- The color looks less bright
- Edges have lost their clean lines
- The surface feels rough
- Many touch-ups show
When you decide to refresh, follow exactly your first painting steps. Clean the wall, repair any damage, and use good painter’s tape. A careful repaint makes your arch look new again.
Keep track of your paint type and color. This info helps when you need more paint later. Take a photo of the paint can label or save the color card. Good records make future touch-ups easier.
Styling Your Painted Arch
The way you style around your painted arch can make it shine. Let’s explore how to arrange your space to make the most of this wall feature.
What to Place Around Your Arch
A well-placed desk makes your arch a perfect work spot. Set the desk in the middle, letting the arch frame it naturally. This setup works great for home offices or study areas. Keep the desk simple to let your arch be the main focus.
Bookshelves fit nicely to one side of the arch. They add height without paying attention to your painted features. Place smaller items on the shelves – too many large books might look heavy.
A cozy reading nook works well, too. Put a comfortable chair under the arch with a small side table. Add a reading lamp to create a warm spot for quiet moments.
Consider hanging a mirror within the arch space. It adds light and makes your room look bigger. Choose a shape that follows your arch’s curves – round or oval mirrors work well.
How to Pair the Arch with Room Decor
Your room’s soft items should work with your arch color. Pick throw pillows that have hints of your arch shade. Add a few in different colors that go well together. This creates a pulled-together look without being too matched.
Rugs help ground the space. Choose one with subtle patterns that include your arch color. Keep the main rug color neutral if your arch is bold. This balance helps the room feel calm but interesting.
Mix different materials to add interest. Smooth ceramics, rough baskets, and soft fabrics create nice contrasts. These touches make the room feel complete and lived-in.
Plants bring life to your arch area. Try a tall plant to one side or small potted ones on nearby surfaces. Their green leaves look good with any arch color you choose.
Keep your decor simple at first. You can always add more items later. This approach lets you see how different pieces work in the space. Your arch should still be the star of the show.
Remember to step back often as you add items. Look at how everything works together. The best setups feel natural and make your arch look like it was always meant to be there.
Conclusion
Creating a painted arch adds a personal mark to any wall. This simple project takes time and care but rewards you with lasting results. The right color choice and proper setup make all the difference.
Your painted arch can become the heart of your room – a spot that catches every guest’s eye. With good care and quick fixes for small issues, your wall feature stays fresh and bright through the years.
From marking the first lines to putting the final touches, each step builds toward your finished arch. The result? A wall that tells your story and fits your style.
Now that you know the steps, tools, and tips, you can turn any blank wall into something special. Take your time, follow each step, and watch your space change.