
A fairy garden is a simple way to turn a small space into something fun and creative. I know starting something new can feel unsure, especially if you’ve never done gardening before.
That’s why fairy gardens are great to start with. They are small, easy to manage, and creative.
You can make one indoors or outdoors using basic supplies and beginner-friendly plants.
In this guide, I will share how to make a fairy garden as a Beginner in a simple and easy way. You’ll learn what a fairy garden is, what supplies you need, and how to set everything up step by step.
I have also shared some plant choices, simple care tips, and common mistakes to avoid.
By the end, you’ll have a clear plan and the confidence to create a fairy garden that feels fun, personal, and easy to maintain.
What Is a Fairy Garden?
A fairy garden is a small garden set up with tiny plants and simple decorations to create a playful scene.
It can be made in a pot, a tray, or a small outdoor space, which makes it easy to fit into any home.
Indoor fairy gardens work well on shelves or windowsills, while outdoor fairy gardens are often placed in yards or patios.
Container fairy gardens are the most popular because they are easy to move and manage.
Fairy gardens are beginner-friendly because they use basic supplies and low-care plants. You don’t need special tools or deep gardening knowledge to get started.
The small size also makes mistakes easier to fix, which helps build confidence.
This type of garden lets beginners learn planting, spacing, and care without feeling overwhelmed. That balance of simplicity and creativity is what makes fairy gardens such a great first project.
Supplies Needed to Make a Fairy Garden
Gathering a few simple items ahead of time helps the process feel easy and organized. Most supplies are beginner-friendly and budget-safe.
- Planter or pot: Any container that can hold soil
- Potting soil: Regular soil works well for most small plants
- Plants: Ferns, ground cover, or any small plants you already have
- Small terracotta pots: Used to create fairy houses
- Clay saucers: Works as the roof for fairy houses
- Paint and paintbrushes: Used to decorate houses
- Paint pens or markers: Helpful for younger kids
- Hot glue gun: Best for attaching decorations
- Small stones or pebbles: Used to create walkways
- Moss or ground cover: Fills space and adds texture
How to Make a Fairy Garden as a Beginner?
Creating the main features first helps shape the garden layout and makes the rest of the setup feel simple and organized.
Step 1: Create Fairy Houses Using Small Pots
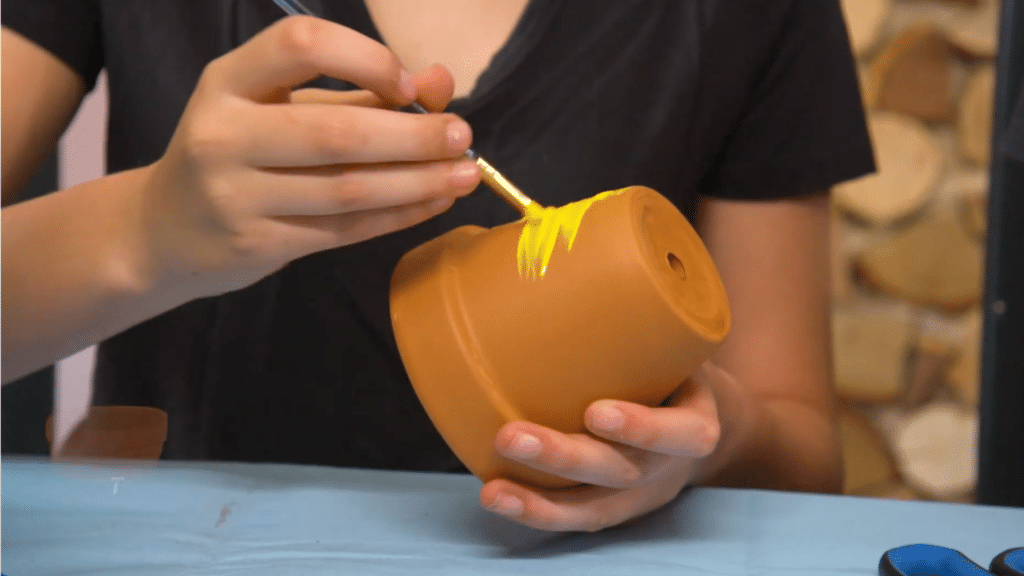
Turn small terracotta pots upside down to form the base of your fairy houses. Paint the entire pot and a clay saucer, which will be used as the roof.
Bright colors help the house stand out and make it easier to see once placed in the garden.
Two coats of paint may be needed for even coverage. If younger kids are helping, markers or paint pens are easier to handle.
Allow all painted pieces to dry fully so the colors set before adding details or moving to the next step.
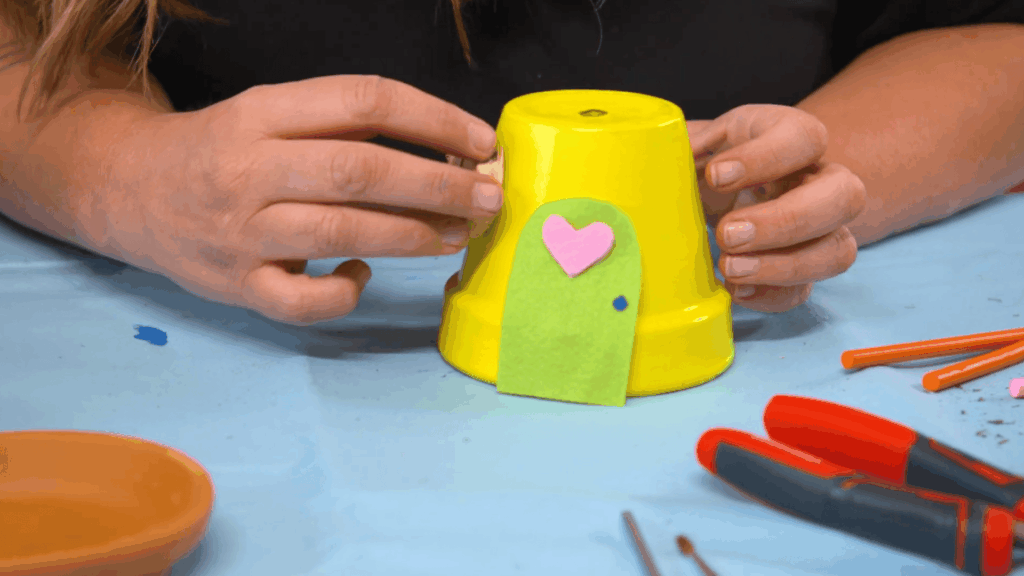
Step 2: Add Simple Details

Once the paint is fully dry, start decorating the fairy houses with simple details. Felt pieces work well for doors, panels, or small shapes, while craft cutouts can be used for windows.
Attach each piece carefully using hot glue or another strong adhesive.
Adults should handle the glue to keep things safe. Try not to add too many decorations at once. Simple designs look better in small spaces and are easier to adjust.
Using just a few details helps the fairy house stay neat, balanced, and easy to place in the garden.
Step 3: Build a Mini Fence for the Garden
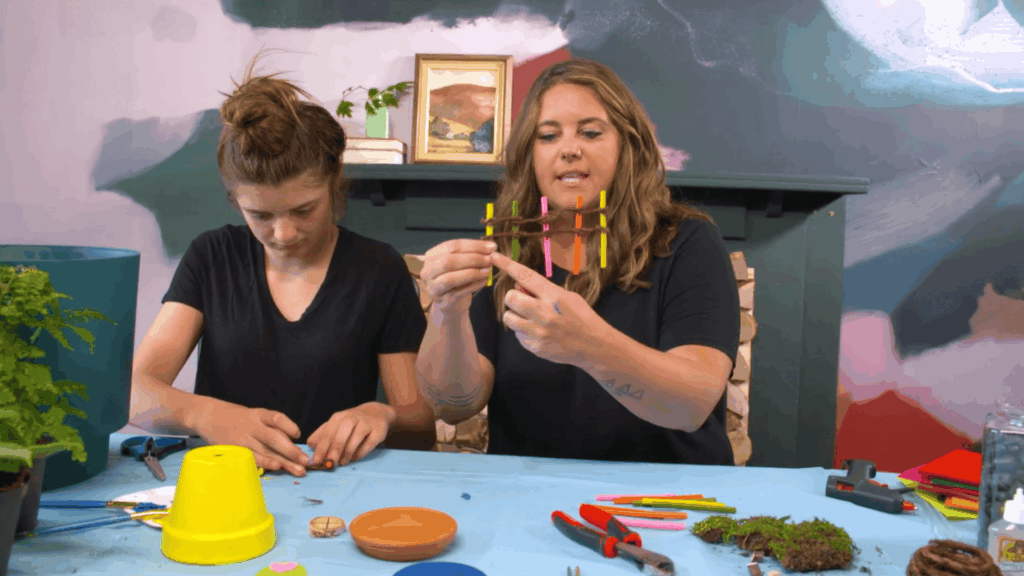
Create a small fence using wooden dowels, string, or other similar materials you have at home. Arrange them to form a short barrier that fits your garden space.
Leave the bottom ends long so they can be pushed into the soil later.
This helps the fence stay upright without needing glue or extra support. A fence adds structure to the layout and helps frame the fairy house.
You can adjust the height and width based on your container size and how much open space you want around the house.
Step 4: Paint Final Decorative Details
Add final touches to the fairy house after everything is assembled. Small details like dots, lines, or simple patterns help give the house a finished look.
Keep the designs light so they do not take over the garden space.
Let all painted pieces dry fully before placing them in the soil. Rushing this step can cause paint to smudge or peel.
Taking a little extra time here helps the fairy house stay neat, hold its color longer, and fit well with the rest of the garden.
Step 5: Plant the Garden Base
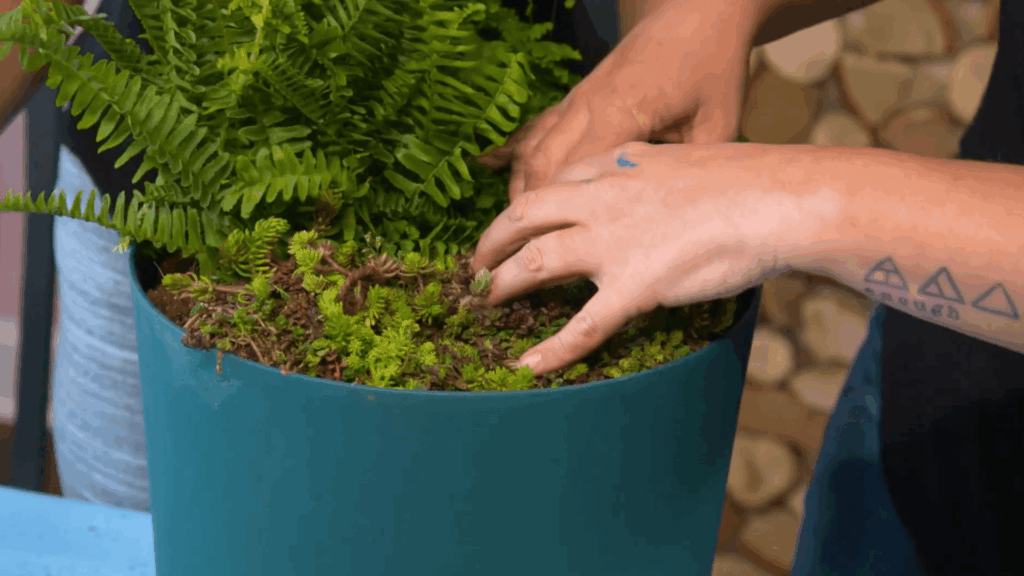
Fill your planter with potting soil, leaving enough space at the top for plants and decorations.
Place taller plants toward the back of the container to create depth. Ferns and similar plants work well because they stay soft and full.
Add moss or ground cover around the base to fill empty spaces.
Press soil gently around the roots to secure them. This layout leaves room at the front for the fairy house and decorations.
Step 6: Place the Fairy House and Decorations
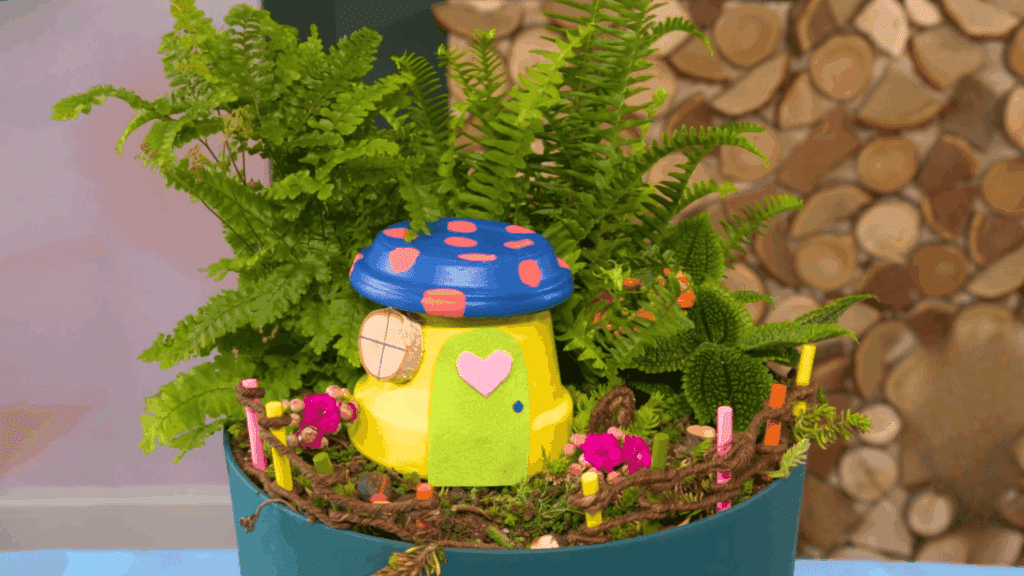
Once the plants are in place, set the fairy house near the front of the planter so it stays visible. Push the fence gently into the soil to secure it.
Use small pebbles to create a simple path leading to the house.
If you have small figures or toys, add them carefully without crowding the space. Place items one at a time and pause to check how everything looks.
Keeping decorations balanced helps the garden feel open and makes future changes easier.
This tutorial is based on a helpful video by Lowe’s Home Improvement. You can check out the original video on their YouTube channel here or watch it below.
How to Care for Your Fairy Garden?
Simple upkeep helps the garden stay neat and healthy over time. Small habits make a big difference without taking much effort.
- Water lightly: Check the soil before watering and avoid soaking it
- Watch sunlight: Place the garden where plants get the right amount of light
- Trim when needed: Remove dead leaves and trim overgrown plants
- Check drainage: Make sure excess water can flow out easily
- Clean decor: Wipe or rinse decorations to keep them dust free
- Rotate the container: Turn it every few weeks for even growth
Best Plants for a Beginner Fairy Garden
Choosing the right plants keeps the garden easy to manage and enjoyable. These options stay small, need little care, and work well for first-time setups.
1. Succulents
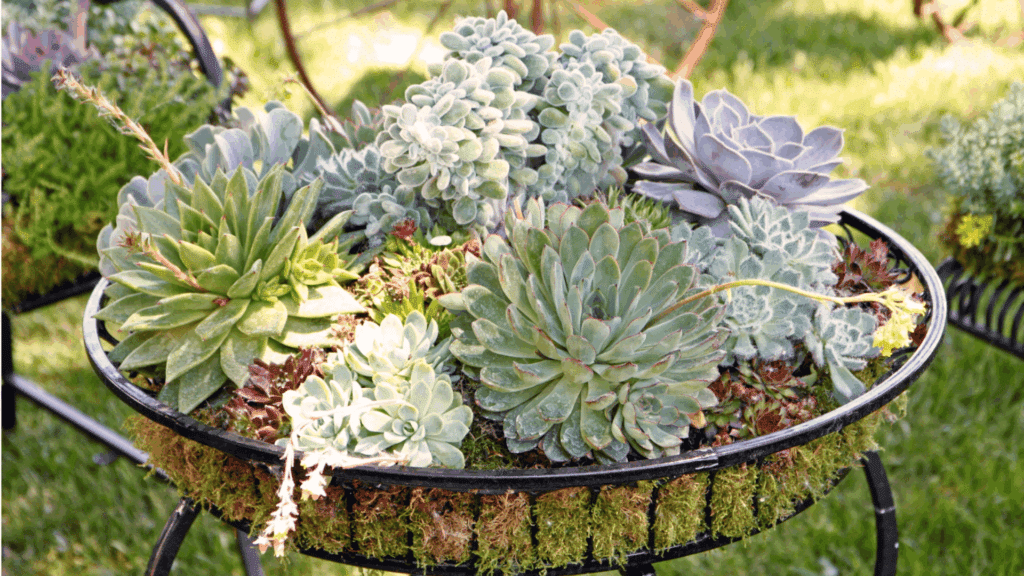
Succulents are one of the easiest choices for a beginner fairy garden. They stay small, grow slowly, and need very little water.
Most succulents prefer bright light and well draining soil, which helps prevent root issues.
Because they hold water in their leaves, they are forgiving if you forget to water for a few days.
Succulents also come in many shapes and colors, making them great for adding interest without extra care. They work well indoors and outdoors when placed in suitable conditions year round.
2. Moss

Moss is a popular plant for fairy gardens because it creates a soft ground cover look.
It grows low, spreads easily, and works well in shaded areas. Moss prefers moist soil and indirect light, making it ideal for indoor containers.
It does not need frequent trimming or feeding. For beginners, moss helps fill empty spaces and adds texture without needing much attention or gardening experience at all.
It also pairs nicely with mini paths stones and small fairy accessories in most simple garden setups today.
3. Mini Herbs
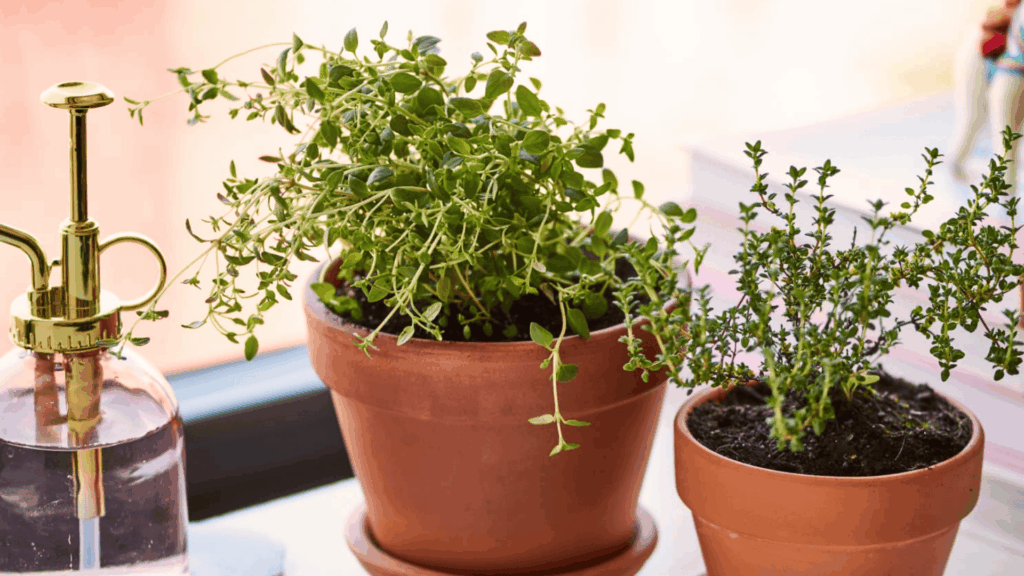
Mini herbs like thyme or baby tears are great options for beginner fairy gardens. They stay compact, handle light trimming well, and grow steadily.
These plants enjoy bright light and regular watering, but they are not overly delicate.
Herbs also add a natural look and mild scent to the garden. Beginners like them because they recover quickly from small mistakes and are easy to replace if needed.
This makes them a smart choice for first time fairy garden projects at home and school spaces everywhere.
Common Fairy Garden Mistakes to Avoid
Many beginners run into problems that are easy to avoid with a little planning. One common issue is using too many plants, which can crowd the space and limit growth.
Another mistake is overwatering, since small containers hold moisture longer than large gardens.
Poor drainage can also lead to root damage if water has nowhere to go. Some people place their garden in the wrong spot, where light levels do not match plant needs.
Using decorations that are too large can take over the space and make it hard to adjust plants later.
Skipping regular checks is another issue, as small problems grow quickly in tight spaces.
Choosing plants that grow too fast can also cause trouble over time. Paying attention to spacing, light, and water helps keep the garden balanced and easy to manage.
Conclusion
By now, you know the basic steps to build a fairy garden without stress.
You’ve learned what a fairy garden is, which supplies to gather, how to set it up, and how to care for it over time.
The key is to start simple, choose easy plants, and give your garden the right light and water. You don’t need perfect tools or fancy decor to enjoy the process.
This project is about having fun and creating something small that feels personal.
Start with one container, learn as you go, and make changes when needed. Every fairy garden grows with practice.
If you try this guide, I’d love to hear how it goes. Share what you made, what worked, or what you learned in the comments below and inspire other beginners.