
I’ve made many party crafts over time, but nothing brings more smiles than a bright, handmade piñata.
If you want a fun project that also works as a party favor, we will walk through how to make a star piñata for party favors simply and clearly.
In this guide, you’ll learn what materials to use, how to shape a neat star, and how to decorate it so it looks festive.
I’ll also show you how to make it strong enough to hold treats without breaking too soon. You’ll find helpful tips, common mistakes to avoid, and easy ideas for fillings.
By the end, you’ll have everything you need to create a star piñata that looks great and adds fun to any celebration. It’s an easy craft you can finish at home today without stress or special tools.
What Is a Star Piñata for Party Favors?
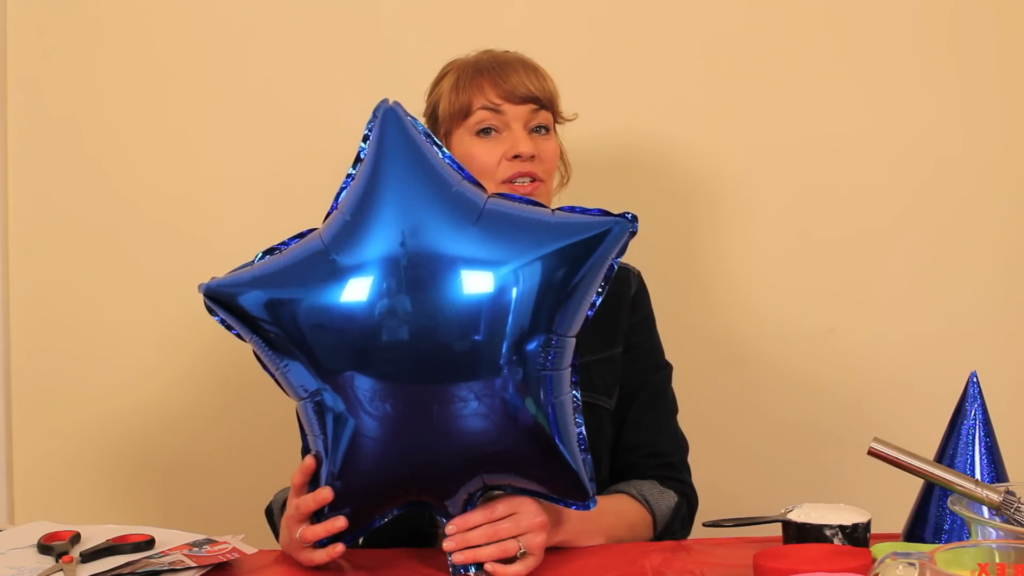
A star piñata for party favors is a small, decorative piñata shaped like a star and filled with treats.
It’s often given to guests as a fun takeaway rather than using a single large piñata. These ni versions are easy to make and add a creative touch to any party setup.
The classic design is a seven-pointed star, giving it a bold, festive look. You can hang them as décor or place them on tables for guests to grab.
What makes them special is their size and purpose. They are not meant for heavy hitting but for sharing small surprises like candy or toys.
You can also match the colors to your party theme. This makes each piñata feel more personal and fun for everyone attending.
What You Need to Know Before Making a Star Piñata
Before you start, it helps to know how much time and effort this project needs.
Most piñatas take a few hours to build, plus drying time if you use glue or paste. The skill level is beginner-friendly, but patience is key.
You can choose between cardboard or papier-mache. Cardboard is quicker and less messy, while paper machehe gives a smoother finish but takes longer to dry. Pick what works best for your time and comfort.
Budget: Under $10 for most households. Newspaper, flour, and a balloon are the core costs. Crepe paper and craft glue add a few dollars at most.
If you’re new, keep the design simple. Start with fewer star points and basic decorations so you don’t feel overwhelmed.
Safety is also important. Use scissors carefully and work in a clean space. If kids are helping, guide them during the cutting and gluing steps.
How to Make a Star Piñata Step by Step
Making a star piñata at home is easier than it looks. With simple supplies and a little time, you can create a bright and fun party favor that stands out.
Supplies Needed to Make a Star Piñata
- Balloon (star or round)
- Party hats
- Masking tape
- Newspaper
- Flour
- Tissue or crepe paper
- White craft glue
- Scissors
- Brush
- String
Step 1: Create the Base Shape
Start by blowing up your balloon to the size you want. Then, place party hats over each section to form a star shape.
For a party-favor piñata, 8–10 inches in diameter is the right size — small enough to handle, large enough to hold a good handful of treats.
Use masking tape to secure them in place. This creates the main frame of your piñata. Make sure each cone is firmly attached so it doesn’t shift while you work on the next steps.
Step 2: Prepare Papier Mache
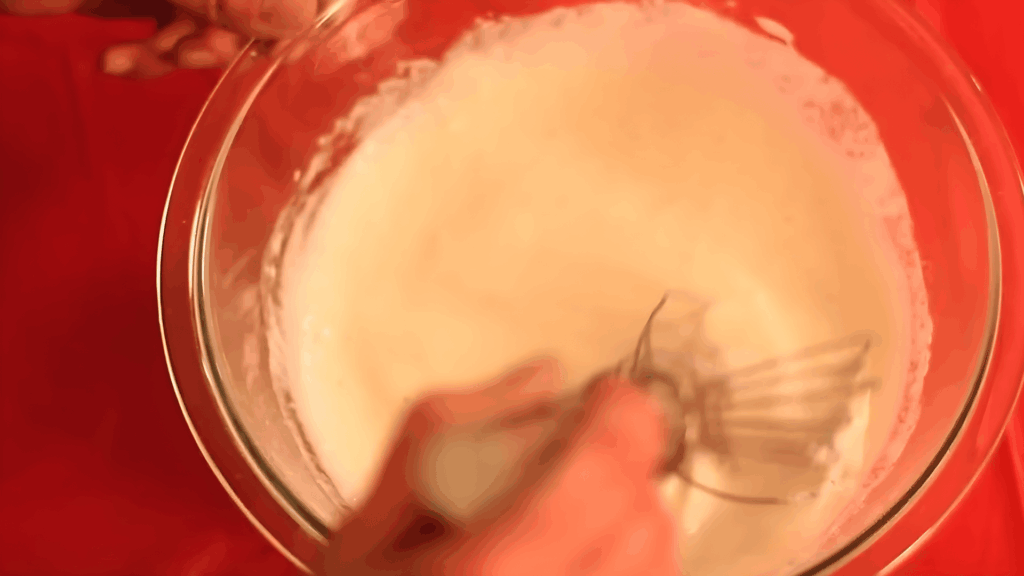
In a bowl, mix 1 cup of flour with 1.5 cups of water. The correct consistency is similar to thin pancake batter; it should coat the back of a spoon but drip off cleanly.
Too thick, and the strips won’t conform to the balloon’s curves; too watery, and they won’t bond. The texture should be thick but still easy to spread so it coats the paper evenly without dripping too much.
Step 3: Apply Papier Mache
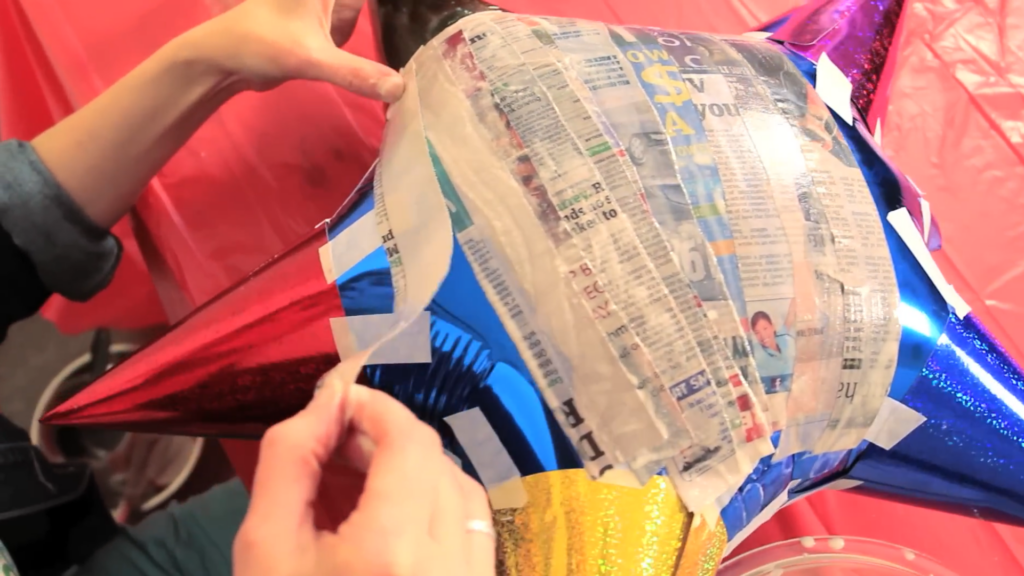
Cut the newspaper into strips, dip each strip into the paste, and remove excess paste with your fingers. Aim for strips about 1 inch wide and 4–6 inches long. Shorter strips are easier to control around the curved cone sections.
Place the strips over the balloon, slightly overlapping each piece. Cover th the balloon and cones fully. Apply 3 to 4 layers to make the structure strong enough to hold candy and stay intact during use.
Step 4: Let It Dry
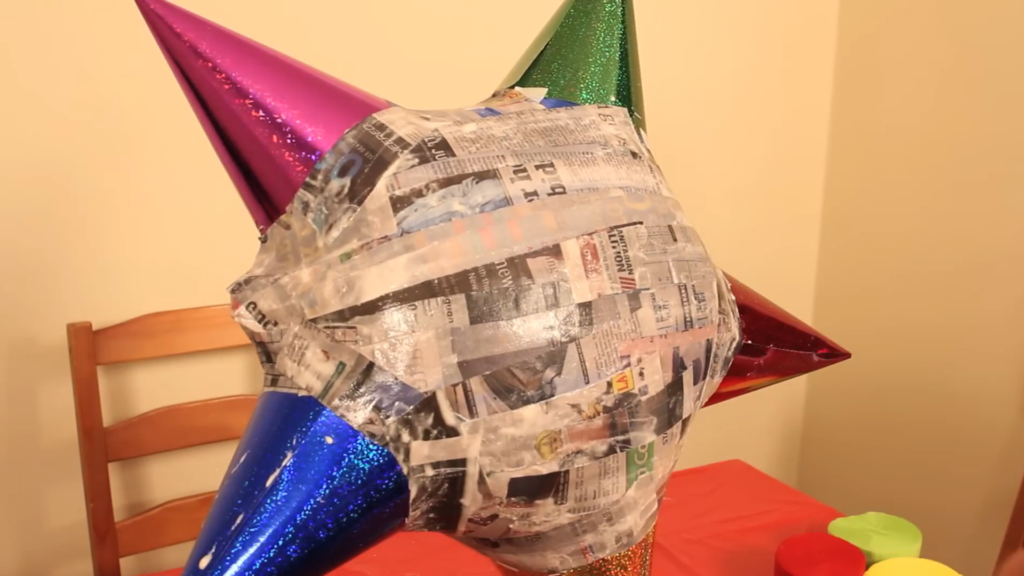
Allow each layer of papier-mache to dry completely before adding another. You can place the piñata on a jar to help it stay upright while drying. This makes it easier to work on all sides.
Drying properly is important because rushing can cause weak spots that may break too early during the party.
Step 5: Cut Opening
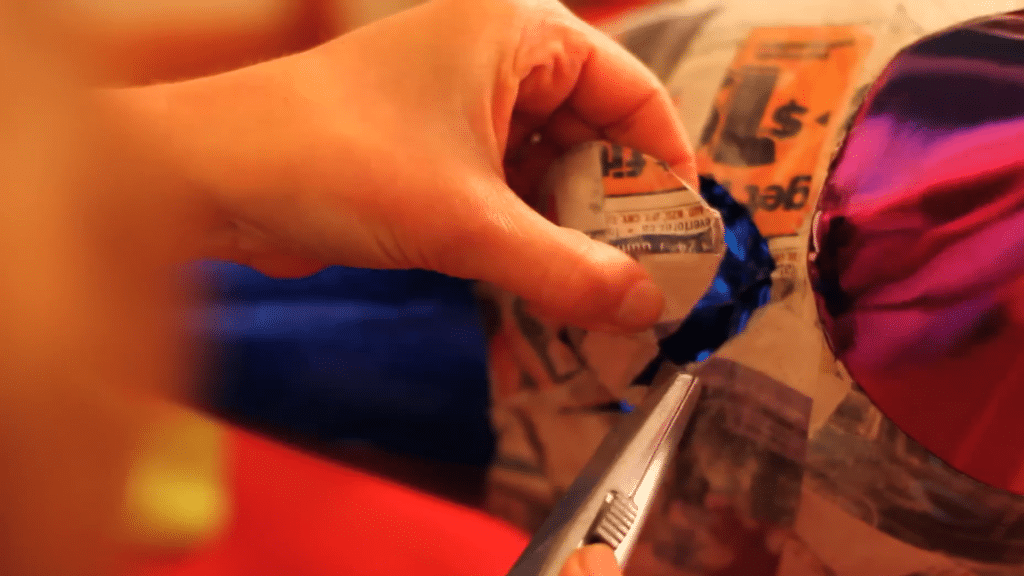
Once everything is dry, carefully cut a small hole in the piñata. This opening will be used to add candy and small items later.
Try to keep the cut clean and not too large. A neat opening makes sealing easier and helps maintain the shape of your piñata after filling it.
Step 6: Decorate
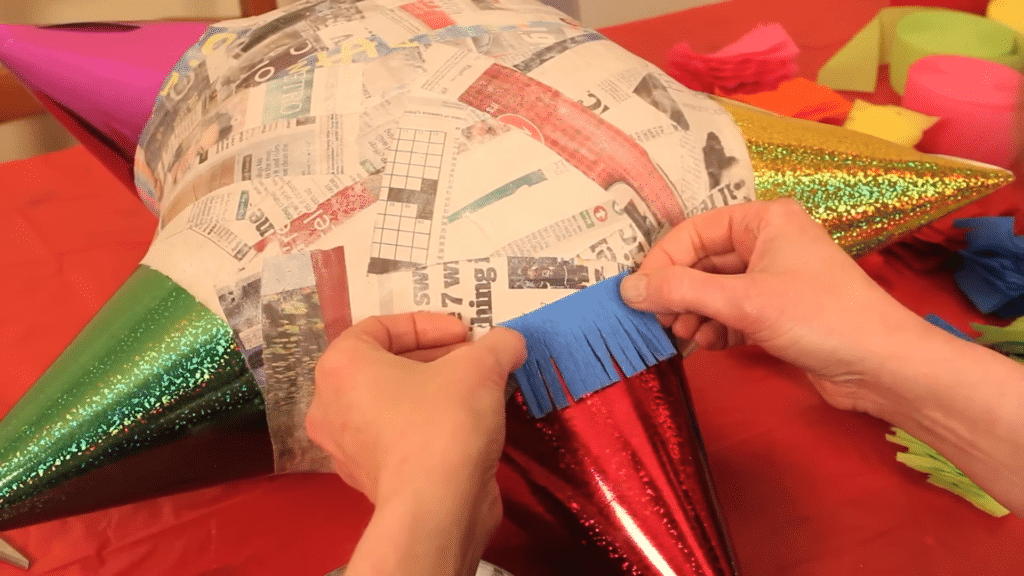
Cut crepe paper into strips and make small fringe cuts along one side.
Apply glue to the surface and stick the strips in layers, starting from one section and moving around. Overlap each strip slightly to give your piñata a full and colorful look that stands out at the party.
Step 7: Fill and Seal
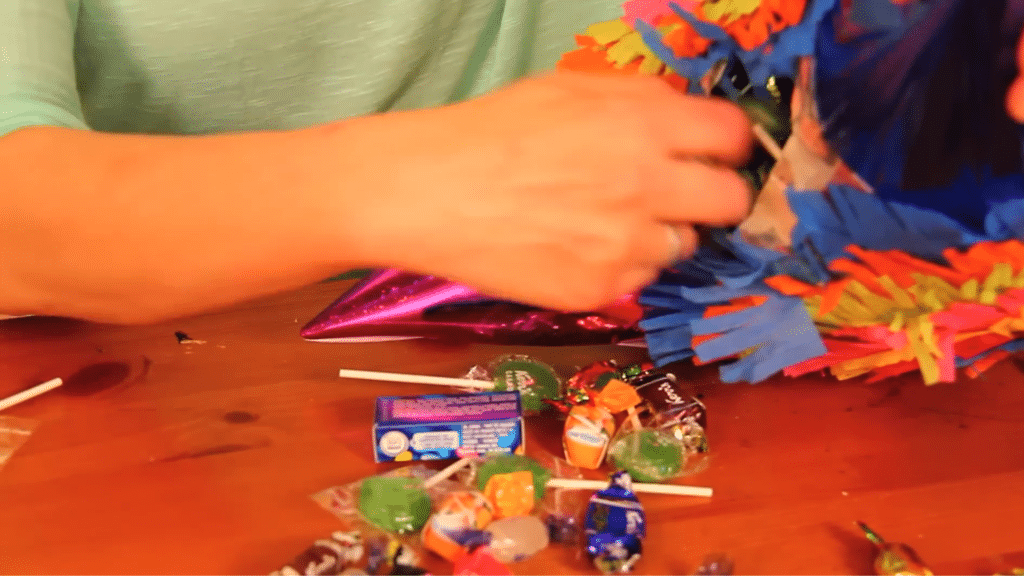
Add wrapped candy, small toys, or treats through the opening. Insert the string through the top so you can hang it later.
Close the hole with cardboard and tape, then cover it with decoration. Always check that the string is secure so the piñata stays in place when it’s time to use it.
Check out this video for more detailed steps to paint a wall:
Best Fillings for Mini Star Piñatas
Choose fun, safe, and size-friendly items that fit easily inside mini piñatas, keeping kids happy while balancing cost, variety, and age-appropriate choices.
| Category | Ideas | Why It Works | Tips |
|---|---|---|---|
| Candy | Chocolates, gummies, wrapped sweets | Loved by kids, easy to share, fits well inside mini piñatas | Use individually wrapped candy for hygiene and easy distribution |
| Small Toys | Stickers, mini erasers, tiny figures | Adds lasting fun beyond candy | Choose lightweight items that fit easily |
| Budget-Friendly Options | Bulk candy, balloons, paper notes | Saves money while keeping excitement high | Mix treats and non-edible items for variety |
| Age-Appropriate Choices | Larger treats for younger kids, avoid very small items | Keeps play safe and enjoyable | Skip tiny or hard items for younger children |
Common Mistakes to Avoid When Making Piñatas
Small errors can affect how your piñata looks and works. Paying attention to these points will help you get better results with less frustration.
- Weak Structure: If the base is too thin or not secured well, the piñata can break before the fun starts. Use the same material and reinforce the edges.
- Overfilling the Piñata: Adding too many items can make it heavy and hard to close. Keep the filling light so it holds its shape.
- Not Allowing Enough Drying Time: Rushing this step can ruin the structure. Let each layer dry fully so the piñata becomes strong.
- Using the Wrong Type of Glue: Some glues don’t hold well on paper or cardboard. Choose strong craft glue or paste for better results.
How to Store and Handle Your Piñata Safely
To keep your piñata in good shape, store it in a dry place away from moisture. Humidity can weaken the structure, especially if you used paper or paste.
Keep it away from water and direct heat so it doesn’t soften or lose its form.
When moving it, handle it gently and avoid pressing on the sides. If you need to hang it, use a strong string and attach it to a secure spot.
Always check the support before hanging it to prevent it from falling.
It’s best to fill the piñata close to party time. This keeps it light, fresh, and less likely to tear before use.
Wrapping Up
Making your own star piñata for party favors is a fun way to add a personal touch to any celebration. You don’t need expensive tools or advanced skills; just a bit of time and creativity.
By following these steps, you can create something colorful, strong, and exciting for your guests.
I hope this guide made the process feel simple and doable for you. Once you finish your piñata, you’ll see how rewarding it is to make something by hand.
If you give this a try, I’d really like to hear how it turned out. Share your experience, tips, or even small challenges in the comments below so others can learn from you, too!
FAQs About Star Piñata Making
How Long does it Take to Make a Piñata?
It usually takes a few hours to build, plus extra time for drying if you use glue or paste, plan for one full day to finish it without rushing.
Can I Make One without Papier-Mache?
Yes, you can use cardboard instead. It’s for the ter, cleaner, and great for beginners who want an easy option.
What is the Best Size for Party Favors?
Mini piñatas are best for party favors. They are easy to handle and hold just enough treats for each guest.
How do I Make it Easy for Kids to Break?
Don’t make it too thick. Use light layers and avoid heavy reinforcement so kids can break it without too much effort.