
When I first painted pressure-treated wood, I thought it’d be just like any other outdoor project. I was wrong. If you don’t take a few extra steps, your paint can start peeling within months.
Pressure-treated wood is great because it resists rot, insects, and moisture, but those same chemicals make it tricky to paint.
The treatment can actually push paint away if you rush the process.
In this blog, I’ll share what I wish I had known from the start. You’ll learn what pressure-treated wood is, how to handle it, and a step-by-step method that really works.
Let’s turn your outdoor project into something strong and great-looking.
What Is Pressure-Treated Wood?
Before you break out the paintbrush, it helps to understand what you’re working with.
Pressure-treated wood is lumber that has been infused with preservatives under high pressure. This process helps the wood resist decay, termites, and water damage, making it ideal for outdoor use.
You’ll usually find this type of wood used in:
- Decks
- Fences
- Outdoor furniture
- Garden beds
- Pergolas
The catch? The treatment makes the wood hold onto moisture longer than untreated wood. If you paint it too soon, that moisture gets trapped, and your paint job won’t last.
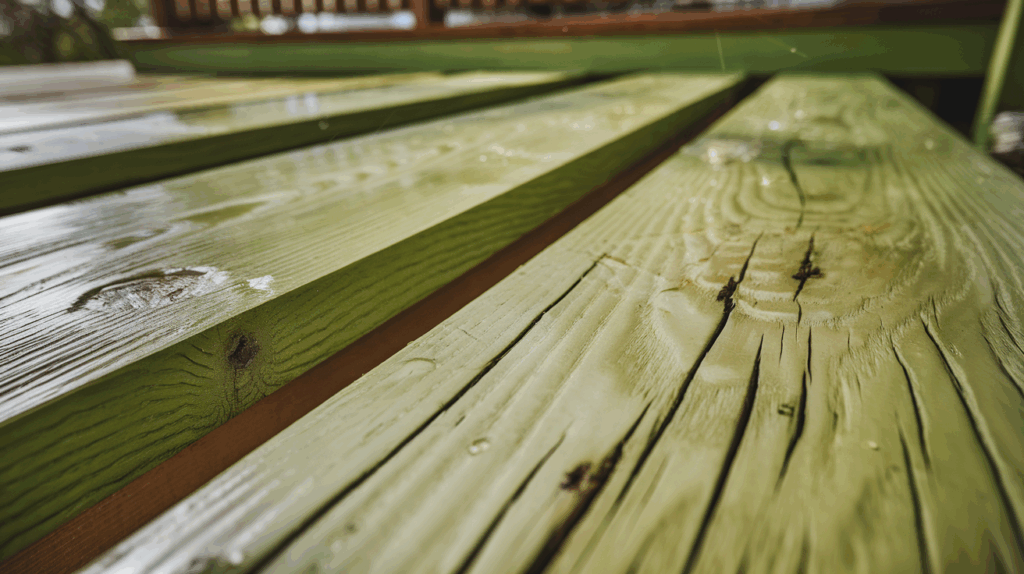
It’s also worth noting that pressure-treated wood often has a slightly green tint when new, which is a result of the chemicals used during treatment.
This color fades over time, especially with sun exposure.
Some pressure-treated wood also has a slick or waxy coating that resists moisture and can also resist paint. This is why preparing the surface before painting is absolutely crucial.
It’s not just about aesthetics; paint failure on improperly prepped wood can lead to blistering, flaking, and costly do-overs.
Can You Paint or Stain Pressure-Treated Wood?
Short answer: yes, but only if the wood is dry. Many people think you can’t paint or stain pressure-treated wood, but that’s not true.
The key is timing – both paint and stain need dry wood to work well. To check, sprinkle some water on the surface. If it beads up, wait. If it soaks in, you’re ready.
For new wood, I wait 2 to 3 months before painting or staining.
Stains soak in and highlight the wood’s texture, while paint sits on top and hides the grain.
Stain gives a rustic, natural look and needs reapplication more often. Paint adds bold color and lasts longer, but it can chip or peel.
If you’re in doubt, use a moisture meter to test. It’s worth the small cost to avoid a bad finish.
What You’ll Need
Before you get started, take a few minutes to gather the right tools. You don’t need a professional setup, just quality materials and a little prep time.
- Mild detergent and water
- Scrub brush or pressure washer (optional)
- Sandpaper (80–120 grit)
- Exterior wood primer (specifically for pressure-treated wood)
- Exterior paint (acrylic latex works best)
- Paintbrushes and/or rollers
- Drop cloth or tarp
- Paint tray
- Safety gloves and mask (if sanding or pressure washing)
It’s also helpful to have a weather forecast on hand. You’ll want several clear, dry days with moderate temperatures for the best results.
Step-by-Step: How to Paint Pressure-Treated Wood
Once your wood is fully dry and you’ve gathered your tools, follow these steps for a long-lasting paint finish.
Step 1: Clean the Wood
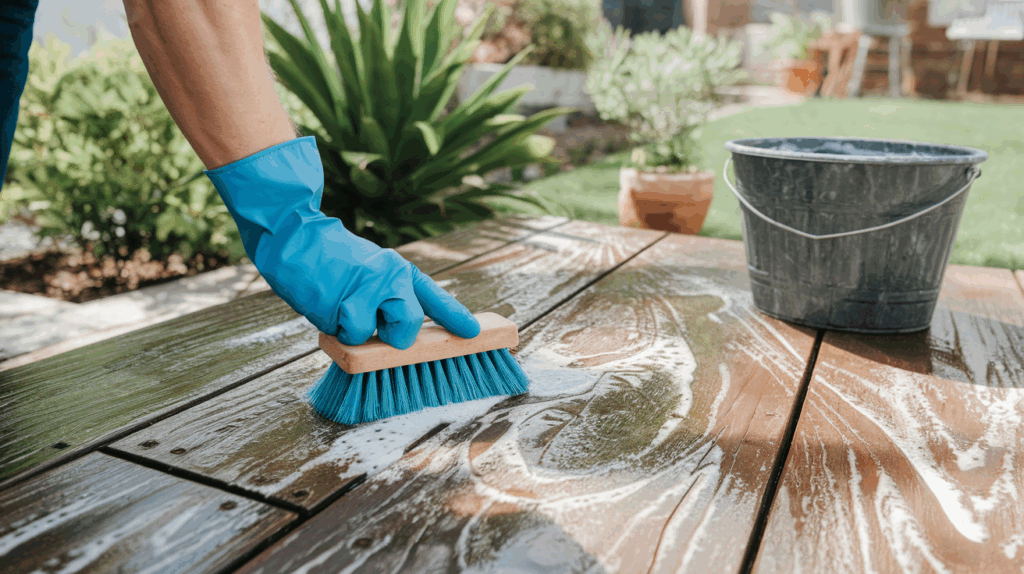
Even if the wood is brand new, clean it. Use a mixture of mild detergent and warm water to scrub away dirt, grime, or mildew.
If the wood is older or has been exposed to the elements, you might want to use a pressure washer, but keep the pressure light to avoid damaging the surface.
Let the wood dry completely before moving on. This could take a full day or more, depending on the weather.
Step 2: Sand the Surface
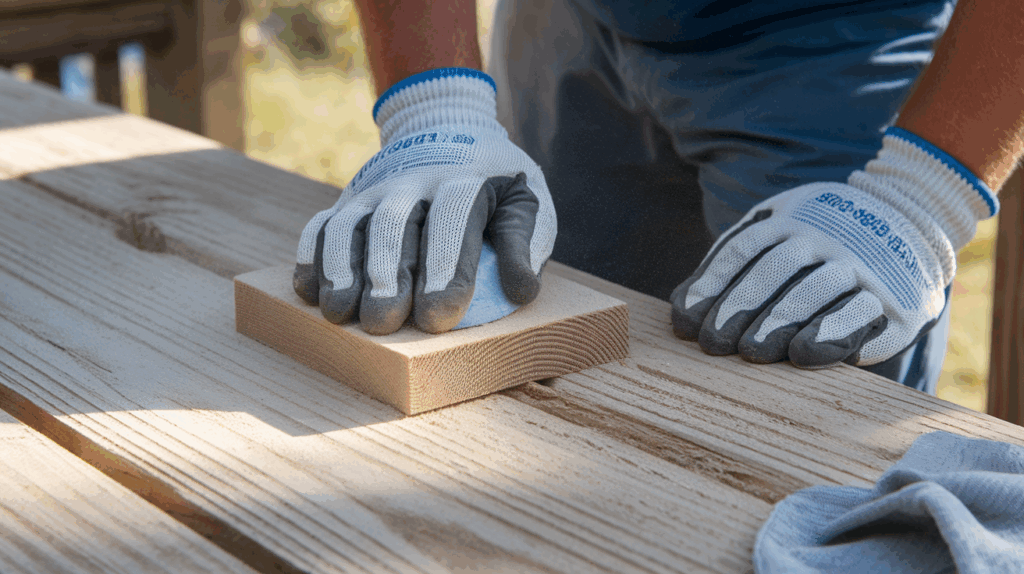
Pressure-treated wood often has a rough surface or a shiny outer layer called “mill glaze.” Sanding lightly helps remove that layer and gives your primer something to stick to.
Use 80–120 grit sandpaper and go with the grain. Focus on any rough patches or glossy spots.
Sanding also helps even out inconsistencies and splinters. Wipe away the dust with a clean, dry cloth.
Step 3: Apply Exterior Primer
Priming is crucial for painting pressure-treated wood.
Use an exterior wood primer labeled for use on pressure-treated surfaces. This helps block any residue from the wood treatment that might interfere with the paint.
Apply one even coat and let it dry according to the manufacturer’s instructions.
Don’t rush; if the primer isn’t fully dry, your paint won’t go on smoothly.
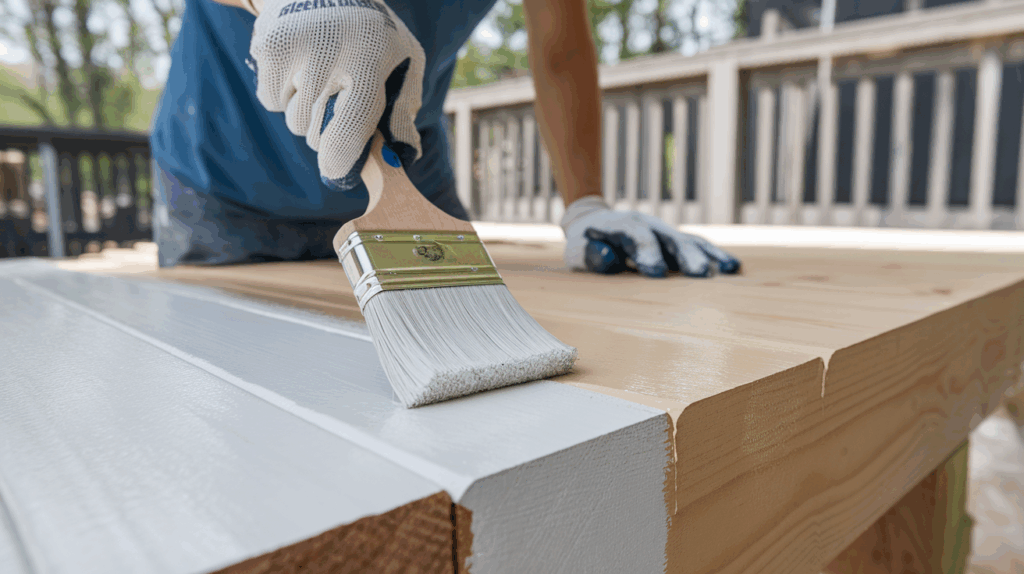
Step 4: Paint the Wood

Now the fun part, adding color!
Use a high-quality exterior acrylic latex paint. This type of paint is flexible and breathable, so it works well with pressure-treated wood.
Apply your first coat using a brush or roller, working in even strokes. Let it dry completely, then add a second coat for durability and full coverage.
If you’re working on vertical surfaces like fences or siding, start from the top and work your way down to avoid drips.
Step 5: Let It Cure
Even after the paint feels dry to the touch, it needs time to cure. Avoid heavy use or placing furniture on it for several days.
Full curing may take up to a week, depending on weather conditions. The longer you let it sit, the better it will hold up.
Curing is different from drying; it’s the final stage where the paint hardens and bonds fully with the surface.
Tips for Better Results
You don’t have to be a pro to get pro-level results. Here are a few things I’ve learned from experience:
- Be patient: Let the wood dry fully before starting. Rushing will only lead to peeling later.
- Check the weather: Aim for a few dry days in a row with temps between 50°F–85°F.
- Stir your paint: Always stir your paint well, especially if it’s been sitting for a while.
- Use drop cloths: Protect surrounding areas from splatter and drips.
- Test a small patch: If you’re unsure, test on a hidden section to make sure the wood is ready.
- Store extra paint: Touch-ups are easier when you’ve got matching paint on hand.
- Avoid overly thick coats: Multiple thin coats are better than one thick one.
Conclusion
Painting pressure-treated wood isn’t hard; it just takes the right timing and a few extra steps.
I’ve used this method on everything from deck railings to raised garden beds, and the results always make me smile.
There’s something satisfying about turning a raw, greenish board into a polished piece that fits your style perfectly.
So if you’ve been staring at your weathered porch or backyard bench, wondering if you can paint it, now you know the answer is yes.
Just prep it properly, grab the right paint, and enjoy the transformation.
With a little patience and planning, you’ll get a finish that looks great and lasts for years.
Plus, you’ll have the satisfaction of knowing you did it yourself. You’ve got this.