
Most people think planting a tree is simple. Dig a hole, drop it in, fill with dirt. Done, right?
Not quite. Trees are tough, but they’re also surprisingly easy to kill with good intentions.
Too deep, too shallow, wrong soil, wrong timing. The list goes on. And when a tree doesn’t make it, it’s not just disappointing; it’s a waste of time, money, and effort.
But planting a tree doesn’t have to be complicated. With a few key steps, anyone can give a young tree the strong start it needs to thrive for decades
Why Planting a Tree Correctly Matters
Planting a tree seems straightforward, but the details make all the difference.
Get it wrong, and that sapling might struggle for years or never recover at all. Roots can suffocate, trunks can rot, and growth can stall.
But that tree will establish strong roots, resist disease, and grow into something that lasts. It’ll provide shade, clean air, and beauty for generations. The effort put in at planting time pays off for decades.
Understanding why proper planting matters isn’t just helpful; it’s the foundation for success. Because a healthy tree starts with a healthy beginning.
What You Need Before You Plant a Tree
Before digging in, gather the right tools and materials. Having everything ready makes the job smoother and more efficient.
| Tools | Materials |
|---|---|
| Shovel | Tree sapling |
| Spade | Mulch |
| Garden fork | Compost or soil amendment |
| Pruning shears | Water |
| Wheelbarrow | Stakes (if needed) |
| Measuring tape | Tree ties or straps |
| Hose or watering can | Fertilizer (optional) |
| Gloves | Burlap or root protection |
Step-by-Step Instructions on How to Plant a Tree
Planting a tree the right way involves more than just digging. Each step builds on the last for long-term success.
Step 1: Choose the Right Location
Location matters more than most people realize. Consider sunlight, soil drainage, and space for growth. Trees need room for roots and branches to spread without hitting buildings, power lines, or other plants.
Check what’s underground, too; utility lines can cause problems later. Also, think about the tree’s mature size. A spot that seems perfect now might feel cramped in ten years.
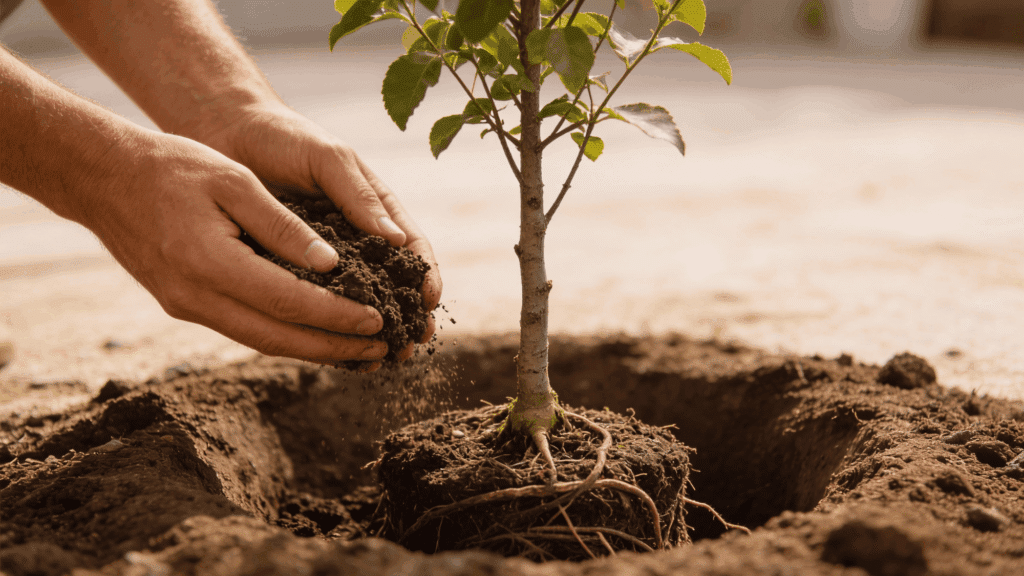
Step 2: Dig the Proper Hole
The hole should be 2 to 3 times wider than the root ball, but no deeper.
Depth is critical; planting too deep kills more trees than almost anything else. The root flare, where roots meet the trunk, should sit slightly above ground level.
Loosen the soil on the sides to help roots penetrate outward. A wide, shallow hole encourages healthy root spread and stability.
Step 3: Prepare the Tree
Carefully remove the tree from its container. If roots are circling or bound, gently tease them apart with your fingers or a garden fork.
Cut any damaged or dead roots with clean pruning shears. For burlap-wrapped trees, remove all synthetic materials and pull the natural burlap away from the trunk.
This prep work helps roots grow outward rather than remain tangled, giving the tree a better start.
Step 4: Position and Backfill
Set the tree in the hole, keeping the root flare visible. Check that it’s straight from multiple angles.
Begin backfilling with the original soil; no amendments needed in most cases. Add soil gradually, tamping gently to remove air pockets but avoid packing too hard.
Water as you fill to settle the soil naturally. Leave a slight basin around the trunk to hold water during future irrigations.
Step 5: Water Thoroughly
After planting, water deeply and slowly. The goal is to soak the entire root zone, not just the surface.
Newly planted trees need consistent moisture to establish roots. Water again after a few hours to ensure complete saturation.
For the first few weeks, check soil moisture regularly and water when the top few inches feel dry. Deep, infrequent watering beats shallow, frequent sprinkles every time.
Step 6: Apply Mulch
Spread two to four inches of mulch around the base, extending out to the drip line if possible.
Keep mulch a few inches away from the trunk; piling it against bark invites rot and pests. Mulch conserves moisture, regulates soil temperature, and suppresses weeds.
Organic options like wood chips or shredded bark work best. Refresh the mulch layer annually as it breaks down, adding nutrients to the soil.
Step 7: Stake Only If Necessary
Most trees don’t need staking. But if the tree can’t stand on its own or the site is windy, use stakes for support.
Place two or three stakes outside the root ball and attach them with flexible ties. The tree should still move slightly in the wind; this builds trunk strength.
Remove stakes after one growing season. Leaving them too long can damage the bark or weaken the trunk over time.
Common Tree Planting Mistakes to Avoid
Even experienced gardeners make planting mistakes. Knowing what to avoid can save a tree’s life and years of frustration.
- Planting too deeply and burying the root flare below soil level.
- Digging a hole that’s too narrow, restricting root growth and expansion.
- Using amended soil that differs too much from the surrounding ground.
- Overwatering or underwatering during the critical establishment period.
- Piling mulch against the trunk to create a “mulch volcano.“
- Leaving stakes on too long, weakening the trunk, and damaging the bark.
How to Care for a Newly Planted Tree

Planting the tree is just the beginning. What happens in the weeks and months that follow determines whether it thrives or struggles.
Newly planted trees are vulnerable. Their roots haven’t spread into the surrounding soil yet, so they depend entirely on careful watering and protection. Skip this care, and even a perfectly planted tree can fail.
Post-planting care isn’t complicated. It’s about consistency and attention to a few key needs.
Water properly, protect from damage, and monitor for problems. Do this right, and the tree will establish strong roots and shift from surviving to thriving.
Benefits of Planting Trees Around Your Home
Trees do more than look good. They offer real, measurable benefits that improve property value, comfort, and the environment around homes.
- Provide natural shade that reduces cooling costs during hot summer months.
- Increase property value by up to 15 percent with mature, healthy trees.
- Improve air quality by filtering pollutants and producing fresh oxygen.
- Reduce noise pollution by acting as a natural sound barrier from traffic.
- Support local wildlife by offering habitat and food sources for birds.
- Prevent soil erosion and manage stormwater runoff on the property.
To Conclude
Planting a tree correctly sets the stage for years of growth and enjoyment. The steps aren’t difficult, but they matter.
Proper depth, adequate watering, and smart location choices make the difference between a tree that struggles and one that flourishes.
Take the time to do it right from the start. The tree will reward that effort with shade, beauty, and environmental benefits for decades to come.
Got a spot picked out? Grab the tools, follow these steps, and give that sapling the strong foundation it deserves. Before long, it’ll be standing tall and healthy in the yard.