
We have always wished to capture the beauty of a flower in full bloom and keep it forever.
Drying flowers is a wonderful way to preserve precious memories, whether fromyour garden, prom, wedding bouquets, wildflowers picked on a special walk, or even a loved one’s funeral.
But whatever the reason, I will always encourage you to do so because flowers are just so pretty, aren’t they? I’m all for adding a little more beauty to our lives!
But the problem is how to preserve your beautiful flowers so they last years instead of weeks while still retaining their color and shape. Don’t worry, I’ve got you covered.
And the fact that you can do it easily without breaking the bank. In this blog, you’ll learn:
- How to air dry flowers
- Techniques to preserve dried flowers
- Dried flower care tips
Let’s start now!
Best Flowers for Air Drying
By the word ‘air drying ‘, you must have got an idea of what it means. It is simply known as hanging the bouquet upside down.
But the most important thing is to know which flowers are the right ones, as not all flowers are suitable for drying. Look for flowers with sturdy petals and low moisture content.
Some of my favorite flowers that I would suggest dry naturally are:
- Roses
- Lavender
- Statice
- Strawflower
- Amaranth
- Baby’s Breath
- Celosia
- Coneflower
- Daisies
- Gomphrena
- Hydrangea
- Lavender stems
- Marigolds
- Thistle
- Yarrow
- Herbs (mint, lavender, basil)
How to Air Dry Flowers?
Supplies you’ll need:
- Flowers
- Scissors
- Rope to Hang
- Hanger or drying Rack
Follow these easy steps and start now:
Step 1: Undo the Bouquet

I know that the bouquet itself is pretty, and why not preserve these flowers as they are inside the bouquet? Plus, it will not be easy to redo the bouquet once we open it right. But to dry flowers effectively you have to separate the flowers from each other.
Always choose fresh flowers for the best results and remember that flowers with fleshy or water-rich petals may not preserve well. So choose flowers which are less fleshy.
Step 2: Select the Flowers
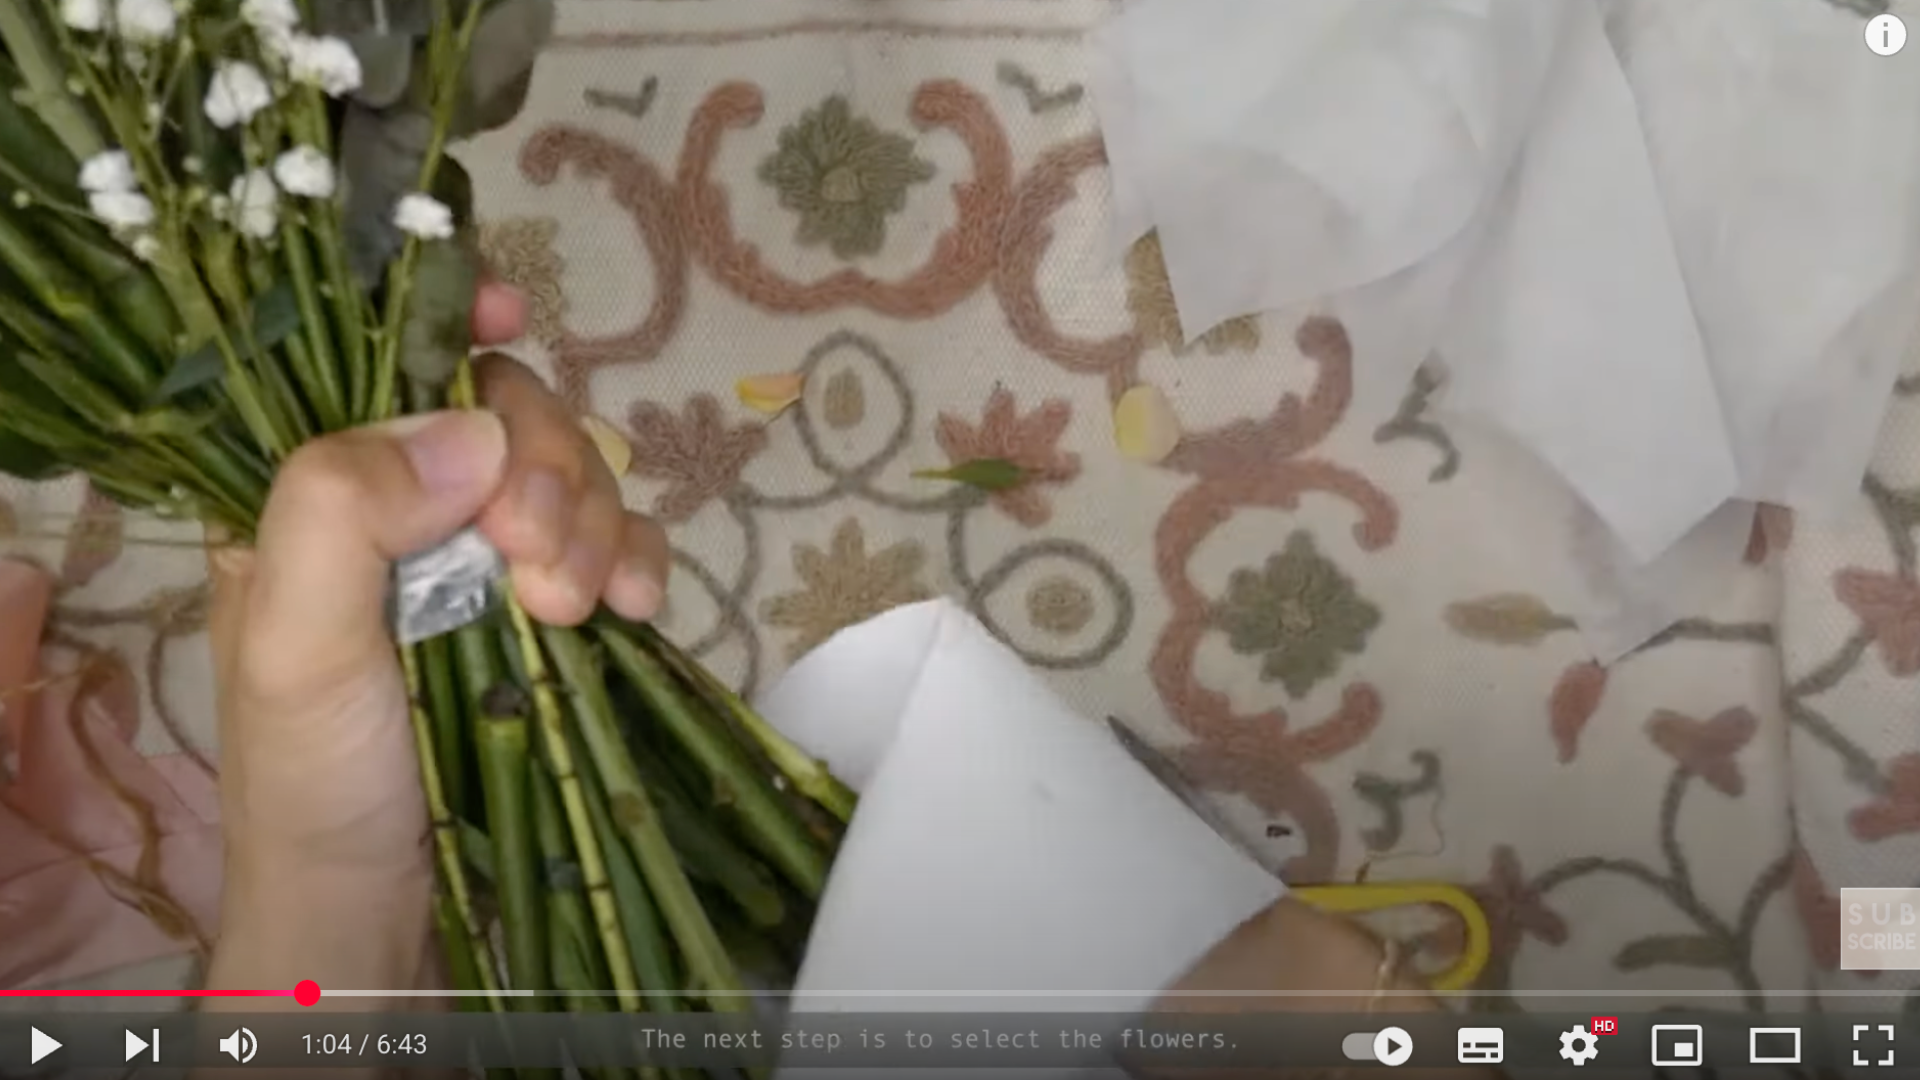
Since the florist wants to keep the bouquet hydrated for several days, it has a water pocket inside. That’s why the stems are wet to preserve well.
We need to avoid water from the flowers, because otherwise they will get moldy or even rot. This step is essential to get better results, so take your time to examine one by one.
Wipe the excess water and dispose of flowers that are already covered with mold, like this one.
Step 3: Hang Upside Down in A Cool and Dry Place

The next step is to hang them, and they have to be hung upside down to keep the flowers’ shape straight naturally. As the flower is dying, the stem will bend due to gravity, and once dry, this stays in that position.
So we won’t be able to straighten them back because they are crispy, and they will break, so make sure to hang them upside down.
How to Preserve Dried Flowers Using Silica Gel?
The quicker you can start preserving them the better the flowers will turn out. Using silica gel is the best method for preserving the color and texture of flowers.
And the results will be worth it, especially if you plan to use the preserved flowers for jewelry or other craft projects.
Supplies you’ll need:
- Flowers
- Pruners or Scissors
- Plastic Bin
- Silica Gel Beads
- Gloves and Mask
- Metal or Plastic Container
Step 1: Pour Silica Gel Into an Airtight Container
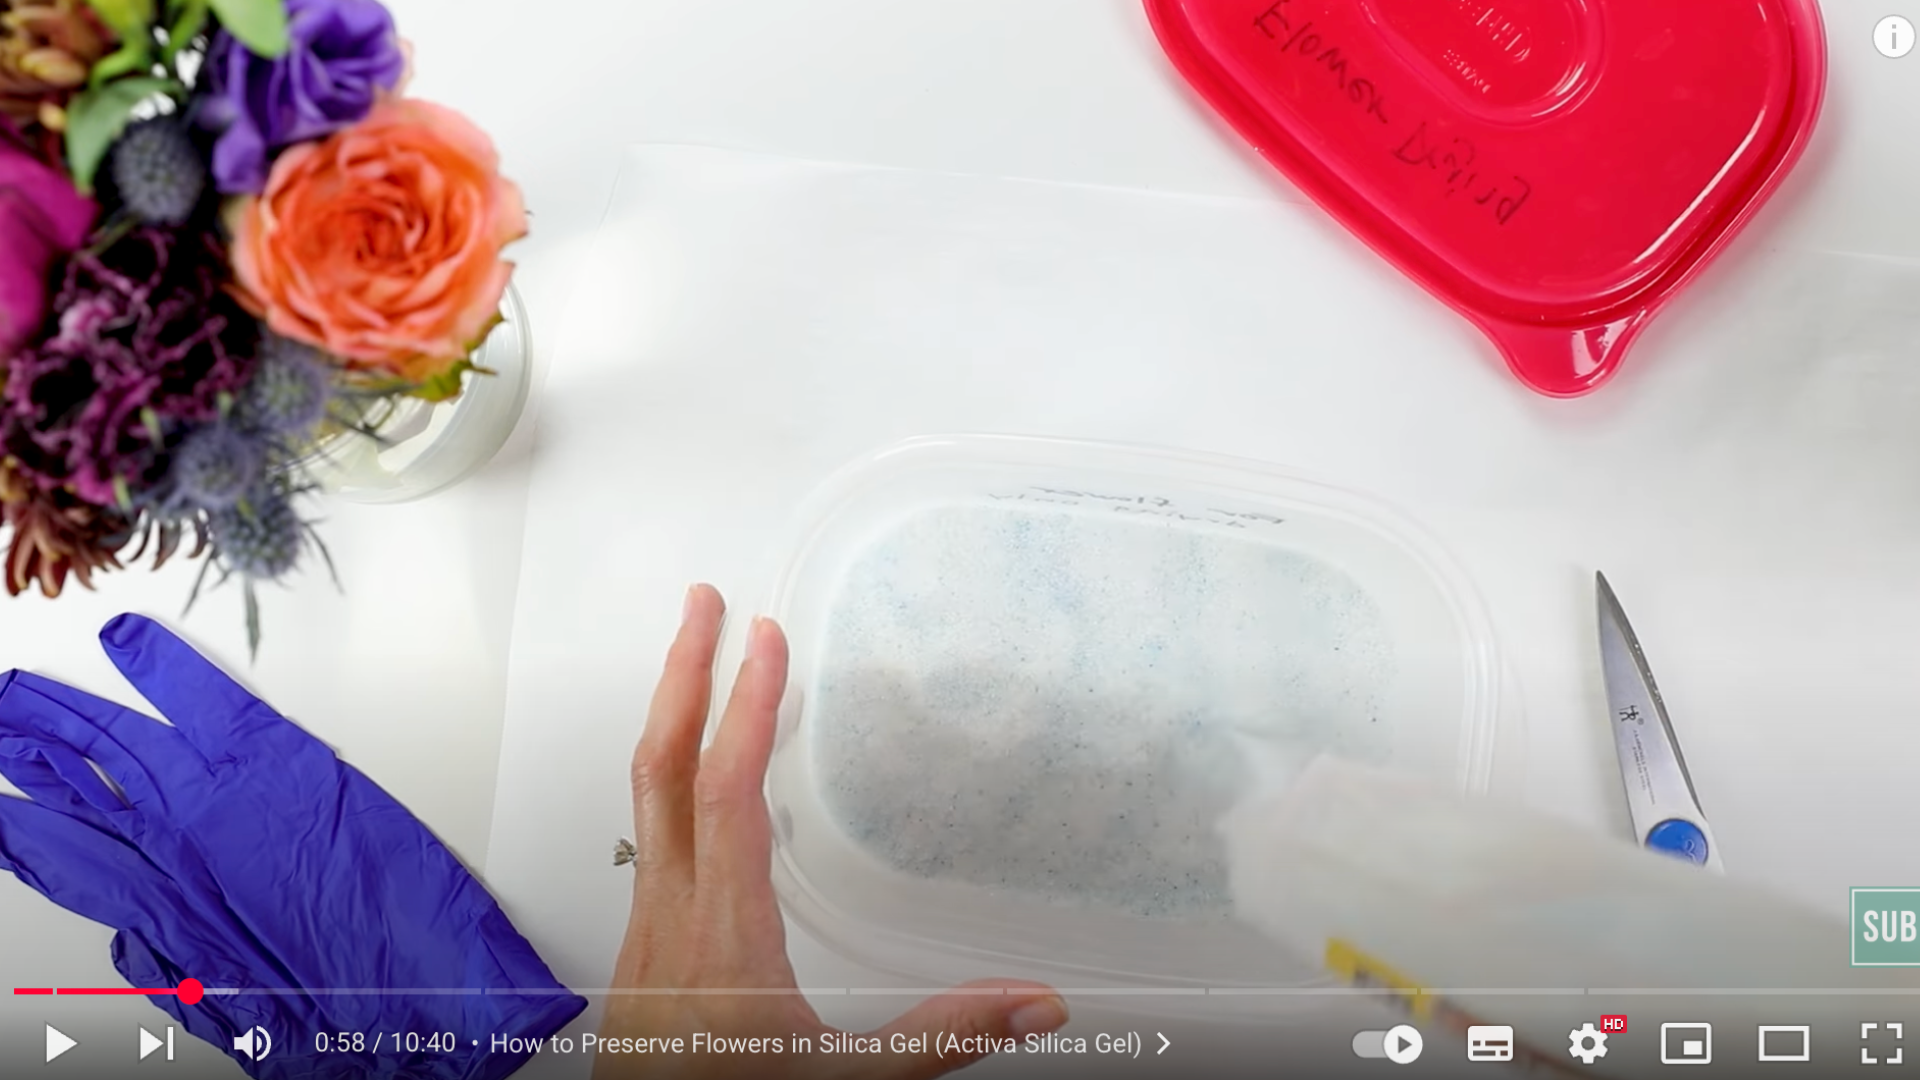
To begin, pour the silica gel into your container. I always use the same container for flower drying as you don’t want to use the same food containers for silica gel and food storage.
So just make sure that you designate your container just for flower drying. So pour once you have a layer that’s about an inch to an inch and a half thick.
Step 2: Placing Flowers in the Container
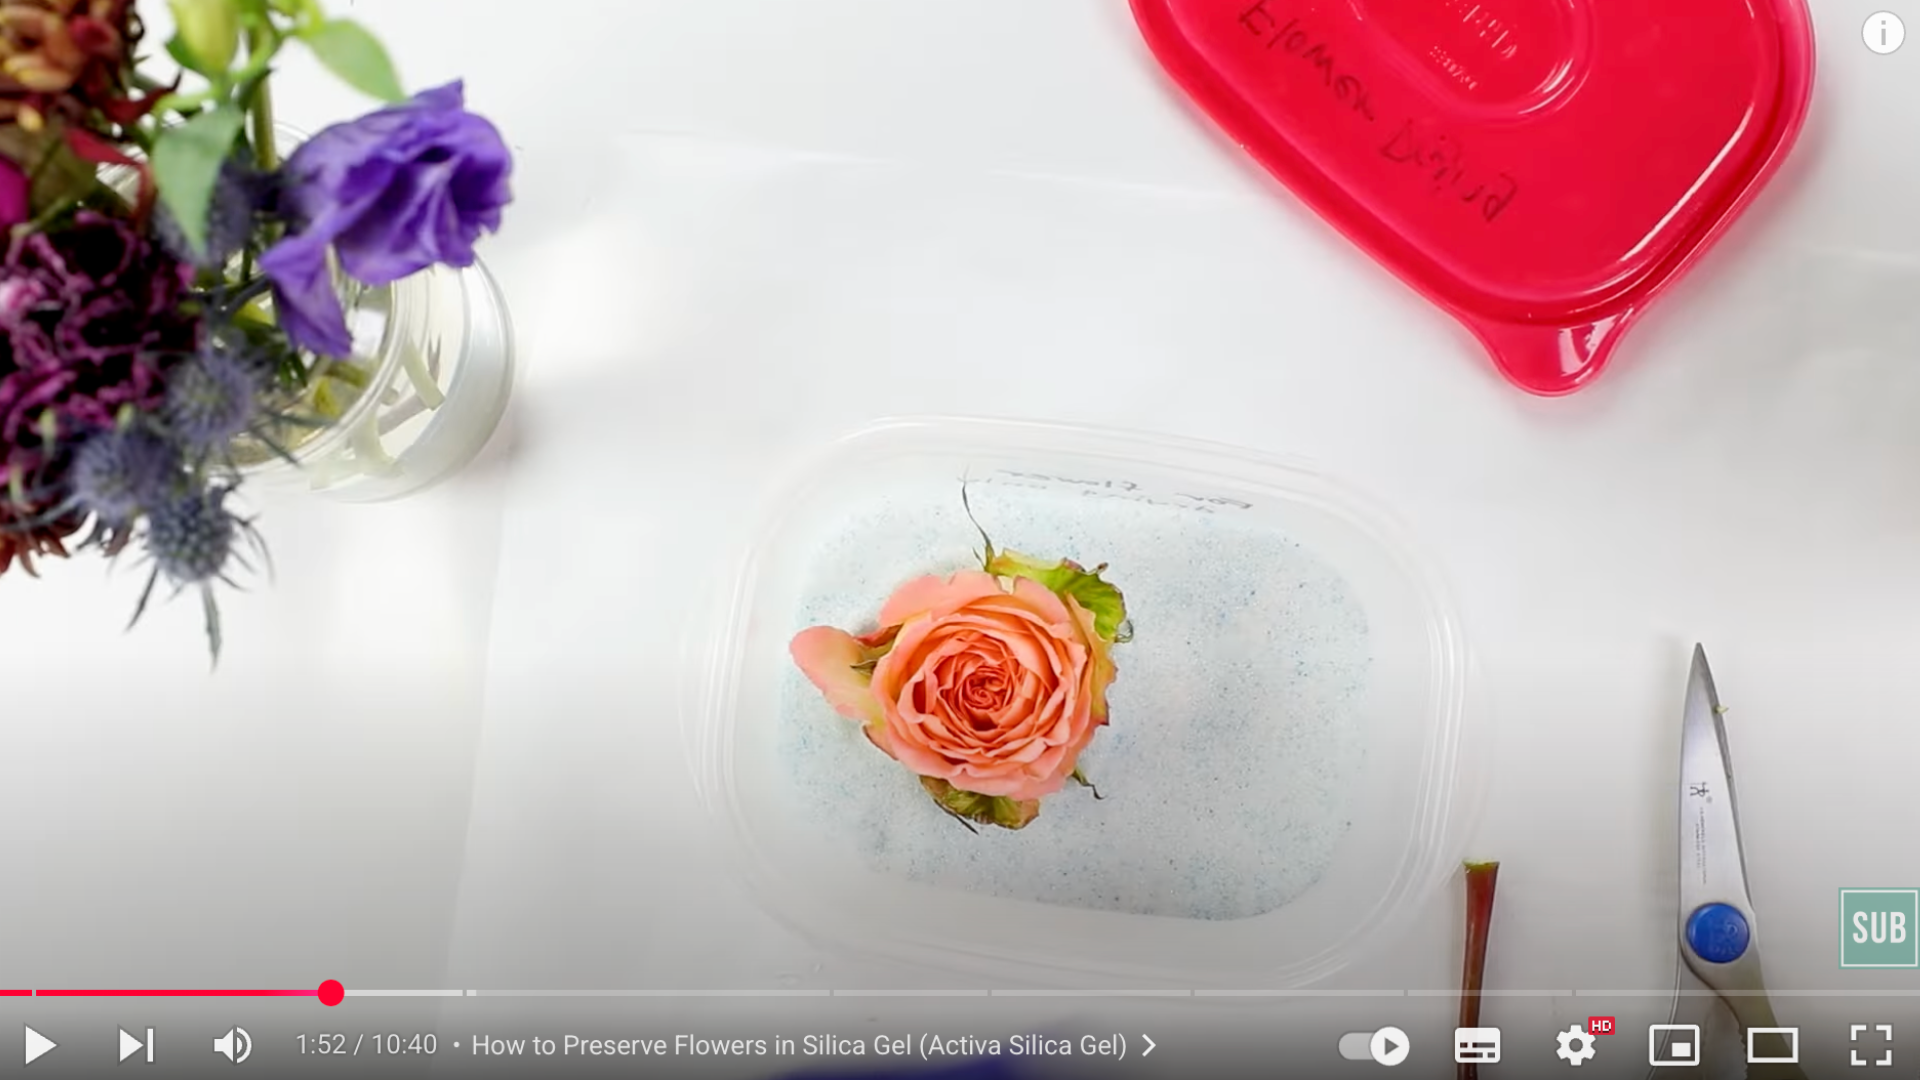
Next step is to place the flowers in that container facing upward and then add more crystals in and around the petals until its fully covered but not submerged completely.
I cut it off right at the top of the stem here and if you do want to have the stem on, what I recommend is threading some wire through the stem and through the base of the flower blossom.
And you can always reattach it after you’ve dried the blossom. That way you save a little bit on space.
Step 3: Pouring More Silica Gel
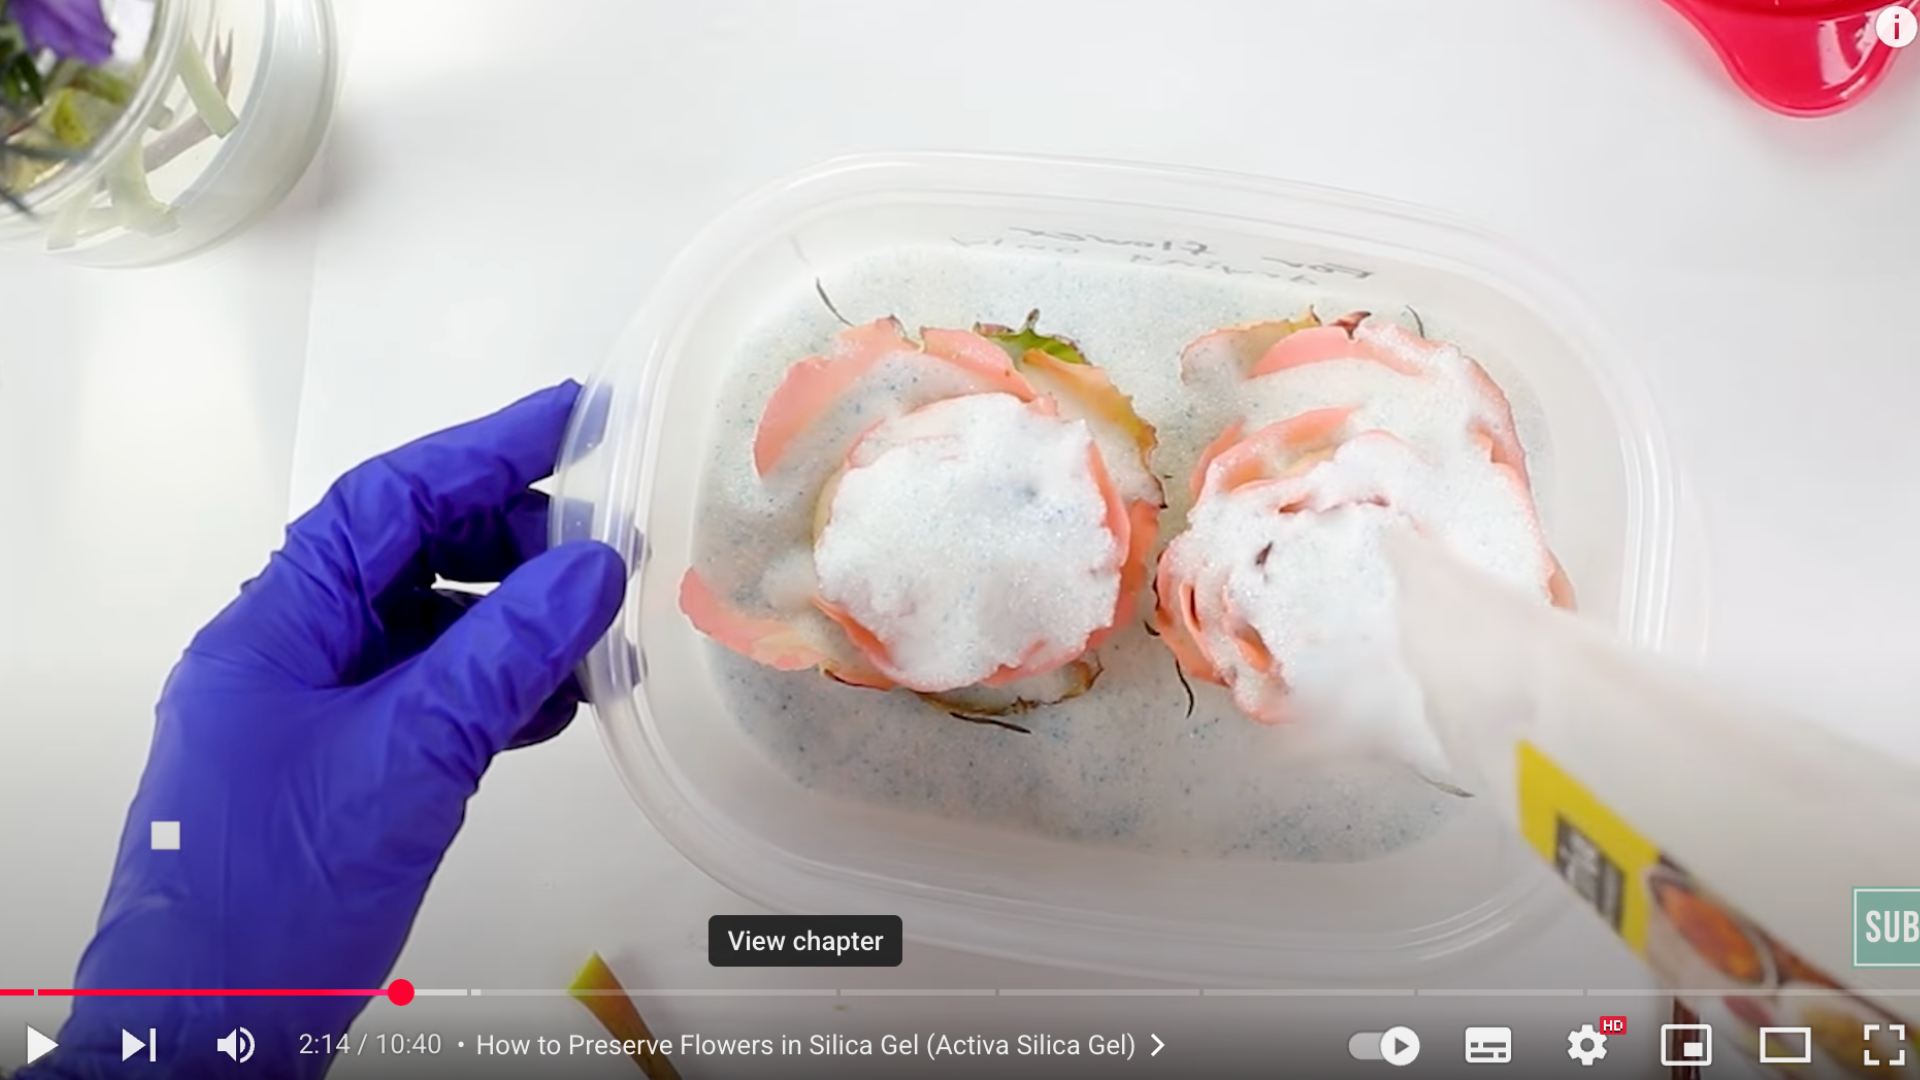
Last step is to pour more silica gel on the flowers. And you don’t need to worry too much about getting it inside because you can always use a fine brush to get those crystals out later.
And once we have our container full of silica gel, we’re going to seal it. And then I’m just going to wait a few days for this to dry before checking on it again.
How to Preserve Flowers Using Sand?
Similar to the silica gel technique, fine sand can be used to preserve flowers. Since sand is heavy, you can only use this preserving technique with hardy flowers and foliage.
Supplies you’ll need:
- Flowers
- Sand
- Metal or Plastic Container
- Scissors
Step 1: Choosing and Trimming your Flower
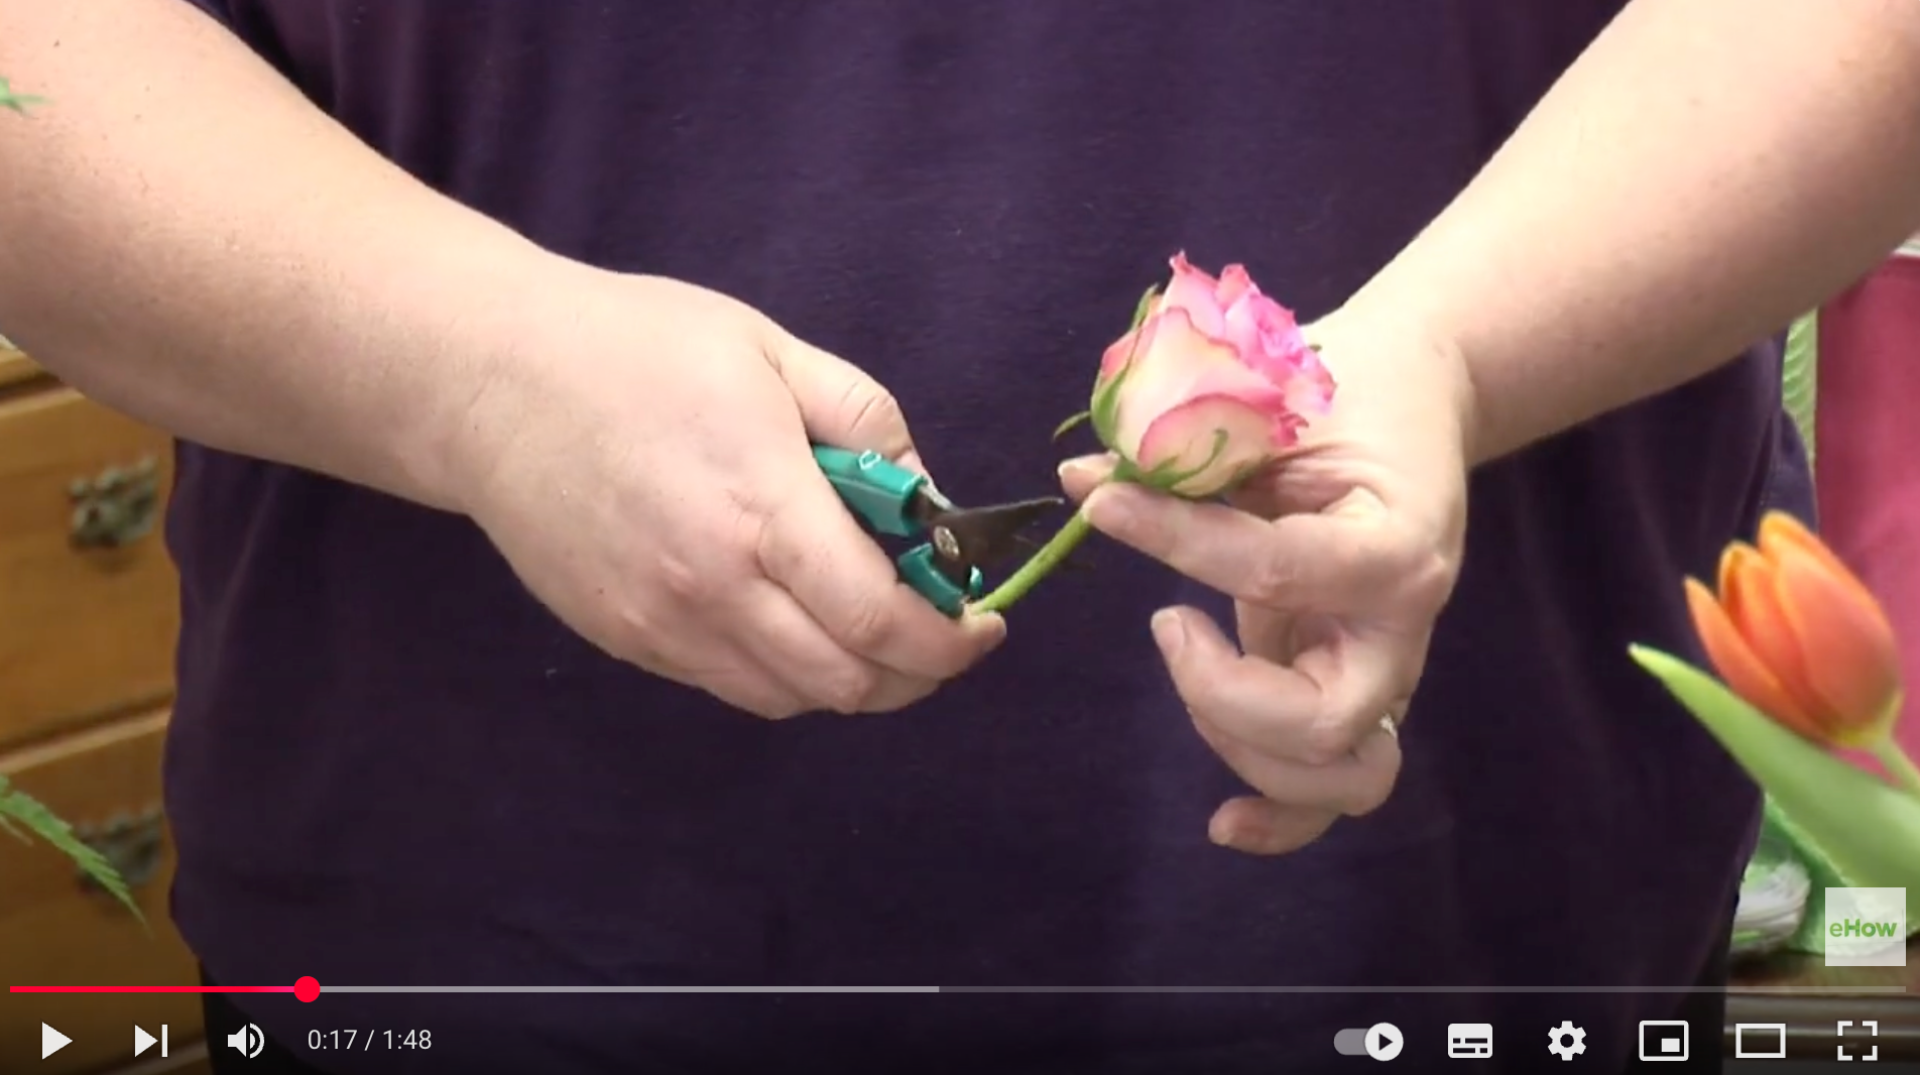
First of all you want to start with a flower in a somewhat of an open bud or a bud that’s about to bloom.
Next cut its stem as close to the Bloom as possible. So you’re going to leave maybe about an inch or so from the bottom of the bloom.
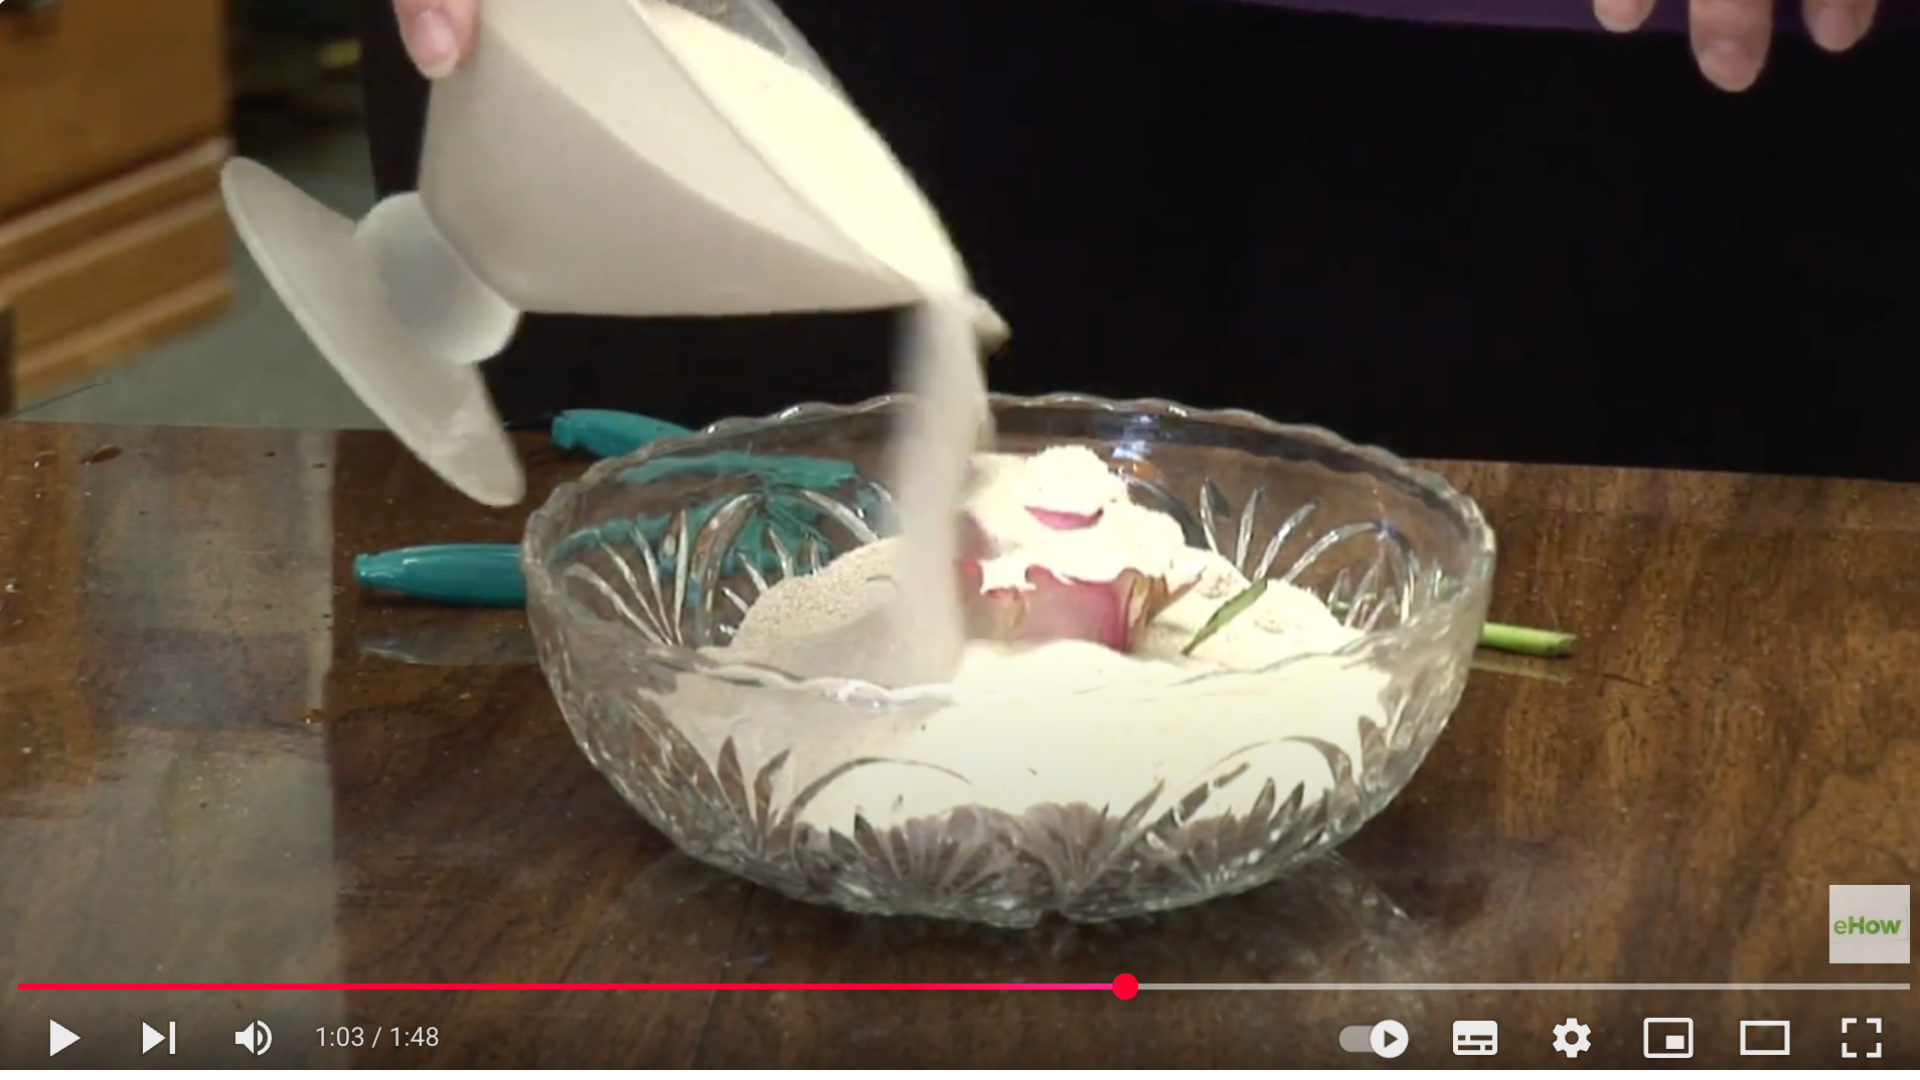
Step 2: Put Flower in a Container with Sand
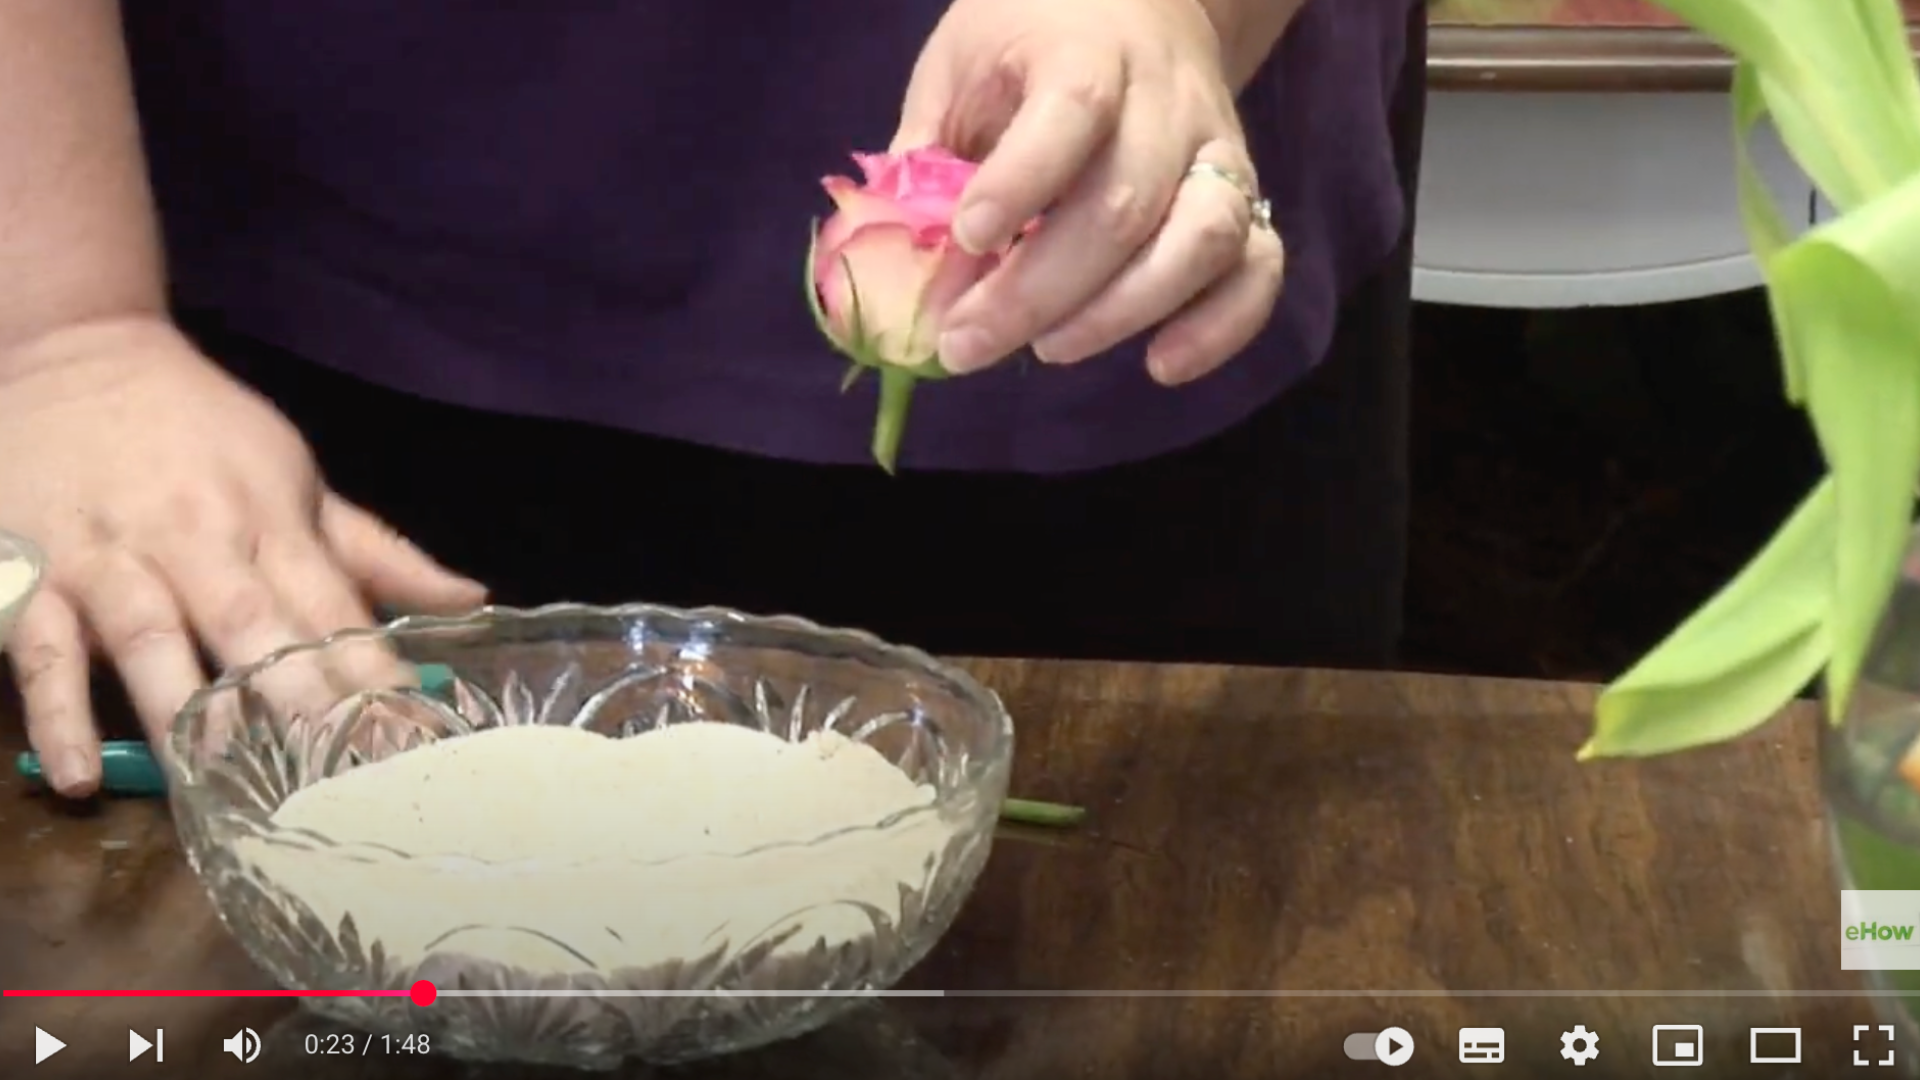
Next you’re going to put it in some fresh dry sand; it could be beach sand, river sand or anything that’s dry. And if it’s not dried out then pull the sand out for a while, put it in the sun and let it dry out.
Once you put the flour in the sand you’re going to bring the sand around the flower as much as possible. Then you’re going to take additional sand and very slowly cover your flour; make sure the sand doesn’t have rocks or shells.
Step 3: Leave it in a Cool and Dry Place
The last step is to just leave that container in a cool and dry place, like in a garage, an addict or anything.
Leave it like that for about three to four weeks and once the time period is up you can come out and slowly pull the sand away from the bloom.
Dried Flower Care Tips
Its really very easy to care for your dried flowers. You just have to follow simple steps to keep them beautiful for several years.
1. Keeping Them Away from Water
Dried flowers do not like water, unlike fresh ones.
The water makes their stems weak and mouldy. So keep them dry at all times. You can try keeping them in areas where there is no sign of water.
2. Avoid Direct Sunlight
These flowers will naturally fade over time, especially if they are kept in direct sunlight.
This is a part of their beauty that is to be enjoyed as much as any other time. But to slow the fade, keep them away from direct sunlight.
3. Handle with Care
Dried flowers are fragile, and they become more fragile as time goes by, so you always have to handle them with care. You may see some fallout, but don’t be sad. Collect these and enjoy them in another way.
4. Keeping Them in a Quiet Place
Areas with no to little movement are best suited for dries flowers.
Places where they’ll be lifted up and down or moved around a lot, like dining tables and hallways, are probably not the best places to be placed. They would be better suited to a side table.
5. Keep out Of Reach of Toddlers and Pets
Try to keep them out of reach of children and pets to keep them pretty and looking their best for a long time.
To avoid knocks or being crushed by your little one’s hands, and to stop them ending up in little mouths, keep them at a higher place.
6. Areas with Good Airflow
Make sure there is a good amount of airflow where these dried flowers are kept. But remember not to provide them direct airflow as it will make them moist.
And if they become moist they will become mouldy as I’ve already mentioned earlier. If it seems that the flowers became moist in a vase, then think about putting them in a different one.
If you care for your dried flowers well, they will continue to look pretty for months, even years to come! They are truly special and worth taking care of. Follow the above caring tips and you’ll give your flowers the best time.
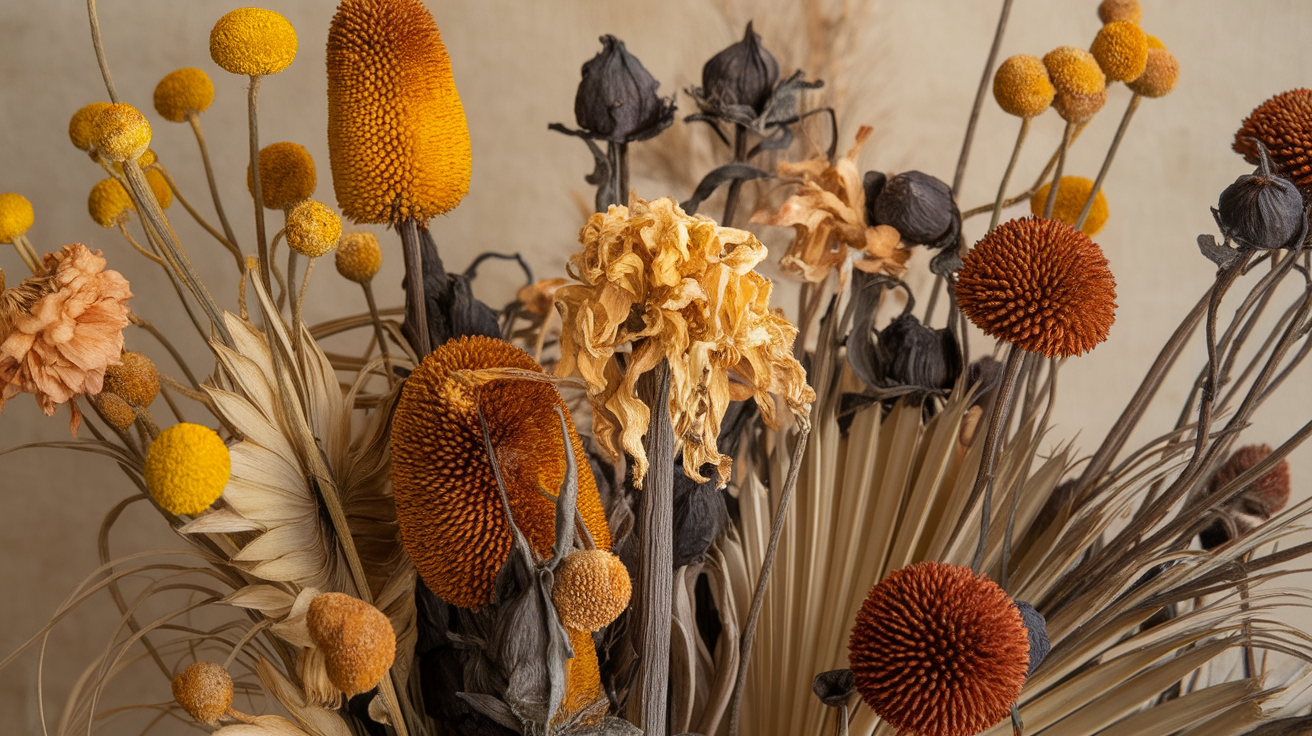
Creative Project Ideas for Dried Flowers
One of the reason that you are looking for ways to dry and preserve flowers is that you might have a project in mind already.
You can use your dried blossoms as beautiful decor or DIY gifts. Let’s see a few dried flower crafts to spark your imagination:
- DIY wreath
- Floral swag
- Flower crown
- Resin crafts
- Jewelry
- Wall art or shadow box
- Gift tags
Uses Of Dried Flowers
Dried flowers have many other benefits other than resin crafts, gifts, or jewelry. Let’s see some of the advantages of keeping and using them:
- Calendula: Salve, sprinkles, infused oil
- Rose: Rose water
- Lavender: Syrups, scented sachets
- Chamomile: Tea, infused honey
- Lilacs: Syrups
- Borage: Edible details, on cream cheese or fruit trays.
- Nasturium: Salad
- Marigold: Salad
- Dandelion: Tea, infused oil
- Sunflower: Salad
Conclusion
When you see so many different techniques for drying or preserving flowers, it becomes difficult to decide which one is right for you. And if you’re like me, you can’t resist trying them all at some point to satisfy your curiosity.
Your choice depends on the type of display you want and the types of flowers you’re using. So I suggest you decide carefully and then pick your method as its not only the flowers you will be preserving but also some precious memories.
And now that you have some tips and techniques up your sleeve to maintain the beauty of dried blooms, why not try some out for yourself?
I’d love to see how your flowers turned out! Share your before-and-after photos in the comments below. Your creative solutions might help other readers with similar pieces.
And if you’re looking to preserve your wedding bouquet, check out my blog on How to Preserve Wedding Bouquet: 11 Creative Methods for a more detailed guide.