
Putting ribbon on a Christmas tree is a simple way to make it look warm and bright. Many people enjoy this step because it adds color and shape to the whole tree.
A ribbon can fill empty spots, guide the eye, and bring the theme together. With a few easy steps, anyone can place ribbon in a clean, smooth way.
This guide explains how to do it without stress. It keeps the process clear and easy to follow. The goal is to help the tree look balanced and inviting.
No special tools are needed, just time, patience, and a bit of care. By learning a few basic methods, anyone can feel confident adding ribbon to their holiday tree.
How Ribbon Transforms a Christmas Tree
A ribbon is an easy way to change the look of a Christmas tree without much effort. It adds soft color, texture, and shape that help the tree feel warm and full.
Ribbon can fill empty spots, pull the whole theme together, and make the tree look more balanced from top to bottom.
It also gives the branches a smooth, flowing style that feels polished and bright. Another benefit is cost.
By switching ribbon colors or patterns each year, a tree can take on a brand-new look without buying new ornaments. This makes ribbon a budget-friendly and straightforward decorating tool.
Tools & Supplies Needed
| Tools & Supplies You Will Need | How Much Ribbon Do You Need |
|---|---|
| Wired ribbon (for loops and weaving) | 6 ft tree: 15–20 yards |
| Floral wire (only if needed) | 7.5 ft tree: 20–25 yards |
| Scissors | 9 ft tree: 25–30 yards |
| A fluffed and lit tree | Add more ribbon for a fuller look |
| A little patience and some time | Short rolls are great for bows or small loops |
Step-by-Step: How to Put Ribbon on a Christmas Tree
Here is a straightforward, simple method for putting ribbon on a Christmas tree. Follow these steps to shape smooth loops and place ribbon with ease.
Before You Start: Fluff and Add Lights
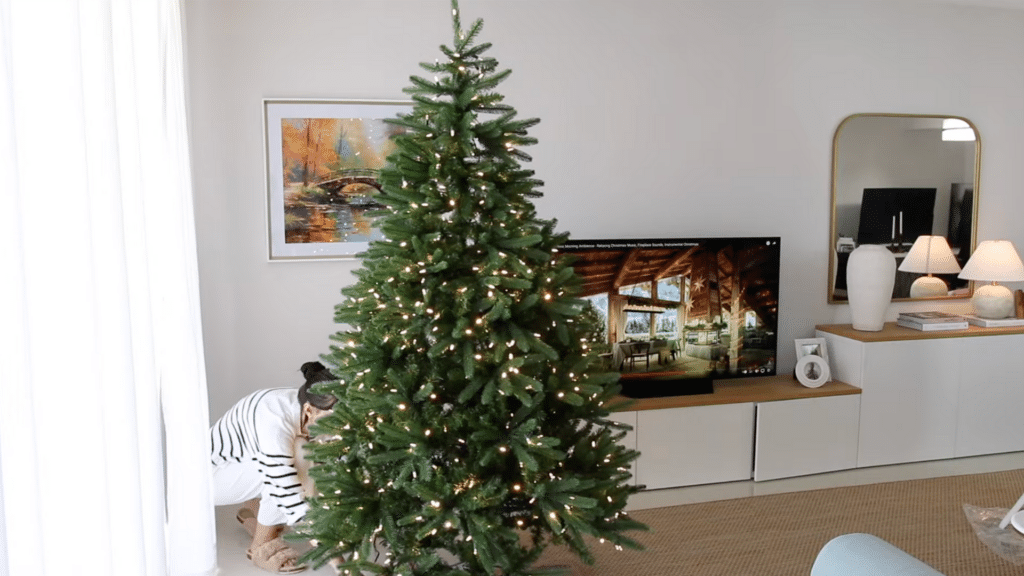
Before any ribbon goes on the tree, the branches should be ready:
- Fluff all the branches so the tree looks full.
- Adjust the tips so there are no significant gaps.
- Add the lights and spread them evenly from the inside out.
Step 1: Add Ribbon Before Ornaments
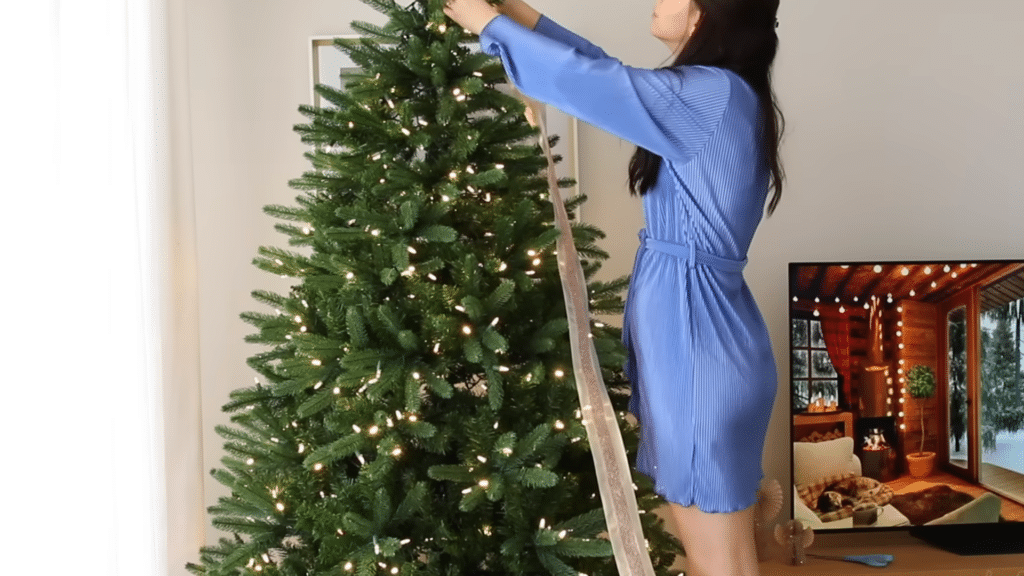
One of the first big questions is: Should ribbon go on before or after ornaments? The answer in this method is straightforward: always start with ribbon.
Here is why:
- You will move branches and tips a lot while shaping loops.
- It is easier to work on a bare tree.
- You will not risk knocking glass ornaments off the tree.
Step 2: Pick the Right Ribbon
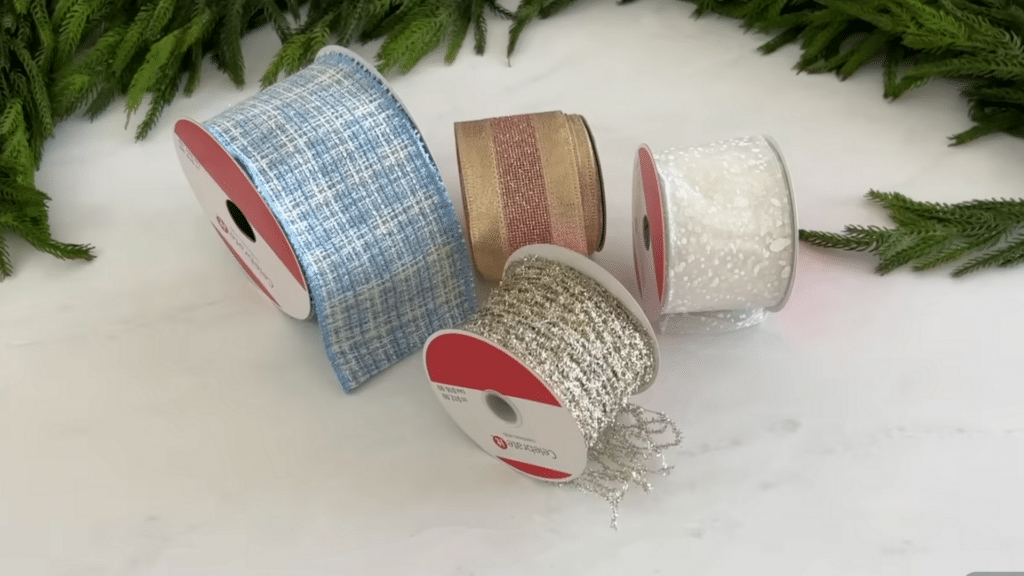
For the woven ribbon look on a tree, wired ribbon works best.
- Use wired ribbon when you want to weave it in and out of the branches. The wire helps hold the shape of each loop.
- Non-wired ribbon can still be used for small bows at the tips, but that is not the main style shown here.
Step 3: Learn the Basic Weaving Technique
This is the heart of the whole look. Many “different” ribbon methods online are actually just small changes of this one basic technique. Once you learn it, you can move the ribbon in any pattern you like.
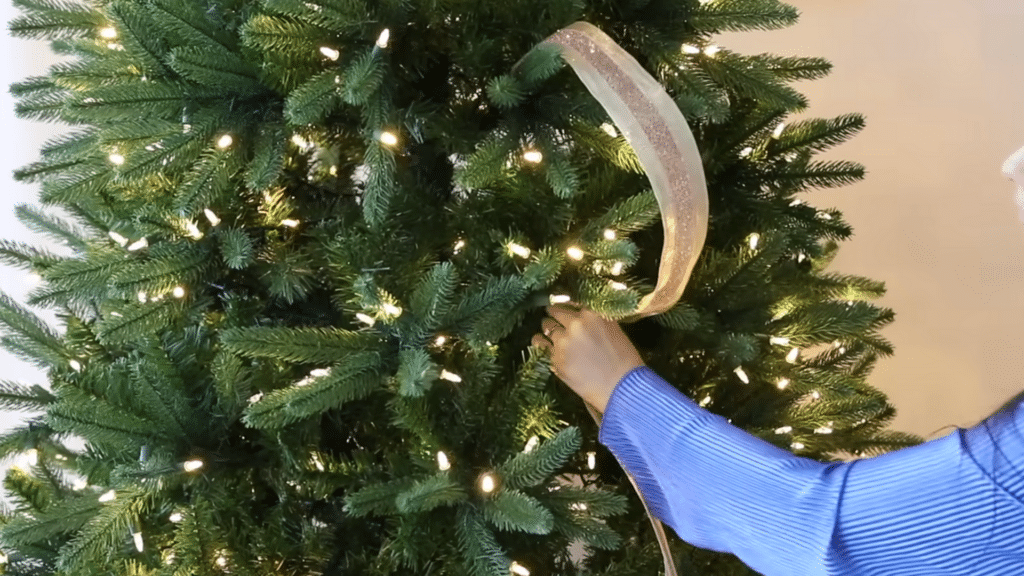
3.1 Anchor the Ribbon Deep Inside the Tree
- Let the roll of ribbon fall to the floor so it can unroll freely.
- Take just the end of the ribbon in your hand.
- Pinch the end.
- Push it deep inside the tree, near the trunk.
- Use two branch tips to twist around the ribbon and hold it in place.
If there is only one twig there, twist that one twig tightly around the ribbon instead. If there is nothing to grab onto, you can use a small piece of floral wire to anchor the ribbon.
3.2 Shape the First Loop
- Gently pull some ribbon out toward the front of the tree.
- Let it form a soft curve or loop over the branches.
- Do not pull it tight like a straight line.
- The loop should have a little “body” and feel soft, not flat.
The loop should not stick way out past the natural line of the tree, but it also should not hug the branches too tightly. Aim for a smooth curve that follows the tree’s shape.
3.3 Anchor the Next Point and Repeat
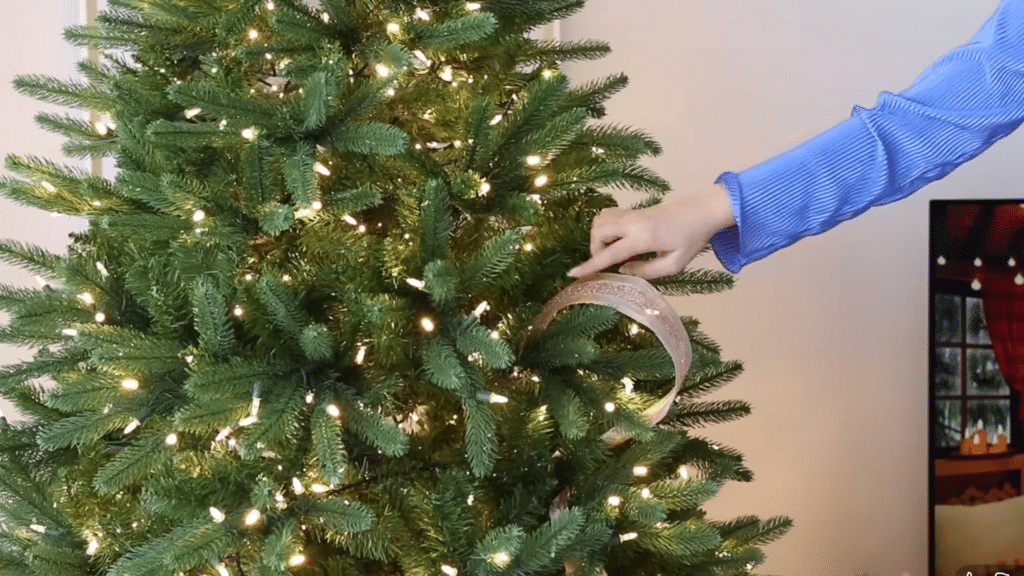
- Decide how big you want your loop to be.
- At the end of that loop, push the ribbon back inside the branches.
- Pinch that point and twist the branch tips around the ribbon again.
- Shape the loop with your hands until it looks smooth and full.
Then repeat: loop out, anchor in, loop out, anchor in. Wired ribbon bends easily, so you can tweak the shape until it looks right.
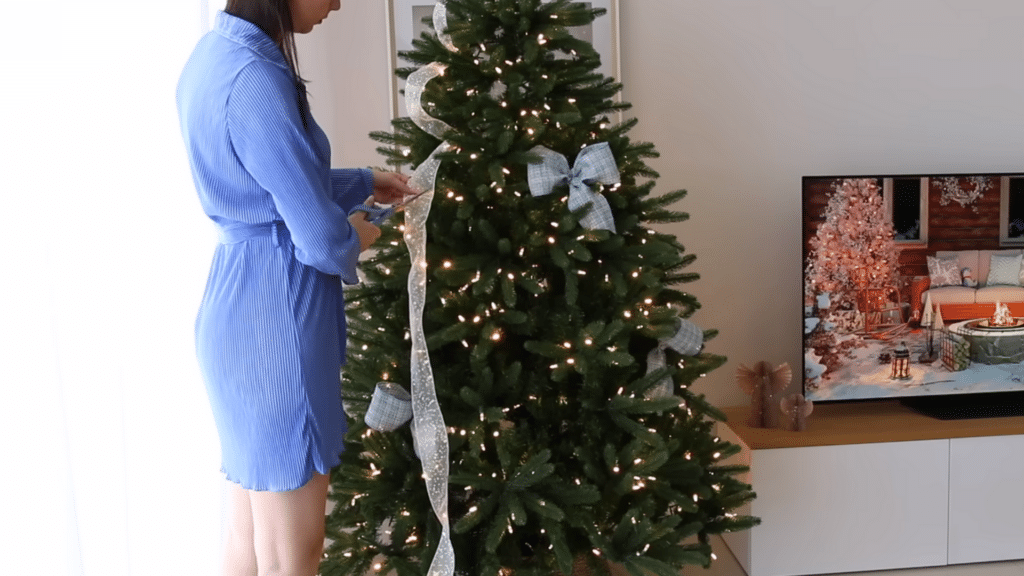
Step 4: Plan Ribbon Direction and Placement
Start at the top of the tree and work your way down. Anchor the ribbon near the top, make a few loops, then cut the ribbon and begin again in a new spot. This keeps the pattern natural and easy to control.
4.1 Vertical, Horizontal, or Zigzag
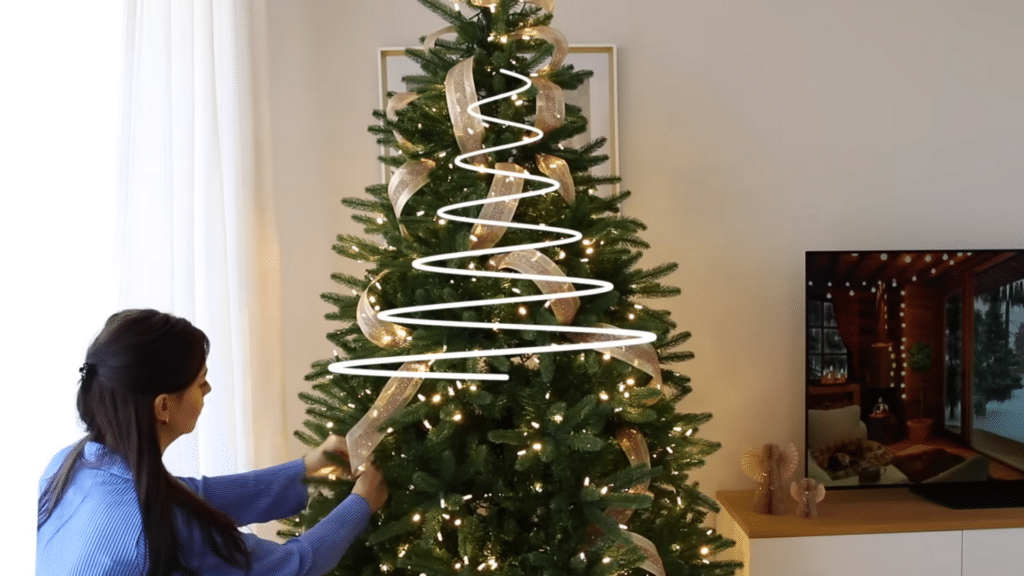
Ribbon can be placed in many directions once you learn how to anchor and shape each loop. You can move the ribbon:
- Straight down for a vertical look
- Around the tree in a spiral or horizontal line
- In a zigzag pattern for a more playful style
The direction depends on where you place each loop and anchor point.
4.2 Cut the Ribbon for a More Random Look
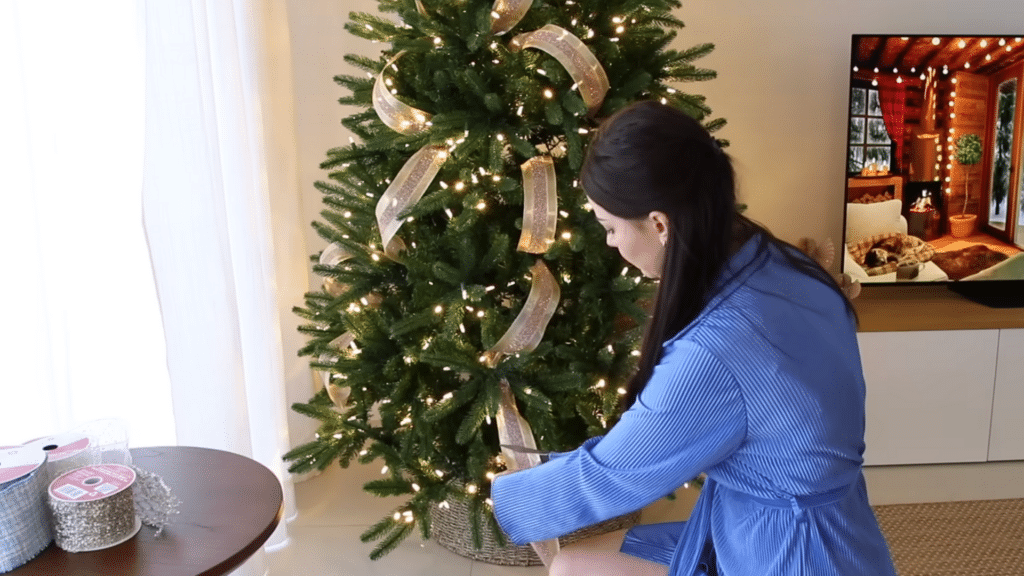
A helpful method is to:
- Make 2–4 loops with one piece
- Cut the ribbon
- Start again in a new area
This creates a natural, complete look instead of one long ribbon running down the tree. Cutting also gives better control over each section.
Step 5: Trim the Ribbon Ends
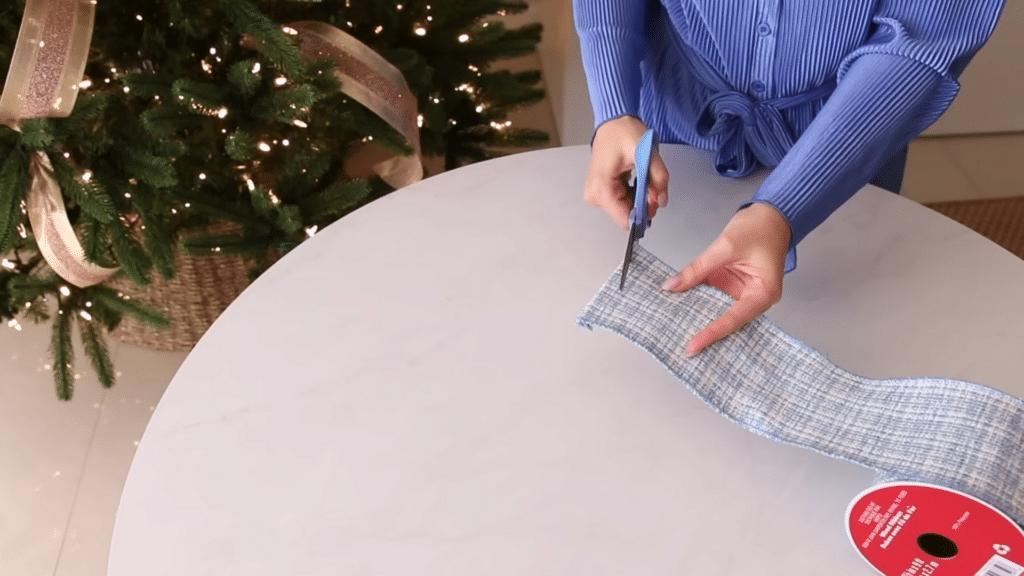
There are two simple ways to trim ribbon tails:
- Diagonal Cut: A clean, slanted cut from one corner to the other. Great for a modern look.
- Fishtail (V-cut): Fold the ribbon in half lengthwise and cut from the fold toward the corners to make a “V.” Perfect for classic or traditional styles.
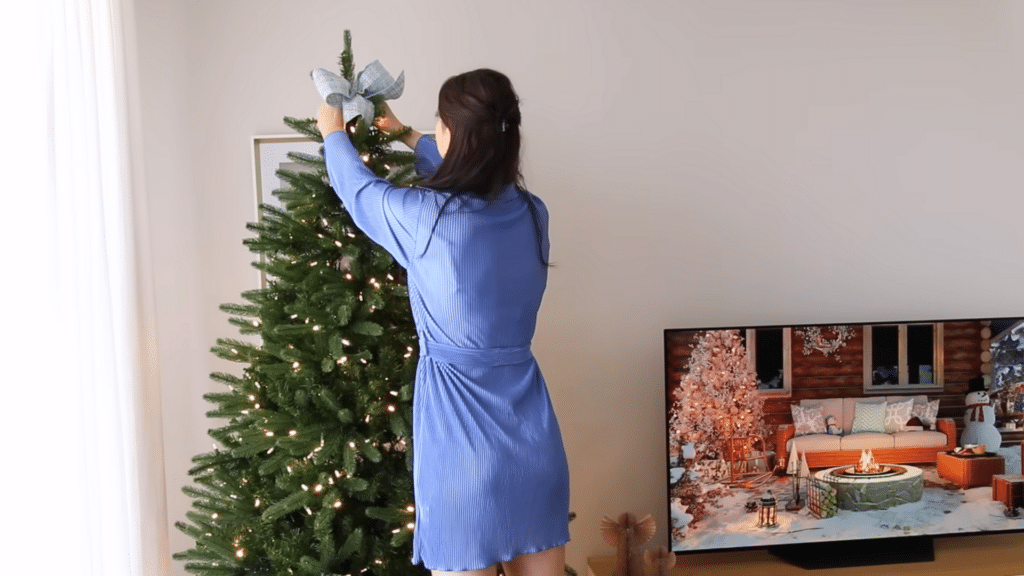
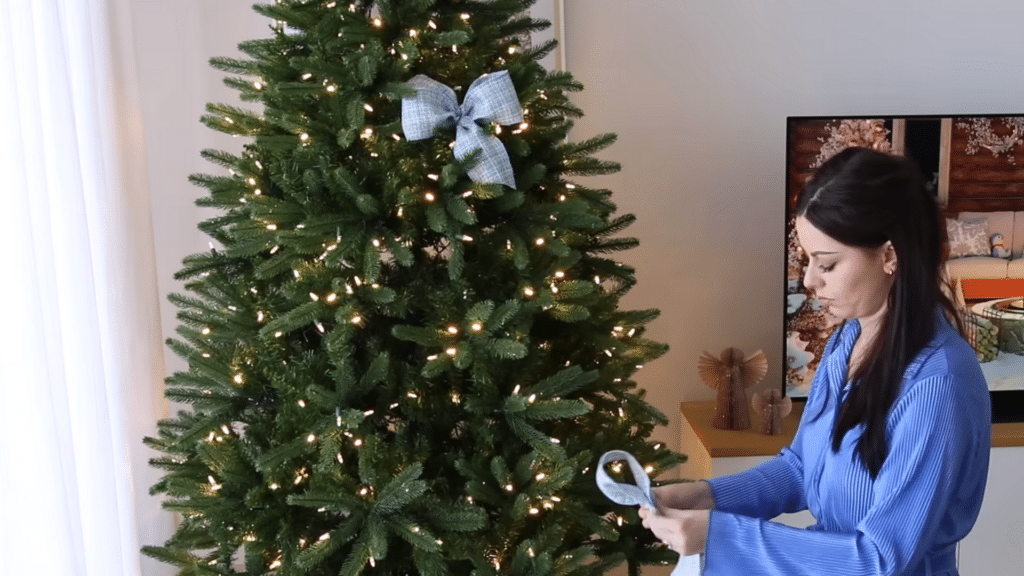
Step 6: How to Make Ribbon Bows
Bows can be used at the top of the tree or placed throughout the branches.
6.1 Build the Bow
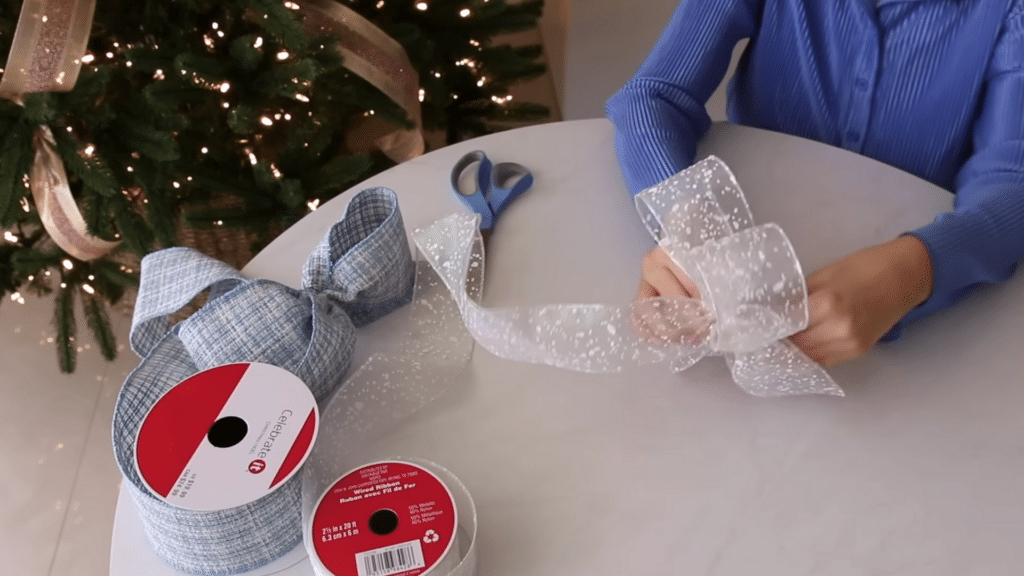
- Leave a tail at the start
- Make the first loop and pinch the center
- Twist the ribbon so the pretty side stays outward
- Make a loop on the other side and pinch again
- Keep adding loops if you want a fuller bow
You can make simple two-loop bows or large multi-loop bows.
6.2 Secure the Bow with Wire
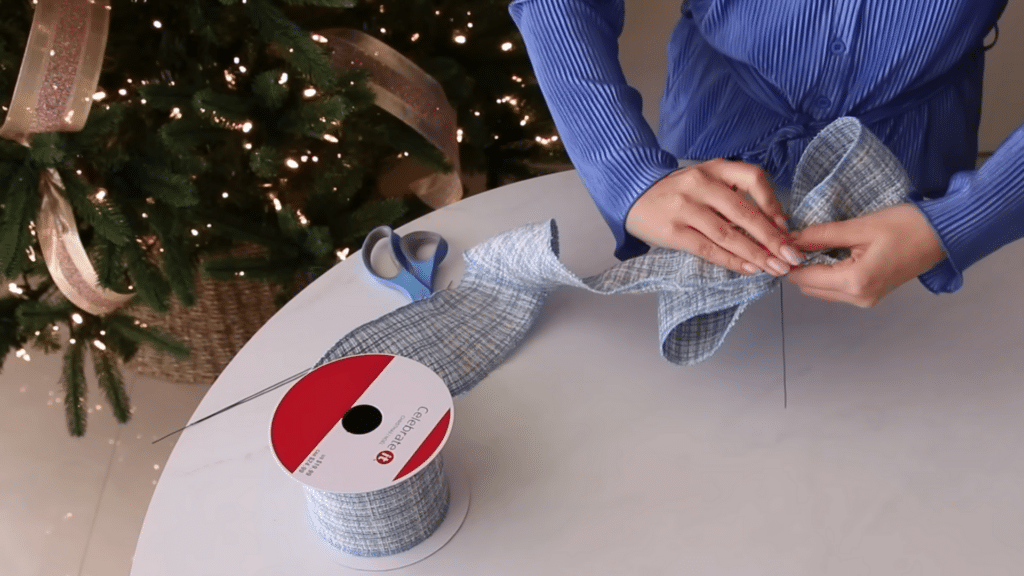
- Use floral wire to hold the bow together tightly.
- Then wrap the wire around a branch to attach the bow to the tree.
- This works especially well for thick ribbon, like velvet or tweed.
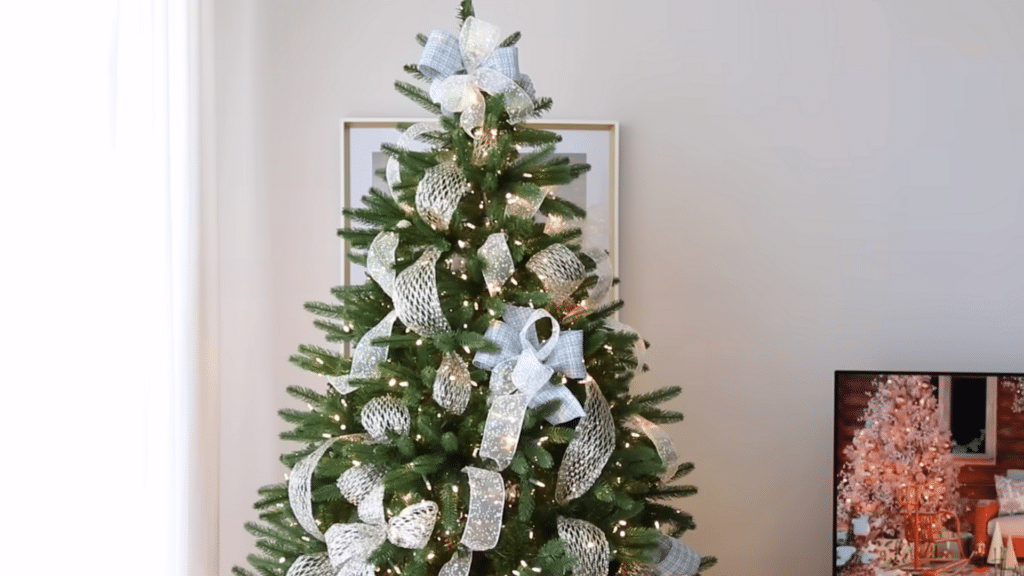
Step 7: Use More Than One Ribbon
You can mix different ribbons for extra depth and interest.
7.1 Separate, Not Stacked
Instead of placing ribbons directly on top of each other, put them separately around the tree.
This gives the design more fullness and dimension.
7.2 Working with Short Rolls
Short rolls can still be useful. They can create:
- Small bows
- Single loops
- Quick accents
If you only have a small strip left, you can pinch the middle and attach it to show two tails, even without a loop.
7.3 Adding a Third, Special Ribbon
A mesh or expandable ribbon adds:
- Texture
- Fullness
- Soft sparkle
It creates interest without hiding ornaments.
Step 8: Balance Ribbon and Ornaments
Ribbon takes up visual space, so it can easily become the main feature of the tree. If you want ornaments to stand out:
- Use less ribbon
- Use mesh ribbon for lighter coverage
Changing ribbon colors and styles can refresh your tree each year without buying new ornaments. Before you start, decide whether the ribbon should be:
- The main highlight
- A soft accent
Adjust how much ribbon you use based on the look you want.
If you want a more detailed tutorial, watch this YouTube video:
Budget-Friendly Ribbon Tips
Below are simple ways to save money while still getting a beautiful ribbon look:
- Buy after-holiday sales: Ribbon prices drop a lot right after Christmas.
- Mix ribbon types: Pair one “special” ribbon with cheaper mesh or plain wired ribbon for fullness.
- Reuse ribbon each year: Store ribbon neatly so it stays in good shape.
- Use leftover pieces: Short strips work well for small bows, single loops, or simple accents.
- Change ribbon instead of ornaments: A new ribbon color or pattern can refresh your tree without buying new decor.
How to Store Ribbon After Christmas
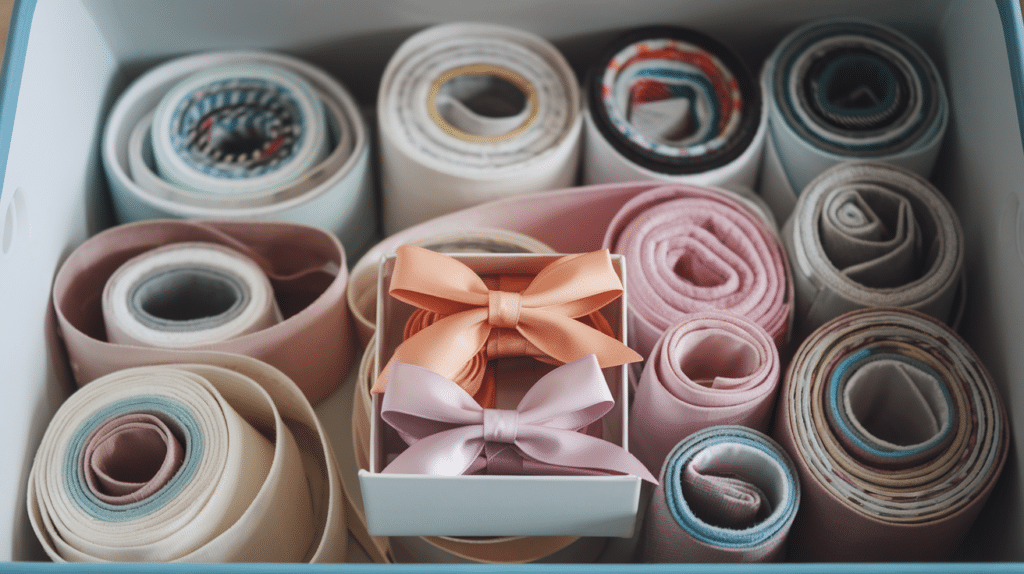
Storing ribbon the right way helps it last for many years. Start by gently smoothing each piece and rolling it back into a tight coil.
Use rubber bands, twist ties, or small clips to keep each roll from unraveling. For bows, place them in a small box so they keep their shape.
Keep all ribbon rolls in a labeled bin or bag to make them easy to find next year.
Store everything in a cool, dry place so the fabric does not fade or get crushed. With simple care, your ribbon will stay neat, clean, and ready to use next Christmas again.
Wrapping Up
Adding ribbon to a Christmas tree can turn a basic setup into something bright and charming.
With the right ribbon and a clear plan, decorating becomes calm and enjoyable. The tree starts to take shape as you place loops, trim ends, and add bows.
Small details make a significant impact, and each section of ribbon helps build the final look. The design does not need to be perfect. It only needs to feel right to you.
Take your time, adjust as you go, and let the tree reflect your style. Try these steps on your own tree and share how it turned out!