
Are your bathroom countertops looking old or worn out?
You don’t need to replace them to make them look nice again. There are easy ways to give your counters a fresh, new style. This can save you money and time. It also helps you avoid the mess of a full remodel.
In this blog, you’ll learn how to redo your bathroom countertops without tearing them out. We’ll show you simple, budget-friendly options you can do yourself.
If you want to paint, cover, or resurface them, there’s a method for you. No special skills are needed. Just follow the steps, and you’ll love the results.
Why You Might Skip Replacing Bathroom Countertops
You don’t have to tear out your countertops to give your bathroom a fresh new look. Keeping them and giving them a makeover can be a much smarter choice.
- It saves money because you don’t have to buy new materials or pay for a full replacement.
- It’s faster since most countertop makeovers take just a day or two to finish.
- It avoids the mess, dust, and stress that come with big remodelling jobs.
- It protects your cabinets, walls, and plumbing from damage during removal.
- It lets you keep using your bathroom while the update is happening.
Redoing your countertops gives you a beautiful result with less work, less cost, and way less hassle.
Popular Methods to Redo Bathroom Countertops
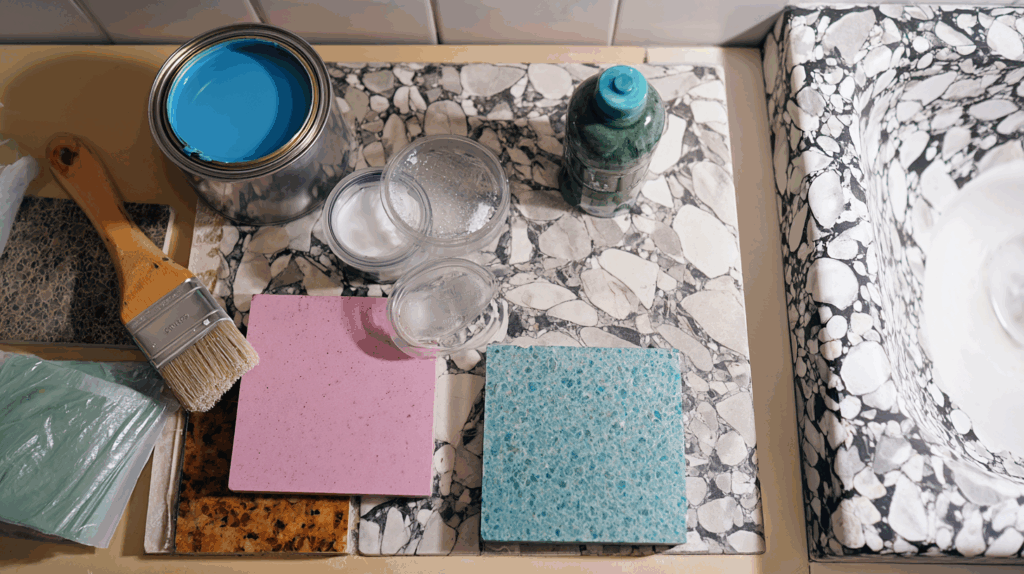
There are several ways to update your bathroom countertops without replacing them. Each method has its own look, cost, and level of effort. If you’re not sure where to start, this table can help you compare your options.
| Method | What It Is | Pros | Cons |
|---|---|---|---|
| Painting | Applying countertop or epoxy paint to change the surface color and finish. | Budget-friendly Wide range of colors |
Can chip without proper prep Requires sealing |
| Contact Paper / Peel-and-Stick Film | Sticking decorative adhesive film over the existing surface for a quick update. | Renter-friendly Easy and fast to apply |
Less durable May peel in humid environments |
| Concrete Overlay | Spreading a thin layer of concrete over the existing countertop for a sleek, modern look. | Strong and long-lasting Covers imperfections |
Needs skill and time Can crack if not sealed properly |
| Tiling Over Surface | Installing tile directly on top of the old countertop using mortar or adhesive. | Lots of design choices Very water-resistant |
Grout needs maintenance Adds weight to the vanity |
| Laminate Sheet Covering | Gluing a new laminate sheet over the old surface to refresh the look. | Affordable alternative to full replacement Many style options |
Requires precise cuts Edges may lift over time |
No method is perfect for everyone, just choose the one that fits your style, budget, and how much work you’re ready to take on.
Step-by-Step DIY Guide: Refreshing Bathroom Countertops
If you want to refresh your bathroom countertops without replacing them, follow this simple, step-by-step process for great results, no professional needed.
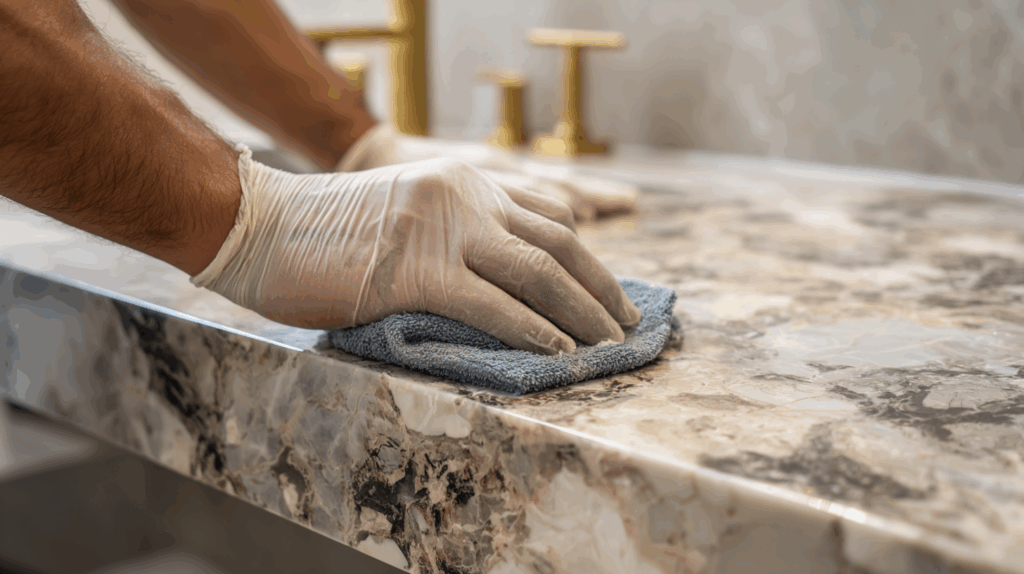
Step 1: Clean the Countertop
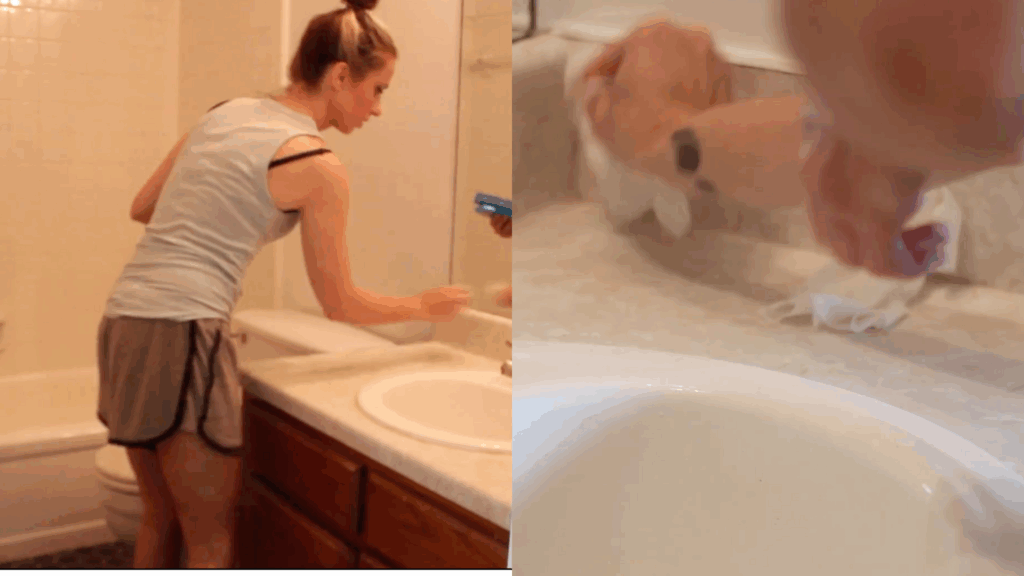
Start by giving your countertop a deep clean. Use a strong degreasing cleaner to remove built-up dirt, soap scum, and oils.
This is an important step, as any leftover residue can prevent the new coating from sticking well. Once everything is wiped down, allow the surface to dry fully before moving to the next step.
Step 2: Lightly Sand the Surface
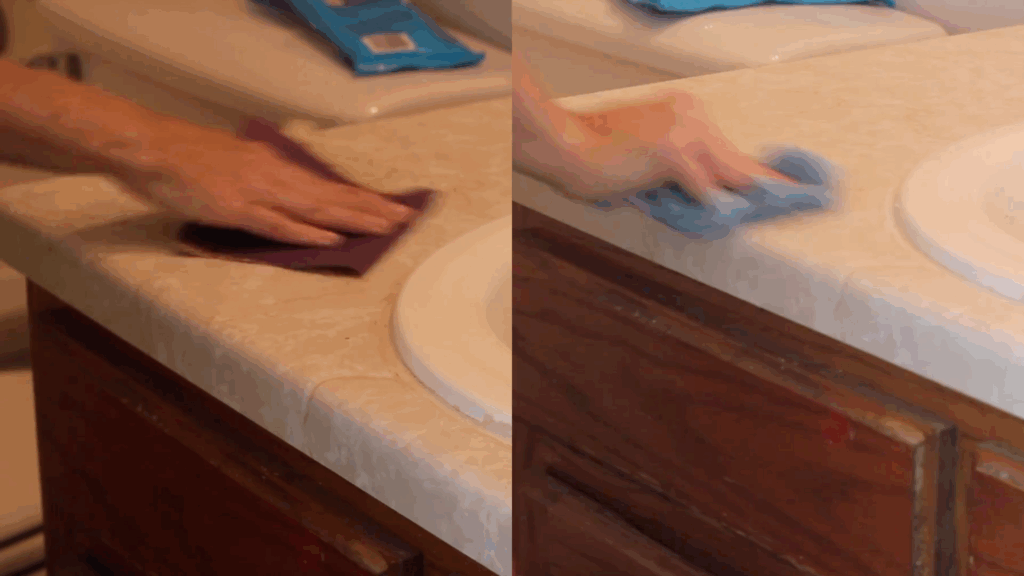
Now that the countertop is clean and dry, it’s time to prep the surface so the new finish can properly stick. This step might seem small, but it makes a big difference in how well the paint or epoxy holds up over time.
Use 150-grit sandpaper to lightly sand the entire surface. You’re not removing the finish, just scuffing it enough to give the epoxy something to grip.
Avoid pressing too hard or over-sanding. Afterward, wipe away all the dust using a damp cloth or tack cloth, and let it dry fully.
Step 3: Prep the Surrounding Area
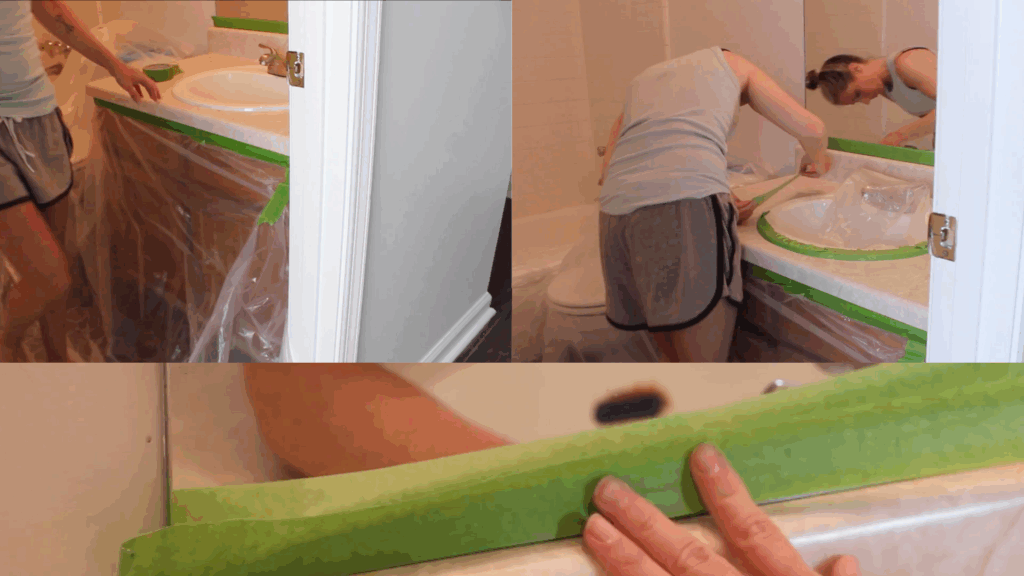
Before you spray, take a few extra minutes to protect your bathroom. This step is easy to overlook, but it makes a big difference.
Epoxy overspray can float through the air and land on surfaces you wouldn’t expect. Use painter’s tape and plastic drop cloths to carefully seal off and cover:
- Walls, faucets, and sinks
- Vanity sides and the bathroom floor
- The hallway floor just outside the bathroom, if necessary
Be generous with coverage; overspray can drift further than you think. A little extra prep now means you won’t be stuck scrubbing paint off places it shouldn’t be later.
Step 4: Apply the Epoxy Spray
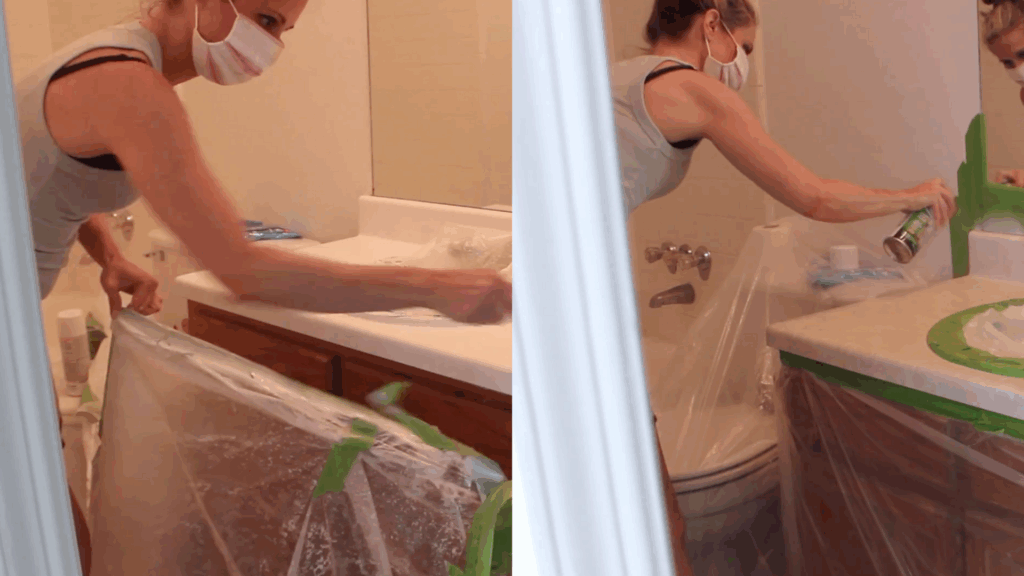
Once everything is prepped, it’s time to spray. Now comes the fun part, spraying on your new finish. You can use an appliance epoxy spray in white or any color that matches your space.
Even though it’s not made just for countertops, it actually works great for quick, budget-friendly updates
Shake the can for a full minute before use. Always wear a mask or respirator (the fumes are strong). Spray using light, even strokes.
Let the first coat dry for about an hour before applying a second. Try to keep your distance consistent as you spray to avoid drips or heavy spots.
Step 5: Remove Tape While Paint Is Damp
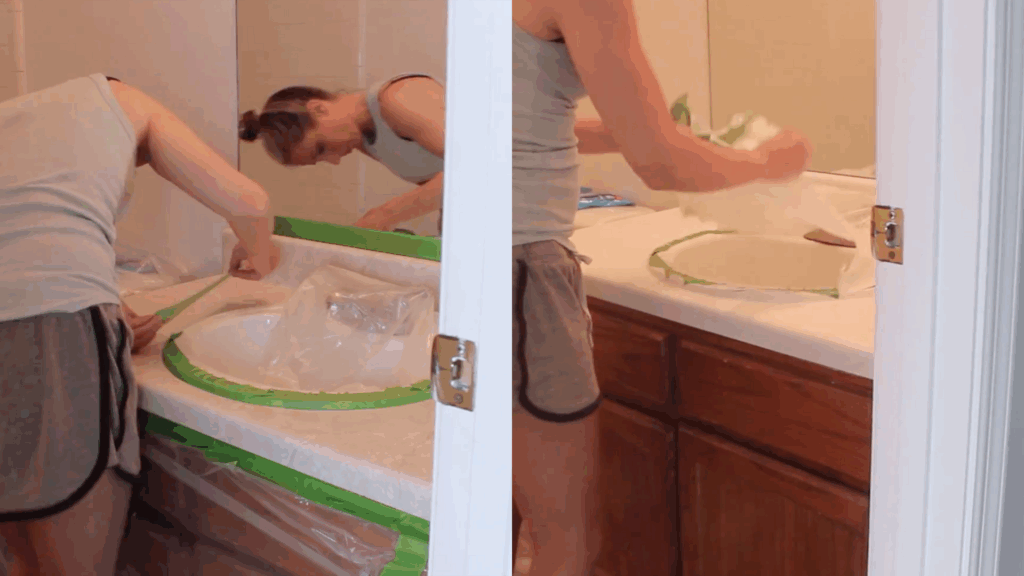
Now that your second coat is on, it’s time to start cleanup, while the paint is still soft.
Begin by carefully removing all painter’s tape and plastic coverings. Don’t wait too long. If the epoxy dries fully, it can seal over the tape edges.
Peeling tape off dry paint can cause it to lift or chip, ruining your clean finish. Damp removal helps everything come off smoothly.
This small but important step helps protect all the hard work you’ve done so far.
Step 6: Prepare the Cabinet Base for Painting
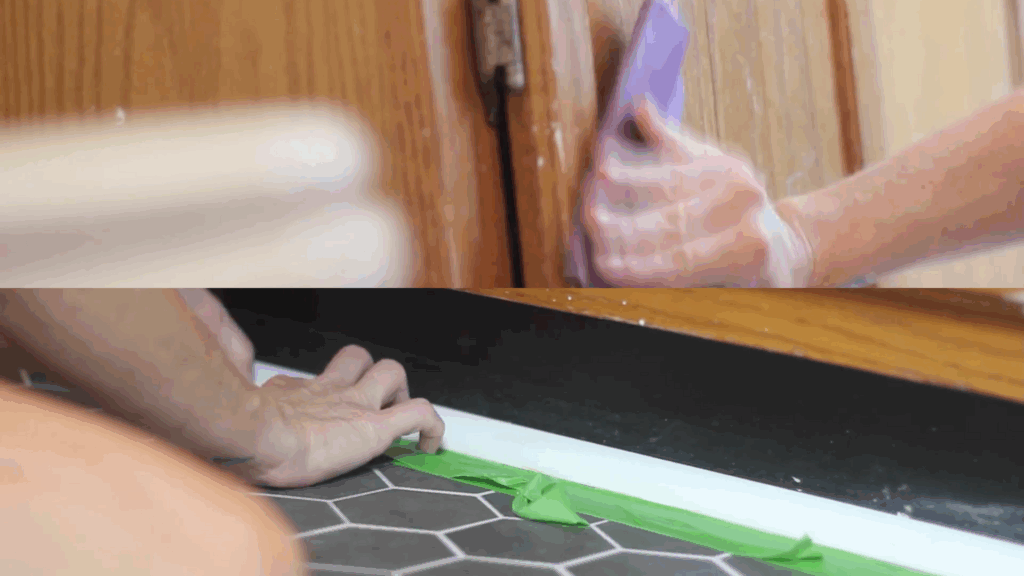
Once the countertop is dry, it’s a good time to refresh the vanity base.
Reapply tape and drop cloths to protect the area. Lightly sand the cabinet doors and frame so the paint can stick, then wipe away the dust with a damp or tack cloth.
You can remove the doors and tape off the hardware for a cleaner finish. Some people prefer painting over the hinges to blend them in.
Step 7: Prime the Cabinet
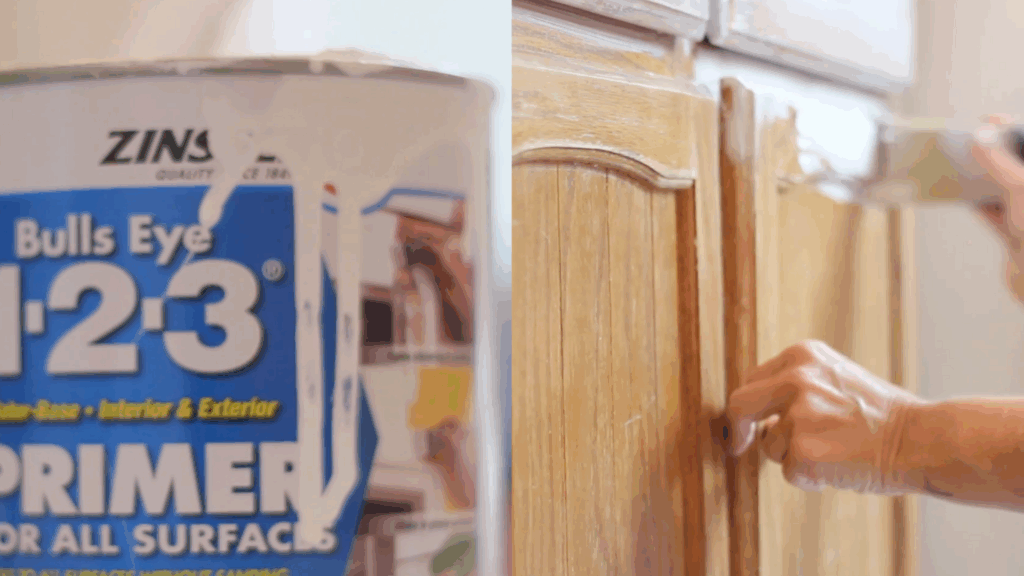
Before painting, it’s a good idea to use a bonding primer; it helps the paint stick better and last longer.
A small angled brush works great for edges and corners, but if you’re working on flat surfaces, a foam roller can make the job quicker and smoother.
Go with a thin, even coat and let it dry all the way. Once it’s dry, give it a quick light sanding to smooth out any brush marks or rough spots. That’ll set you up for a nice, clean finish.
Step 8: Apply Two Thin Coats of Paint

Choose a cabinet-safe paint with a satin finish for durability and moisture resistance.
Begin by painting inside grooves or detailed areas, then cover the flat surfaces. Apply two thin coats rather than one thick one to avoid drips and get a smoother finish.
Lightly sand between coats for the best result. Keep cabinet doors slightly open while drying to prevent them from sticking.
A top coat isn’t required if the paint is left to cure fully, but for added protection, a water-based polyacrylic can be applied.
A special thank you to @Erin Spain YT for this informative video on how to redo bathroom countertops without replacing them.
Once you’ve completed all the steps, step back and admire the transformation. With just a little time and care, you’ve given your bathroom a clean, updated look without replacing a single thing.
Tips and Common Mistakes to Avoid for Best Results
Redoing your bathroom countertop is a satisfying DIY project, but getting a clean, durable finish depends on more than just following the steps. A few smart habits and knowing what not to do can make all the difference.
What to Do
- Always ventilate the bathroom well to reduce fumes and speed up drying.
- Use moisture-resistant paint or epoxy designed for bathrooms.
- Let each coat dry completely before applying the next.
- Apply thin, even layers instead of thick ones for a smoother finish.
- Use painter’s tape and drop cloths to protect nearby surfaces and get crisp edges.
What to Avoid
- Skipping surface prep. Always clean and sand before painting.
- Using the wrong type of paint or sealant not meant for damp environments.
- Rushing the process can lead to bubbling, peeling, or uneven coverage.
- Painting over cracks or warped countertops. These need fixing before cosmetic updates.
By taking your time and avoiding common pitfalls, you’ll end up with a countertop that not only looks great but also holds up to daily use.
Maintenance Tips for Your Updated Countertops
A little routine care can help your refreshed countertops stay looking great for the long run. Keep these tips in mind:
- Use mild soap and a soft cloth for regular cleaning
- Avoid harsh scrubbing pads or acidic cleaners that can wear down the surface
- Reapply sealant every 6–12 months if your surface requires it
- Wipe up spills right away to prevent staining or water damage
- Place trays or mats under toiletries to protect high-use areas
- Don’t place hot tools or items directly on the surface
With simple maintenance, your DIY makeover can stay fresh, clean, and durable for years to come.
Final Thoughts
Redoing your bathroom countertops doesn’t have to be expensive, messy, or overwhelming.
With a little prep, some patience, and the right method for your needs, you can create a clean, updated look that feels brand new without ever removing the original surface.
If you choose to paint, overlay, or cover, the satisfaction of a DIY transformation is well worth the effort.
So take your time, follow the steps, and enjoy the fresh new space you’ve created all on a budget and your own terms.