
Faded, weather-worn trex decking can really drag down the vibe of your backyard, I know because I’ve been there myself. I used to step outside and sigh at the dull, tired look of my once-beautiful deck.
But here’s the good news: restoring its color and life is totally doable without replacing the whole thing.
I’ve tested out cleaners, revivers, and quick-fix repair tricks so you don’t have to waste time guessing.
In this blog, I’ll walk you through everything that actually works to bring your Trex back to life – from deep cleaning to protecting it from future wear.
Whether you’re a weekend DIYer or just want a simple routine, I’ve got tips for every level.
Ready to transform that faded deck into a backyard showpiece?
Let’s start – you’ll be amazed at what a little care can do! Keep reading, and let’s get started together.
What Is Trex Decking?
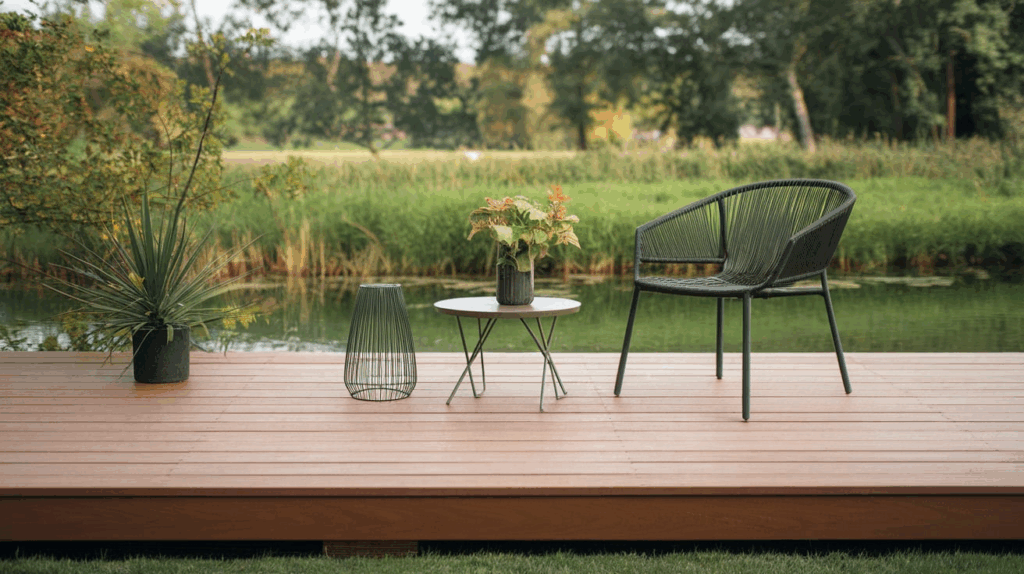
Trex decking is a type of composite decking material made from a blend of 95% recycled wood fibers and plastic. Unlike traditional wood decking, Trex is designed to resist fading, staining, scratching, mold, and mildew.
It was one of the first brands to popularize eco-friendly composite decking, and it’s now one of the most well-known names in the industry.
- Low Maintenance: No sanding, staining, or sealing needed – just occasional cleaning.
- Durable: Resists rot, splinters, warping, and insect damage.
- Eco-Friendly: Made from reclaimed wood and recycled plastic.
- Variety: Comes in a wide range of colors and wood-like finishes.
Many homeowners, including myself, love Trex for its long-lasting beauty and the fact that it doesn’t require the constant upkeep that wood demands. It’s ideal for busy individuals who still desire a stylish and functional outdoor space.
Is Trex Deck Restoration Always Possible?
Yes – restoring Trex decking is possible in most cases.
If your deck is faded, stained, or lightly scratched, a deep clean and composite deck reviver can make a big difference. These products refresh the color and improve the surface.
However, restoration has limits. Deep gouges, severe warping, or structural damage may not respond well to surface treatments and might require replacing individual boards.
Knowing the extent of the damage helps you decide whether a simple refresh or partial replacement is the right move.
Step-By-Step Guide to Restoring a Trex Deck
Restoring a Trex deck is easier than it sounds when you follow the right steps. With just a few tools and some light effort, you can bring back its original beauty and enjoy a clean, refreshed outdoor space.
Materials Needed
Before you begin restoring your Trex deck, gather a few basic tools and cleaning supplies. Having everything ready will make the process quicker and more efficient.
- Soft-bristle brush
- Warm, soapy water
- Garden hose
- Pressure washer (max 3100 PSI)
- Fan nozzle for pressure washer
- Soap suitable for pressure washers
Step 1: Clear the Deck Surface
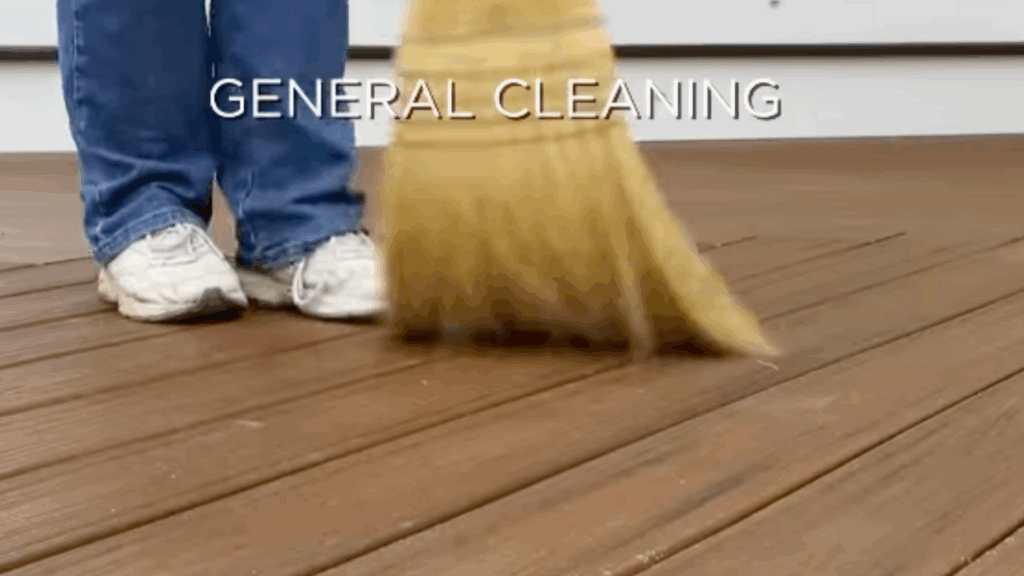
Start by removing all furniture, rugs, planters, and other items from the deck. Sweep away any loose debris like leaves, dust, and soil, especially in the grooves.
Clearing the surface ensures that dirt isn’t ground in during cleaning and helps cleaning products work more effectively across the entire deck.
Step 2: Wet the Entire Surface
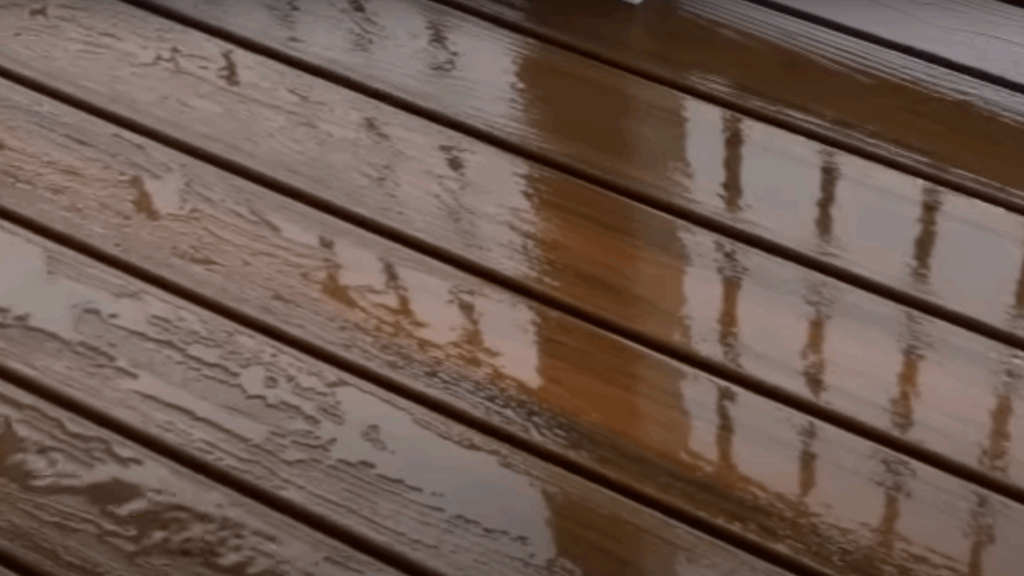
Use a garden hose or pressure washer on a gentle setting to thoroughly soak the deck. Wetting the surface loosens surface dirt and prepares the boards for cleaning.
Ensuring an even layer of moisture helps soap spread properly and penetrate grime, making the scrubbing process far more effective in the next step.
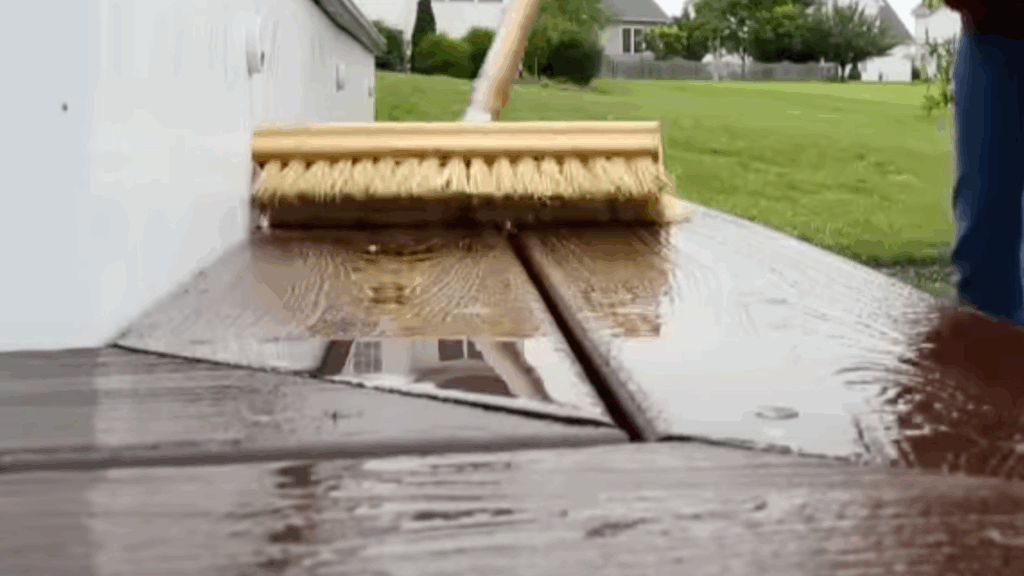
Step 3: Scrub with Warm, Soapy Water
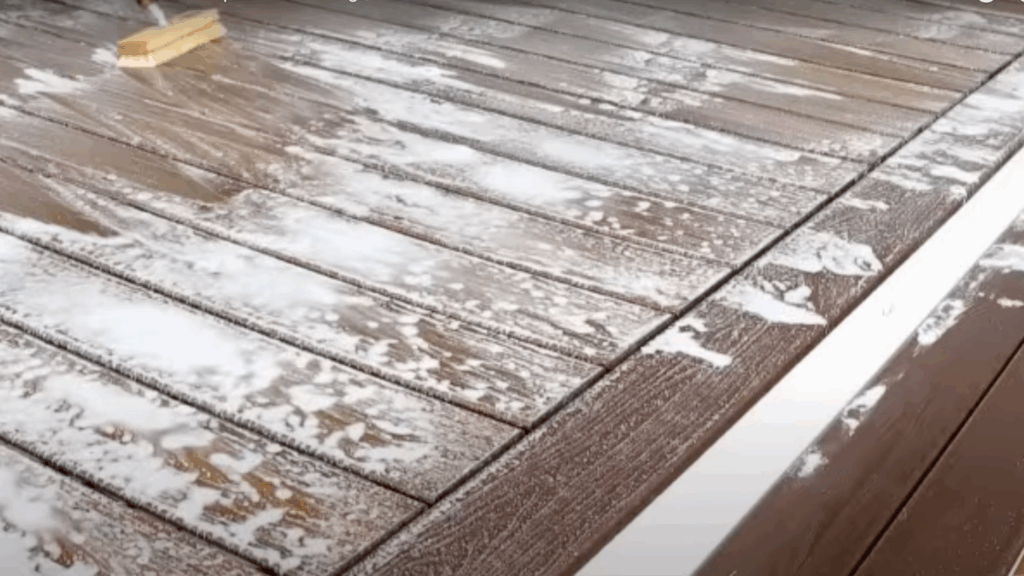
Mix warm, soapy water and apply it to the deck using a soft-bristle brush. Scrub each board in the direction of the wood-grain pattern to reach deep into the grooves.
This removes trapped dirt, mildew, and minor surface stains. Avoid using harsh brushes, which can damage the Trex shell.
Step 4: Rinse Thoroughly with a Hose
Once you’ve scrubbed the entire surface, rinse the deck well using clean water from a garden hose or a low-pressure washer.
This removes soap, loosened grime, and any leftover residue. A thorough rinse prevents soap streaks and helps avoid attracting new dirt once the deck starts drying.
Step 5: Use a Pressure Washer for Stubborn Grime
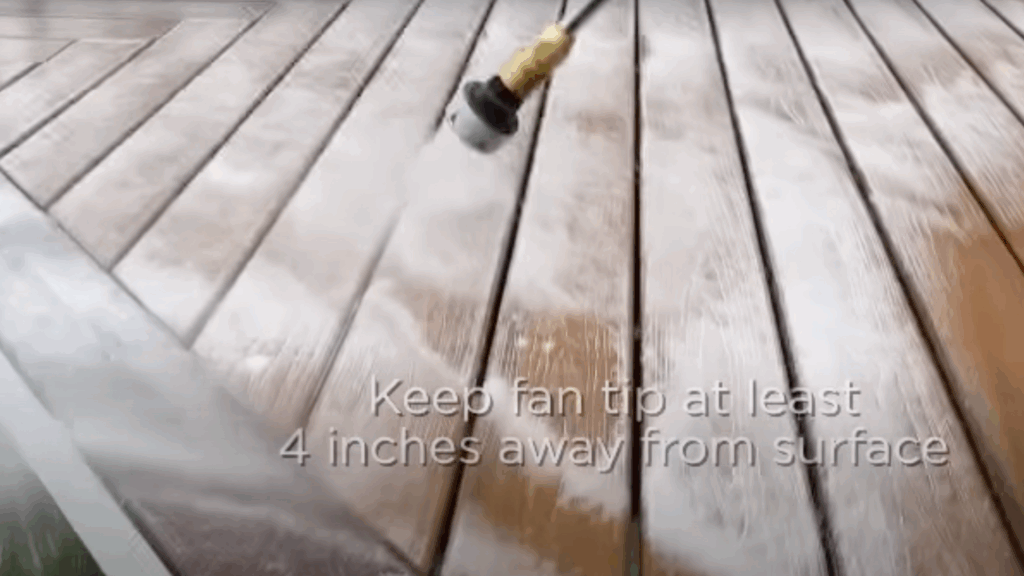
For stuck-on debris like dried stucco, concrete dust, or clay, use a pressure washer set no higher than 3100 PSI.
Attach a fan nozzle and spray gently across the deck surface. Work evenly across all boards to avoid damage and get rid of any hardened buildup safely.
Step 6: Add Soap for Stubborn Stains
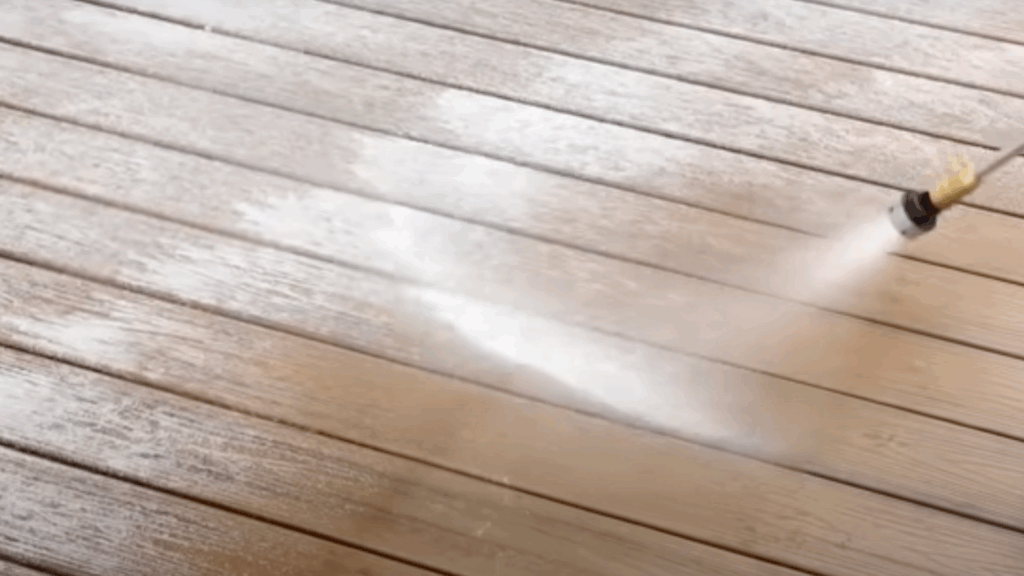
If stains remain, add soap to the pressure washer’s detergent tank and continue cleaning. Use soft water if available, as hard water may leave mineral deposits.
Lightly scrub problem spots with a soft-bristle brush to lift any remaining dirt or discoloration before rinsing again.
Step 7: Final Rinse and Dry Naturally
Do one final rinse, making sure all soap, residue, and dirt are fully washed off. Take your time rinsing each board evenly.
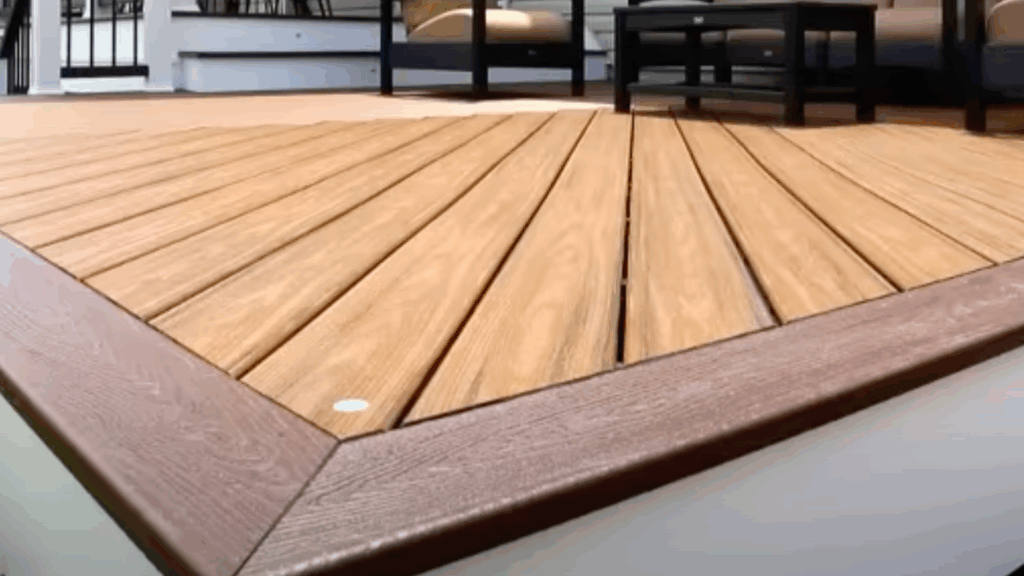
Then, allow the deck to dry naturally in the sun. After a few hours, your Trex deck will look clean, refreshed, and ready for relaxing outdoor days.
Recommended: Check out this quick video by @TheTrexCo that walks you through the entire cleaning and maintenance process from clearing the surface to the final rinse.
Trex Decking: Repairing vs Replacing Boards
Knowing when to repair or replace your Trex decking boards can save you time, money, and hassle.
| Issue | Repair | Replace |
|---|---|---|
| Light Scratches or Scuffs | Use a composite deck repair kit or a heat gun (for older boards). | Not needed. |
| Faded Color | Try a deck reviver or restorer product. | Replace only if aesthetics are a major concern. |
| Minor Stains | Clean with composite deck cleaner or mild soap. | Replace if stains are deep and permanent. |
| Small Dents | Sand lightly if the board is from an older generation. | Replace if the dent affects function. |
| Warped or Twisted Boards | — | Replace to restore safety and appearance. |
| Cracks or Splitting | — | Replace immediately to prevent hazards. |
| Loose or Popped Fasteners | Tighten or replace fasteners. | Replace the board if holes are stripped or damaged. |
| Widespread Surface Damage | — | Replace the section or the whole board for a consistent appearance. |
A quick fix works for minor wear, but bigger issues call for a full board swap to keep your deck safe and looking great.
Common Types of Surface Damage
Trex decking is durable, but surface damage like fading, stains, mold, and scratches can still happen. Recognizing these common issues helps you choose the best way to clean or restore it.
- Fading: Trex decking often fades gradually when exposed to direct sunlight and changing weather conditions. UV rays break down the surface color, especially in older boards without built-in fade resistance.
- Staining: Stains from food, drinks, grease, leaves, and dirt are common on Trex decks, especially after outdoor meals or during fall. If not cleaned promptly, these substances can seep into the surface and leave discoloration.
- Mold and Mildew: In humid, shaded, or poorly ventilated areas, Trex decking may develop mold or mildew spots. These grow where moisture collects and organic debris is present.
- Scratches: Surface scratches can happen from dragging furniture, pets running around, or dropped tools. Most minor marks can be buffed out or hidden with a composite deck restorer, helping your deck stay smooth and attractive.
Effective Ways to Fix Trex Decking
Even the most durable composite decking can show signs of wear over time. From fading and stains to scratches and structural damage, Trex decks may need occasional care to stay in top shape.
Deep Clean the Surface
Start with a composite deck cleaner and a soft-bristle brush to remove dirt, mold, mildew, and stains.
This helps restore your deck’s original look and prevents long-term wear. Aim to do this twice a year – spring and fall are ideal.
Use a Deck Reviver
If your Trex boards look faded or weathered, a deck reviver can bring back their color and shine.
These products refresh the finish without replacing boards. It’s a quick way to make your deck look like new again.
Repair Scratches and Scuffs
Small scratches can be fixed using a heat gun or a composite repair kit.
Older Trex boards may allow for light sanding to smooth out surface marks. Just be gentle to avoid damaging the finish.
Replace Damaged Boards
Cracked, warped, or rotting boards should be replaced for safety and appearance.
If you have the right tools and matching materials, swapping out boards can be a DIY-friendly task. It’s worth it for a strong, clean look.
Seal and Protect
While Trex doesn’t need sealing, older boards benefit from a UV-protective product.
This helps preserve color and resist future fading. Be sure to use a sealer that’s made specifically for composite decking.
Maintenance Tips for Trex Decking
Keeping your Trex decking looking great doesn’t stop after restoration. Regular care helps preserve its color, texture, and durability for years.
- Seasonal Cleaning Schedule: Cleaning your deck at least twice a year, during spring and fall, is ideal. Sweep debris, wash with a composite-friendly cleaner, and rinse thoroughly.
- Avoid Dragging Furniture: Dragging chairs, tables, or planters can scratch the deck’s surface. Always lift furniture when moving it, and consider adding rubber or felt pads to the feet.
- Use Outdoor Rugs: Place outdoor rugs in high-traffic or spill-prone areas like under dining sets. Choose rugs without rubber backing to avoid moisture trapping. Rugs help prevent staining and protect your deck’s finish.
- Inspect Annually for Damage: Each year, do a thorough walk-through of your deck. Check for loose boards, deep scratches, mold spots, or structural issues.
Conclusion
Restoring your Trex decking doesn’t have to feel overwhelming. I’ve done it myself and was surprised by how simple and satisfying the process can be.
With the right tools, a bit of elbow grease, and a clear plan, you can revive your deck’s color, texture, and overall charm. From deep cleaning to minor fixes, every step helps bring it back to life.
I genuinely hope these tips make your journey easier and more rewarding. Whether you’re prepping for summer gatherings or just want your outdoor space to feel fresh again, now’s the perfect time to get started.
So grab your supplies, follow the steps, and enjoy the transformation.
And if you have any questions or would like to share your results, I’d love to hear from you – please drop a comment or share your progress.
Let’s make your deck the highlight of your backyard again!