
Upgrading your kitchen doesn’t have to mean a complete remodel or a sky-high price tag.
Often, the secret to a fresh and inviting space lies in the details, and the cabinets are the perfect place to start. Cabinets take up a large visual footprint, and changing their look can completely shift the vibe of your kitchen. In this
blog, I’ll walk you through budget-friendly cabinet upgrade ideas based on a real kitchen transformation project.
These tips are perfect for homeowners and renters alike and require no full cabinet replacement.
Whether you want to keep your kitchen modern and minimal, cozy and rustic, or anything in between, these practical steps can make a huge impact.
You’ll find easy-to-follow methods, advice on budget-saving materials, and my honest review of what worked (and what didn’t).
Let’s go into how you can breathe new life into your cabinets without calling in a contractor.
Why Update Old Kitchen Cabinets?
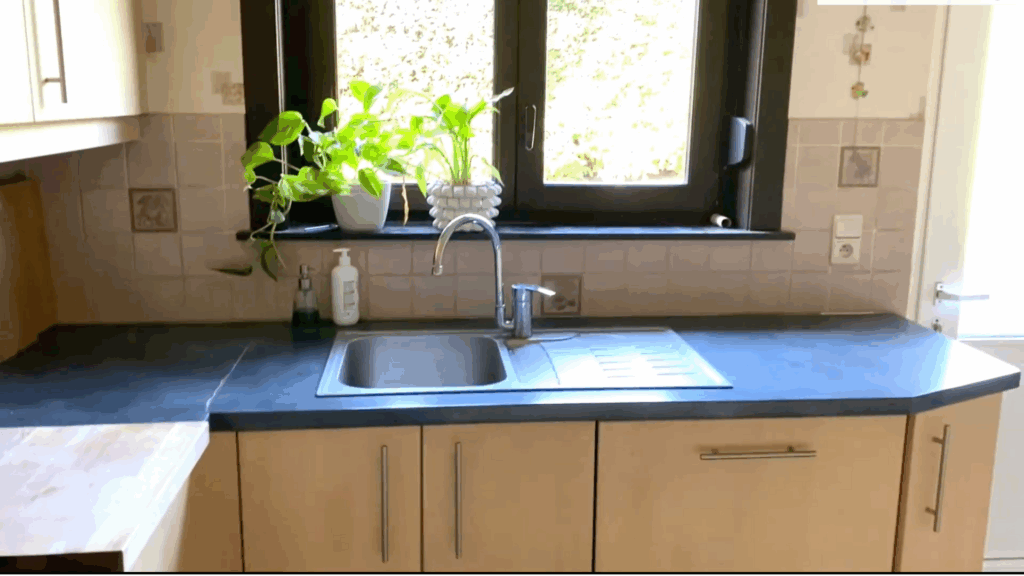
Cabinets are often the first thing you notice when walking into a kitchen, and outdated ones can make the entire space feel tired, even if everything else is in good shape.
Replacing them completely can be costly and time-consuming, especially if the structure remains intact.
That’s why updating your existing cabinets is such a smart move.
With just a few affordable tweaks, like new hardware, paint, adhesive film, or stylish accessories, you can dramatically change the look of your kitchen without breaking the bank.
These upgrades are not only cost-effective but also DIY-friendly, making them perfect for homeowners and renters alike.
If you’re prepping to sell or simply want a fresh new vibe, updated cabinets give your kitchen a clean, cohesive, and refreshed feel while extending the life of your current setup.
Plus, modernizing your cabinets can improve everyday functionality, boost your home’s value, and make time spent in the kitchen feel more enjoyable and inspiring.
What You’ll Need
Here are the basic tools and supplies used throughout the seven upgrade steps. You may not need all of them, depending on which ideas you choose to implement.
Materials:
- Adhesive film (cabinet-friendly)
- Replacement hardware (handles, knobs, pulls)
- Concrete skim coat or countertop refinishing kit (optional)
- Tile or adhesive backsplash panels
- Paint or wallpaper
- Lighting fixtures
- Accessories like cutting boards, tea towels, art frames, and plants
Tools:
- Scissors or a utility knife
- Screwdriver or drill
- Sandpaper
- Level
- Measuring tape
Budget-Friendly Steps to Upgrade Your Kitchen Cabinets
These seven practical methods were used to transform a functional but outdated kitchen into a bright and modern space.
Step 1: Set Your Plan and Budget
Every makeover begins with planning. Decide which parts of your kitchen you want to update: cabinet faces, backsplash, countertops, lighting, or all of the above.
Create a realistic budget to help you stay on track. In the featured makeover, the goal was to spend under $1,000 for all upgrades.
Take note of what already works in your kitchen.
The cabinets in this project were functional and in good condition, which made them perfect candidates for a cosmetic update rather than a full replacement.
Also consider:
- Whether you’re doing the work yourself or hiring help
- The time you realistically have to complete the updates
- If you need landlord approval for rental units
This upfront planning sets the stage for a smoother, more rewarding project.
Step 2: Apply Adhesive Film for a New Cabinet Look
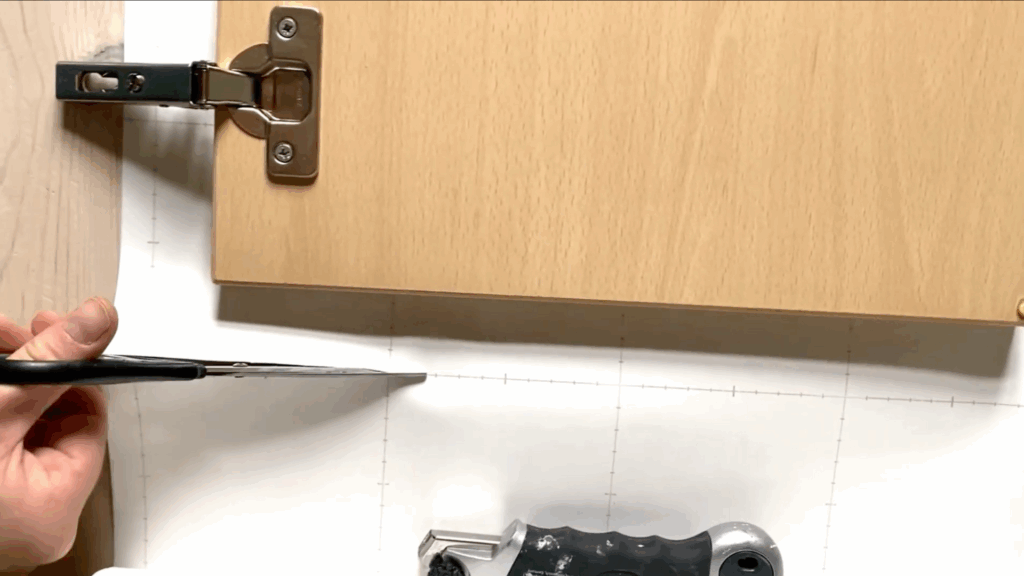
If your cabinets are structurally sound but visually outdated, adhesive film is a fantastic solution.
In this project, a high-quality vinyl film was used, designed specifically for kitchen cabinet doors.
It’s renter-friendly, fully removable, and very easy to apply.
- Leave the hinges on by removing only the doors.
- Cut the adhesive slightly larger than each door.
- Peel and stick it onto the surface, smoothing as you go.
- Trim the edges for a perfect fit.
This instantly refreshed the cabinet fronts without any painting or sanding.
Step 3: Update Cabinet Hardware
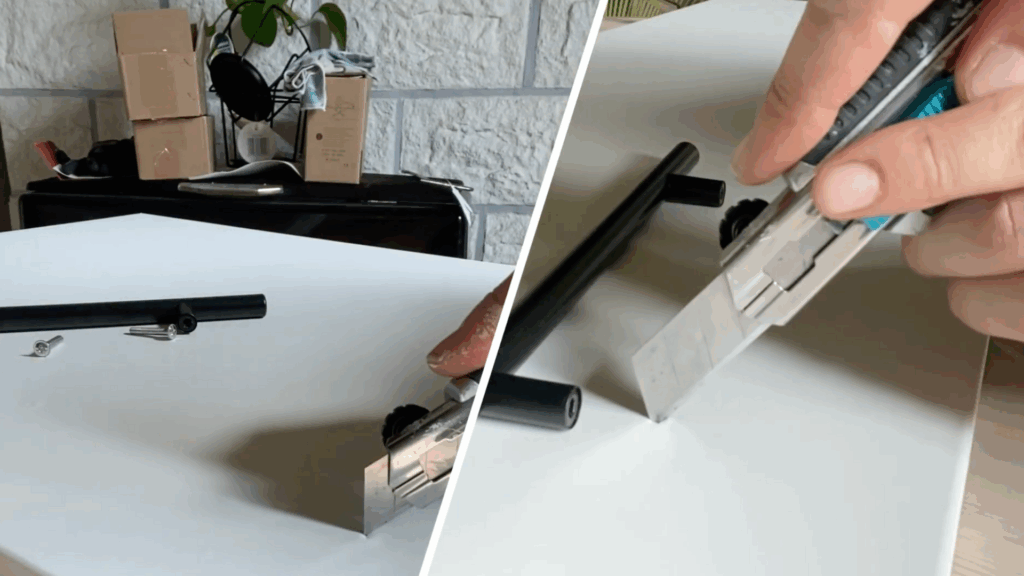
Switching out knobs and handles is one of the simplest ways to make cabinets feel brand new.
The video features affordable, stylish hardware found on Amazon that gave the kitchen a fresh look with minimal effort.
- Unscrew old handles or knobs.
- Use a drill to install new ones, reusing holes if possible.
- Choose a cohesive finish (like matte black or brushed gold) to tie everything together.
This upgrade adds polish and can completely shift the cabinet style, from traditional to modern or rustic to sleek.
Step 4: Refresh Countertops (Optional)
If your countertop feels outdated, there are budget options that don’t involve full replacement.
In this makeover, concrete was applied over a damaged laminate surface. While the process was more challenging than expected, it still helped refresh the space.
- Clean and sand the surface thoroughly.
- Apply thin layers of concrete with a trowel.
- Sand between coats and seal once dry.
Pro tip: Consider using a countertop refinishing kit or adhesive laminate instead for more even results.
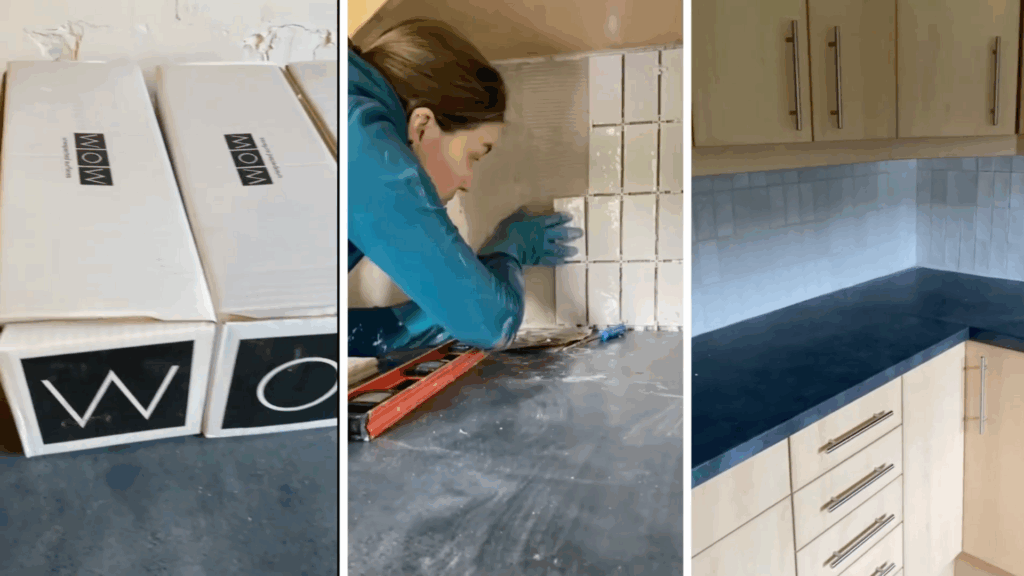
Step 5: Update or Replace the Backsplash
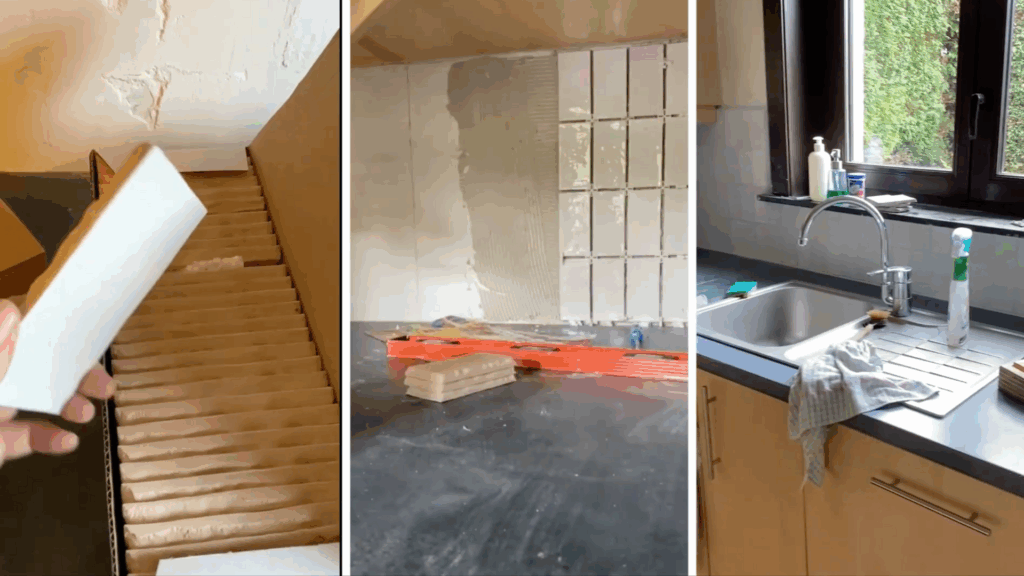
A dated or damaged backsplash can detract from even the nicest cabinets.
In this project, the old tile was removed and replaced with new American-style tiles.
- If tiles are in good shape, use adhesive panels or tile paint.
- If they’re loose or outdated, remove and retile.
- Use spacers for even alignment and grout once finished.
The new backsplash created a clean backdrop that complemented the fresh cabinet look.
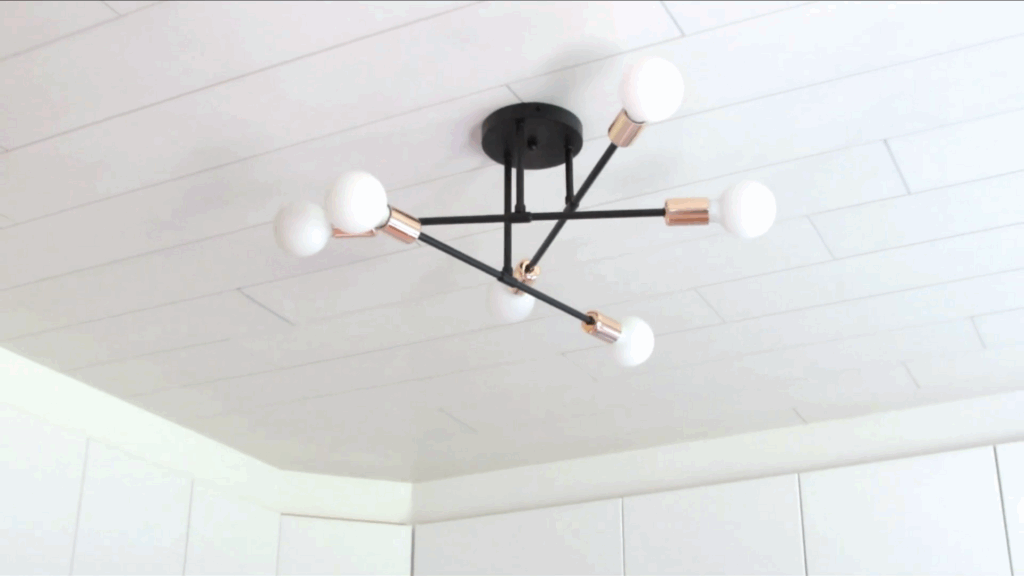
Step 6: Add Finishing Touches with Lighting, Paint, and Accessories
To wrap up your cabinet makeover, consider updating the surrounding elements:
- Lighting: Swap out old light fixtures for something stylish and functional. A pendant or track light can enhance both form and function.
- Walls: A fresh coat of paint or kitchen-safe wallpaper can tie your cabinets into the room’s overall color scheme.
- Accessories: Hang a few art prints, display cutting boards, arrange matching tea towels, and add greenery for warmth.
These small touches help your updated cabinets feel like part of a full, thoughtful design.
This blog is inspired by @Amaryllis. For a more detailed understanding, watch-
Tips for Success
- Measure before buying film or hardware. Double-check sizes for a smooth install.
- Start with clean surfaces. Adhesive and paint need a dust-free base.
- Try one door first. Perfect your method before doing the whole kitchen.
- Don’t rush grout or paint. Let it dry fully for professional-looking results.
- Save extra materials. Keep leftover adhesive or hardware for repairs or future touch-ups.
Conclusion
Giving your kitchen cabinets a new look doesn’t have to mean starting from scratch.
With a few smart updates and a weekend or two of work, you can dramatically transform your space and do it all on a budget.
From adhesive films to new hardware, each step in this project was designed to maximize impact without major renovation.
As you plan your own makeover, remember that even small changes add up. Whether you’re upgrading one cabinet or the whole kitchen, your efforts will be worth it.
This project came in at around $1,000 and took two weeks, all DIY.
It just goes to show: with a little creativity and effort, your dream kitchen might be closer than you think.
If you’re ready to start your cabinet refresh, pick the ideas that work best for your space, gather your tools, and get inspired.
Your upgraded kitchen is just a few steps away!