
That echo in the room? It’s not just annoying; it completely kills the sound quality. Music sounds muddy. Voices bounce off walls. And no matter how good the speakers are, the room keeps ruining everything.
Sound-absorbing panels fix this. Most people assume they’re expensive or hard to build. They look at studio setups online and think, “That’s way out of my budget.” But that’s not always true.
DIY panels can work just as well when built the right way. The materials matter. So does the placement. Get those two things wrong, and the panels won’t do much at all.
This post breaks down exactly how to build sound-absorbing panels that actually get the job done, without spending a fortune.
How Many DIY Sound Absorbing Panels Do You Need?
The number of panels needed depends on the size of the room and how bad the echo is. A small bedroom studio might need as few as 6 panels. A larger room could need 12 or more.
Room shape plays a role, too. Rooms with hard, flat surfaces, such as bare walls and wood floors, reflect more sound. That means more panels are needed to get things under control.
A good starting point is to cover about 25% to 35% of the total wall space. That range works well for most home setups.
From there, adjustments can be made based on how the room sounds after the panels go up.
Best Materials for DIY Sound Absorbing Panels
Picking the wrong material wastes both time and money. Here are the top options that actually deliver results.
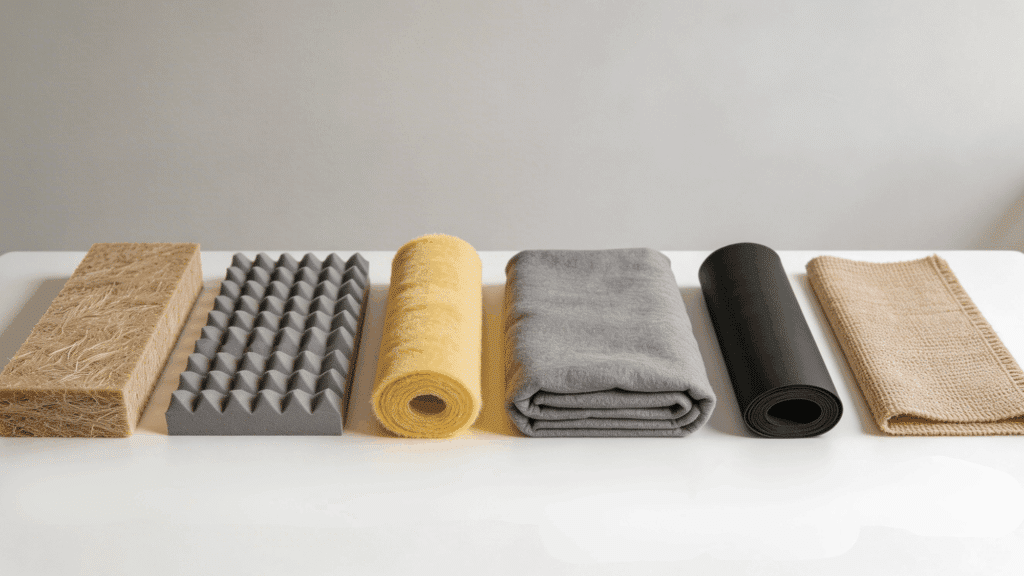
- Rockwool / Mineral Wool: Dense fibers trap sound waves across a wide frequency range. It works well for broadband absorption in home studios and media rooms.
- Acoustic Foam: Lightweight, easy to cut, and simple to install. Best for targeting high-frequency sounds like sharp echoes and harsh reflections in smaller spaces.
- Fiberglass Insulation: Offers a high absorption rate at a lower cost than most options. A solid pick for anyone building panels on a tight budget.
- Moving Blankets: Thick and heavy enough to reduce sound reflection noticeably. Great for temporary setups where a permanent solution is not yet needed.
- Mass Loaded Vinyl (MLV): Adds a dense barrier that stops sound from passing through walls. Works well when both soundproofing and absorption are needed at the same time.
- Fabric (Burlap/Muslin): Breathable and affordable, making it a reliable choice for wrapping panels. Sound passes through easily, so the insulation behind it can do its job.
Materials You’ll Need for DIY Sound Absorbing Panels
| Category | Item | Notes |
|---|---|---|
| Wood | Timber for the main frame | 120cm x 60cm; thinner boards work best |
| Thin sideboards | 2–3mm thick plywood or particle board | |
| Fasteners | Wood screws | One per corner |
| Staples or small nails | For sideboards and fabric | |
| Picture hooks and wire | For wall mounting | |
| Insulation | Recycled denim slabs | 20–30 kg/m³ density recommended |
| Hemp or wood fiber insulation | Safe, easy to handle | |
| Fabric | Weed barrier membrane | For back lining |
| Acoustic fabric | Breathable and durable | |
| Tools | Saw, drill, staple gun | Basic build tools |
| Safety | Gloves and a mask | Especially when cutting insulation |
How to Make DIY Sound Absorbing Panels
Building sound-absorbing panels at home does not require special skills. With the right materials and a clear plan, anyone can get solid results.
Step 1: Build the Wooden Frame
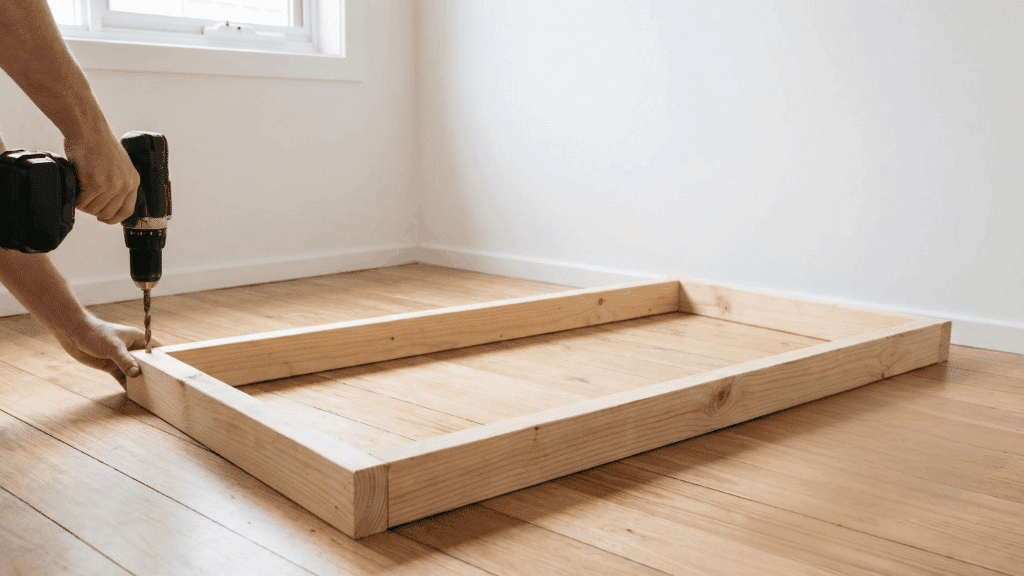
The frame is the backbone of the panel, so it needs to be strong. Cut timber to 120cm x 60cm.
Let the vertical pieces run from top to bottom, with the horizontal piece sitting between them. Pre-drill each corner before adding screws; this stops the wood from splitting.
Use one good screw per corner. Fit picture hooks about one foot down from the top on both sides, making sure they sit at equal heights for a balanced hang.
Step 2: Attach the Side Boards
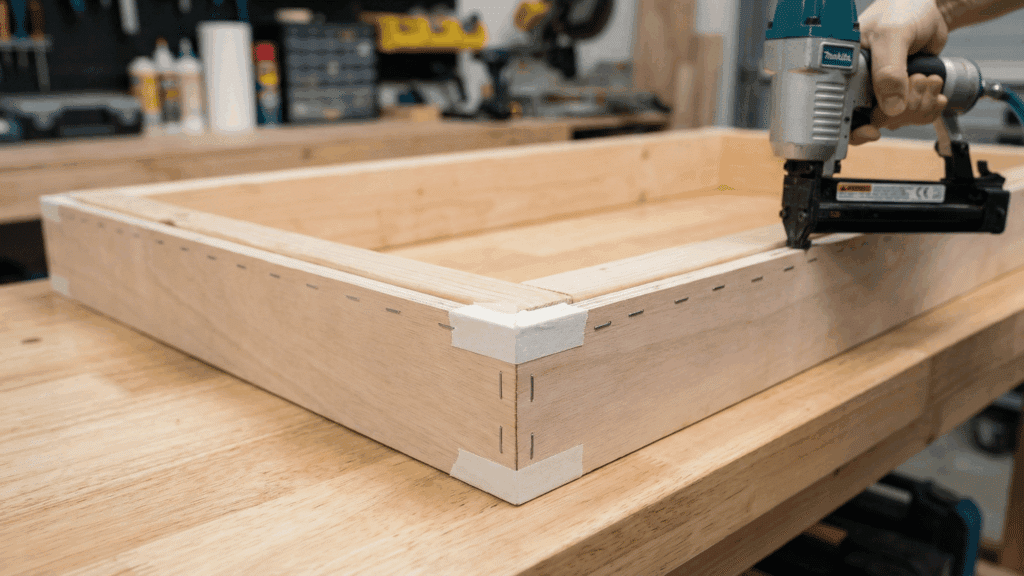
Sideboards give the panel its depth and hold the insulation in place. Cut thin plywood or particle board to match the thickness of the insulation, usually around 2 to 4 inches.
Staple or nail the boards around the outer edge of the frame. Stapling is faster and works just as well.
Once the boards are on, reinforce all four outer corners with tape. This small step protects the fabric from tearing during the wrapping stage later.
Step 3: Add the Backing Fabric
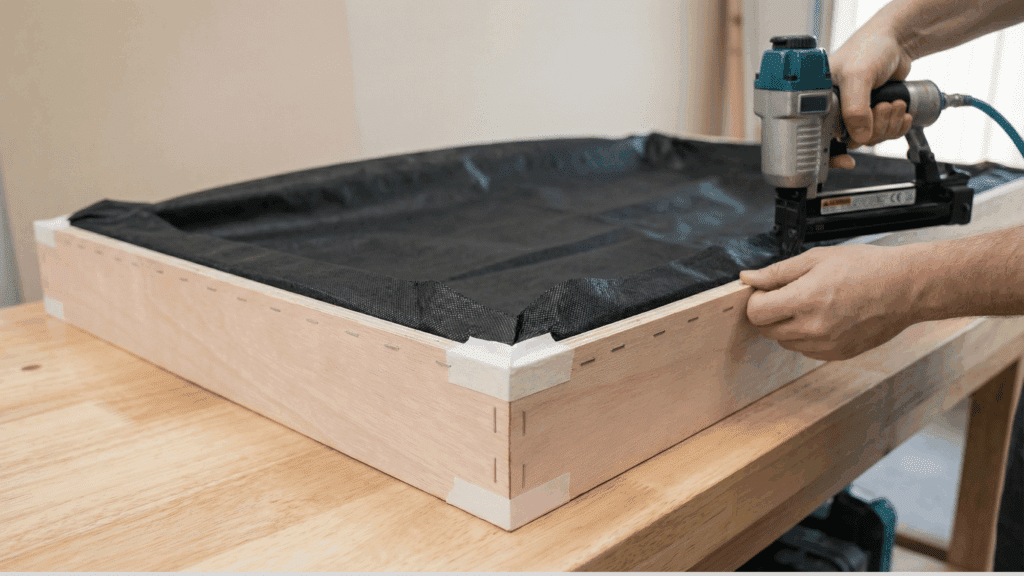
Before the insulation goes in, the back of the panel needs to be sealed.
Cut a piece of weed barrier membrane slightly larger than the frame opening. Staple it to the inside edge of the frame, working around all four sides.
Do not pull it tight against the boards; leave a small gap between the fabric and where the insulation will sit. That air cavity helps sound waves break down before they reflect off the wall.
Step 4: Insert the Insulation
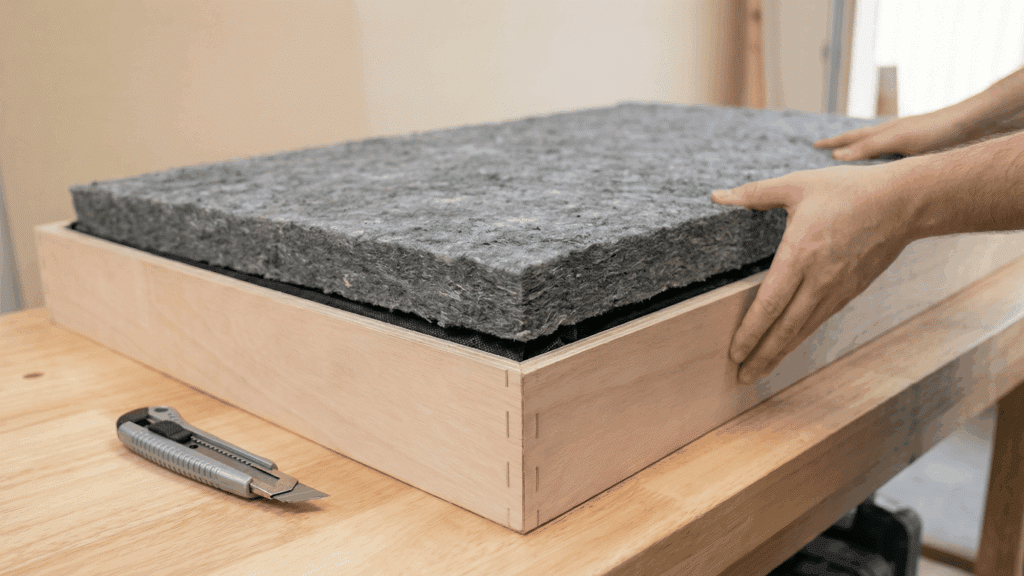
The insulation does most of the acoustic work, so choosing the right type matters. Recycled denim slabs, hemp insulation, or wood fiber panels are all safe and effective options.
Look for a density of around 20-30 kg/m³. Press the insulation snugly into the cavity.
If it is slightly too large, trim it with a utility knife. Do not compress it to make it fit. Compression reduces the sound-absorption rate.
Step 5: Wrap With Fabric and Hang
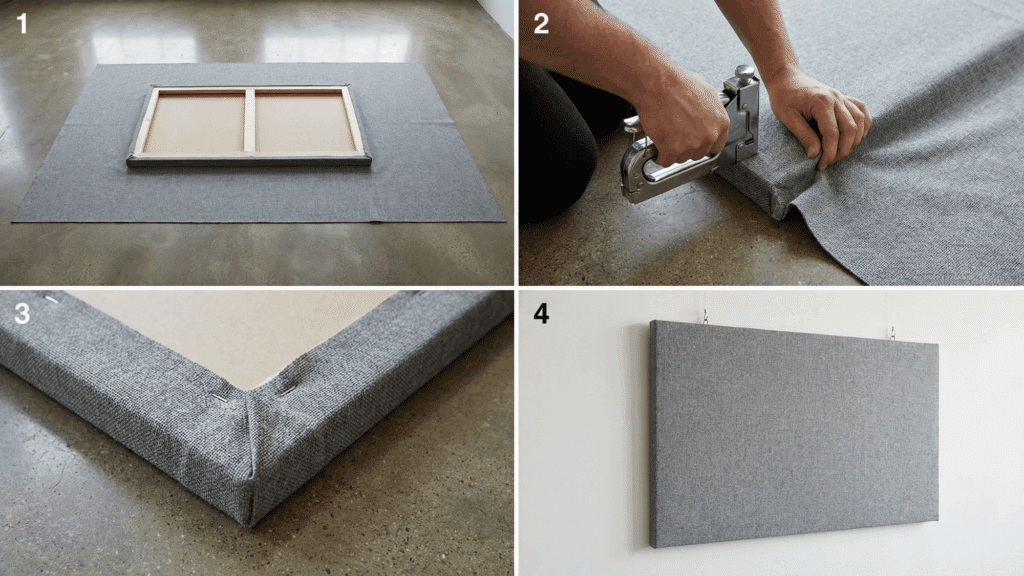
Lay the acoustic fabric face down on a flat, clean surface. Place the panel on top with the front facing down.
Leave enough fabric on all sides to fold over the edges. Staple one long side first, then pull gently and staple the opposite side.
Fold the corners like wrapping a gift and staple them down for a neat finish. Attach the picture wire between the hooks, then hang the panel. It should sit slightly away from the wall for the best results.
DIY Sound Absorbing Panels Cost Breakdown
DIY sound absorbing panels offer professional acoustic performance at a fraction of retail cost using affordable, easy-to-source materials.
The total cost per DIY sound-absorbing panel typically ranges between $25 and $50, depending largely on insulation choice.
Recycled denim insulation averages $15–$25 per panel, while hemp or wood fiber options usually fall between $10–$20. Timber for the frame costs approximately $5–$10 per panel when purchased in bulk.
Breathable acoustic fabric such as Camira Cara runs about $4–$8 per panel, depending on width and supplier. Weed barrier membrane, screws, staples, and mounting hardware generally add $2–$5 per panel.
Building six panels would likely total $150–$300 overall, making this a highly cost-effective acoustic treatment solution.
To Conclude
DIY sound-absorbing panels are one of the most practical upgrades for any room dealing with poor acoustics. The materials are affordable, the build process is manageable, and the results speak for themselves.
Start with six panels, place them at the main reflection points, and test the room. Adjust from there.
Anyone looking to take their space further can pair these panels with bass traps in the corners for even better sound control.
The difference will be noticeable from the very first listen.