
Stone foundations are strong and built to last, but even they need upkeep. Over time, the mortar holding the stones together can crack, crumble, or fall out.
When that happens, your home becomes more vulnerable to water leaks, shifting, and damage.
I learned that repointing, removing old, damaged mortar, and replacing it with fresh mortar is key to keeping a stone foundation strong.
It helps prevent moisture issues, adds stability, and keeps the foundation looking good.
In this guide, I’ll cover everything you need to know about repointing a stone foundation, from spotting early signs of trouble to choosing the right tools and materials.
You’ll also find tips I wish I knew sooner, common mistakes to avoid, and how to tell when it’s time to call in a pro.
What Is Stone Foundation Repointing?
Repointing is the process of removing old, damaged mortar from between the stones in a foundation and replacing it with new mortar.
This helps restore the strength of the foundation without needing to rebuild it. It’s especially common in older homes where the original mortar has begun to fail.
Repointing is especially important for stone foundations because these structures rely on both the stones and the mortar for strength.
Without solid mortar, the foundation can shift, let in water, or even start to fail. Repointing keeps the stones in place, prevents moisture damage, and helps preserve the life of your home.
Signs Your Stone Foundation Needs Repointing
1. Cracked, loose, or missing mortar: Look closely at the spaces between the stones. If the mortar is cracked, falling out, or missing completely, it’s no longer doing its job. This weakens the structure and lets in water.
2. Water seepage or damp basement walls: Moisture in your basement could mean the mortar joints are no longer sealed. Water can seep through damaged mortar, leading to wet spots, mold, or musty smells.
3. Bulging or shifting stones: When the mortar fails, the stones may move out of place. If you notice bulges, leaning sections, or gaps between stones, the foundation may be under stress.
4. White powder or salt deposits (efflorescence): White, chalky stains on your stone or mortar often signal moisture problems. This happens when water pulls minerals out of the masonry and leaves them behind.
Necessary Tools and Materials
Before you begin repointing your stone foundation, it’s important to gather the right tools and materials. Having the proper equipment not only makes the job easier but also helps you get longer-lasting results.
- Cold chisel or plugging chisel
- Hammer or mallet
- Tuckpointing trowel
- Stiff brush or wire brush
- Mortar hawk or board
- Pointing tool or jointer
- Spray bottle or hose
- Premixed or lime-based mortar
- Water
- Gloves
- Dust mask
- Safety goggles
Quick Tip: Always test your mortar before doing the full wall. Try to match the color, texture, and hardness of the original mortar. For old foundations, lime mortar is usually the safest choice.
Step-by-Step Guide to Repointing Stone Foundation
Here’s how I safely and reliably repoint a stone foundation. Each step is designed to extend the foundation’s life, block out moisture, and restore structural stability.
1. Prep the Area
Start by brushing off any dirt, dust, and loose debris from the stone and joints.
Use a spray bottle or hose to mist the area lightly; this helps the new mortar stick better and prevents it from drying too quickly.
Make sure the area is clean and slightly damp, but not soaking wet. This step helps with adhesion and prevents the dry stone from pulling moisture out of the mortar too fast.
2. Remove Old Mortar
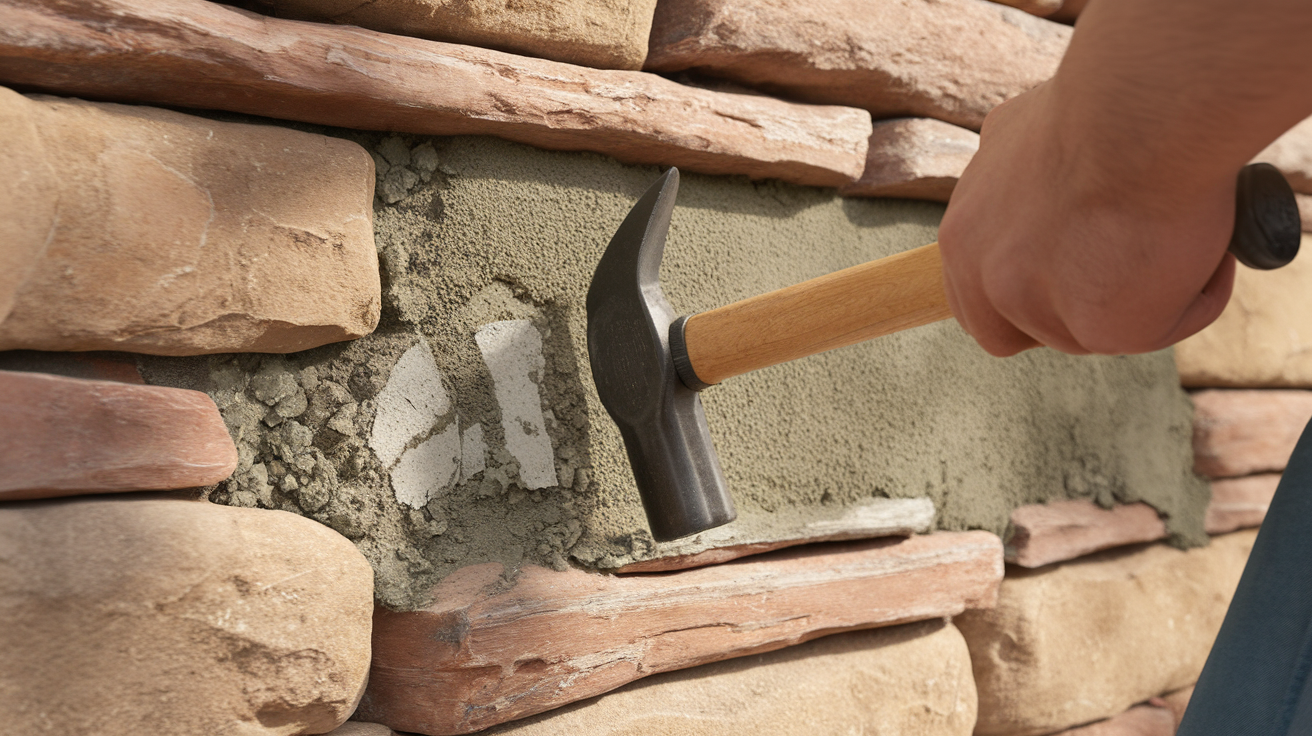
Use a cold chisel and hammer to chip out the old, loose mortar carefully. Aim for a depth of about 1 to 2 inches so the new mortar has enough room to bond properly.
Go slowly and work evenly across the joints. Try not to damage the surrounding stones during removal.
Removing too much or going too deep isn’t necessary, but make sure all loose or powdery material is cleared out.
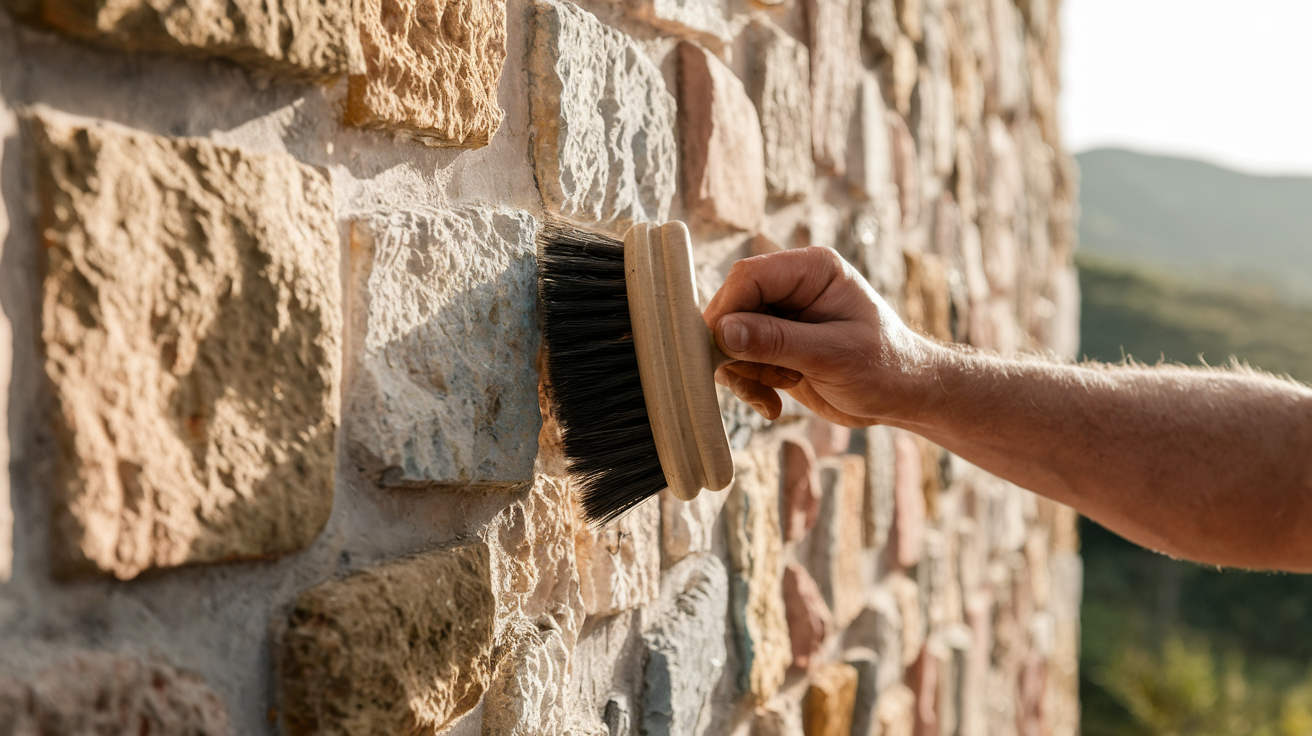
3. Clean the Joints
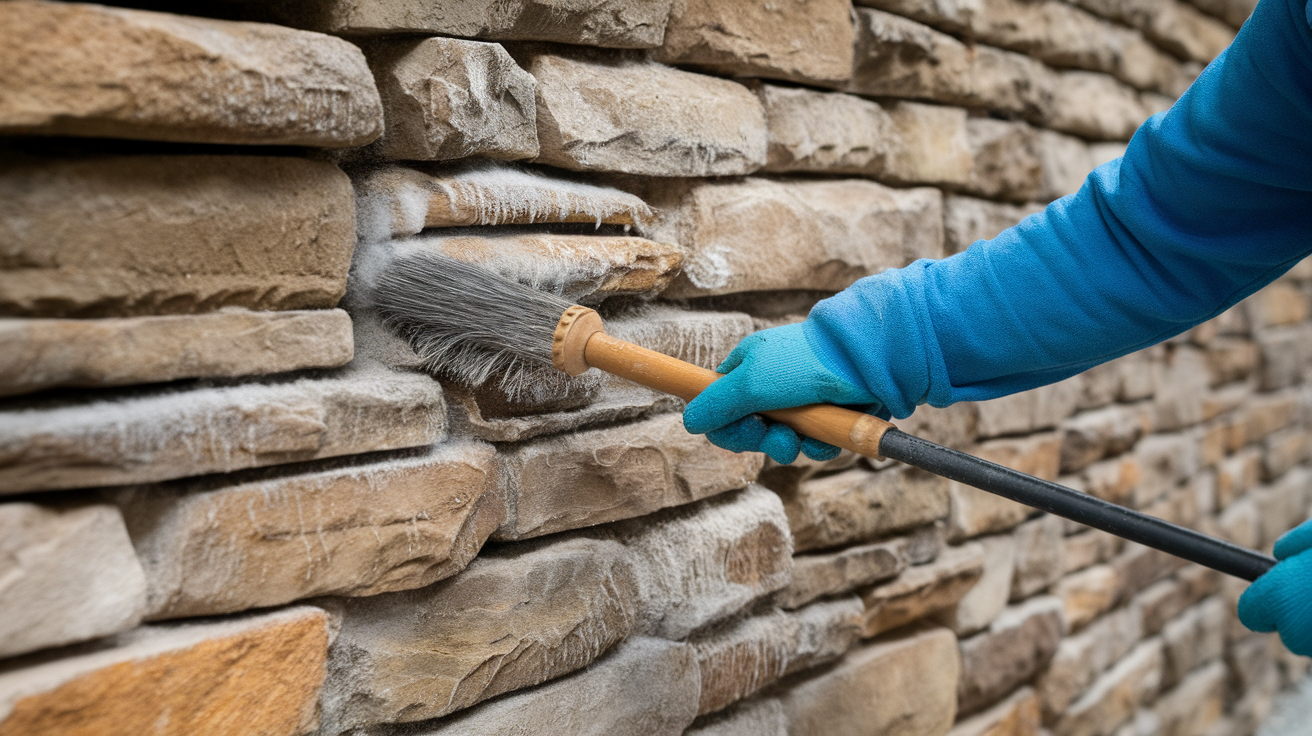
After removing the mortar, scrub the joints with a stiff or wire brush to remove any leftover dust or loose particles.
Give the area a light misting with water to reduce suction that can pull moisture out of fresh mortar.
This cleaning step helps the new mortar grip the stones better. A clean joint means fewer chances of failure later.
You can also use a vacuum or compressed air to remove fine dust if needed.
4. Mix the Mortar
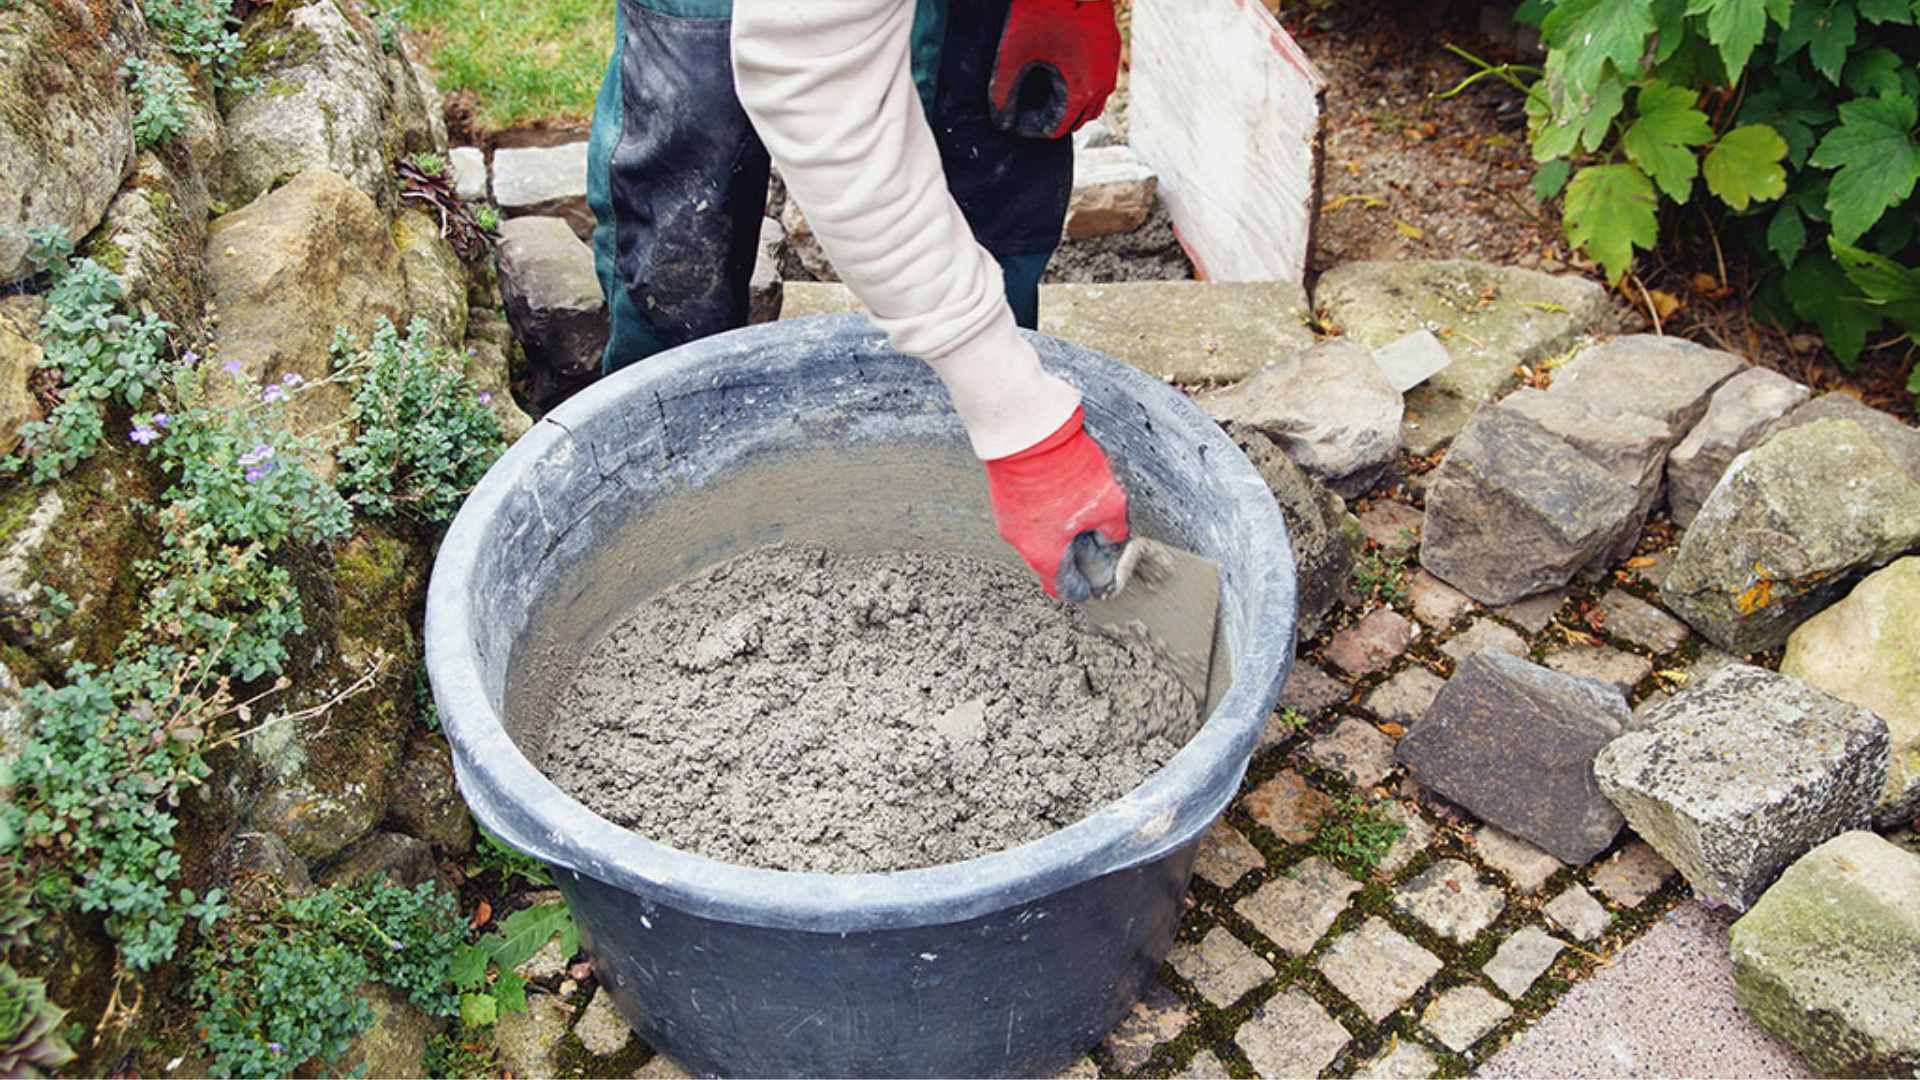
Follow the instructions on your mortar bag, mixing small batches at a time.
You want a thick, peanut butter-like texture, smooth enough to work with but firm enough to stay in place.
Be sure to mix thoroughly so there are no dry pockets or lumps. Use a margin trowel or mixing paddle if you have one.
If you’re working with lime mortar, let it rest (or “slake”) as needed.
5. Apply the New Mortar
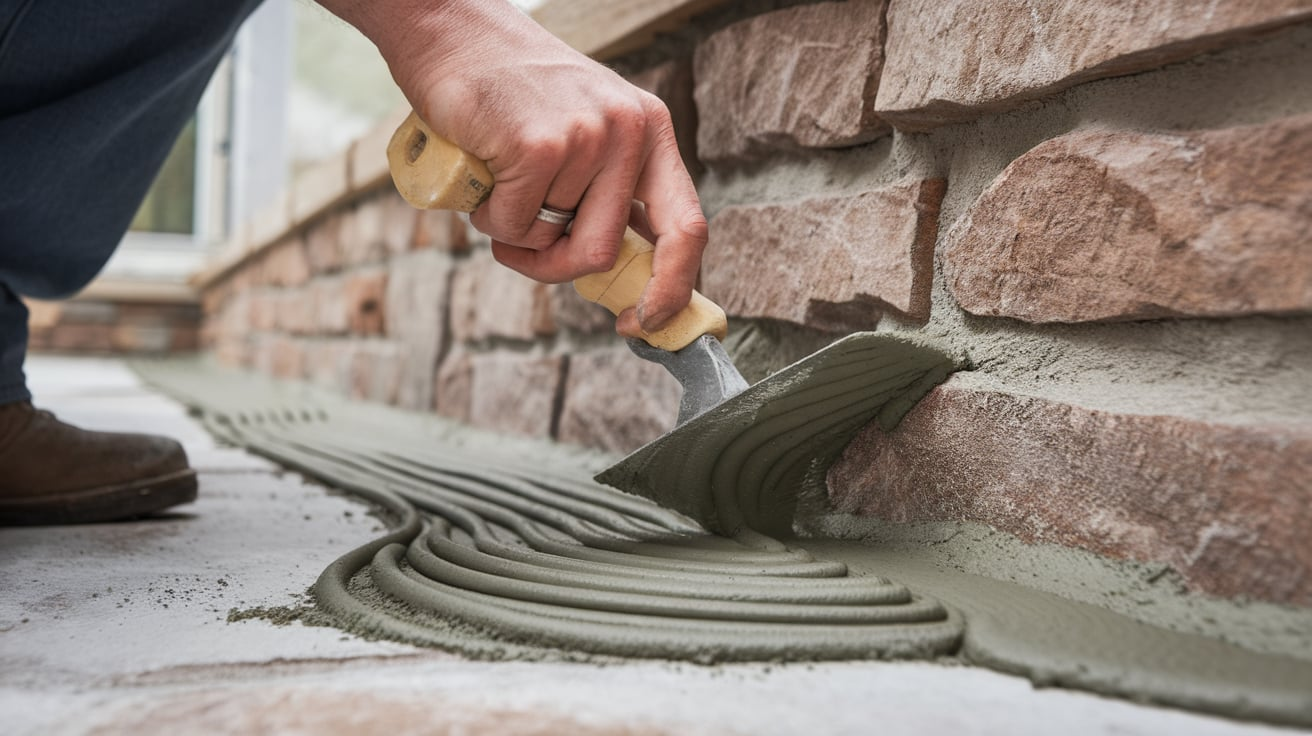
Using a tuckpointing trowel or pointing tool, press fresh mortar firmly into the cleaned joints.
Work in small sections to make sure the mortar is packed tightly with no air gaps.
Fill the joint completely, pushing mortar firmly so it sticks to both sides of the stone.
Don’t smear mortar across the face of the stones; keep it neat. Start from the top of the wall and work your way down.
6. Shape the Joint
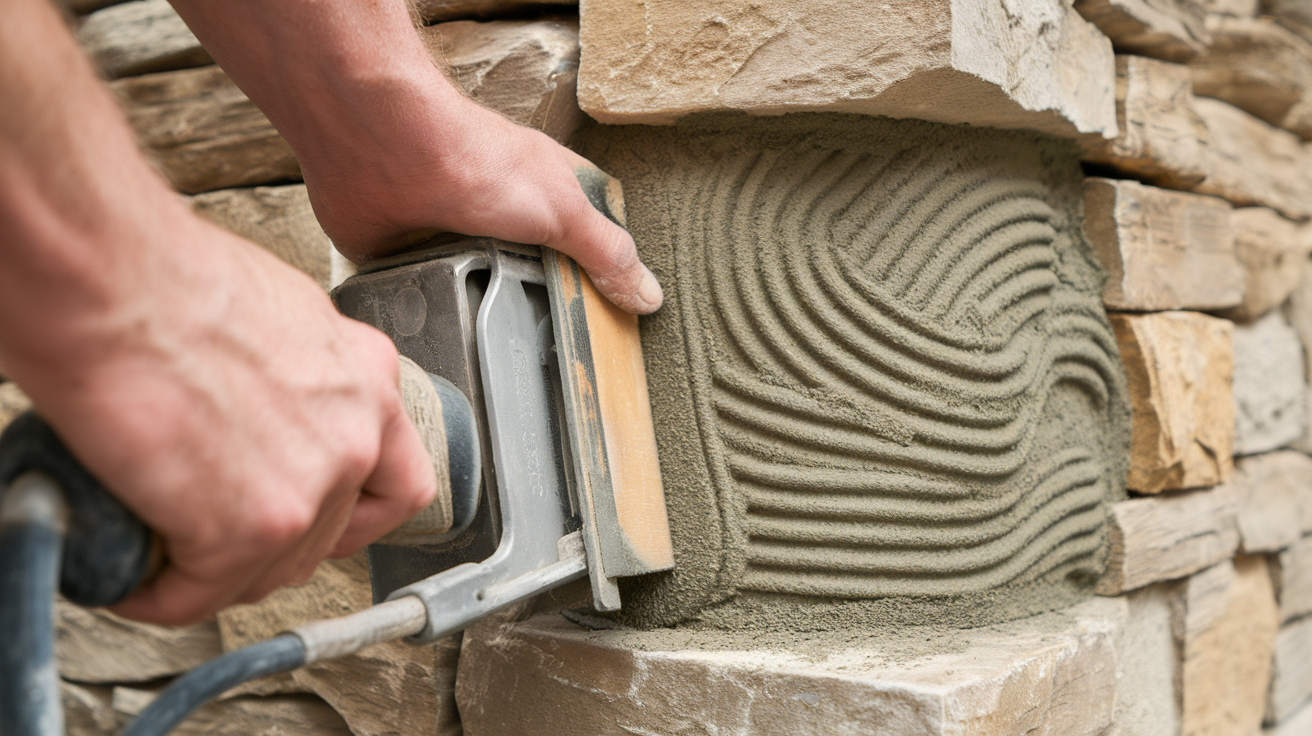
Once filled, shape and smooth the joint using a jointer or the edge of your trowel.
Try to match the look of the original joints so the repair blends in naturally with the rest of the wall.
Tooling the mortar gives it a clean, finished look and also compresses the mortar for a stronger bond.
There are different joint styles, concave, flush, or recessed, so choose one that matches your wall.
7. Mist the Mortar
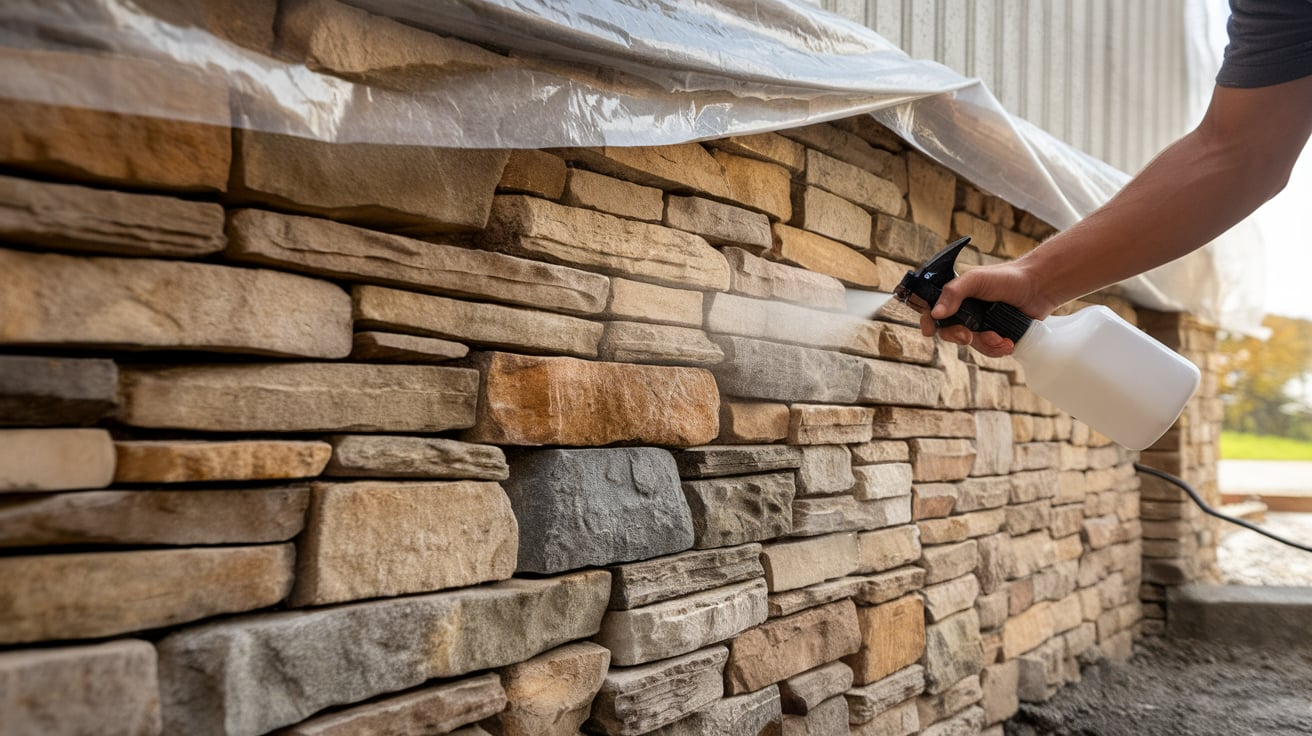
Mist the newly repointed area gently once or twice a day for several days.
This keeps the mortar moist and helps it cure slowly, making it stronger and more durable in the long run. If mortar dries too quickly, it can crack or weaken.
Use a fine mist and cover the area with a tarp or plastic sheeting if needed to protect it from wind and sun.
Continue misting for at least 3–5 days. This step is crucial for mortar strength and weather resistance.
Tips for Best Results
- Work in cool weather, not in extreme heat or freezing temperatures.
- Only repoint a few feet at a time so the mortar doesn’t dry too fast.
- Match your mortar to the old in texture and color if possible.
- Wet the stone slightly before applying mortar to help with bonding.
- Check the drainage around your foundation to avoid future damage.
When to Repoint vs. When to Replace
Not every foundation issue can be solved with reporting. While repointing is great for fixing worn-out mortar, more serious damage may require resetting or replacing the stones.
| Repointing | Replacing / Resetting Stones |
|---|---|
| Crumbling or missing mortar | Bulging or bowed stone walls |
| Hairline cracks in mortar joints | Stones that are loose, shifting, or falling out |
| Moisture seepage without flooding | Heavy water leaks through the wall |
| Cosmetic or minor repairs | Major structural damage or instability |
| The original stone wall is solid and stable | The wall has movement or major structural failure |
If your foundation has worn-out mortar but the stones are still in place, repointing is likely.
But if the wall is moving, leaking heavily, or falling apart, it’s time to get professional help and consider full repairs or replacement.
Benefits of Repointing
Repointing a stone foundation isn’t just about appearance. It plays a big role in protecting your home from water damage, structural weakening, and long-term decay.
- Stops water leaks and moisture problems: Fresh mortar seals gaps, keeping rainwater and groundwater out of your basement or crawl space.
- Improves the stability of the foundation wall: Repointing strengthens weak joints, helping the wall hold its shape and bear weight safely.
- Keeps pests and insects out: Tight, well-sealed joints block bugs, rodents, and other pests from getting in through cracks.
- Preserves the historical look of old homes: Matching the original mortar helps maintain the character and charm of older properties.
- Adds value to your property: A well-maintained foundation boosts curb appeal and reassures potential buyers about long-term durability.
How Long Does Repointing Last?
When done correctly using the proper mortar mix and technique, repointing a stone foundation can last anywhere from 50 to 100 years.
Lime-based mortar, commonly used in older homes, offers flexibility and breathability, helping the structure move slightly without cracking.
Cement-based mortars, while stronger, can be too rigid for old stonework and may cause damage over time.
The longevity of repointing also depends on external factors. If your home has good drainage and proper grading to keep water away from the foundation, the mortar joints will last much longer.
However, excess moisture, poor sealing, or water pooling near the foundation can break down the mortar sooner than expected.
To make your repointing work last, inspect your foundation every year or two. Look for crumbling mortar, damp spots, or movement in the stones.
Catching small issues early helps you avoid costly repairs later.
Conclusion
Repointing a stone foundation is a smart and practical way to protect your home from water damage, pest entry, and long-term wear.
By removing old, crumbling mortar and replacing it with a fresh, compatible mix, you restore strength and seal out moisture where it matters most.
With the right tools and a step-by-step approach, many homeowners can handle small repointing jobs on their own.
However, it’s just as important to know when a problem is too big for DIY.
If your foundation has large cracks, bulging stones, or signs of major shifting, I strongly suggest calling in a professional mason, as it’s the safer choice.
Take a close look at your stone foundation today. Fixing the issue early can help you avoid expensive repairs and keep your home solid and secure for many more years.