
Shadowbox molding is a way to decorate plain walls using thin strips of wood. These strips are placed on the wall in a box shape, and it looks like a picture frame without the picture. This style is also called shadowbox trim.
People use shadow box molding to make walls look more finished. It gives flat walls some shape and style. You can add it to one wall or all around a room.
This type of molding is good for living rooms, hallways, and dining rooms. It also works well with chair rails. Shadowbox molding is simple but makes a big difference. It helps a space look clean and put together.
If you want a wall to stand out without too much effort, this is a smart way to do it.
Planning Your Shadow Box Moulding Project
Before starting your shadow box molding project, it’s important to plan the design. Good planning helps avoid mistakes and saves time. Think about how the molding will look in the room before you begin.
Design Considerations
Start by looking at your wall height. Taller walls can hold larger or more boxes, while shorter walls may need smaller designs. Keep the size of the room in mind so the molding fits well.
Next, consider the shape and number of boxes. You can choose tall rectangles, wide squares, or a mix of both styles. Make sure all boxes are even and look balanced on the wall.
Also, check the space between each box. Keep the spacing equal on all sides for a neat look. Use a pencil and tape measure to sketch your design on the wall first.
Measuring and Layout Tips
Always measure your walls carefully before cutting any molding. Write down the width and height of the wall, and plan how many boxes will fit. Leave space around windows, doors, and outlets.
Mark the box positions with light pencil lines. Use a level to make sure your lines are straight. This step helps avoid crooked or uneven boxes later.
If your wall already has trim or chair rail, plan your design around it. Try to line up your boxes with the trim for a clean layout. Make sure the boxes don’t touch switches or vents.
Materials and Tools Needed
Getting the right materials and tools will help your project go smoothly. You don’t need too many items, but the ones you choose should be of good quality. This makes the job easier and helps the molding last longer.
Choosing the Right Moulding
Start with molding that has a flat back so it lays well on the wall. Most people use base caps or panel molding for shadow boxes. These types are easy to work with and give a clean look.
You can pick molding made of wood, MDF, or even PVC. Wood is strong and classic, while MDF is smooth and low-cost. PVC is a good option if you’re working in rooms with moisture.
The width of the molding also matters. Thinner strips work well for small boxes or tight spaces, while wider molding gives a bold finish for bigger rooms or tall walls.
Essential Tools List
To install shadow box molding, you will need a few basic tools. A measuring tape, pencil, and level will help you mark your layout. A miter saw will cut the molding at the right angles.
- Measuring tape: For checking wall height and width to plan box sizes.
- Pencil: To lightly mark box edges and layout on the wall.
- Level: Helps keep lines and boxes straight and even.
- Miter saw: Used to cut molding pieces at clean, angled corners.
- Nail gun: Speeds up the job of attaching molding to the wall.
- Adhesive: Adds extra strength to hold molding in place.
- Caulk: Fills small gaps or cracks between the wall and molding.
- Sandpaper: Smooth edges or rough spots before painting.
- Paint and brush: Give the final clean and fresh look to the molding.
These tools help speed up the process and give a neat, clean finish. Your molding will stay in place and look well done with them.
Step-By-Step Installation Guide
Installing shadow box molding takes time and care. Each step should be done with a focus on getting the best result. The better the prep, the smoother the finish will be.
Step 1 – Wall Prep
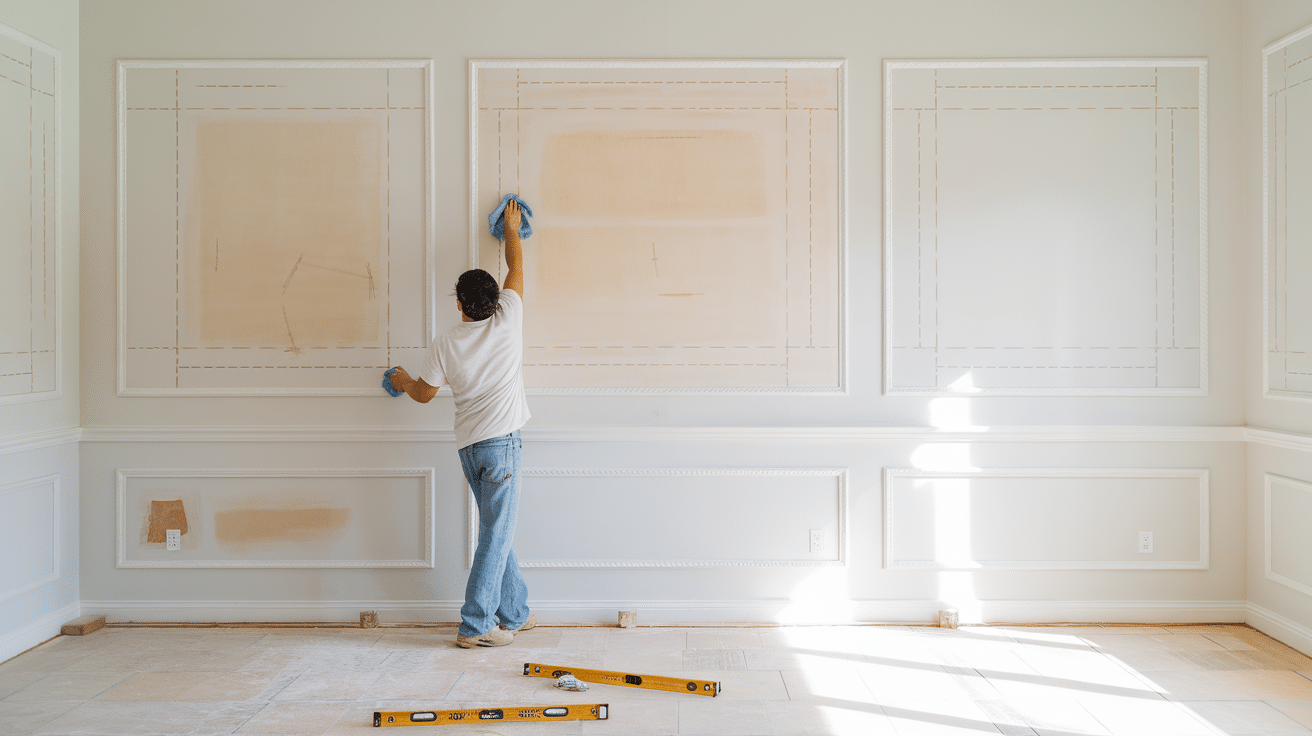
Start by cleaning the wall with a dry cloth or sponge. Dust and dirt can stop molding or paint from sticking well. If the wall has bumps or sticky spots, wipe them down.
Look for holes or cracks in the wall. Fill them with wall putty and let them dry. Sand the spots until they feel smooth.
Mark where the chair rail or baseboard ends with a pencil. Then, plan your box layout between these trim pieces, leaving space at the top, bottom, and sides.
Draw light pencil lines to map out your boxes. A level helps keep these lines straight. Check your lines twice before moving to the next step.
Step 2 – Cutting and Measuring Moulding Pieces
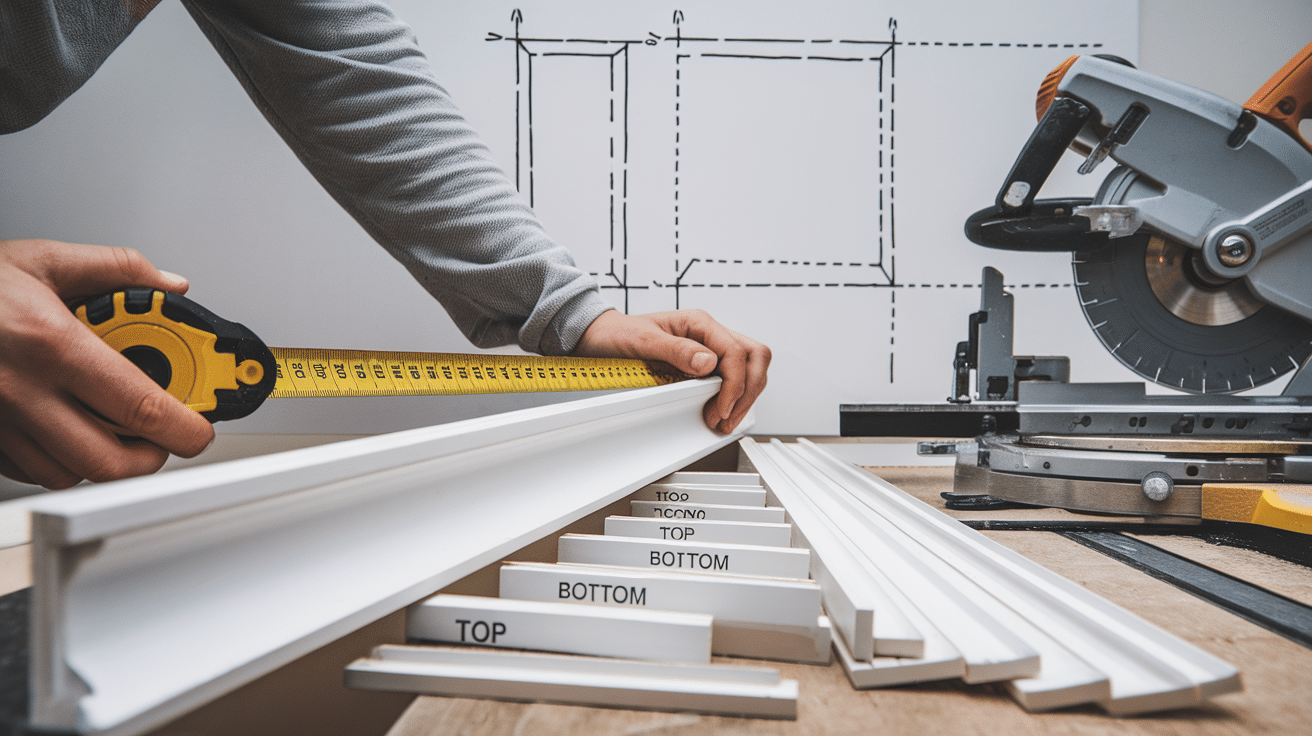
Measure each side of the box you drew. Write the measurements down before you start cutting. Always double-check to avoid waste.
Use a miter saw to cut the ends of the molding at 45 degrees. This helps the corners fit together neatly. Make sure the blade is sharp, and your hands are clear.
After cutting, lay each piece on the wall to see if it fits right. Make small trims if needed. It’s better to cut slowly than to rush and get it wrong.
Label your molding pieces to avoid mix-ups. For example, mark them as top, bottom, left, or right. This makes the next steps quicker and easier.
Step 3 – Attaching the Moulding
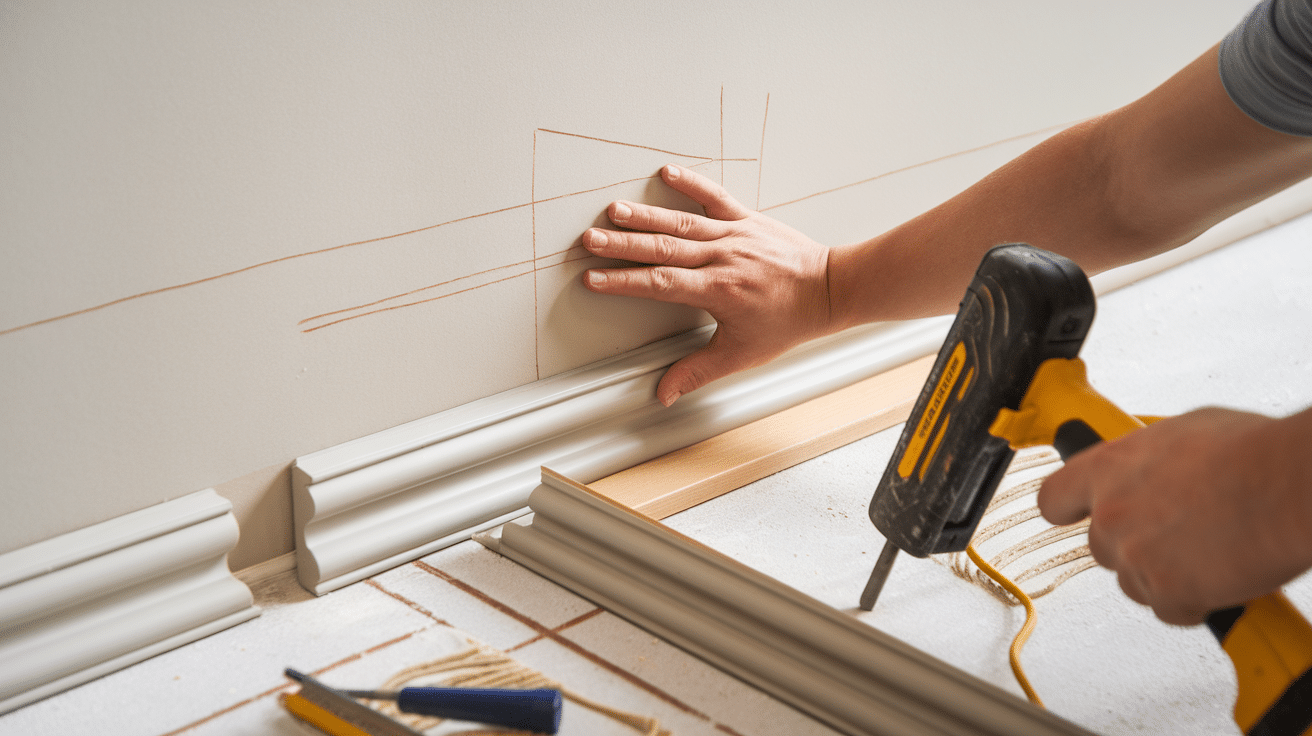
Apply a small amount of adhesive to the back of each molding strip. This gives extra hold, especially if the wall isn’t perfectly smooth. Then, place the molding on your layout lines.
Press the molding firmly against the wall. Secure it with a nail gun or hammer and finish nails. Start from one end and move across.
Before you move on, check that each piece is level. If it’s crooked, adjust it right away. A crooked box can throw off the whole look.
Once the full box is up, repeat the steps for the next one. Take your time to keep all the boxes even. It’s better to go slow than redo a full section.
Step 4 – Finishing Touches
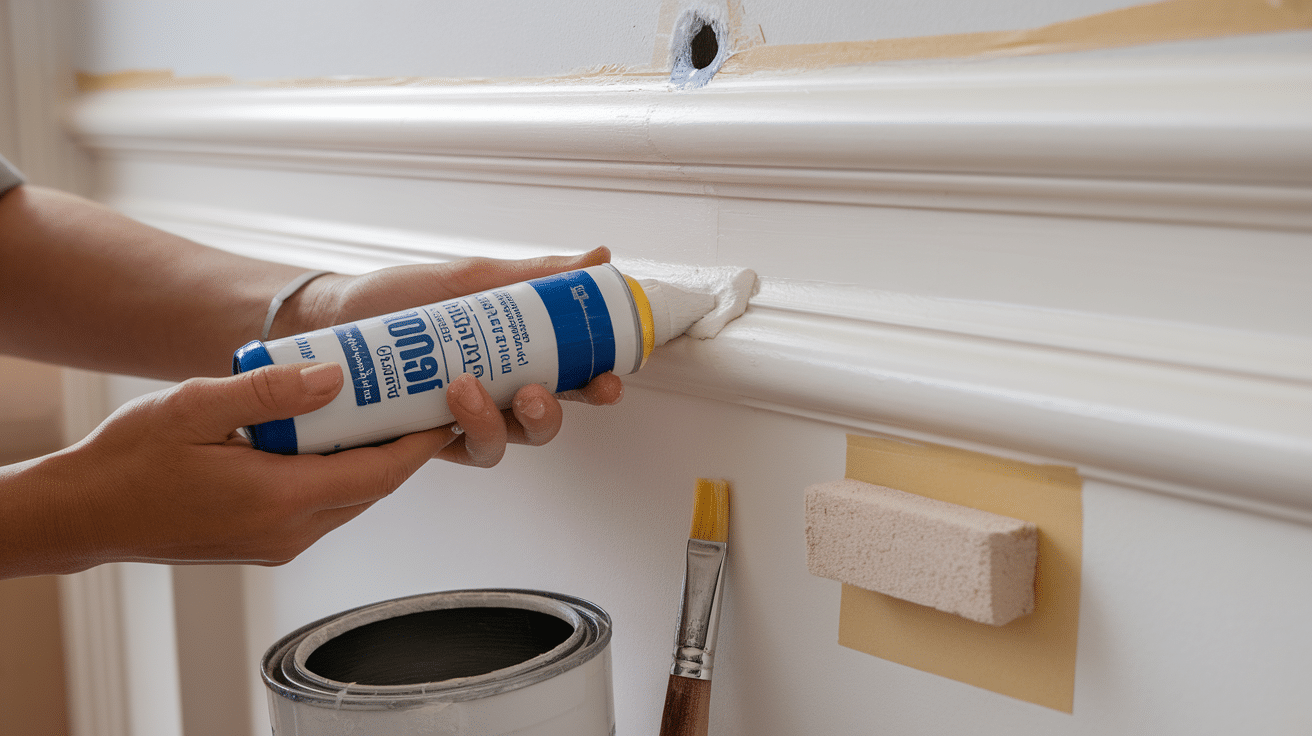
Use caulk to fill any small gaps where the molding meets the wall or corners. Run a wet finger along the caulk to smooth it. Let it dry for a few hours.
Look for nail holes and fill them with wood filler or putty. Once dry, lightly sand the filled spots. This will smooth the surface for painting.
Wipe off any dust from sanding before painting. Use painter’s tape to protect the wall or nearby trim. A small brush gives better control for painting the molding.
Apply one or two coats of paint as needed. Let the first coat dry before adding another. Once finished, your wall will look neat and well-built.
Common Mistakes to Avoid
Even small mistakes can make shadow box molding look messy. Being careful at each step helps the wall look clean and well done. Here are some common things to watch out for and how to fix them.
Inaccurate Measuring Leading to Uneven Boxes
Always take your time measuring each section. If one box is too tall or too short, the whole wall can look off. To stay consistent, use the same tape measure for all steps.
Write each number down right away. Don’t guess or round up your measurements. Even half an inch can make a big difference.
Double-check before you cut. It’s better to measure two or three times than to waste molding. Accurate measuring saves time and gives better results.
Uneven Spacing or Crooked Alignment
Space between the boxes should be equal on all sides. If one side is wider than the other, it will be easy to notice. Use a ruler or spacer to help keep things even.
Crooked boxes can make the whole wall look unbalanced. Always draw straight layout lines first. A level will help you keep boxes lined up properly.
Take your time placing each piece. Step back and look at the wall from a few feet away. This helps you see if anything looks out of place.
Skipping Caulk or Paint Touch-Ups
Gaps between the molding and the wall can show if you skip the caulk. Caulk helps seal edges and makes the molding look smooth. It’s a small step that makes a big difference.
Nail holes or rough spots also need care. Fill them with wood filler and sand gently. This helps the paint look clean and even.
Painting over dust or cracks will lead to a messy finish. Take time to prep the surface before painting. A little effort here makes the molding look better overall.
Not Using a Level Resulting in a Tilted Layout
A tilted layout is easy to spot and hard to fix later. Always use a level when drawing box lines or placing molding. This tool keeps your lines straight.
If the molding tilts, it can throw off every box after it. Please start with the first box and make sure it’s perfect. That way, the others will follow the same line.
Even if the wall itself is not straight, your boxes should be. The level helps you work around small wall issues. A straight layout makes the project look well done.
Maintenance and Care Tips
Once the molding is installed, it’s good to care for it now and then. This helps it stay in good shape and keeps the wall looking fresh. A few easy habits will help it last longer.
Cleaning Without Damaging Paint
Dust the molding once a week with a dry cloth. This keeps dust from building up in the corners. For sticky spots, use a soft cloth with water—no harsh scrubbers.
Never use strong cleaning sprays. They can damage the paint or leave marks. A simple mix of water and mild soap is safe for most paint.
After cleaning, dry the molding with a soft towel. This keeps water from sitting on the paint, and a dry surface also helps prevent mold from growing in damp areas.
Easy Fixes for Cracks And Peeling Caulk Over Time
Tiny chips in paint can be fixed with a small brush. Keep extra paint from the project in case you need it later. Tap the spot with a brush instead of brushing too hard.
If you see cracks or peeling caulk, clean the spot and reapply fresh caulk. Let it dry, then paint over it if needed. This helps seal the molding again.
For deeper cracks or damage, use wood filler. Sand it smooth before painting. Fixing small problems early helps avoid bigger ones later.
Conclusion
Shadowbox molding can make plain walls look more styled and finished. With just a few tools and some planning, it adds depth and shape to any space.
The steps are simple: if you go slow and stay careful. Measuring, cutting, and painting all come together to build a clean design.
DIYers can try this project at home without special skills. It’s a good way to make a room feel more complete. Just take your time and check your work often.
If the steps feel too much, you can ask a local pro for help. The end result is worth it. For layout ideas, you can check online galleries or download simple sketch plans to follow.
Frequently Asked Questions
Can I Do Shadow Box Molding by Myself?
Yes, you can do it yourself with basic tools and a clear plan. Go step by step, measure well, and take your time for the best result.
What Type of Molding Should I Use?
Use flat-back molding, such as base caps or panel styles. Based on your space, choose wood, MDF, or PVC. Make sure the molding is straight, and the size fits your wall.
Do I Need Special Tools?
You only need simple tools, such as a level, tape, miter saw, nail gun, and caulk. These help you measure, cut, and attach the molding properly for a neat finish.
How Long Does It Take to Install?
A small wall may take 3–4 hours, and a larger room may take longer. The time depends on how many boxes you add and how carefully you measure and paint.
What Paint Should I Use for Molding?
Use paint with a slight shine, like satin or smooth finish. White is common, but light colors also work. Two thin coats will help the molding look clean and even.