
Ever scratched your head trying to figure out wheel fitment?You’re not alone. Understanding bolt patterns might seem like a small detail, but it’s crucial when it comes to your vehicle’s wheels.
Today, I’m exploring the 5×100 bolt pattern – one of the most common configurations you’ll find on many cars.
Whether you’re looking to upgrade your wheels, replace a damaged one, or just want to understand your vehicle better, knowing your bolt pattern is essential.
A 5×100 pattern means your wheel has 5 lug nuts arranged in a circle with a 100mm diameter – but there’s much more to it than that.
In this guide, I’ll briefly summarize everything about the 5×100 bolt pattern. You’ll learn which cars use this pattern, how to measure it correctly, and what wheels will fit your vehicle.
No more costly mistakes or returns because of incorrect fitment. By the end of this article, you’ll be confident in choosing the right wheels for your car.
Understanding the 5×100 Bolt Pattern & Its Measurements
What Does 5×100 Really Mean?
When you see “5×100,” it’s actually pretty straightforward. The “5” tells you how many lug holes your wheel has, while “100” is the diameter of the circle these holes make, measured in millimeters.
Think of it like connecting the dots – if you drew lines between the center of each lug hole, you’d get a circle that’s exactly 100mm across.
Getting Your Measurements Right
How do I measure a 5×100 bolt pattern? First, I grab my trusty tape measure or caliper. I start from the center of one lug hole and measure straight across to the back edge of the opposite hole (not the center).
This gives me the bolt circle diameter – which should be 100mm or about 3.94 inches.
Tip: If you’re not sure about your measurements, use a bolt pattern gauge. It’s like a ruler specifically made for this job, and it’ll save you from making expensive mistakes.
Why do Exact Measurements Matter?
Listen, even being off by a millimeter can cause big problems.
Your wheel might not sit right, which can lead to:
- Vibration while driving
- Uneven tire wear
- Safety issues on the road
- Stress on your wheel bearings
The good news? Once you know your bolt pattern, finding the right wheels becomes much easier.
Just remember that 5×100 isn’t the only spec you need – but it’s definitely one of the most important ones to get right.
Factors to Consider When Selecting Wheels with a 5×100 Bolt Pattern
Material Matters
Let’s talk about what your wheels are made of – it’s more important than you might think. Most 5×100 wheels come in either aluminum alloy or steel.
Aluminum alloy wheels are lighter and look great, but they’ll cost you more. Steel wheels are tougher and cheaper, but they’re heavier and might not win any beauty contests.
Getting the Offset Right
Offset is the distance between your wheel’s centerline and where it mounts to your car. Think of it like this – if you’re wearing a backpack, the offset is how close it sits to your back.
For 5×100 wheels, you’ll typically see offsets ranging from +35mm to +45mm. Getting this wrong can make your wheels stick out too far or rub against your fenders.
Size Really Does Matter
Your wheel size needs to work with both your car and your tires. For most vehicles with a 5×100 bolt pattern, common wheel sizes are:
- 15-inch: Great for daily driving
- 16-inch: Balanced performance and comfort
- 17-inch: More performance-focused
- 18-inch: Mostly for style, but watch out for rough rides
Load Rating: The Weight Champion
Don’t skip this part: Every wheel has a maximum weight it can handle. Your wheels need to support not just your car’s weight, but also everything you put in it – passengers, cargo, the whole deal.
Most 5×100 wheels have load ratings between 1,200 to 1,500 pounds per wheel. Going below your vehicle’s requirements isn’t just risky – it’s dangerous.
Remember, fitting wheels isn’t just about matching the bolt pattern. Each of these factors plays a key role in how your car drives, feels, and stays safe on the road. When in doubt, I always recommend checking your vehicle’s manual or talking to a trusted wheel specialist.
How to Install Wheels with a 5×100 Bolt Pattern
Getting Your Tools Ready
I’ve installed hundreds of wheels, and having the right tools makes all the difference. You’ll need:
- A torque wrench (essential – don’t skip this)
- Socket set with the correct lug nut size
- Floor jack and jack stands
- Wheel chocks
- Anti-seize compound (optional but recommended)
Installation Step by Step
Safety first: Always work on a level surface and engage your parking brake.
- Lifting the Vehicle I start by loosening (but not removing) the lug nuts while the wheel’s still on the ground. This gives you better leverage. Place the jack under your car’s designated lifting point, and raise it until the wheel is off the ground. Always use jack stands – never rely on just the jack.
- Mounting the Wheel Clean the hub surface and wheel mounting face – any dirt here can cause vibration. Lift your wheel onto the hub (yes, they can be heavy). If you’re using hub-centric rings, make sure they’re seated properly before mounting the wheel.
- The Critical Part: Tightening The sequence I use for 5×100 wheels – think of drawing a star pattern:
- Start with the top lug nut
- Move diagonally across to the bottom right
- Then top left
- Bottom left
- Finally, top right
Getting the Torque Right
This is non-negotiable: Most 5×100 applications need between 85-90 ft-lbs of torque. I always:
- Do a first pass at about 30 ft-lbs
- Second pass at 60 ft-lbs
- Final pass at the specified torque
After Installation
Don’t just walk away after installation. I always:
- Lower the vehicle slowly
- Double-check the torque on all lug nuts
- Check for any wheel wobble or vibration
- Re-torque after 50-100 miles of driving
Tip: Mark your lug nuts with a paint pen after torquing. If the marks misalign later, you’ll know something’s loose.
Remember: A proper wheel installation isn’t just about getting the wheel on – it’s about ensuring your safety on the road. Take your time, follow these steps, and you’ll have a secure installation that’ll last.
Common Mistakes to Avoid During Installation
The Torque Trap
After 15 years of working on wheels, I can tell you the biggest mistake I see: improper torque. Some folks think “tighter is better” – it’s not.
Over-torquing can stretch lug bolts and even break wheel studs. Just as bad is using an impact gun without a torque wrench for final tightening. These tools are great for removal but terrible for installation.
My golden rule: Impact guns are for taking off, and torque wrenches are for putting on.
Clean Surfaces Save Lives
You’d be amazed how many problems start with dirty mounting surfaces. I’ve seen perfectly good wheels develop vibrations because someone didn’t take 2 minutes to clean:
- The wheel hub face
- The back of the wheel
- The lug nut seats
Even a tiny bit of rust or debris can cause your wheel to sit unevenly. Think of it like trying to close a door with a pebble in the way – it’s just not going to work right.
The Lug Nut Puzzle
A costly mistake: Using the wrong type of lug nuts. 5×100 wheels might all share the same bolt pattern, but lug nuts aren’t universal. You need to match:
- The correct seat type (conical, flat, etc.)
- The proper thread pitch
- The right length
Using mismatched lug nuts is like wearing shoes with different-sized heels – it’s going to cause problems.
The Hub-Centric Ring Reality
Many aftermarket wheels have a larger center bore than your vehicle’s hub. Some folks skip the hub-centric rings thinking they’re optional. They’re not. Without them, your wheel isn’t truly centered, leading to:
- Vibration at highway speeds
- Uneven tire wear
- Extra stress on your lug nuts
Quick test: If your wheel has any play when mounted (before tightening lug nuts), you probably need hub-centric rings.
Remember, installing wheels isn’t just about matching the 5×100 pattern. Each of these details matters for your safety and comfort.
When in doubt, consult your wheel manufacturer’s specs or talk to a professional. Better to ask questions now than fix problems later.
Applications of the 5×100 Bolt Pattern in Different Vehicles
| Vehicle Type | Common Models | Production Years | Notes |
|---|---|---|---|
| Compact Cars | • Subaru Impreza• Toyota Corolla• Volkswagen Golf• Scion tC | 1993-Present | Most common application of the 5×100 pattern. Ideal for everyday commuting and fuel efficiency. |
| Sports Cars | • Subaru WRX (Pre-2015)• Toyota 86/Scion FR-S• Subaru BRZ• Lexus IS300 | 2000-2015 | Popular in performance applications due to wide wheel selection and aftermarket support. |
| Performance Vehicles | • Volkswagen GTI (MK4)• Audi TT (MK1)• Subaru Legacy GT• Volkswagen Jetta GLI | 1999-2005 | Often modified with wider wheels for better handling and stance. |
| Crossovers/Small SUVs | • Subaru Forester• Toyota Matrix• Pontiac Vibe• Lexus RX300 | 1998-2008 | Requires careful attention to offset and load ratings for proper fitment. |
| Aftermarket Applications | • Custom Builds• Track Cars• Show Cars• Drift Builds | Ongoing | A popular choice due to • Wide wheel availability• Competitive pricing• Easy sourcing of parts |
Key Benefits of the 5×100 Pattern:
- Large selection of wheel styles
- Competitive pricing due to common fitment
- Easy wheel sharing between compatible vehicles
- Strong aftermarket support
- Various width and offset options are available
Always verify your specific model’s specifications as manufacturers may have variations within the same model line.
Benefits of the 5×100 Bolt Pattern
Abundant Wheel Selection
I’ve seen the 5×100 bolt pattern remain one of the most versatile fitments in the automotive world. Walk into any wheel shop or browse online, and you’ll find hundreds of options.
From lightweight racing wheels to classic chrome designs, this pattern gives you real freedom to choose. Most major brands like Enkei, BBS, and Work Wheels offer extensive 5×100 lineups, often at competitive prices due to high production volumes.
Parts That Don’t Break the Bank
What makes 5×100 special? It’s the replacement parts are everywhere.
When you need:
- Lug nuts
- Hub rings
- Wheel spacers
- TPMS sensors
You won’t have to hunt down rare, expensive parts or wait weeks for special orders. Most auto parts stores keep these components in stock, and they’re typically more affordable than parts for less common bolt patterns.
Proven Track Record
The 5×100 pattern isn’t just popular – it’s battle-tested. It’s been used successfully in:
- Daily commuters put down hundreds of thousands of miles
- Race cars handling extreme lateral forces
- Rally cars absorbing brutal impacts
- Show cars winning competitions
This track record means you’re getting a design that’s been refined through decades of real-world use.
Style Without Compromise
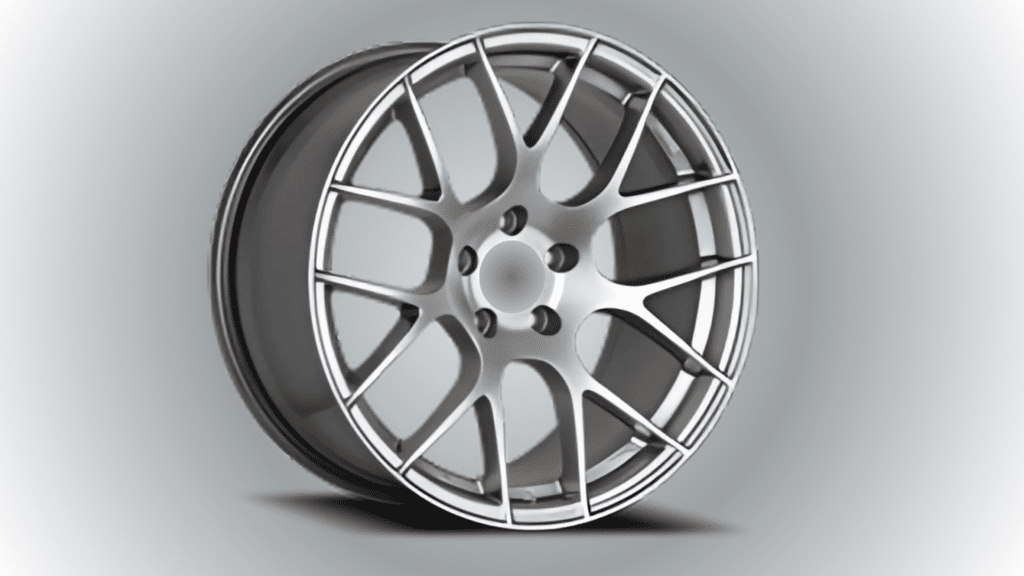
What I love about 5×100? It hits the sweet spot between form and function. The five-lug design looks balanced and sporty while providing enough structural support for most applications. You can find wheels in:
- Different finishes (polished, painted, machined)
- Various spoke patterns
- Multiple lip designs
- Sizes ranging from 15″ to 20″
Remember, this pattern’s popularity means wheel manufacturers invest heavily in design options, giving you more choices without sacrificing quality or breaking your budget.
List of Vehicles Using the 5×100 Bolt Pattern
| Manufacturer | Model | Years | Notes |
|---|---|---|---|
| Audi | TT MK1 | 2000-2006 | • All base models• Excludes quattro versions |
| Chevrolet | CavalierHHR | 1999-20052006-2011 | • All trim levels• Including SS model |
| Chrysler | PT Cruiser | 2001-2010 | • Including GT model• All engine variants |
| Subaru | ImprezaLegacyForester | 1993-20142000-20091998-2008 | • Excludes STI models• Includes WRX (pre-2015)• All non-turbo models• Turbo models until 2009• All models in range |
| Toyota | CelicaCorolla | 1990-20052003-2008 | • All generations in range• GT and GTS models• S and XRS models |
| Volkswagen | BeetleGolfGTI | 1998-20101992-19981999-2005 | • New Beetle platform• MK3 generation• MK4 generation |
Important Notes:
- Always verify fitment for specific trim levels
- Some models may have regional variations
- Special editions might use different patterns
- Mid-year changes can affect bolt patterns
This list includes common applications but isn’t exhaustive. Always double-check your specific vehicle’s specifications.
As a wheel specialist who’s worked with countless 5×100 patterns, I can tell you this setup is like a trusted friend in the automotive world.
I’ve covered everything from how to measure it properly (remember, it’s 5 lugs in a 100mm circle) to installing wheels the right way.
Whether you’re driving a Subaru Impreza, VW Golf, or Toyota Celica, getting your bolt pattern right is crucial for both safety and performance.
Take it from me – always double-check your measurements, use a torque wrench, and don’t skip those hub-centric rings if you need them.
The best part about the 5×100 pattern? You’ve got plenty of wheel options without breaking the bank.
Just remember the basics: clean your mounting surfaces, follow the torque specs, and recheck everything after a few days of driving.
Stay safe on the road, and happy wrenching!
Frequently Asked Questions About 5×100 Bolt Pattern
Can I Use 5×114.3 Wheels on a 5×100 Car?
No, you can’t use 5×114.3 wheels on a 5×100 car. Even though both patterns have 5 lugs, the 14.3mm difference in bolt circle diameter makes them incompatible.
Using adapters isn’t recommended as they can affect handling and safety.
How Do I Know if My Car Has a 5×100 Bolt Pattern?
You can check your bolt pattern by measuring from the center of one lug hole to the back of the opposite hole.
For a 5×100 pattern, this measurement should be 100mm (or about 3.94 inches). Your owner’s manual will also list this specification.
What’s The Most Common Problem With 5×100 Wheel Installation?
From my experience, incorrect torque specification is the biggest issue. People often overtighten lug nuts or don’t follow the proper star pattern sequence.
Always use a torque wrench and stick to manufacturer specifications – typically 85-90 ft-lbs for most 5×100 applications.
Will All 5×100 Wheels Fit My Vehicle?
Not necessarily. While the bolt pattern might match, you need to consider other factors like wheel offset, center bore diameter and wheel width.
These specifications must match your vehicle’s requirements for proper fitment and safe operation.
How Often Should I Check My Wheel Lug Nut Torque?
After installing new wheels, check the torque after the first 50-100 miles of driving.
After that, I recommend checking during every tire rotation (about every 5,000-7,000 miles) or if you notice any vibration or looseness in the wheels.