
Wood shelves are one of the easiest and most useful DIY projects you can make at home. They’re perfect for adding extra storage, showing off your favorite décor, or giving a room a cozy, handmade feel. The best part? You don’t need to be a pro to build them.
With just a few basic tools and some wood, you can create shelves that fit your space and style. Whether you like modern, rustic, or farmhouse looks, there’s a DIY shelf idea for you.
In this blog, I’ll explain the benefits of making your own wood shelves, how to plan your project, what tools and materials you’ll need, and step-by-step instructions to help you get started.
I’ll also share some creative ideas to inspire your next build. Let’s dive in and make something both useful and stylish for your home!
Benefits of DIY Wood Shelves
Making your own wood shelves has many great perks. It’s not just about saving money—it’s also fun and rewarding!
1. You Save Money: Buying shelves from the store can be expensive. When you build them yourself, you can get the same look for way less. A few pieces of wood and some basic tools are all you need.
2. You Can Customize Them: DIY shelves let you pick the exact size, color, and style you want. Whether you need something for a tiny corner or a whole wall, you can make it fit your space perfectly.
3. Great for Beginners: Building shelves is a great first project for new DIYers. It teaches you how to measure, cut, sand, and use simple tools.
4. Adds Personality to Your Home: Homemade shelves add a personal touch. You get to choose the wood, stain, and layout, making your space feel more “you.”
5. You Learn New Skills: DIY projects are a great way to learn. With each shelf you make, you’ll improve your tool use and become more confident in your building skills.
6. They’re Super Useful: Shelves help keep your home tidy and organized. You can use them to hold books, plants, décor, or kitchen supplies—whatever you need!
DIY wood shelves are affordable, fun to make, and totally useful. Plus, you get the satisfaction of saying, “I made that!” every time someone compliments them.
Planning Your DIY Wood Shelves
Before you grab your tools and start building, it’s important to plan your DIY wood shelves carefully. Taking a little time to think through the details can help you avoid mistakes, save money, and create shelves that fit your space and style perfectly.
1. Choose the Right Spot
- Think about where you want your shelves to go. Are they for your kitchen, living room, bedroom, or bathroom?
- Do you need extra storage, a place to display décor, or both?
- Once you pick the location, look at the wall space you have to work with. Avoid areas with light switches, outlets, or anything that could get in the way.
2. Measure Your Space
- Use a tape measure to determine the width and height of your shelf area. Write down the measurements and decide on the length and depth of your shelves.
- A shelf that’s too deep can stick out too far, and one that’s too short may not be useful. Standard shelf depth is usually between 6 and 12 inches, depending on what you’re storing.
- Also think about how many shelves you want. If you’re stacking multiple shelves, leave enough space between each one—12 to 15 inches usually works for books or décor items.
3. Pick a Shelf Style
Now, it’s time to choose a style that fits your space and skill level. Pick a style that matches your home décor and how confident you feel about building it.
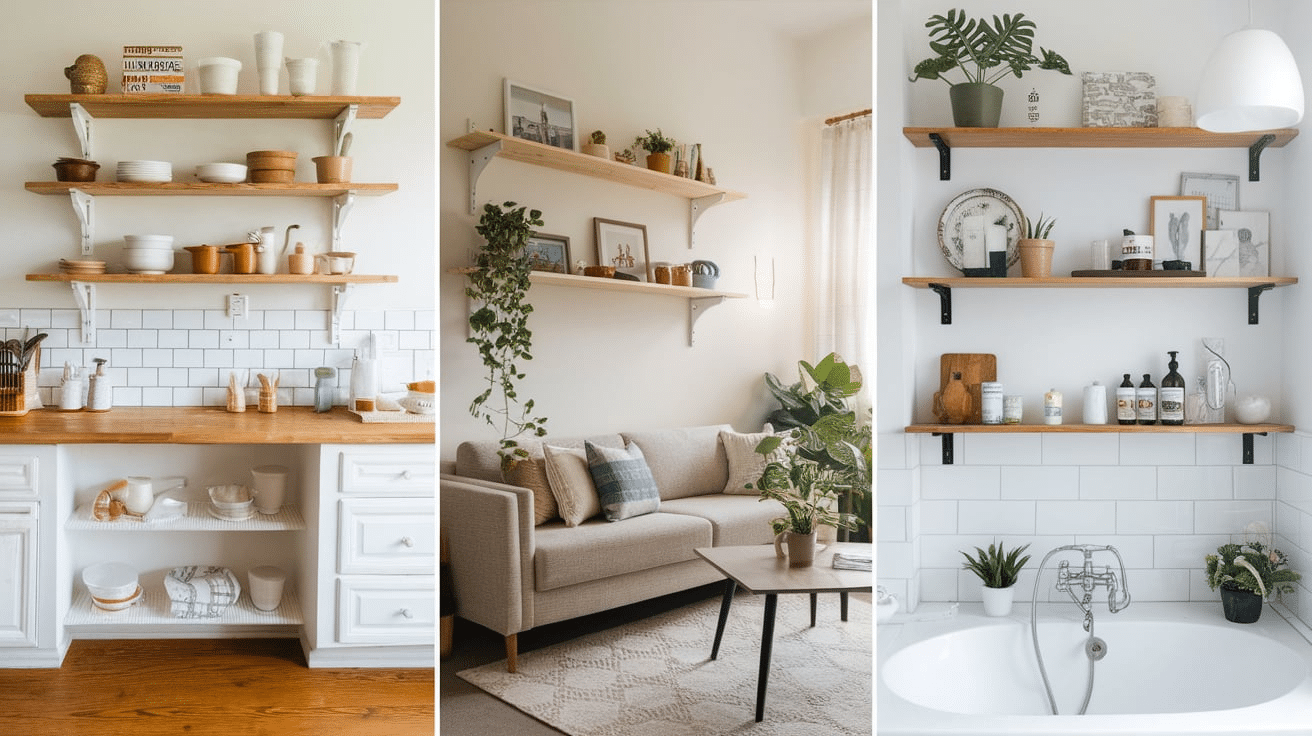
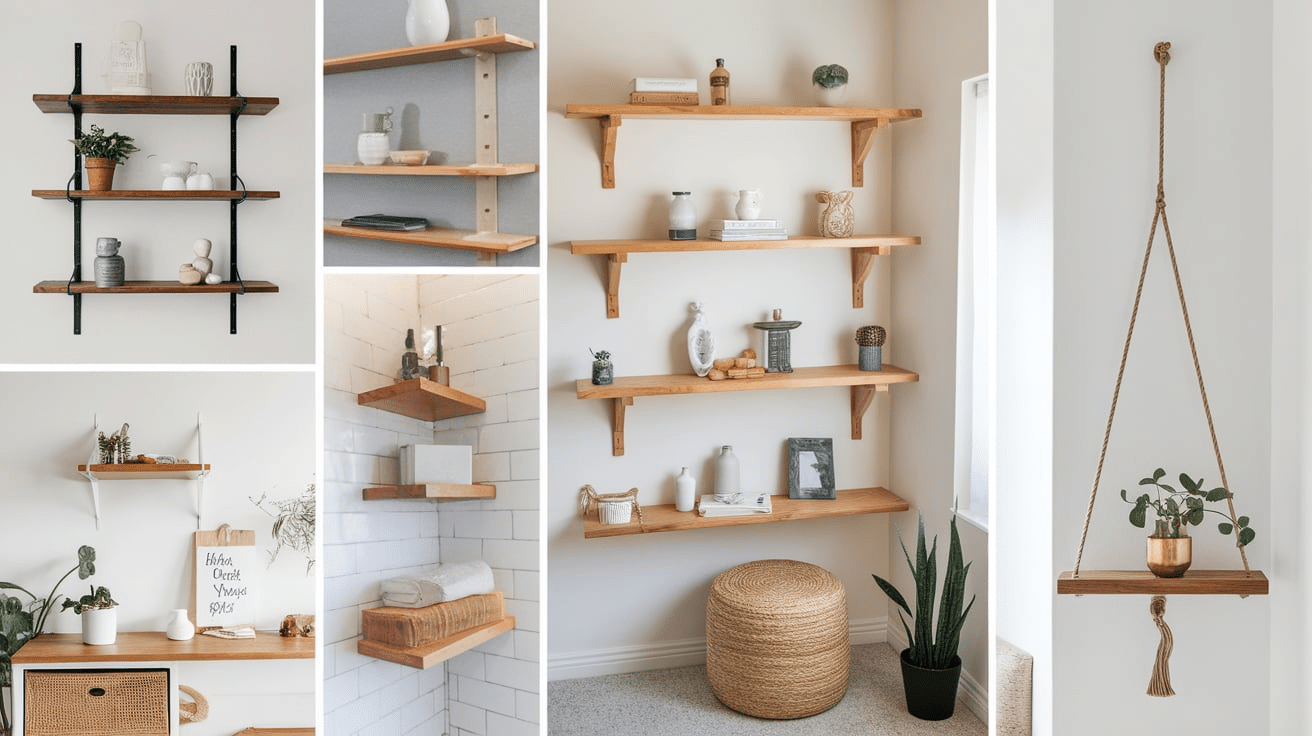
- Floating shelves: Sleek and modern, with hidden supports.
- Bracket shelves: Easy to install and great for beginners.
- Corner shelves: Perfect for small spaces or awkward corners.
- Hanging shelves: Use ropes or chains for a creative twist.
4. Choose Your Wood

The type of wood you use affects the look, strength, and price of your shelves. Decide if you want a natural wood look or if you plan to paint or stain the shelves. This will help you choose the right wood finish.
- Pine: Affordable and easy to work with—great for beginners.
- Poplar: Smooth and paint-friendly, but a bit pricier than pine.
- Oak: Strong and natural grain, but harder to cut.
- Reclaimed wood: Rustic and eco-friendly, but may need extra sanding.
5. Think About What You’ll Store
- Are these shelves for books, dishes, plants, or just small decorations?
- The weight and size of what you plan to put on your shelves will help you choose the right wood thickness and supports.
- Heavy items need thicker wood (at least 1 inch) and strong anchors or studs.
Taking the time to plan your DIY wood shelves makes a big difference. You’ll end up with shelves that are safe, strong, and exactly how you imagined them. Once you’ve got your plan in place, you’re ready to move on to building!
Step-by-Step Guide to Building Wood Shelves
This step-by-step guide will walk you through everything you need to do—from cutting the wood to hanging the shelves on the wall. Don’t worry if you’re new to DIY—take your time and follow each step.
Step 1: Gather Your Tools and Materials
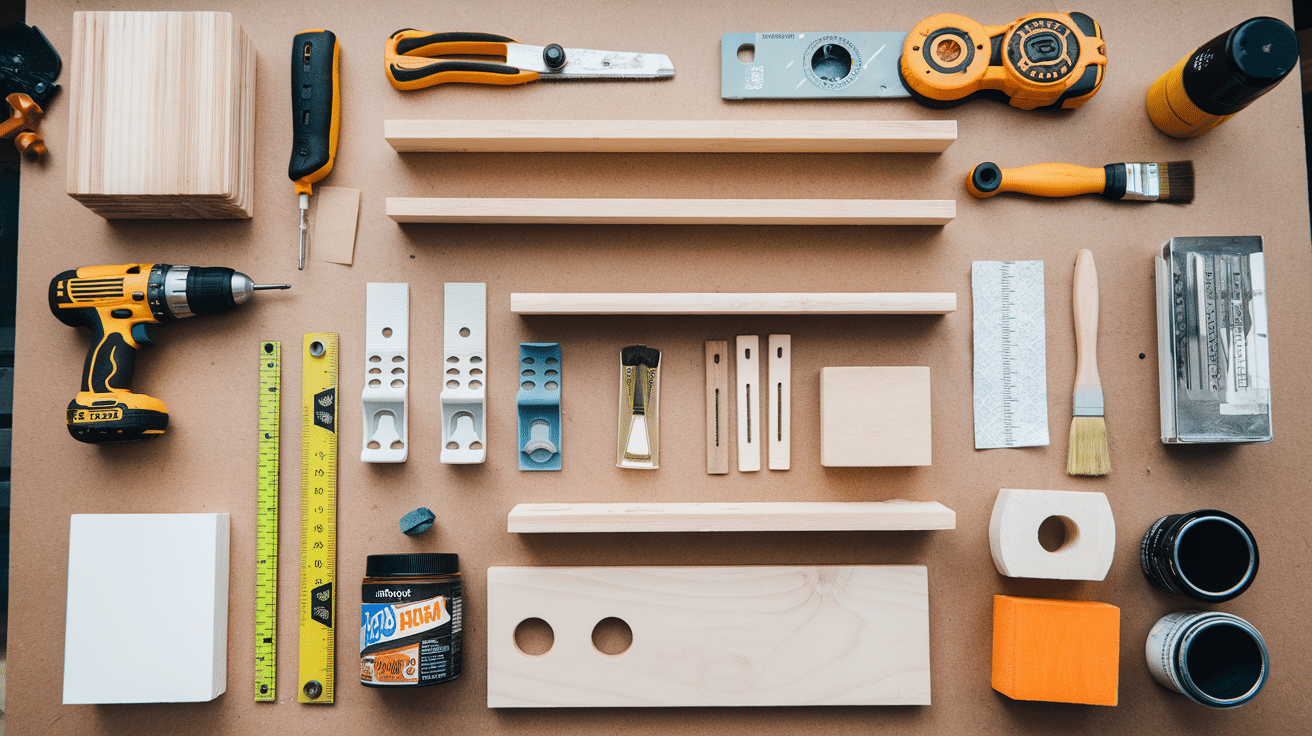
Here’s what you’ll need:
- Wood boards (cut to the length you want)
- Shelf brackets or mounting hardware (for floating shelves)
- Screws and wall anchors
- Drill and screwdriver
- Saw (if you need to cut your boards)
- Sandpaper or sanding block
- Measuring tape and pencil
- Level
- Stain or paint (optional)
- Paintbrush or rag
Step 2: Measure and Cut Your Wood
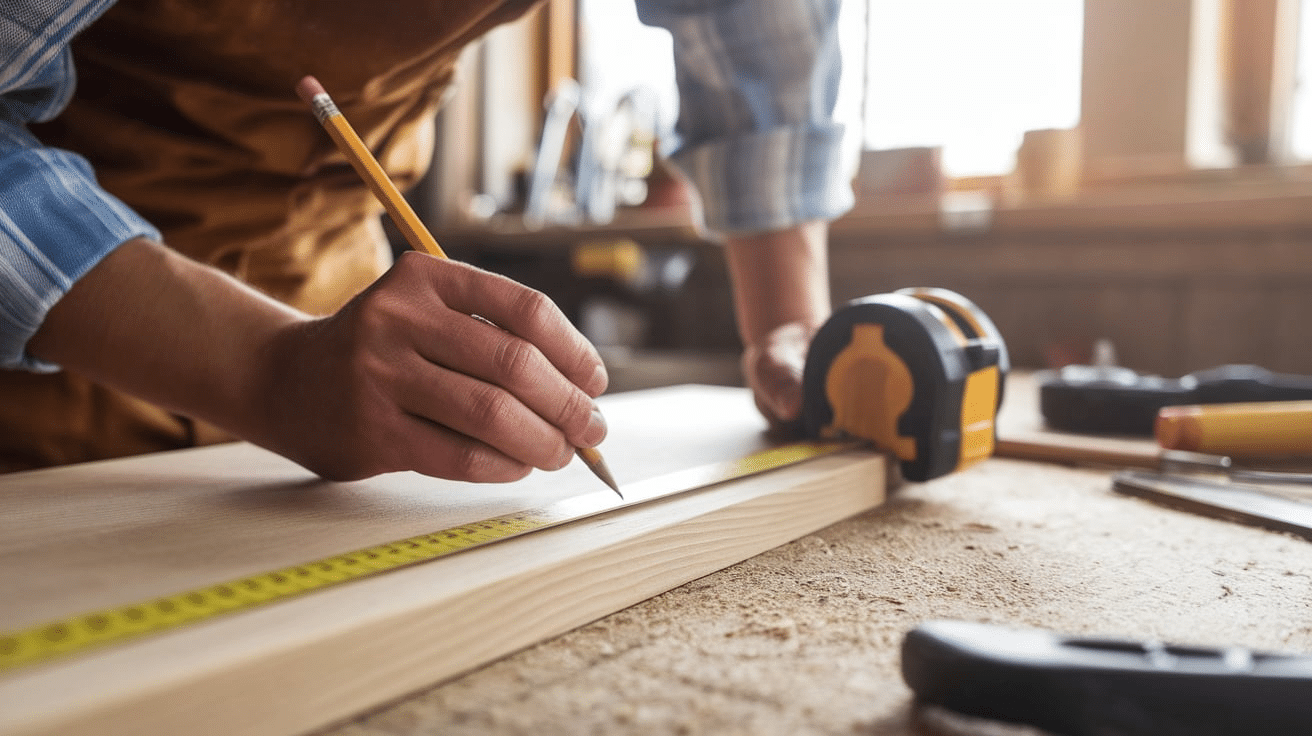
If your wood isn’t pre-cut, measure how long you want your shelves to be. Use a pencil to mark your cuts, and then carefully saw along the lines. Double-check your measurements before cutting—it’s better to measure twice and cut once.
Step 3: Sand the Wood
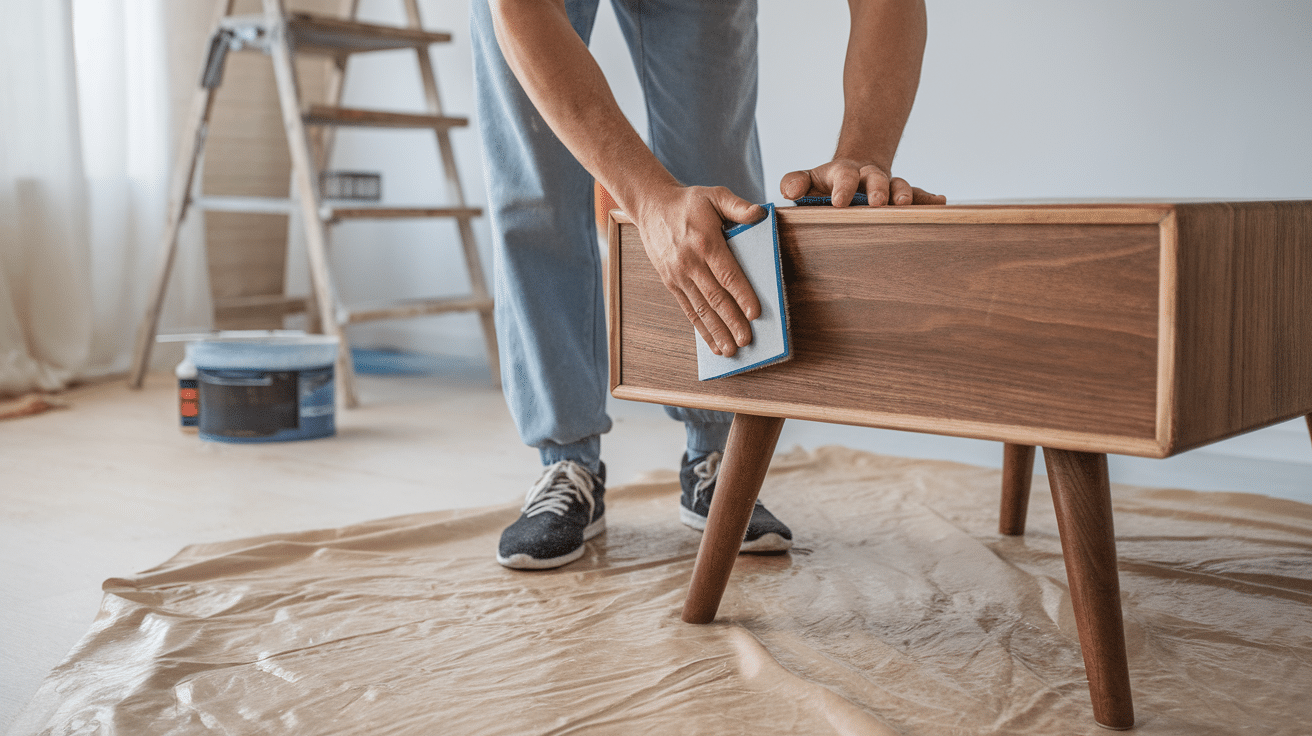
Use sandpaper or a sanding block to smooth out the edges and surface of your wood. This removes rough spots and splinters. Make sure to sand all sides, especially the edges. If you plan to stain or paint, sanding helps the finish go on smoothly.
Step 4: Stain or Paint (Optional)
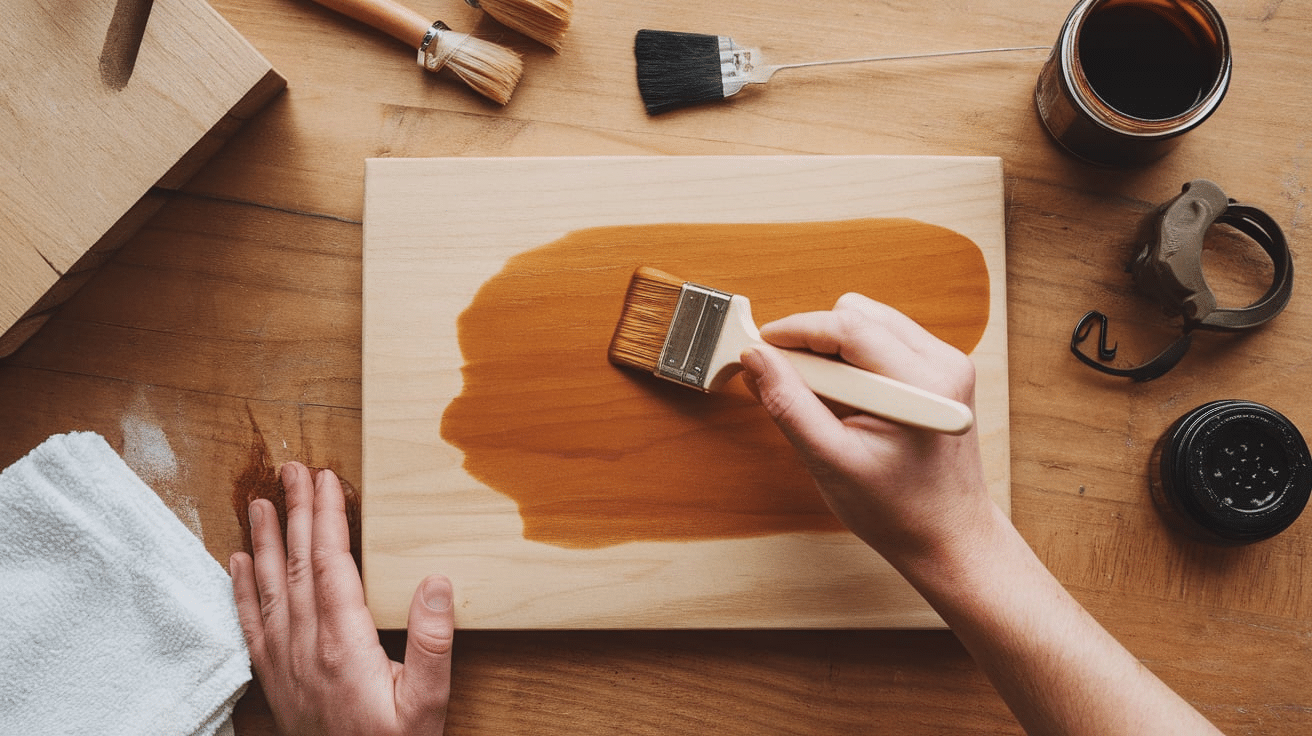
If you want to change the color of your shelves, now’s the time. Use a brush or rag to apply stain or paint. Let it dry completely before moving on. This step can make your shelves match your style—light wood looks modern, while dark stain gives a rustic feel.
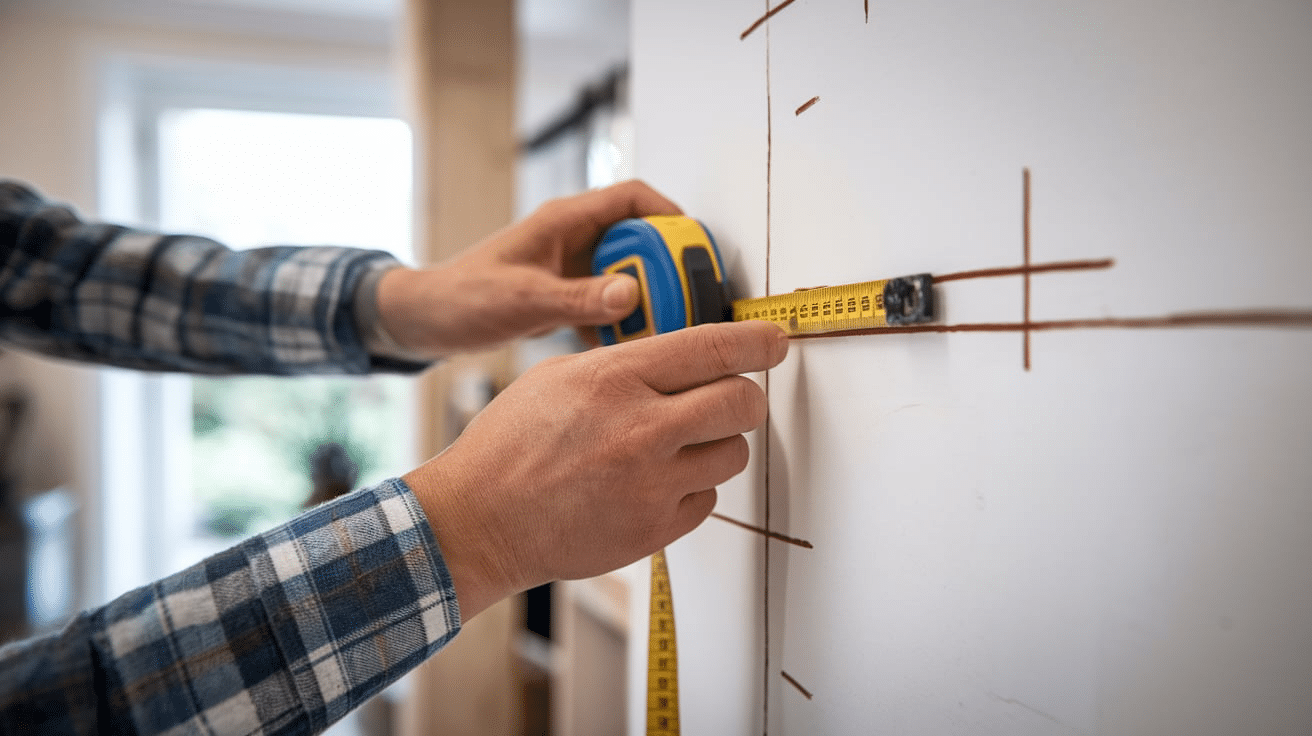
Step 5: Mark Where the Brackets Go
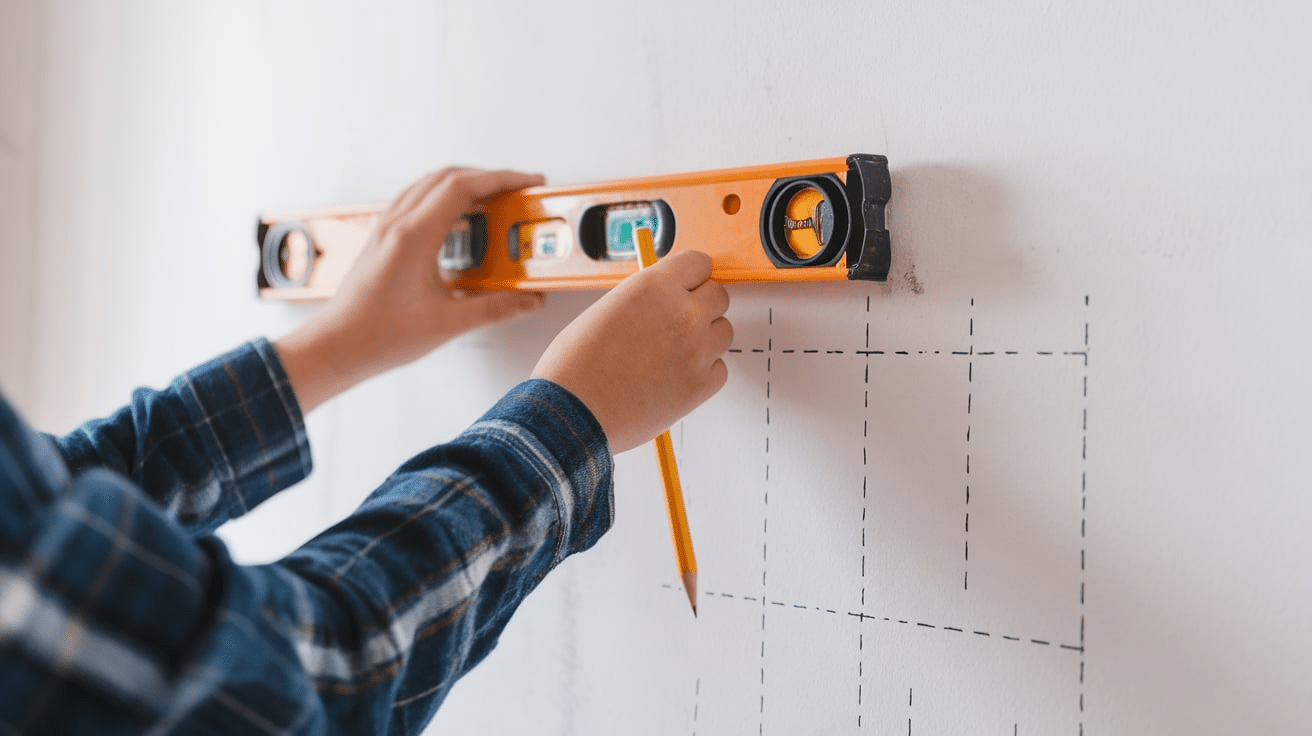
Hold your shelf up to the wall where you want it to hang. Use a level to make sure it’s straight. Then, use a pencil to mark where the brackets or screws will go. If you’re using brackets, mark the holes for the screws. Try to screw into wall studs for extra strength. If you can’t, use wall anchors so the shelves don’t pull out over time.
Step 6: Attach the Brackets or Supports
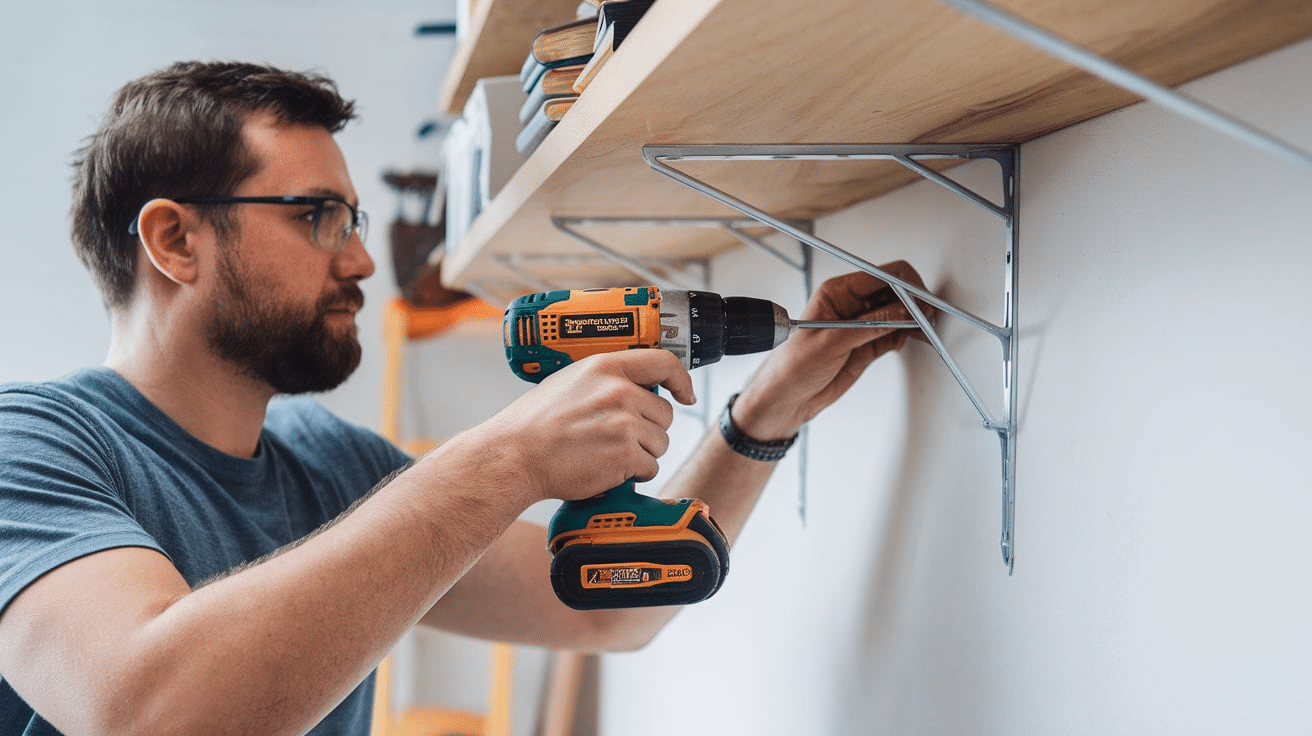
Use a drill to make pilot holes where you marked earlier. This helps the screws go in easier. Then screw the brackets into the wall. Make sure they’re tight and level.
This step will depend on the type of mounting hardware you’re using for floating shelves. Follow the instructions that come with your shelf brackets or floating mounts.
Step 7: Place the Shelf on the Brackets
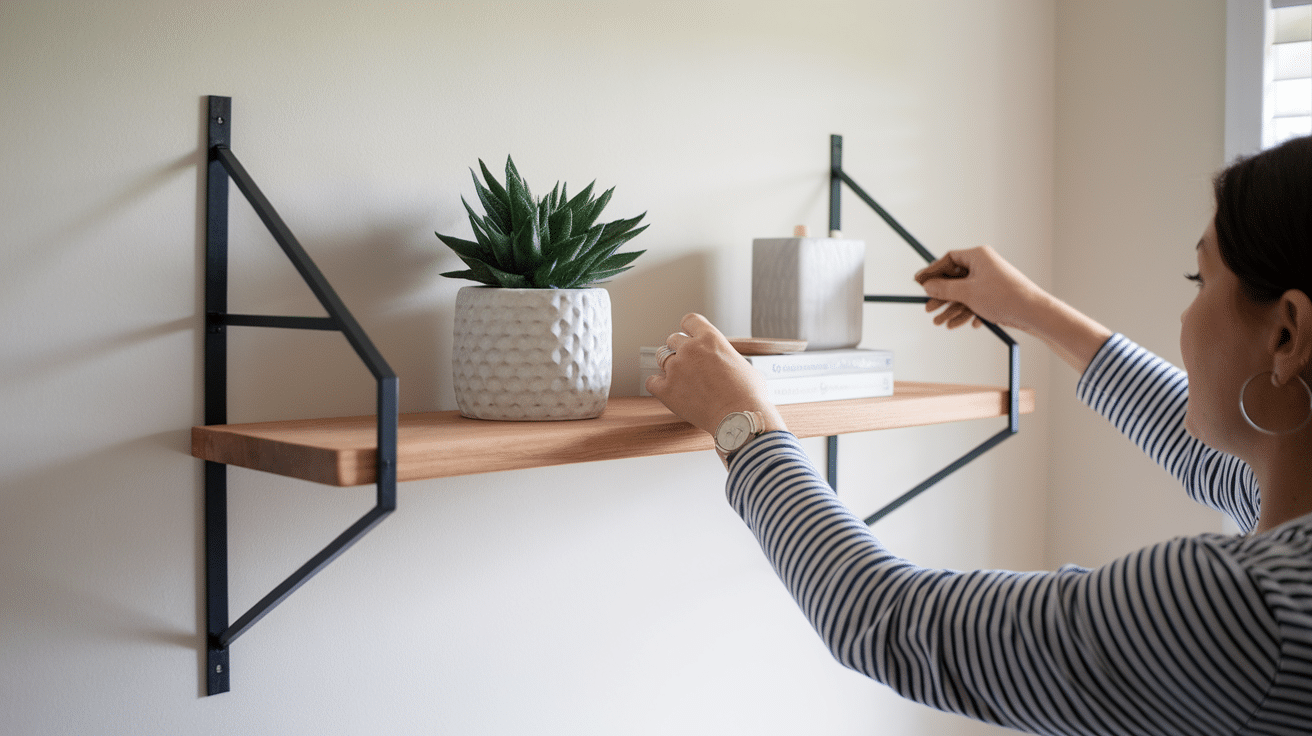
Once the brackets are on the wall, place your shelf on top. Make sure it’s centered and even. If needed, use your drill or screwdriver to attach the shelf to the brackets. Give it a little wiggle to make sure everything feels sturdy.
That’s it! You’ve built and installed your wood shelf. Now, you can decorate it with books, plants, candles, or whatever you like. Not only does it look great, but you made it yourself—how cool is that?
Building DIY wood shelves might seem tricky at first, but once you try it, you’ll see how simple and satisfying it is. Plus, now that you’ve got the hang of it, you can build more for other rooms in your home!
Creative DIY Wood Shelf Ideas
One of the best parts about building your own wood shelves is that you can get really creative with how they look and where you use them. Shelves aren’t just for storage—they can also be a fun way to decorate your home and show off your style.
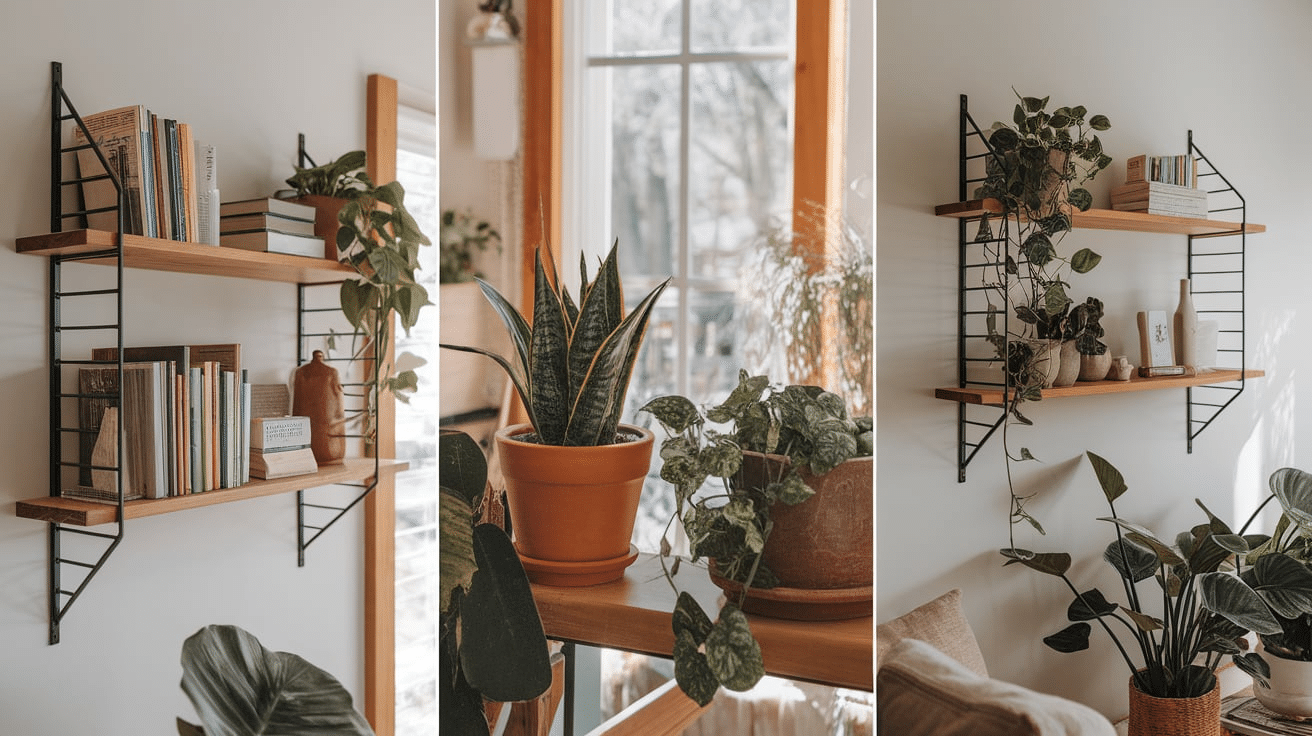
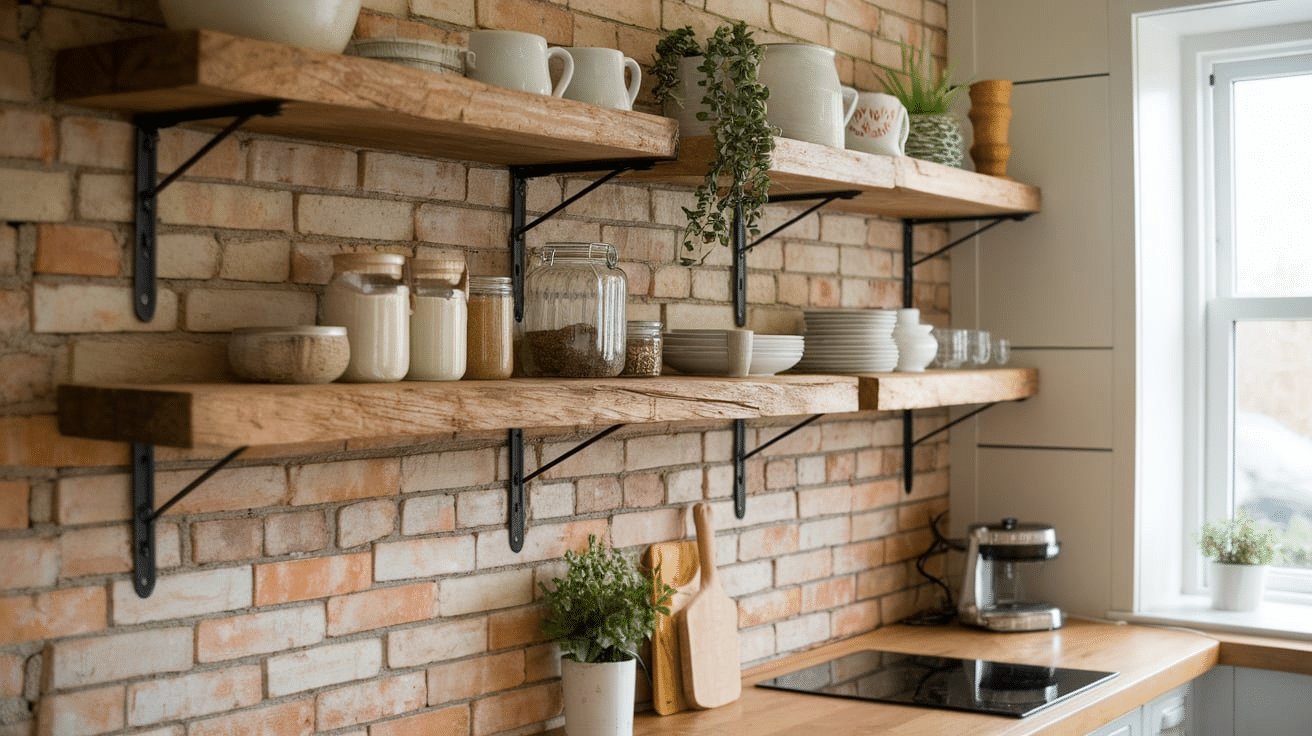
1. Floating Shelves
- Floating shelves are super popular because they look clean and modern. They’re called “floating” because the brackets are hidden inside the shelf, so they look like they’re just hanging on the wall with no support.
- These are great for living rooms, bedrooms, or even bathrooms. You can stack two or three in a row for a simple and stylish display.
2. Rustic Reclaimed Wood Shelves
- If you like a farmhouse or vintage style, try using reclaimed wood. You can find old wood from pallets, barns, or even scrap pieces.
- The wood might be a little rough or uneven, but that’s part of the charm. Sand it lightly and add a clear coat to show off the natural texture and grain.
3. Hanging Rope Shelves

- Want something totally different? Try making a rope shelf! All you need is a wood plank, some strong rope, and hooks for the ceiling or wall.
- Drill holes in each corner of the shelf and thread the rope through, then tie knots underneath to hold it in place. These look great in bedrooms or kid’s rooms.
4. Corner Shelves
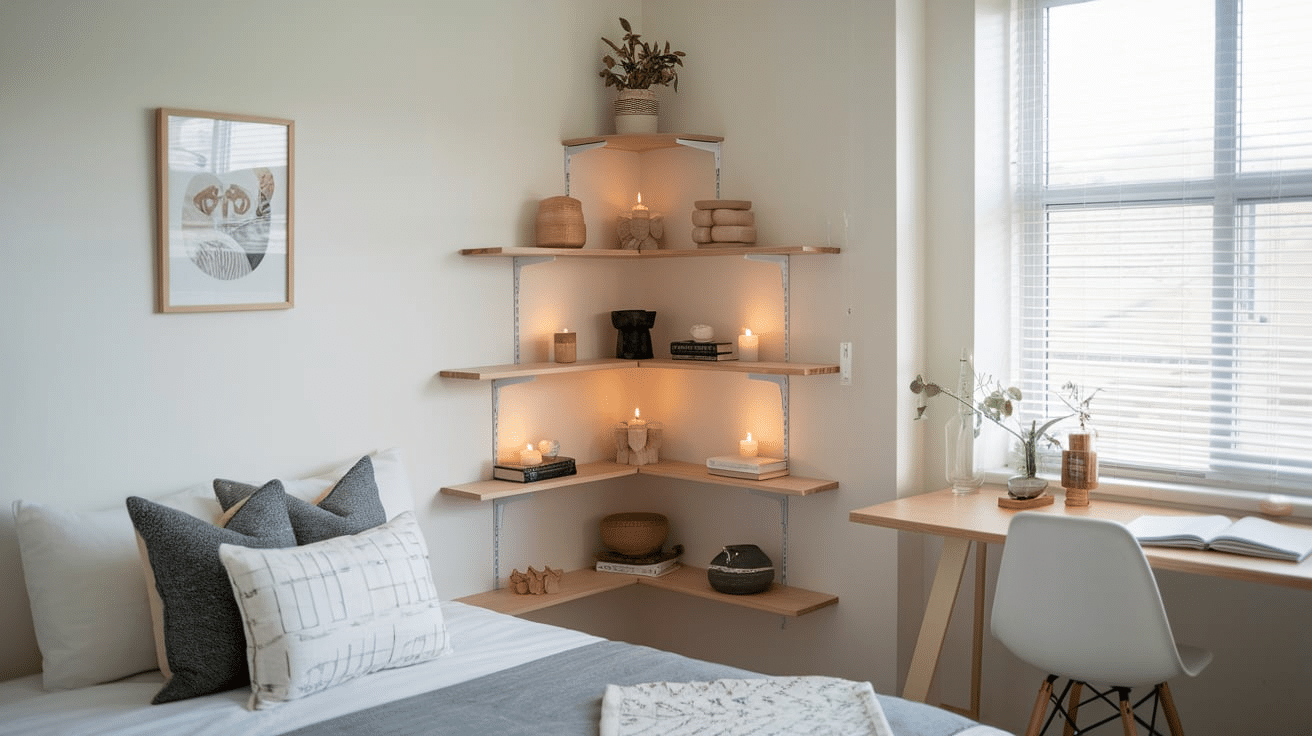
- Corners are often wasted space, but you can turn them into something useful with corner shelves. Cut two boards into triangles and mount them right into the corner of a room.
- They’re perfect for small spaces and can hold plants, candles, or small books.
5. Ladder Shelves
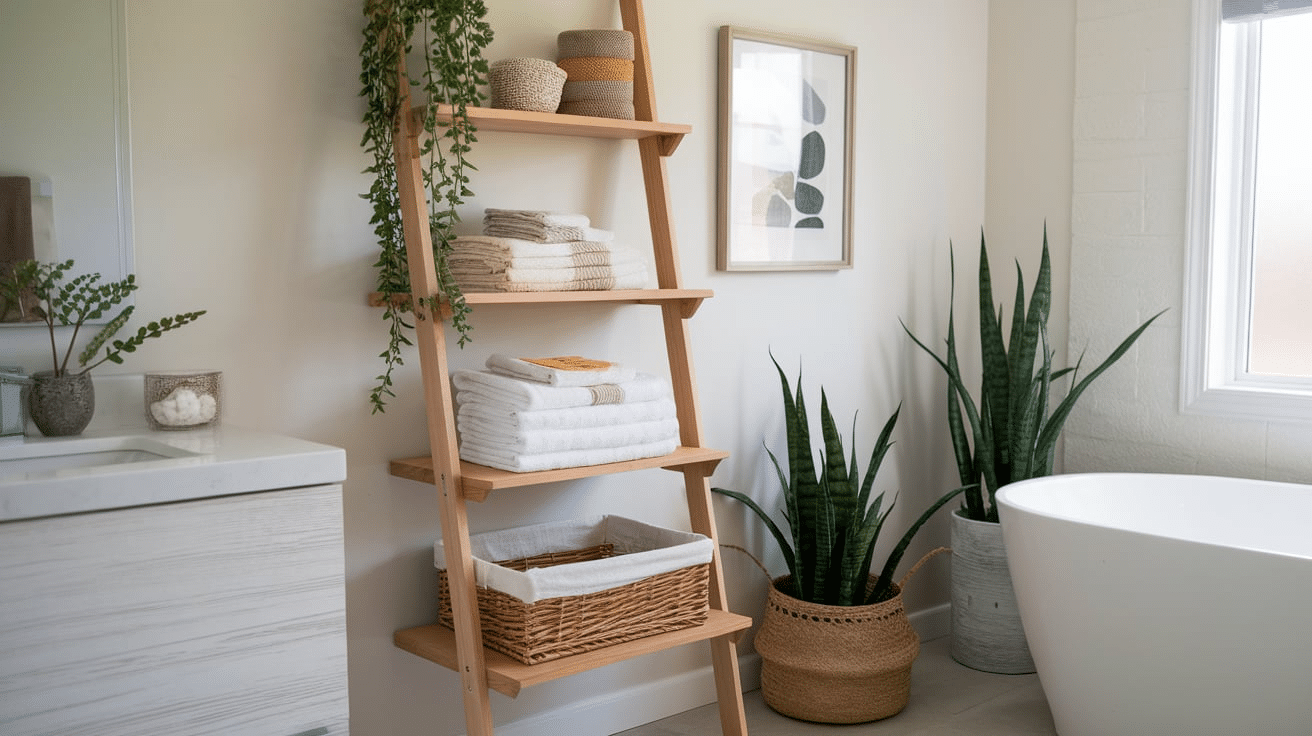
- This one’s a little more advanced, but super cool! Use two wooden ladders (or build your own ladder frame) and place shelves across the steps.
- It creates a tall, leaning shelf that looks great in living rooms or entryways. It’s stylish and holds a lot.
6. Crate Shelves
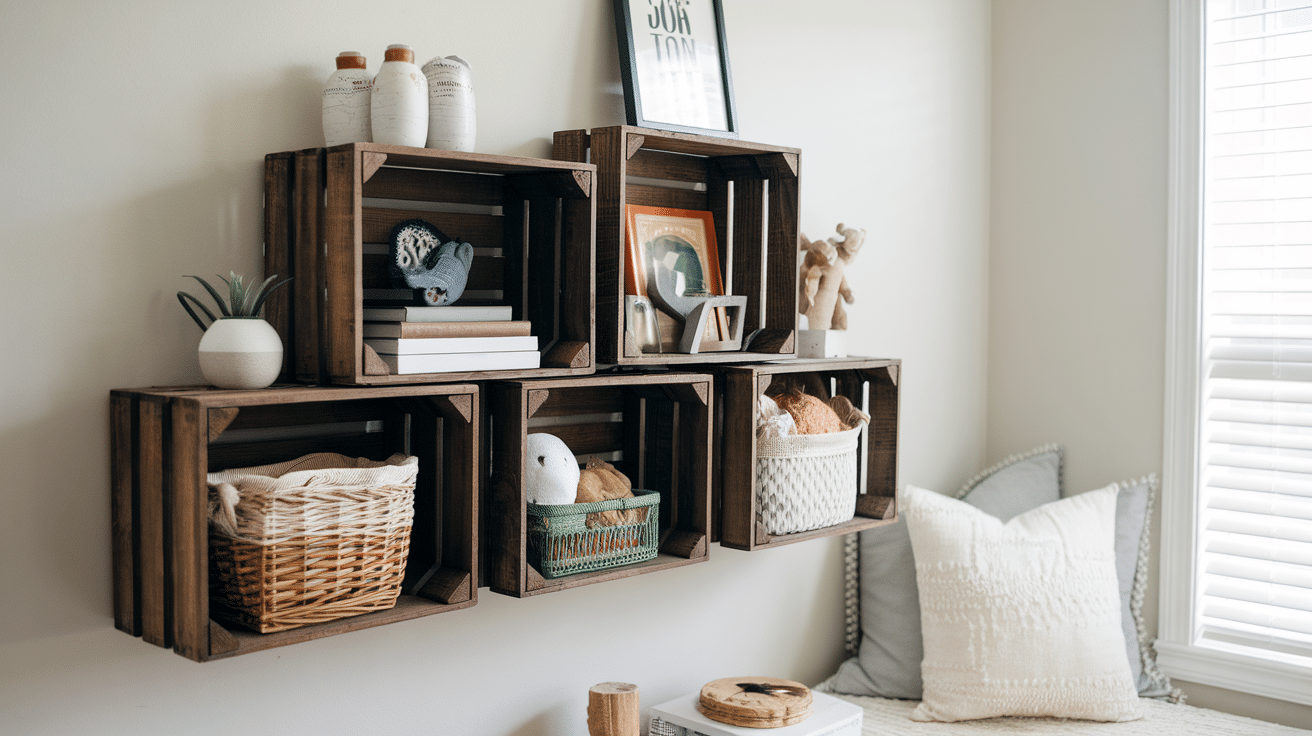
- Wooden crates can be turned into shelves in no time. Just sand and stain them, then stack or hang them on the wall. You can place one crate for a small shelf or arrange a few to make a bigger unit.
- It’s a fun way to add storage with a twist. You can even add wheels to the bottom for a portable storage option that looks great in any room.
7. Pipe and Wood Shelves
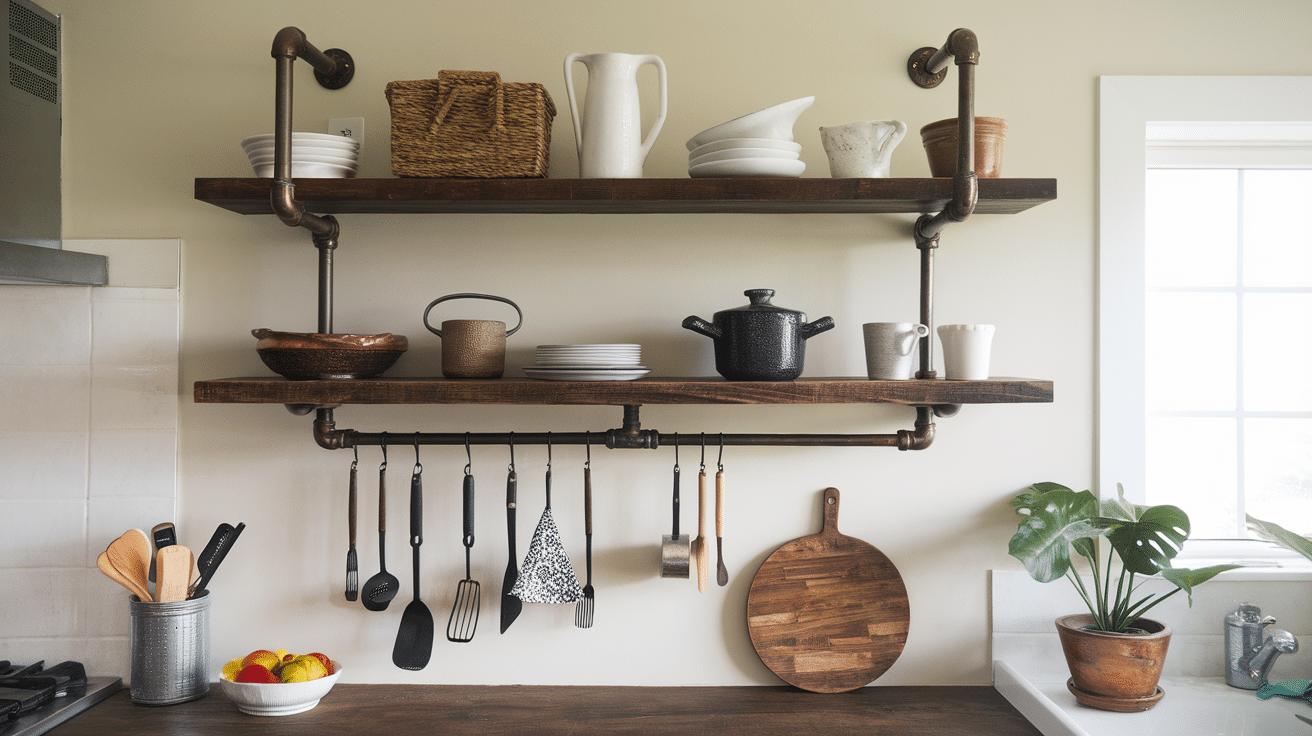
- For an industrial look, combine wood boards with metal pipes. The pipes act as brackets or supports, and the wood sits on top.
- This combo works well in kitchens, offices, or loft-style homes. It’s sturdy, stylish, and easy to customize. You can paint the pipes black or gold to match your room’s vibe and make the shelves stand out even more.
8. Bookshelves with a Twist
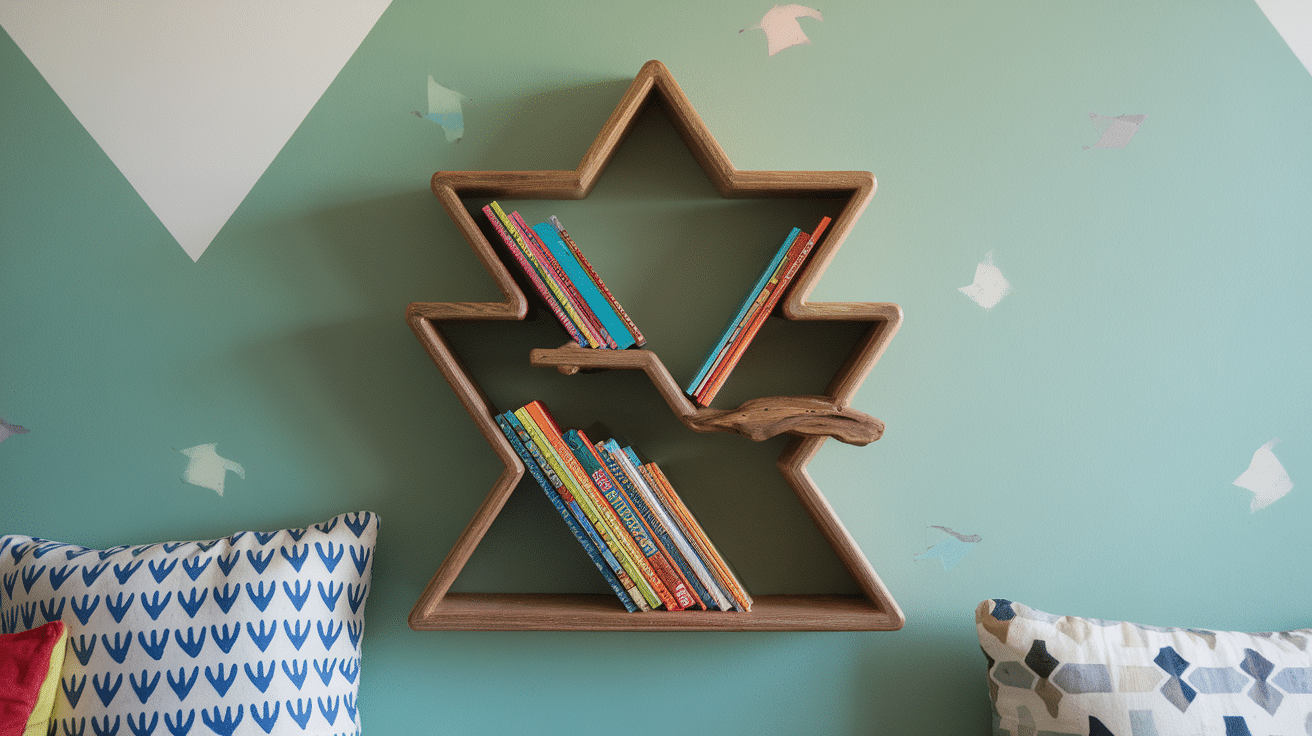
- Instead of a regular bookshelf, make a wood shelf shaped like a tree, a zigzag, or a stepped design. These creative shapes are fun to build and make your wall look like a piece of art.
- Use them in kids’ rooms, reading nooks, or home libraries. They’re not just shelves—they double as bold design pieces that make the room more playful and unique.
9. Picture Ledge Shelves
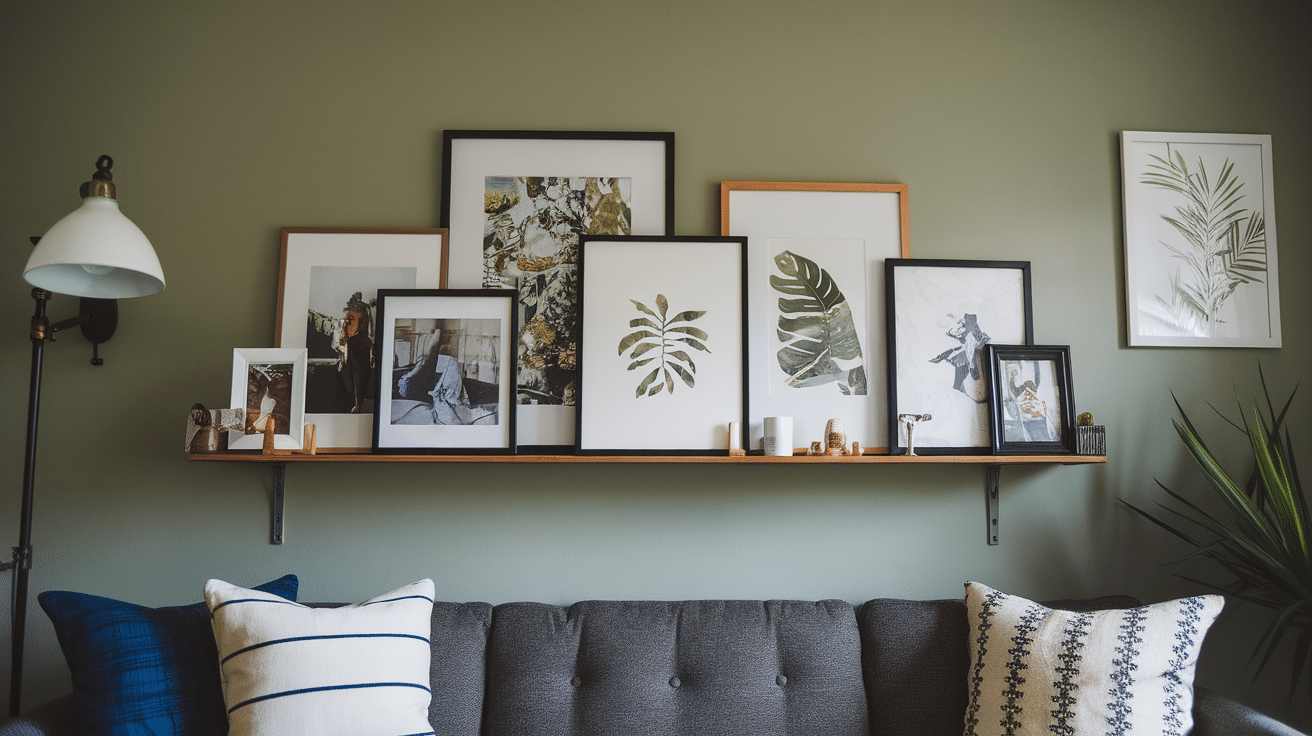
- Picture ledges are narrow shelves made to hold photo frames, artwork, or small books. They’re perfect for swapping out photos without drilling new holes.
- You can line them along a hallway or above a couch for an easy gallery wall. Add a thin lip to the edge to keep frames from sliding off and give the shelf a polished, finished look.
10. Painted or Patterned Shelves
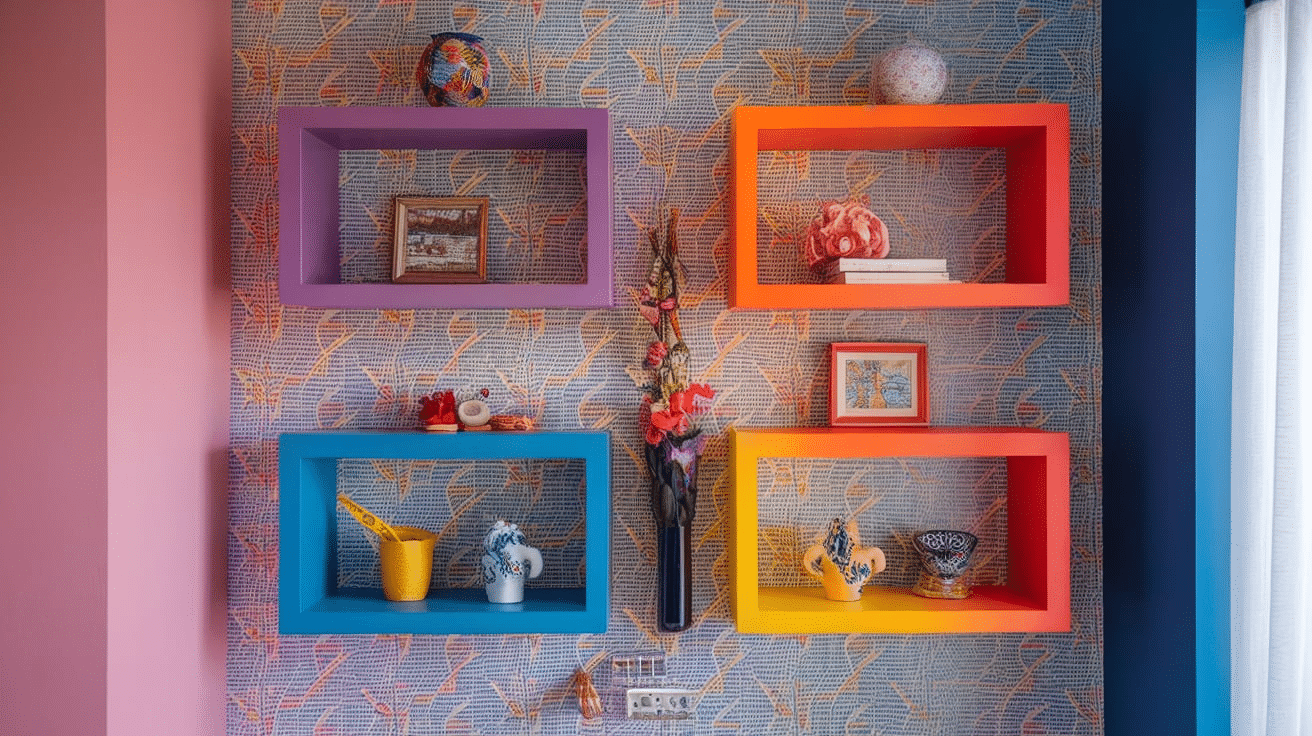
- Want to add a pop of color or a fun pattern? Try painting your shelves a bold color, or use stencils to add shapes or stripes. You can even line the back of the shelf with wallpaper or fabric for extra style.
- Painted shelves are an easy way to match your décor and add personality to any space, big or small.
DIY wood shelves don’t have to be boring. With a little creativity, you can turn simple boards into something creative and unique. Whether you go for rope, crates, ladders, or floating shelves, there’s a style that fits every room—and every budget. So pick your favorite idea and start building!
Helpful Tips for Building DIY Wood Shelves
Building your own shelves is a fun and rewarding project, but a few simple tips can make the process even easier and your results even better.
1. Always Measure Twice: Before you cut your wood or drill holes, double-check your measurements. It only takes a second, and it can save you from making a mistake that’s hard to fix later.
2. Use a Level: A level helps make sure your shelves are straight. Even if the shelf looks straight, it might not be. A small tool like this makes a big difference and keeps things from looking crooked once they’re on the wall.
3. Find the Wall Studs: When hanging heavy shelves, it’s best to screw into the wall studs for strong support. You can use a stud finder or gently tap the wall to find where they are. If you can’t hit a stud, use strong wall anchors instead.
4. Sand the Wood Well: Sanding helps smooth out rough spots and edges so you don’t get splinters. It also helps paint or stain go on evenly. Don’t skip this step—it makes your shelves look and feel better.
5. Pre-Drill Your Holes: Before putting in screws, drill small guide holes. This keeps the wood from splitting and helps the screws go in straight and smooth.
6. Choose the Right Screws: Use screws that are long enough to hold the shelf tightly but not so long they poke through the other side. If you’re using brackets, make sure the screws fit them properly.
7. Paint or Stain Before Installing: It’s way easier to paint or stain your wood before hanging it on the wall. That way, you can cover all the sides and edges without making a mess.
8. Start Simple: If this is your first DIY project, start with an easy shelf design like a basic bracket shelf or a small floating shelf. Once you get the hang of it, you can try more creative styles.
With these simple tips, your shelf project will be smoother, safer, and a lot more fun. Happy building!
Conclusion
DIY wood shelves are a great way to add both style and storage to your home. They’re simple to make, budget-friendly, and easy to customize for any space. Whether you’re looking to fill a blank wall, organize your things, or just try something creative, building your own shelves is a fun and rewarding project.
You don’t need fancy tools or a ton of experience—just a little time, some basic supplies, and a plan. From floating shelves to corner shelves, there are so many ideas you can try. Plus, you get the bonus of saying, “I made that!” every time someone notices them.
With the tips and steps we’ve shared, you’re all set to get started. So grab your tools, pick your favorite style, and start building shelves that fit your home and your style perfectly. You’ve got this—and your walls will thank you!
Frequently Asked Questions
Can I build shelves without brackets?
Yes! You can make floating shelves, which use hidden supports. These look clean and modern and don’t need visible brackets.
How long does it take to build shelves?
It depends on the style, but most shelves can be built in a few hours or a weekend if you’re new to DIY.
How much weight can my shelves hold?
It depends on the wood and how well the shelves are supported. Strong brackets or studs can hold heavier items like books or dishes.
Can I make shelves for corners?
Yes! Corner shelves are a great way to use unused space. Just cut your wood into triangles and mount them where two walls meet.