
I discovered mini pumpkin painting three years ago during a rainy October weekend.
Stuck indoors with my niece and a bag of tiny pumpkins from the farmers market, I’ve transformed our kitchen table into a makeshift art studio. What started as a simple way to pass the time has become my favorite fall tradition.
These little gourds are perfect blank canvases for creativity and won’t break the bank. For just a few dollars, you can create personalized seasonal decor that lasts for weeks.
In this guide, I’ll cover everything you need to know about painting mini pumpkins, from supplies and preparation to techniques and preservation.
Suppose you’re crafting with kids, looking for a relaxing solo project, or wanting to make custom decor for your home.
In that case, you’ll find simple, clear instructions for creating beautiful painted pumpkins that will impress everyone who visits your home this fall.
Supplies You’ll Need
Gathering your materials is the first step to creating beautiful mini pumpkins. I promise you don’t need fancy art supplies – many of these items might already be hiding in your craft drawer!
Basic Supplies
- Mini pumpkins (from grocery stores, farmers’ markets, or craft stores)
- Acrylic paints or chalk paint (both work great on pumpkin surfaces)
- Paintbrushes in various sizes (thin for details, thicker for coverage)
- Painter’s tape for creating clean lines or patterns
- A paint palette or paper plate to mix colors
- Clear sealer to protect your finished design
- Drop cloth or newspaper to protect your work surface
Got a creative streak? Try adding these optional items for extra flair:
- Adhesive stencils
- Glitter (fine or chunky)
- Decorative stickers
- Sponge brushes for textured effects
Remember—the pumpkins are the star of the show. Even with basic white paint and a black marker, you can create beautiful designs that will brighten up your home.
How to Paint Mini Pumpkins for Fall Decor?
I’ve painted dozens of mini pumpkins over the years and discovered some foolproof techniques. You’ll be surprised how easy it is to create beautiful decorations with just a few simple steps!
Step 1: Prepare Your Pumpkins
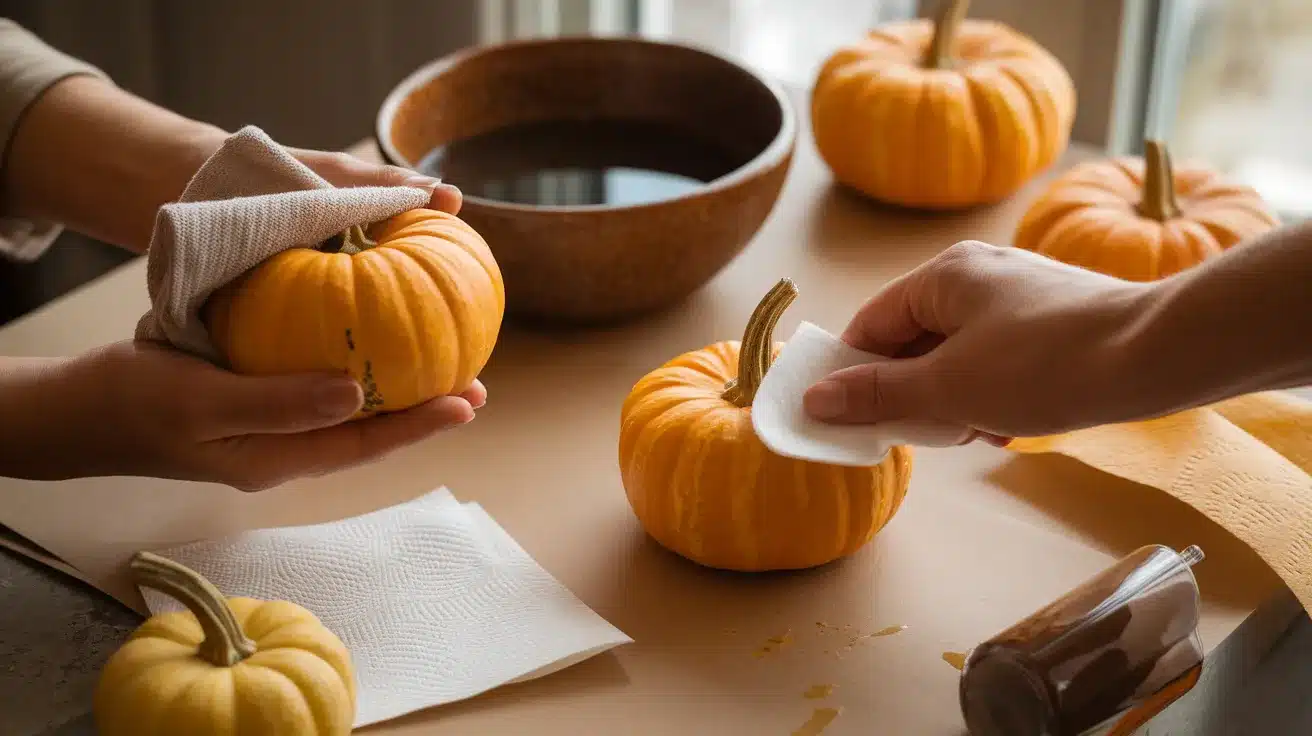
Clean your mini pumpkins with a damp cloth to remove any dirt. Let them dry completely. For the best paint adhesion, I like to wipe mine with a bit of rubbing alcohol.
This removes any natural oils that might prevent the paint from sticking well. If you’re using faux pumpkins, you can skip the alcohol step.
Step 2: Apply a Base Coat
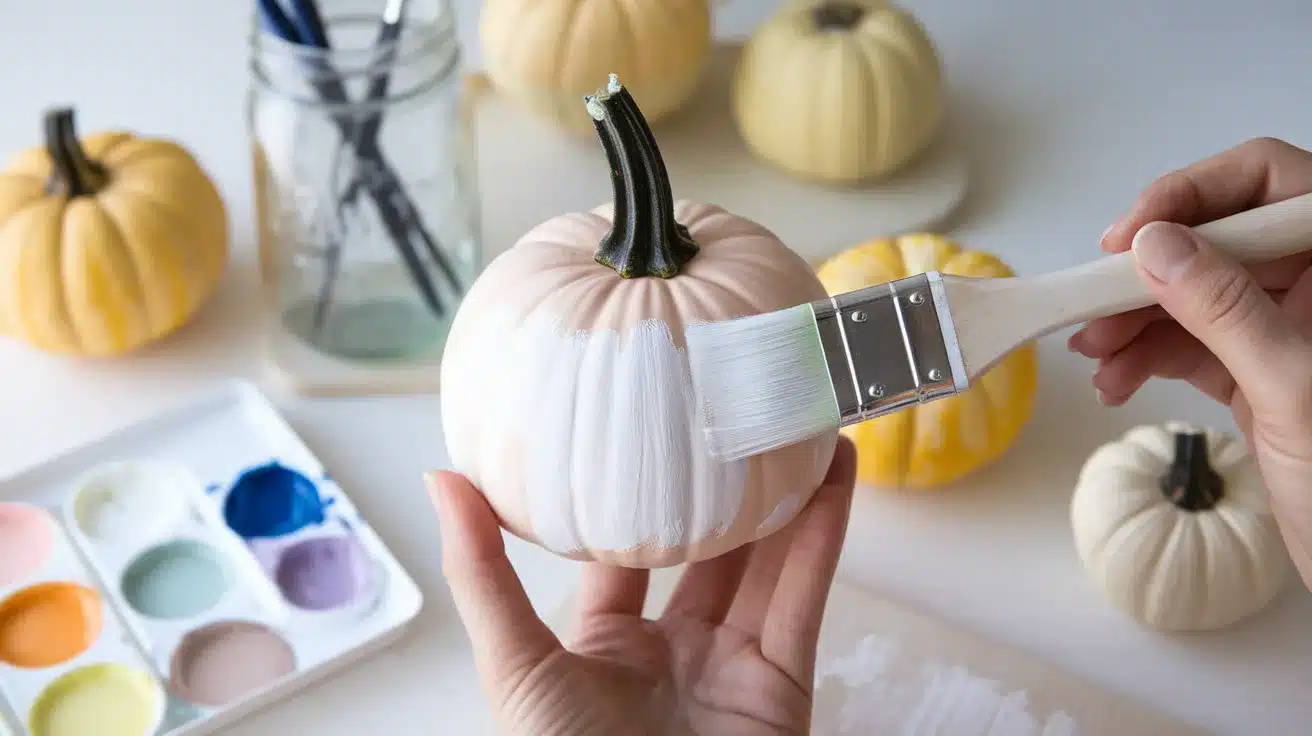
Start with a base coat of paint in your chosen color. White creates a bright canvas for other colors, while darker bases create a more dramatic look.
Hold the pumpkin by the stem and paint from top to bottom. Don’t worry about painting the bottom – nobody will see it! Let this first coat dry completely before adding a second layer for better coverage.
Step 3: Add Your Design

Now for the fun part! Once your base coat is dry, you can start adding your design. Use painter’s tape to create clean lines for stripes or geometric patterns.
For polka dots, dip the end of a paintbrush handle in paint. Feeling artistic? Try simple leaf patterns or swirls with a thin brush. Less is often more when decorating these small canvases.
Step 4: Add Details and Texture

After your main design dries, add special touches to make your pumpkins pop. Try dabbing gold paint on the ridges for a gilded effect.
Outline patterns with metallic markers. Sponge on a contrasting color for a textured look. I sometimes add small rhinestones or glitter to the stem for extra sparkle.
Step 5: Seal Your Creation
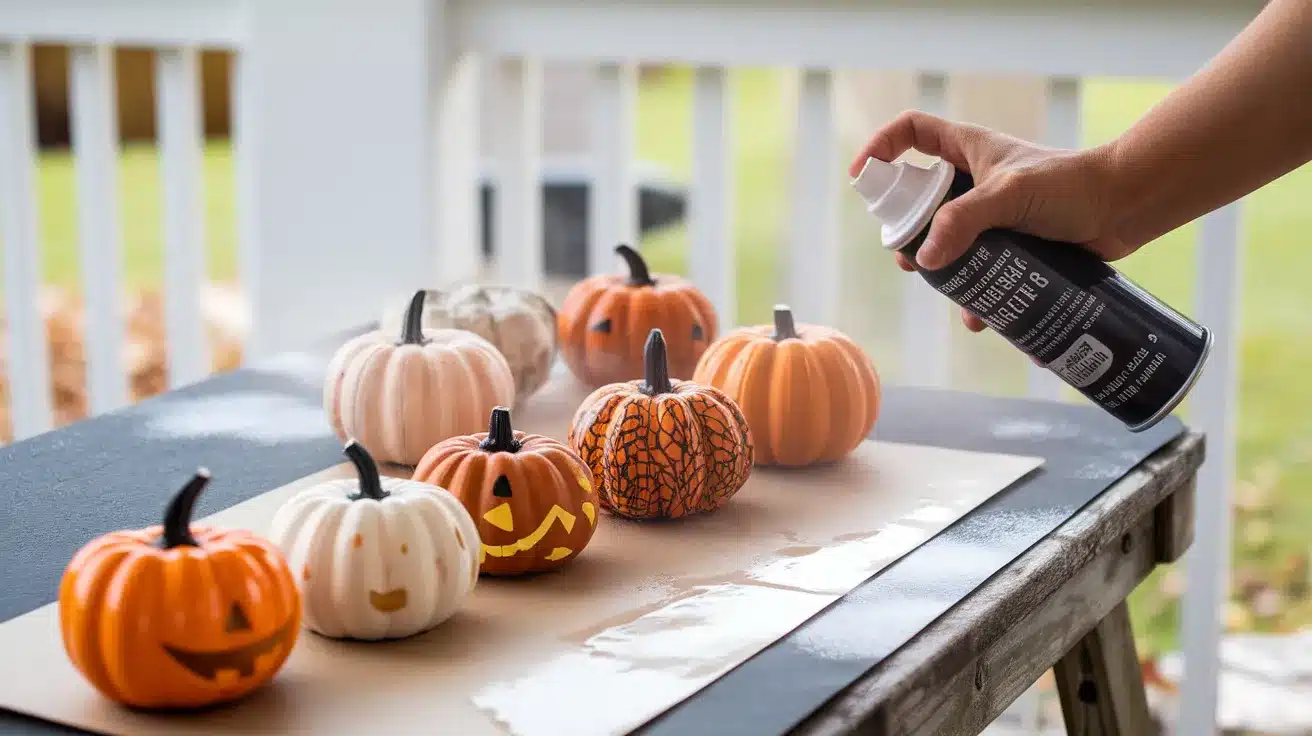
Once all the paint is completely dry, spray or brush on a clear sealer. This protects your design and makes real pumpkins last longer.
Apply the sealer outdoors or in a well-ventilated area. One thin coat usually does the trick. Let your pumpkins dry overnight before displaying them in your home.
Easy Tips for Painting Mini Pumpkins at Home
After years of painting mini pumpkins, I’ve learned some tricks that make the process smoother and more enjoyable. These simple tips will help you avoid common mistakes and create pumpkins you’ll be proud to display!
1. Choose the Right Pumpkins
Look for mini pumpkins with smooth, unblemished surfaces. I prefer ones with interesting stems – they add character to your finished piece!
Green pumpkins work just as well as orange ones and can create a unique look. When selecting faux pumpkins, foam versions tend to hold paint better than plastic ones.
2. Prep Your Space Properly
Set up your painting area near natural light if possible. I like to work by a window during daylight hours. Cover your workspace with old newspapers or a plastic tablecloth – paint splatters are inevitable!
Keep a cup of water nearby for rinsing brushes, and paper towels for quick cleanups. Wearing an apron or old clothes will save you from paint stains.
3. Build Up Colors Gradually
Patience creates better results! Apply thin layers of paint rather than globbing it on thick. Let each layer dry completely before adding the next one.
This prevents cracking and peeling. I’ve found that two to three thin coats look much better than one thick coat. For a unique effect, try dry-brushing techniques, where you use very little paint on your brush to create texture.
4. Fix Mistakes Easily
Made a mistake? Don’t panic! If the paint is still wet, quickly wipe it away with a damp paper towel. For dry paint errors, you can cover them with another color or incorporate them into your design.
Sometimes, the best designs come from happy accidents. White paint is especially useful for covering mistakes on darker backgrounds.
5. Display Them Creatively
Arrange your finished pumpkins in odd-numbered groupings (3, 5, or 7) for the best visual impact. Try placing them at varying heights using small cake stands or books.
I love creating a “pumpkin path” down the center of my dining table or clustering them on my mantel with fairy lights weaved between them. Remember that real painted pumpkins will eventually decay, so enjoy them while they last!
Fun Themes for Painting Mini Pumpkins This Fall
Looking for inspiration? I’ve collected some of my favorite mini pumpkin painting themes that always turn out beautifully. You don’t need advanced skills to try these ideas – just have fun with the process!
1. Galaxy Pumpkins
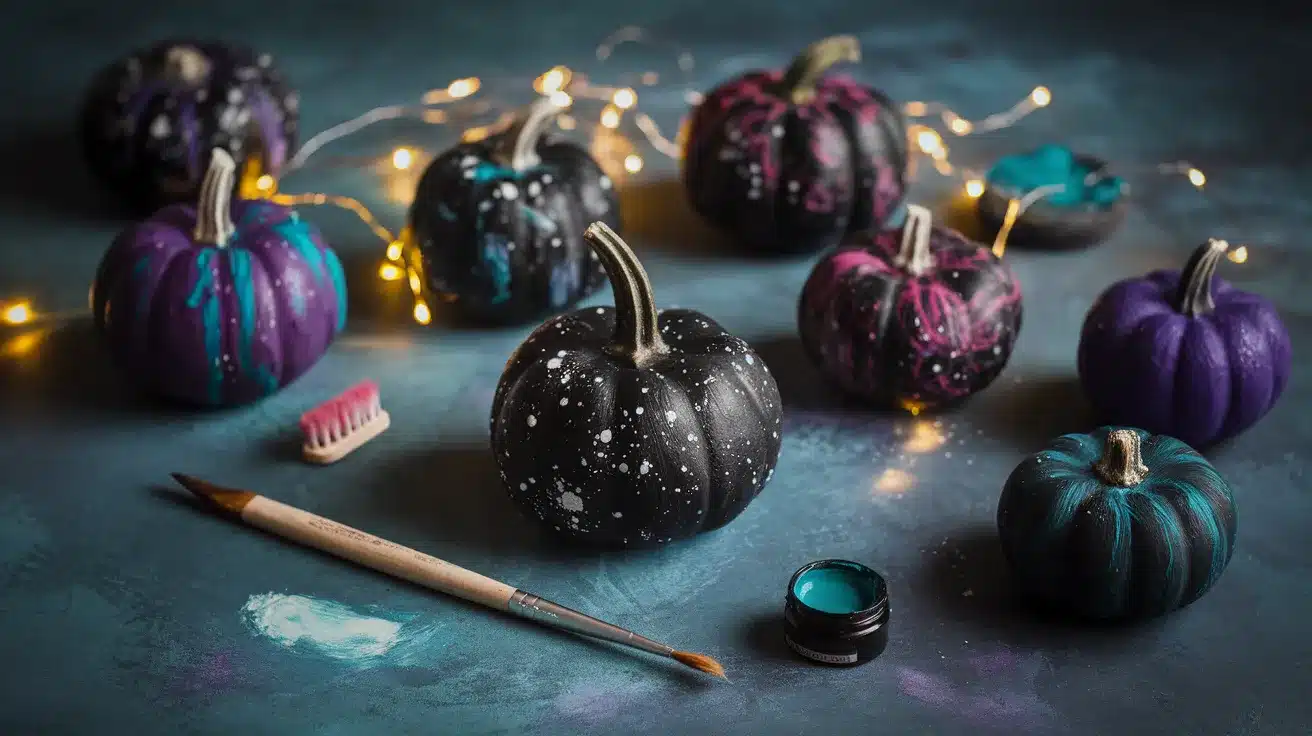
Create a stunning cosmic look with deep blue, purple, and black base coats. Once dry, splatter white paint using an old toothbrush for stars. Add swirls of pink or teal for nebulae effects.
The random nature of galaxy painting makes this perfect for beginners! I like to add a final touch of metallic silver paint for extra sparkle. These look magical when displayed with string lights.
2. Farmhouse Style
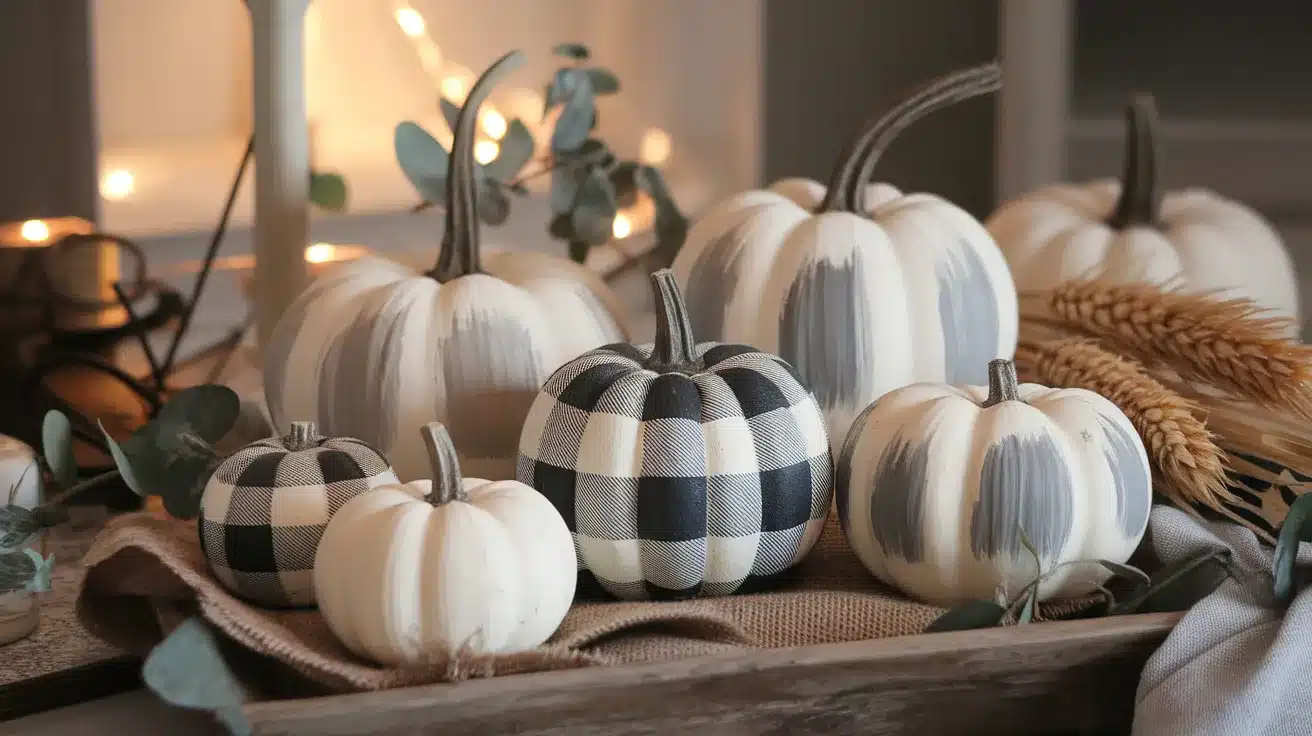
Nothing says cozy fall like farmhouse-inspired pumpkins. Start with a white or cream base coat. Once dry, add simple black buffalo check patterns or thin stripes.
For a weathered look, lightly sand the edges after the paint dries. You can also use a dry brush technique with gray paint to create a distressed finish. These neutral pumpkins blend perfectly with almost any home decor.
3. Halloween Characters
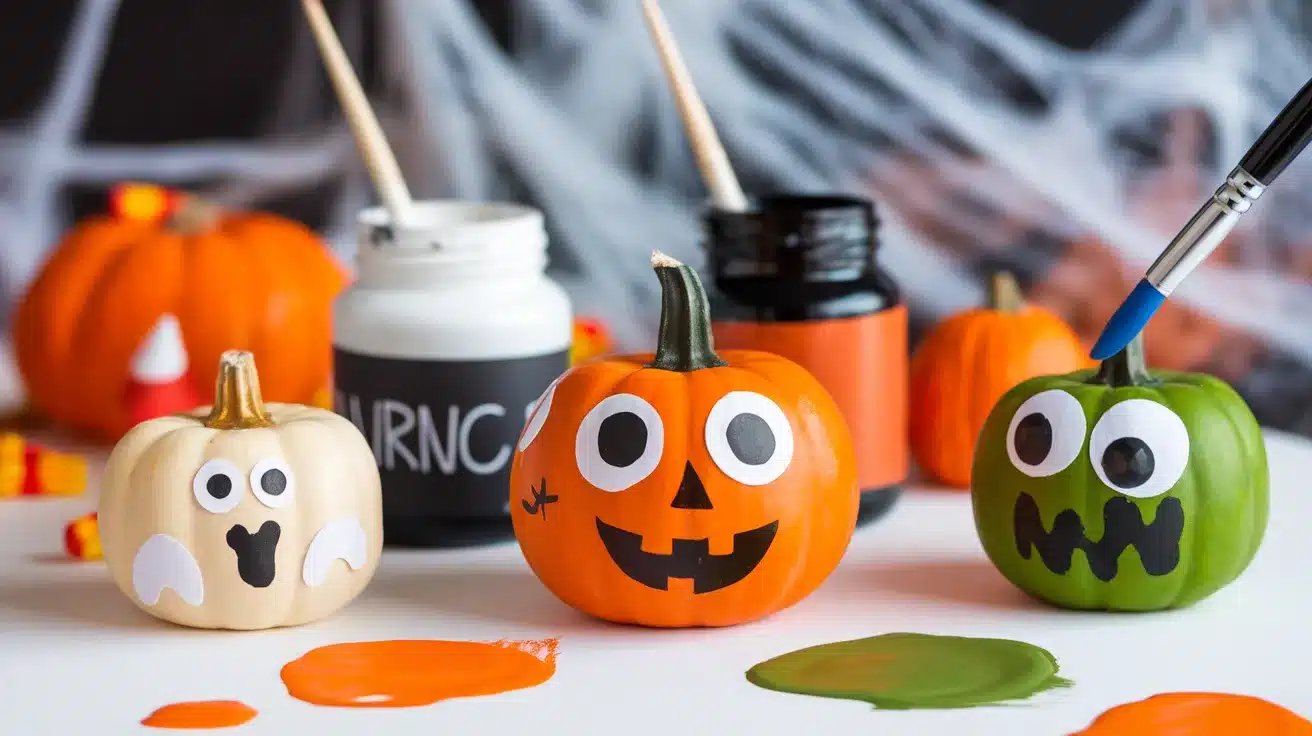
Transform your mini pumpkins into cute characters without carving! Paint the entire pumpkin orange, black, white, or green as your base. Then, add simple facial features with contrasting colors.
Try friendly ghosts, silly monsters, or classic jack-o’-lantern faces. I find that using the natural ridges of the pumpkin can guide your design. These are especially fun to create with kids who can design their own pumpkin personalities.
4. Metallic Beauty
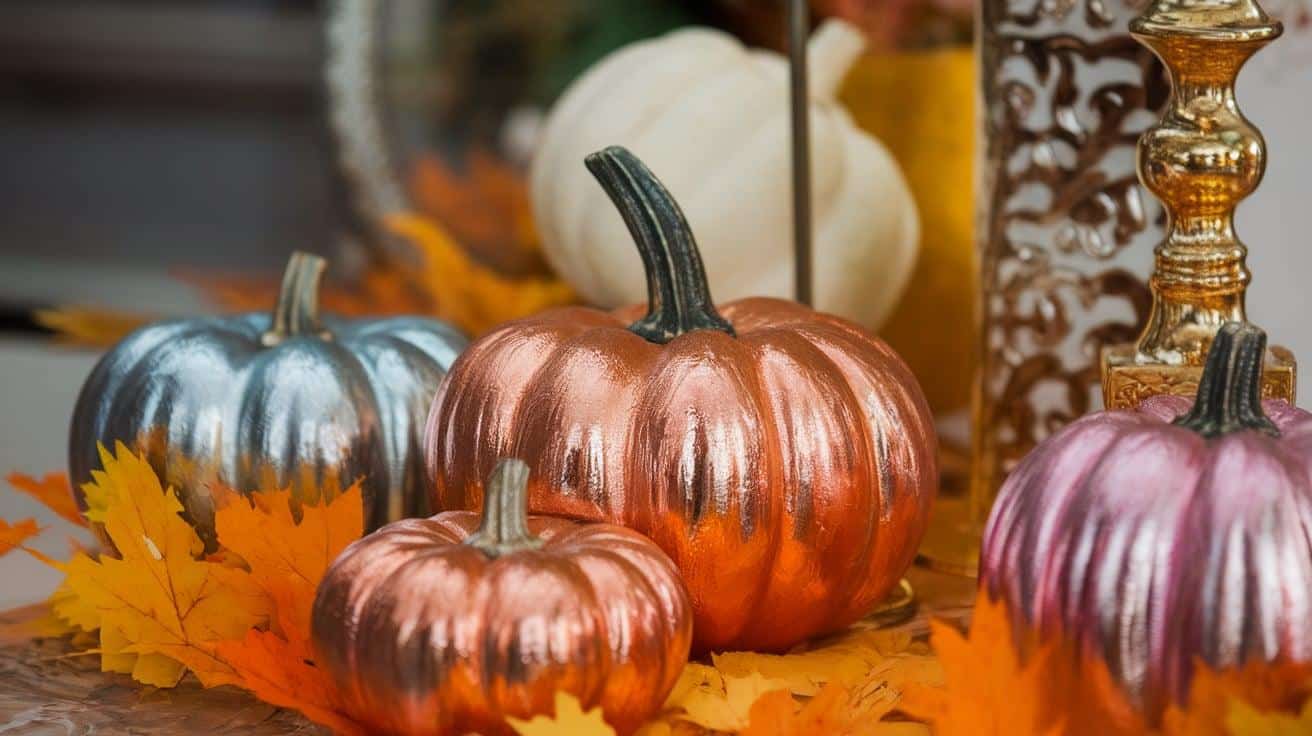
For a more sophisticated look, try painting your pumpkins with metallic paints. Gold, silver, copper, and rose gold create instant glamour with minimal effort.
The pumpkin’s natural texture looks stunning with metallic finishes. Try color blocking by painting half in one metallic shade and half in another. These elegant pumpkins work beautifully for Thanksgiving displays or year-round decor.
5. Nature-Inspired
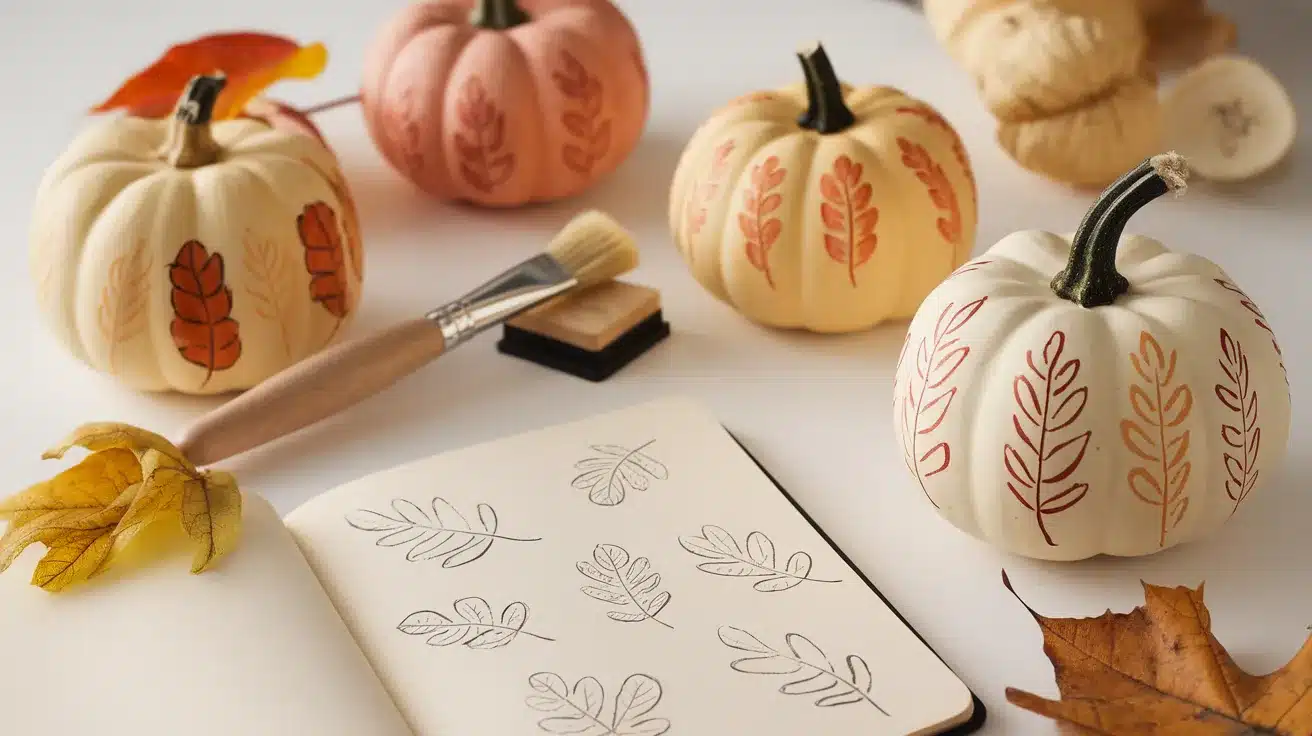
Celebrate fall’s natural beauty by painting leaves, branches, or floral designs. Use a light tan or white base coat, then add simple leaf outlines in autumn colors.
Don’t worry about perfection – loose, sketch-like designs often look more artistic! Another option is to press real leaves into paint and then onto your pumpkin for a stamped effect. These nature-themed pumpkins bring a peaceful, organic element to your seasonal decorations.
Conclusion
You don’t need to be an artist to create beautiful painted mini pumpkins. I’ve seen amazing results from friends who claim they “can’t draw a straight line.” The beauty of this project is in its simplicity and personal touch.
Once finished, arrange your painted pumpkins in groups on your coffee table, line them up on window sills, or create a stunning centerpiece by placing them among fall leaves and tea lights. They make perfect little gifts for neighbors and friends too!
I’d love to see what you create! Drop a photo in the comments section below, or ask any questions if you get stuck along the way.
As the evenings grow cooler, there’s nothing quite like sipping hot apple cider surrounded by your handmade decorations.
The warm glow of candlelight reflecting off your painted pumpkins creates that perfect cozy fall atmosphere we all crave this time of year.