
Have you ever opened your under-sink cabinet only to have cleaning supplies tumble out? You’re not alone. This space often becomes a chaotic black hole where items disappear, never to be found again.
In this article, I’ll show you simple DIY storage solutions that transform this awkward space into an organized dream. These projects use materials you probably already have at home or can get cheaply.
I’ve tested each solution in my small kitchen, where the pipes made storage seem impossible. Trust me, if they work in my cramped space, they’ll work in yours too.
Whether you’re renting and need non-permanent fixes or own your home and want something more substantial, you’ll find options that fit your needs, skill level, and budget.
Say goodbye to the under-sink chaos – let’s get organizing!
Take Everything Out First
Before you grab any tools, empty that cabinet completely. I know it seems obvious, but trust me – this step matters.
Pull everything out and place it on your kitchen floor or counter—every single item. That half-empty bottle of dish soap? Out it comes. Those random sponges? They’re there, too.
Why bother with this mess?
Because you need to:
- See exactly what you’re storing
- Measure your actual space accurately
- Check for any leaks or water damage
- Sort what you actually need versus what’s just taking up space
I once skipped this step and built a perfect organizer that wouldn’t fit around my pipes. Please don’t make my mistake!
While everything’s out, wipe down the interior. Cabinets under sinks often have spills or moisture we don’t notice.
This clean-slate approach gives you the true picture of your situation. Now, you can plan smarter storage that actually fits your needs and your space.
Measure the Space (And Watch for Pipes!)
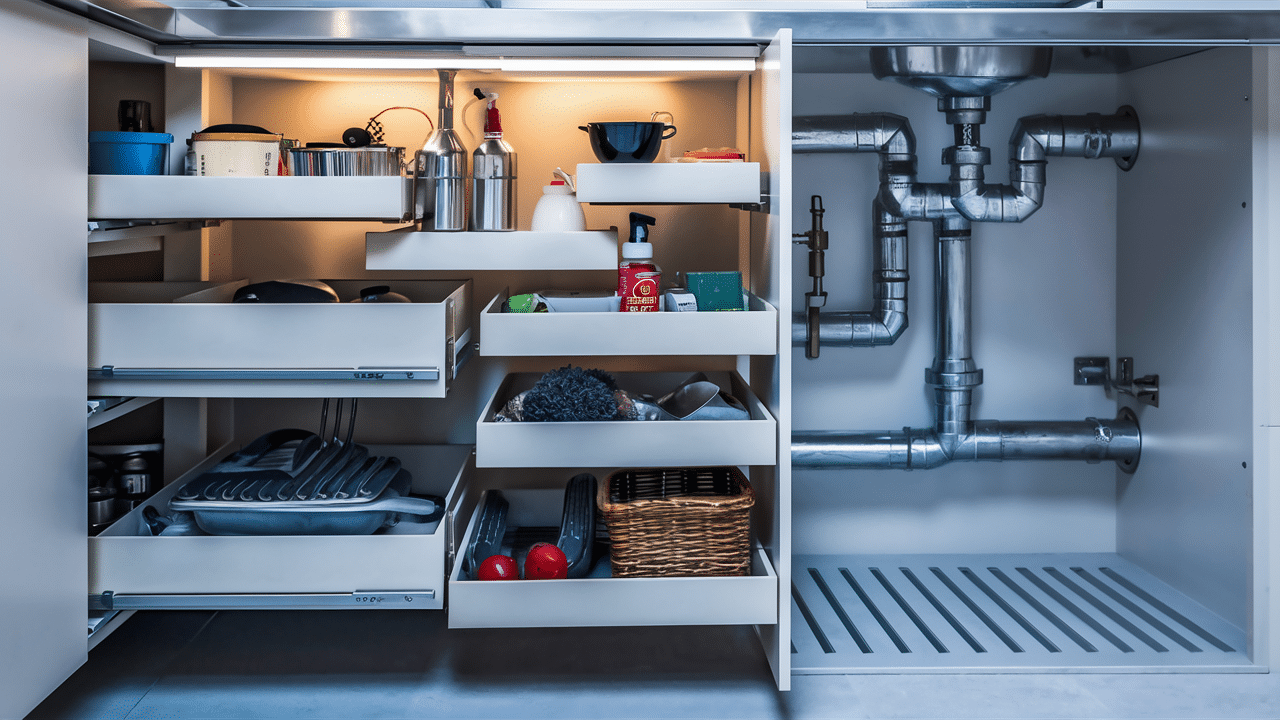
Grab your measuring tape – this step can make or break your project. You need accurate measurements of your under-sink cabinet before building anything.
Measure the width, height, and depth of your cabinet space. Don’t just measure the opening; get the interior dimensions, too.
Now for the tricky part: those pipes. They’re the reason under-sink organization is so challenging.
Map out where your pipes are located by:
- Measuring how far they extend from the back wall
- Noting their height from the cabinet floor
- Marking their position from side to side
I learned this lesson the hard way when I built a beautiful drawer system that couldn’t be installed because of a drain pipe I hadn’t accounted for.
Take photos of your empty cabinet with the measurements written down. This visual reference helps enormously when you’re shopping for materials or planning your design.
Remember that most under-sink spaces aren’t perfect rectangles. Those odd corners and angles? They’re actually perfect spots for smaller storage solutions!
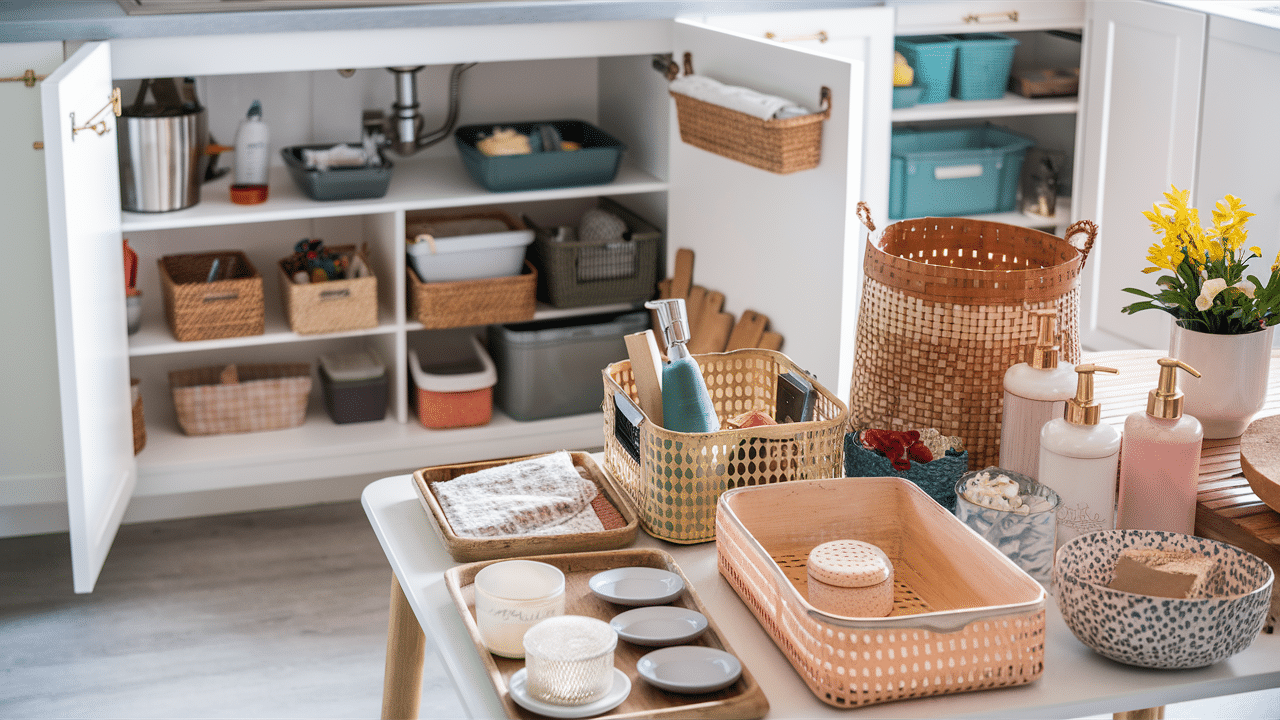
Use Stackable Bins or Drawers
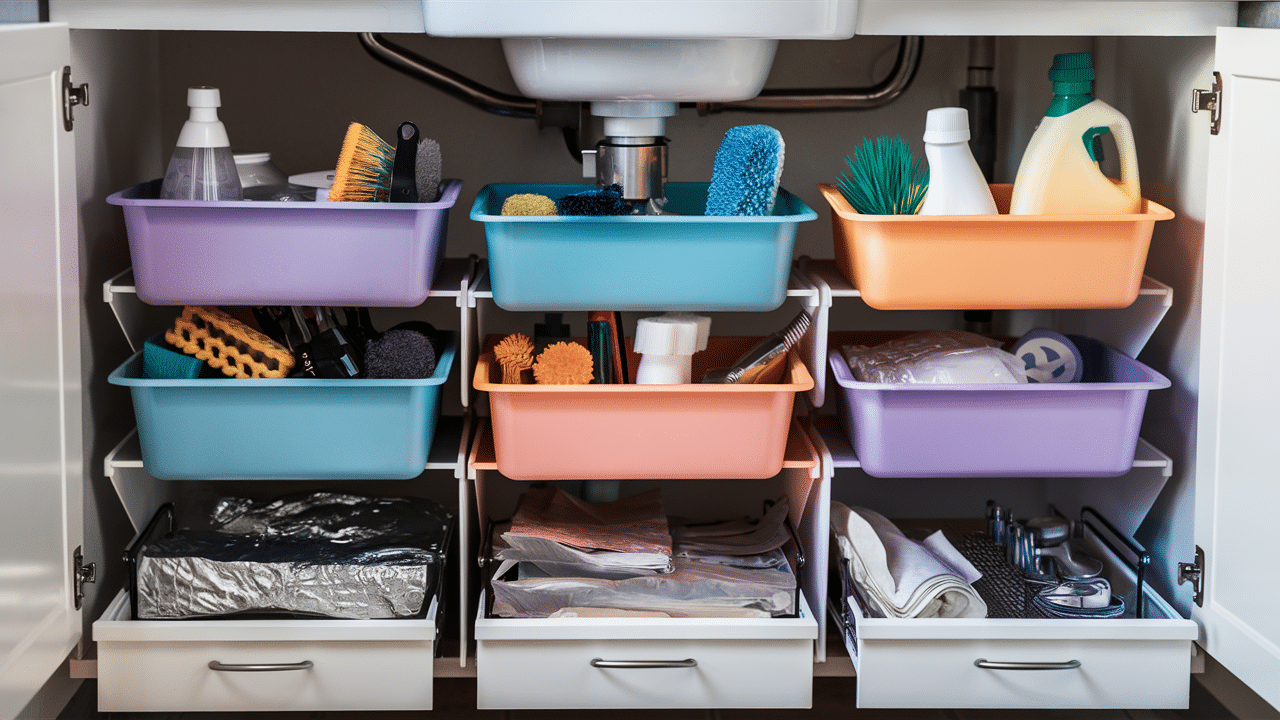
I wasted space in my cabinets for years. The solution was simpler than I thought. Stackable bins changed everything. They let me use every inch of vertical space without creating a jumbled mess.
These containers come in various heights and widths to fit any cabinet perfectly.
I used to pile things randomly. Now, each category has its bin, and I can pull out exactly what I need.
The right containers make organization effortless.
Here’s why stackable bins work so well:
- Create instant vertical storage
- Keep similar items grouped together
- Slide-out for easy access to contents
- Prevent small items from getting lost
- Maximize space in tall cabinets
Clear bins let me see what’s inside at a glance. Opaque ones keep visual clutter hidden.
Don’t just stack randomly. Think about what you use most often and keep those items within easy reach.
Your daily items should live in the middle bins, and less-used items up top or in the back.
This simple system turns chaotic cabinets into organized spaces that actually make sense.
Install a Tension Rod for Spray Bottles

I discovered a cleaning hack that changed everything—a simple tension rod. It’s ridiculously effective. Just install it across the width of your under-sink cabinet.
Your spray bottles hang neatly from their triggers, freeing up the bottom space for other supplies. I used to stack cleaning bottles on top of each other, and they’d fall over every time I reached for one at the bottom.
Not anymore. Now, they hang in a row where I can see each label clearly.
Here’s why this works so well:
- Keeps bottles upright and ready to use
- Creates extra storage space below
- Prevents leaks from pooling at the bottom
- Makes it easy to see when bottles are empty
- Costs under $10 at most stores
Installation takes less than a minute. Just extend the rod to fit snugly across your cabinet. The best part? You can remove it anytime without leaving marks or holes.
Everything visible and accessible will speed up your cleaning routine. This tiny change makes a surprising difference in how organized your cabinets feel.
Add a Lazy Susan or Turntable
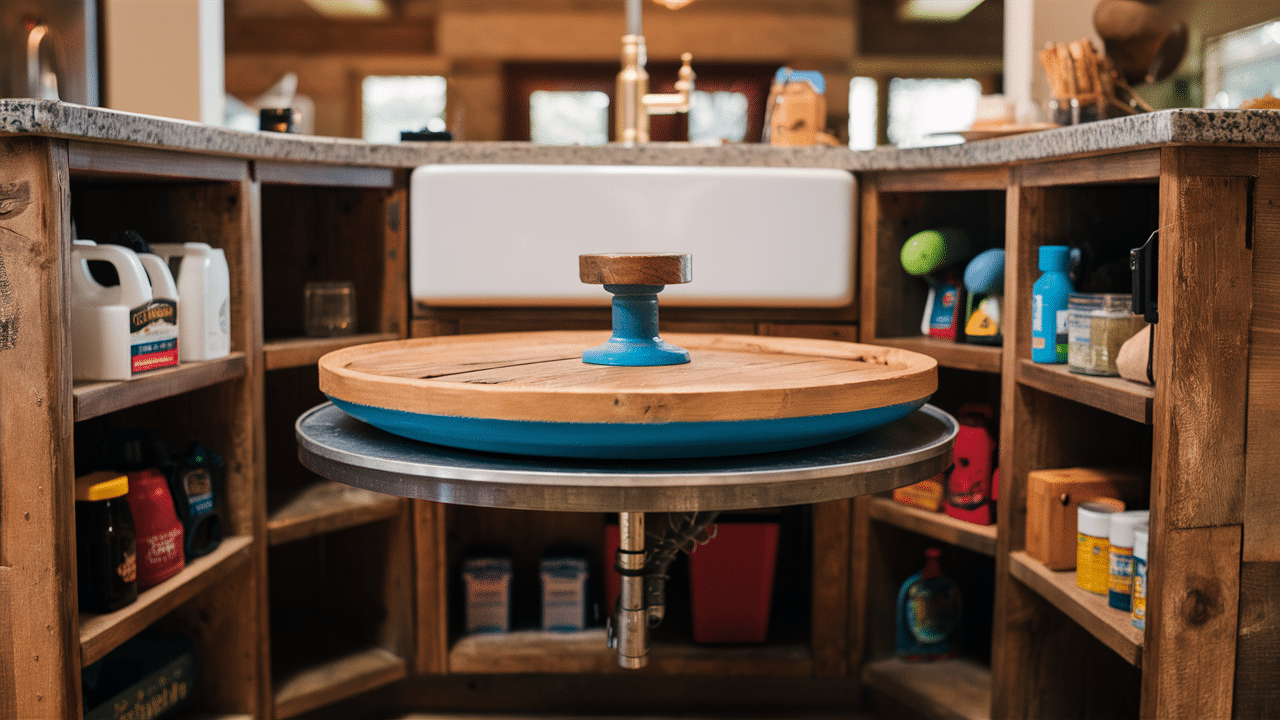
I once lost a bottle of cleaner in the back of my cabinet for three months. Never again! Lazy Susans are kitchen magic. One simple spin brings everything into view.
These rotating platforms transform awkward corners into accessible storage. You won’t have to crawl on hands and knees to reach that distant item.
Measure your cabinet height first. I bought one that was too tall and couldn’t spin properly.
Look for models with raised edges. They keep bottles from tumbling off during rotation.
Here’s why they work so well:
- Make Corner Spaces Actually Useful
- Prevent items from hiding in the back
- Allows quick access with a simple spin
- Perfect for small items that get lost easily
I placed mine in the hardest-to-reach spot, the back right corner. Now, everything there is just a spin away. Don’t overcrowd your turntable. It needs space to rotate freely.
Group similar items together for easy finding. For example, put dishwasher supplies on one side and cleaning products on the other. Your cabinet will suddenly feel twice as spacious without buying anything new.
This small change eliminates frustration and saves time every single day.
DIY Cleaning Caddy Zone
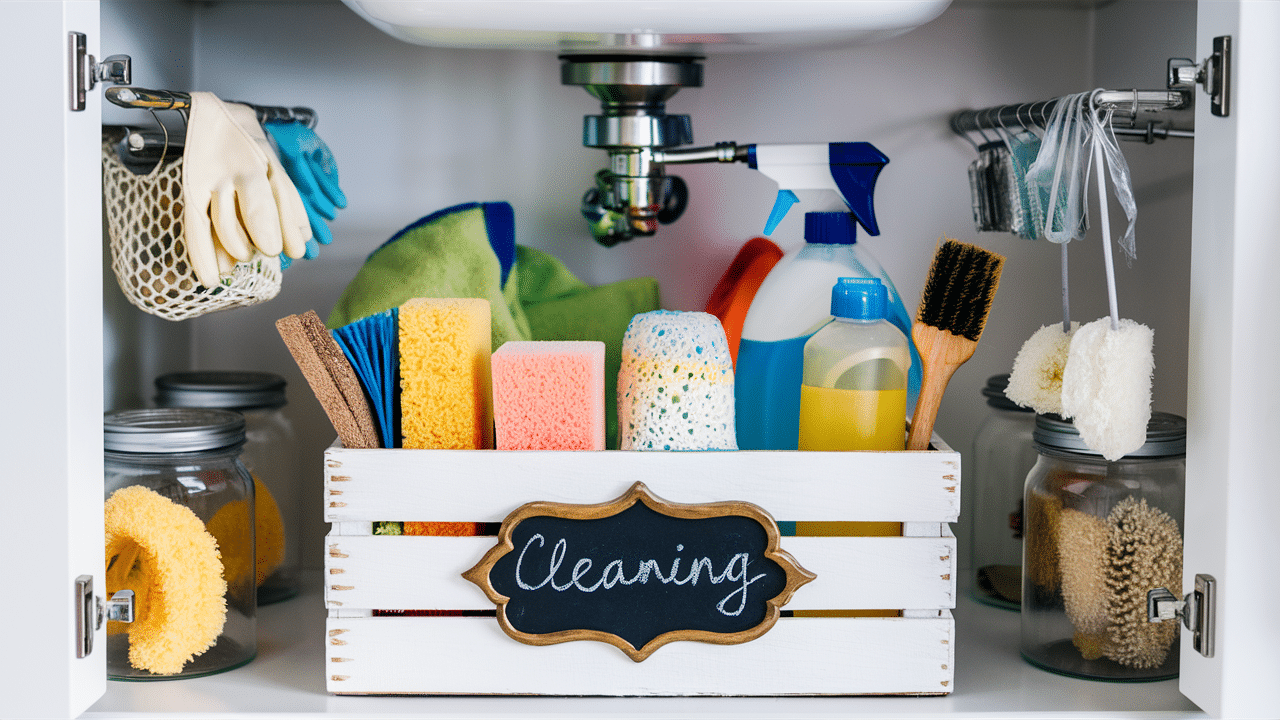
Ready to make cleaning less of a hassle? A cleaning caddy might be just what you need.
I used to waste so much time running back and forth for supplies. Not anymore! With a simple caddy, everything stays in one place.
You don’t need anything fancy to get started. Look around your home – you probably already have what you need.
The basics are simple. Find a container with a handle. Add your cleaning supplies. That’s it!
But there are a few tricks that can make your caddy even better:
- Divide the space with small bins or cups
- Add a hook for hanging a rag or duster
- Use a waterproof container (cleaning can get messy!)
- Label bottles that might look similar
My favorite part? When someone asks for help cleaning, I just hand them the caddy. It has everything they need. Keep it light enough to carry easily. There’s no point in a caddy you can’t lift!
Store your caddy where you use it most. For me, that’s under the kitchen sink.
Try it for a week. I bet you’ll wonder how you ever cleaned without one.
Add Vertical Shelves or Risers
I hate when I can’t find what I’m tucked in the back of my pantry. Maybe you do too. Vertical shelves and risers are game-changers. They create levels in your cabinets so you can see everything at once.
No more forgotten cans or boxes hiding behind taller items!
These simple additions double your storage space without any construction. Think of them like mini-staircases for your food.
Here’s why they work so well:
- They make everything visible at a glance
- No more digging through items to find what you need
- Perfect for canned goods, spices, and small containers
- Available in plastic, bamboo, or metal to match your style
I added risers to my spice cabinet last month. Now I can grab the cinnamon without knocking everything else over.
The best part? They’re affordable and take seconds to install. Just place them where you need them, no tools required. Your pantry will thank you
Hang Hooks or Pocket Organizers on the Cabinet Doors

I discovered a secret space most people ignore. The inside of cabinet doors! Stop wasting this valuable real estate. It’s perfect for small items that always seem to get lost.
Hooks and pocket organizers transform these forgotten surfaces into storage powerhouses. I hung measuring spoons on my cabinet door last week. Now they’re always within reach when I’m cooking.
You’ll love how much counter space this frees up.
Here’s what you can store this way:
- Measuring cups and spoons
- Pot lids
- Cleaning supplies
- Cutting boards
- Oven mitts and dish towels
Small adhesive hooks work for lighter items. For heavier things, try over-the-door organizers that hang without damaging the wood.
The magic happens when you match the organizer to what you need to store. Pockets work great for small bottles, while hooks are perfect for handled items.
This simple change makes everything easier to grab. No more digging through drawers!
Your kitchen will feel twice as organized in minutes.
Keep It Moisture-Friendly

I learned the hard way that moisture and cabinets don’t mix. Water damage can ruin your beautiful kitchen. Prevention is easier than repairs. A few simple steps will keep your cabinets dry and damage-free.
First, check under your sink regularly. This area is prone to leaks that often go unnoticed.
Moisture barriers are your best friends. I place waterproof mats under the sink and near the dishwasher. They catch drips before they cause problems.
Wet dishes are another culprit. Make sure they’re completely dry before putting them away.
Here’s my moisture-fighting strategy:
- Wipe spills immediately, even small ones
- Use a dehumidifier in humid climates
- Install sink mats under dish-drying areas
- Keep a small towel handy for quick cleanups
- Check pipes monthly for early leak detection
Steam from cooking can also damage cabinets over time. I use the exhaust fan whenever I boil water or cook pasta. The simple truth? Most cabinet damage happens slowly, day by day. Small habits make a big difference.
Your cabinets can last decades with proper care. Just keep them dry!
Maintain It in 5 Minutes a Month
I used to think cabinet maintenance required hours of work. It doesn’t. Five minutes is all you need. Just make it a regular habit.
I wipe down the exterior with a soft cloth once a month to prevent buildup, which becomes harder to remove over time. Check the hinges and handles, too. Loose screws take seconds to tighten but can prevent bigger problems later.
This small investment pays off enormously. My cabinets look newer than my neighbor’s, though we moved in the same year.
Here’s my 5-minute monthly routine:
- Dust cabinet tops (they collect more than you think)
- Tighten any loose hardware
- Check for water spots or damage
- Wipe down doors and handles
- Look for signs of pests
I keep cleaning supplies in a small basket, so everything’s ready when I need it.
The secret is consistency. Five minutes every month beats two hours once a year.
Your future self will thank you when your cabinets still look great years from now.
This tiny habit prevents expensive repairs and keeps your kitchen looking fresh without any real effort.
Conclusion
I’ve transformed my messy cabinets using these simple strategies. You can, too. The best organization systems don’t require expensive renovations or complicated setups.
Small changes make big differences. Start with just one of these ideas today. Try the tension rod or add a turntable to your toughest cabinet.
You’ll immediately notice how much easier it is to find what you need. Your future self will thank you every time you open a cabinet door and find exactly what you’re looking for without digging.
These small investments of time and money pay off daily in reduced frustration and a more functional kitchen. Your cabinets deserve this attention; after all, you use them every single day.