
Looking for a smart way to save space and add style to your room? A DIY floating desk might be just what you need.
Unlike big desks that take up floor space, a floating desk attaches right to the wall.
It gives your room a clean, modern look and maximizes small spaces. You can build one yourself using simple tools and easy-to-find materials.
It doesn’t matter if you need a work-from-home spot, a homework station, or just a place to organize your stuff; this project is a great choice.
In this guide, you’ll learn exactly how to build a floating desk step by step. I’ll cover what tools and materials you need, how to plan and measure your space, and how to get a strong, smooth finish.
Let’s get started on building a desk that fits your space and your style.
What Is a Floating Desk?
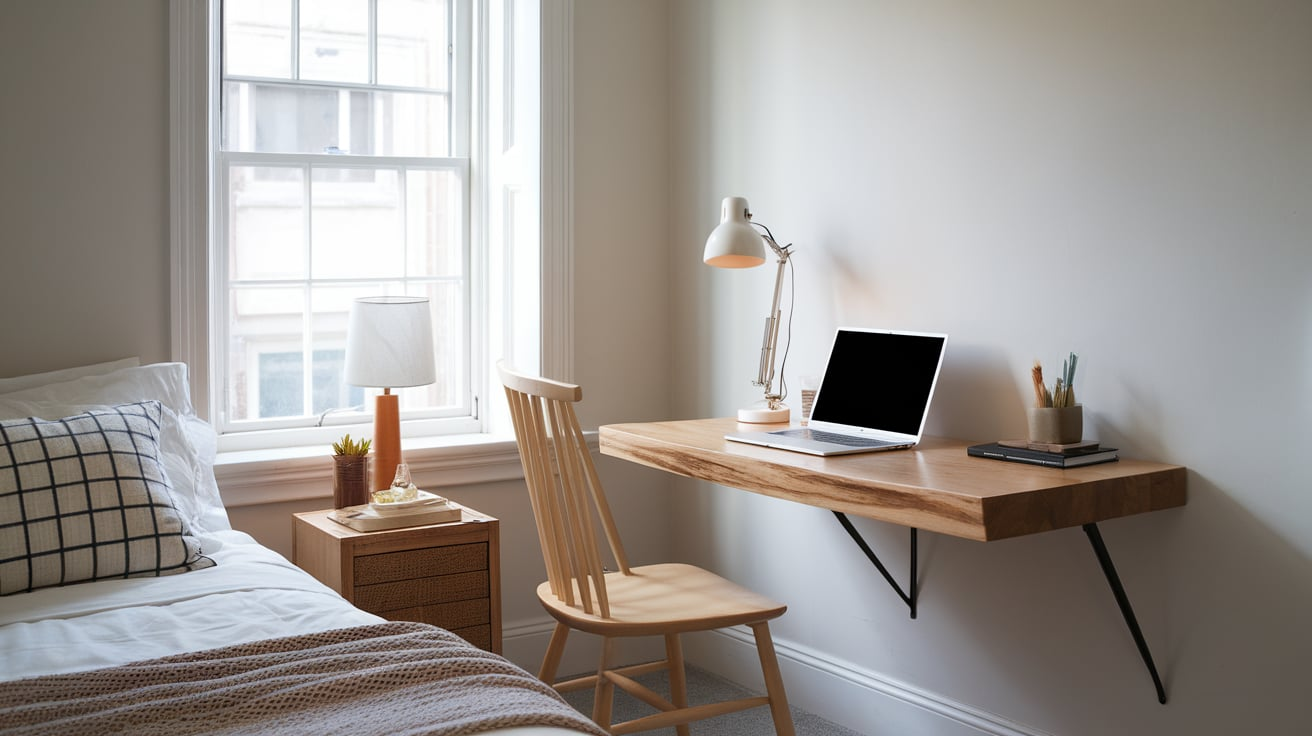
A floating desk is attached to the wall instead of sitting on legs, making it look like it’s hanging above the floor.
These desks are great for saving space because they don’t take up much room and can go almost anywhere, like in a small bedroom, hallway, or corner.
Unlike regular desks that have legs and often take up more floor space, floating desks are mounted straight to the wall, which makes them lighter and easier to fit into tight spots.
Regular desks are usually heavy and not easy to move around, while a floating desk can be built to the exact size you want and styled however you like.
It also makes cleaning the floor underneath simpler since there are no legs or bulky parts in the way.
Materials and Tools Needed
Before you start building your floating desk, it’s a good idea to gather everything you need. Don’t worry, most of the items are easy to find at a hardware store.
- 2×4 lumber: This will be used to build the frame that holds up the desk.
- 3/4″ plywood or butcher block: This is the flat surface you’ll use as the actual desktop.
- Wood screws: You’ll need both 3″ and 1.5″ screws to hold the frame and top together.
- Wood glue: Helps make stronger joints.
- Wood filler and sandpaper: To smooth out holes and rough spots.
- Paint or wood stain and sealant: To give the desk color and protect the wood.
- Optional: edge banding or trim: For a cleaner, more finished look on the desktop.
- Measuring tape and level: To make sure everything is even and fits right.
- Stud finder: Helps you find solid spots in the wall to attach the desk.
- Drill and drill bits: You’ll use this to screw everything together.
- Miter saw or circular saw: For cutting the wood pieces.
- Sander or sanding block: To smooth out the wood.
- Clamps: To hold pieces in place while the glue dries or while drilling.
With these materials and tools, you’ll be all set to start building your floating desk!
Step-by-Step Guide to Building a Diy Front Desk
Are you dreaming of a minimalist yet functional workspace? This DIY guide shows you how to build a beautiful floating desk for under fifty dollars, inspired by a fantastic
Step 1: Selecting and Preparing the Lumber
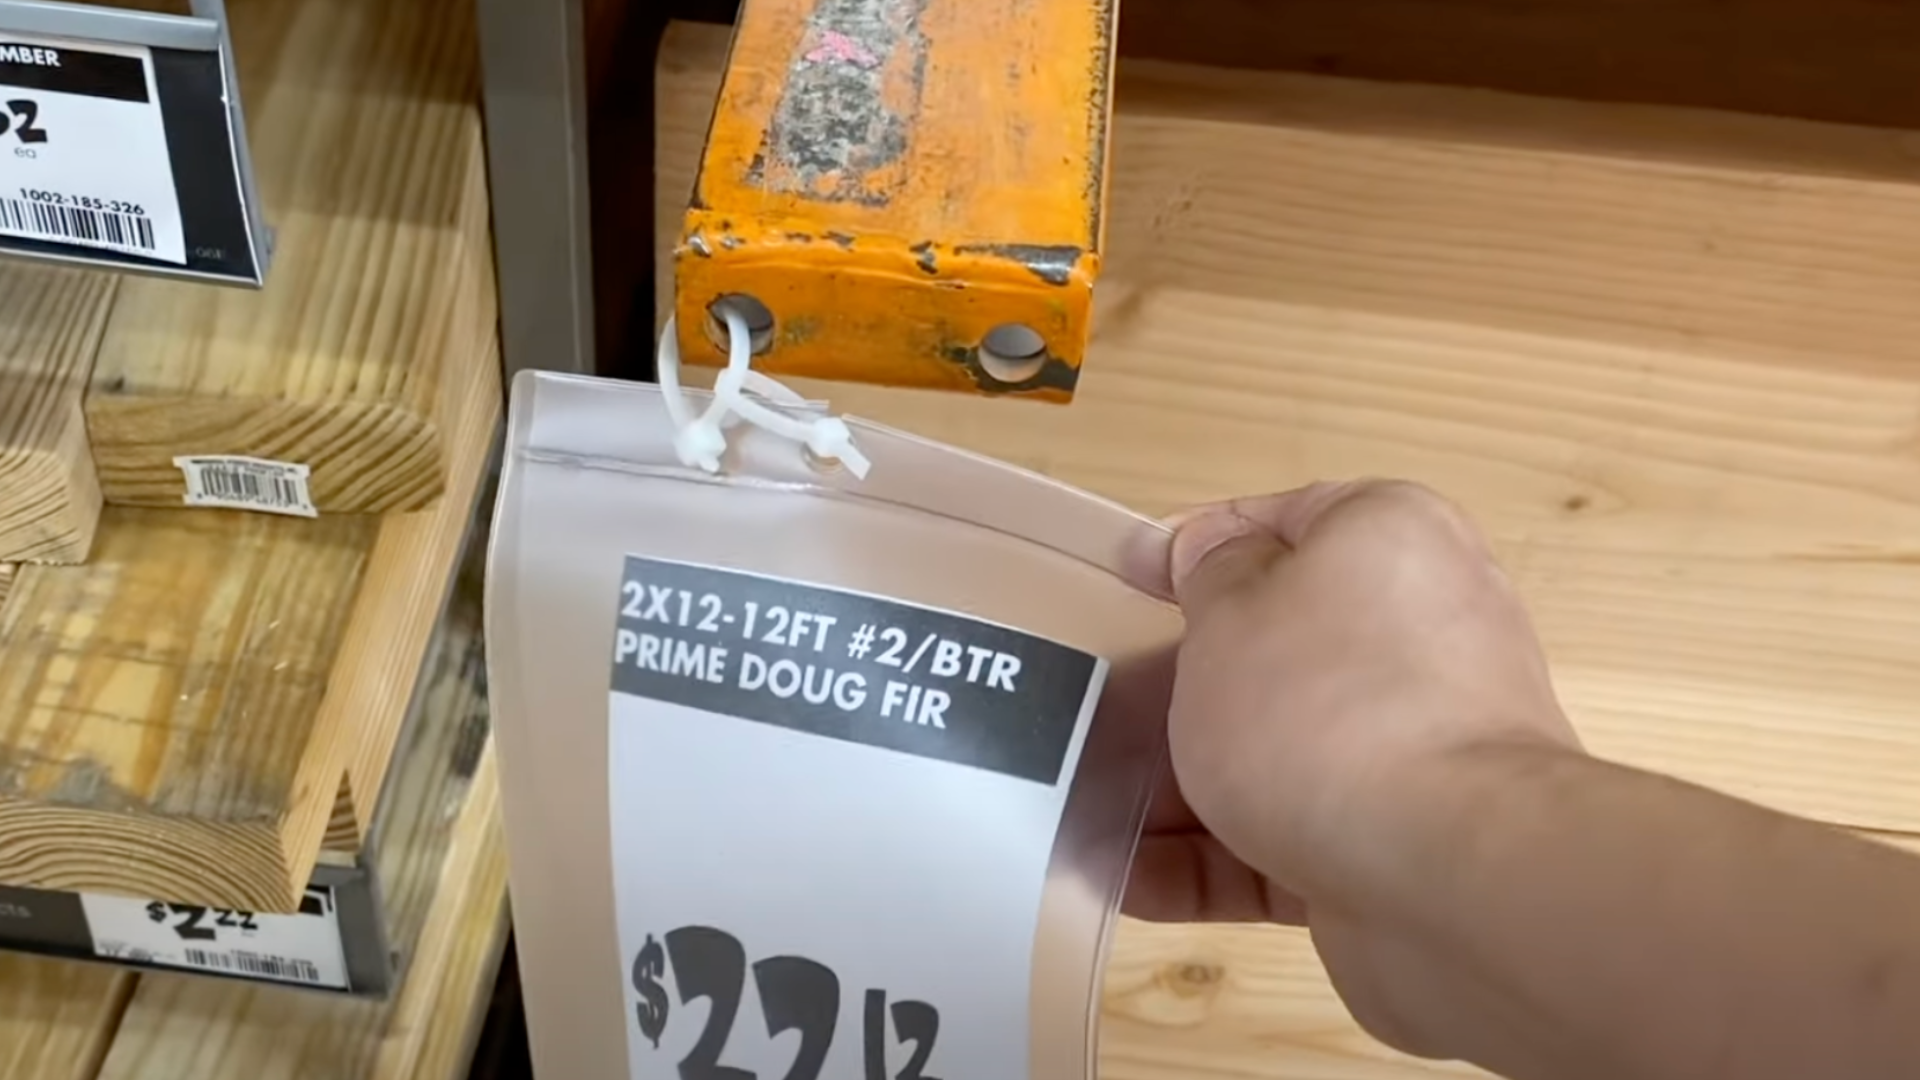
The foundation of this project is two pieces of 2×12 lumber sourced from a local home improvement store.
Since construction-grade lumber isn’t always perfectly straight, take your time to select the two straightest pieces available carefully.
To ensure a smooth, seamless desktop surface, the creator ingeniously built a custom jig for their table saw, effectively acting as a jointer to create straight edges.
This clever workaround eliminates the need for expensive machinery.
A significant amount of sanding follows, utilizing a cordless sander with both 2 amp and 5 amp batteries, recharged as needed, to achieve a flawlessly smooth finish.
Finally, the boards are cut to the desired length of the desk using a circular saw.
Step 2: Gluing and Clamping the Desktop
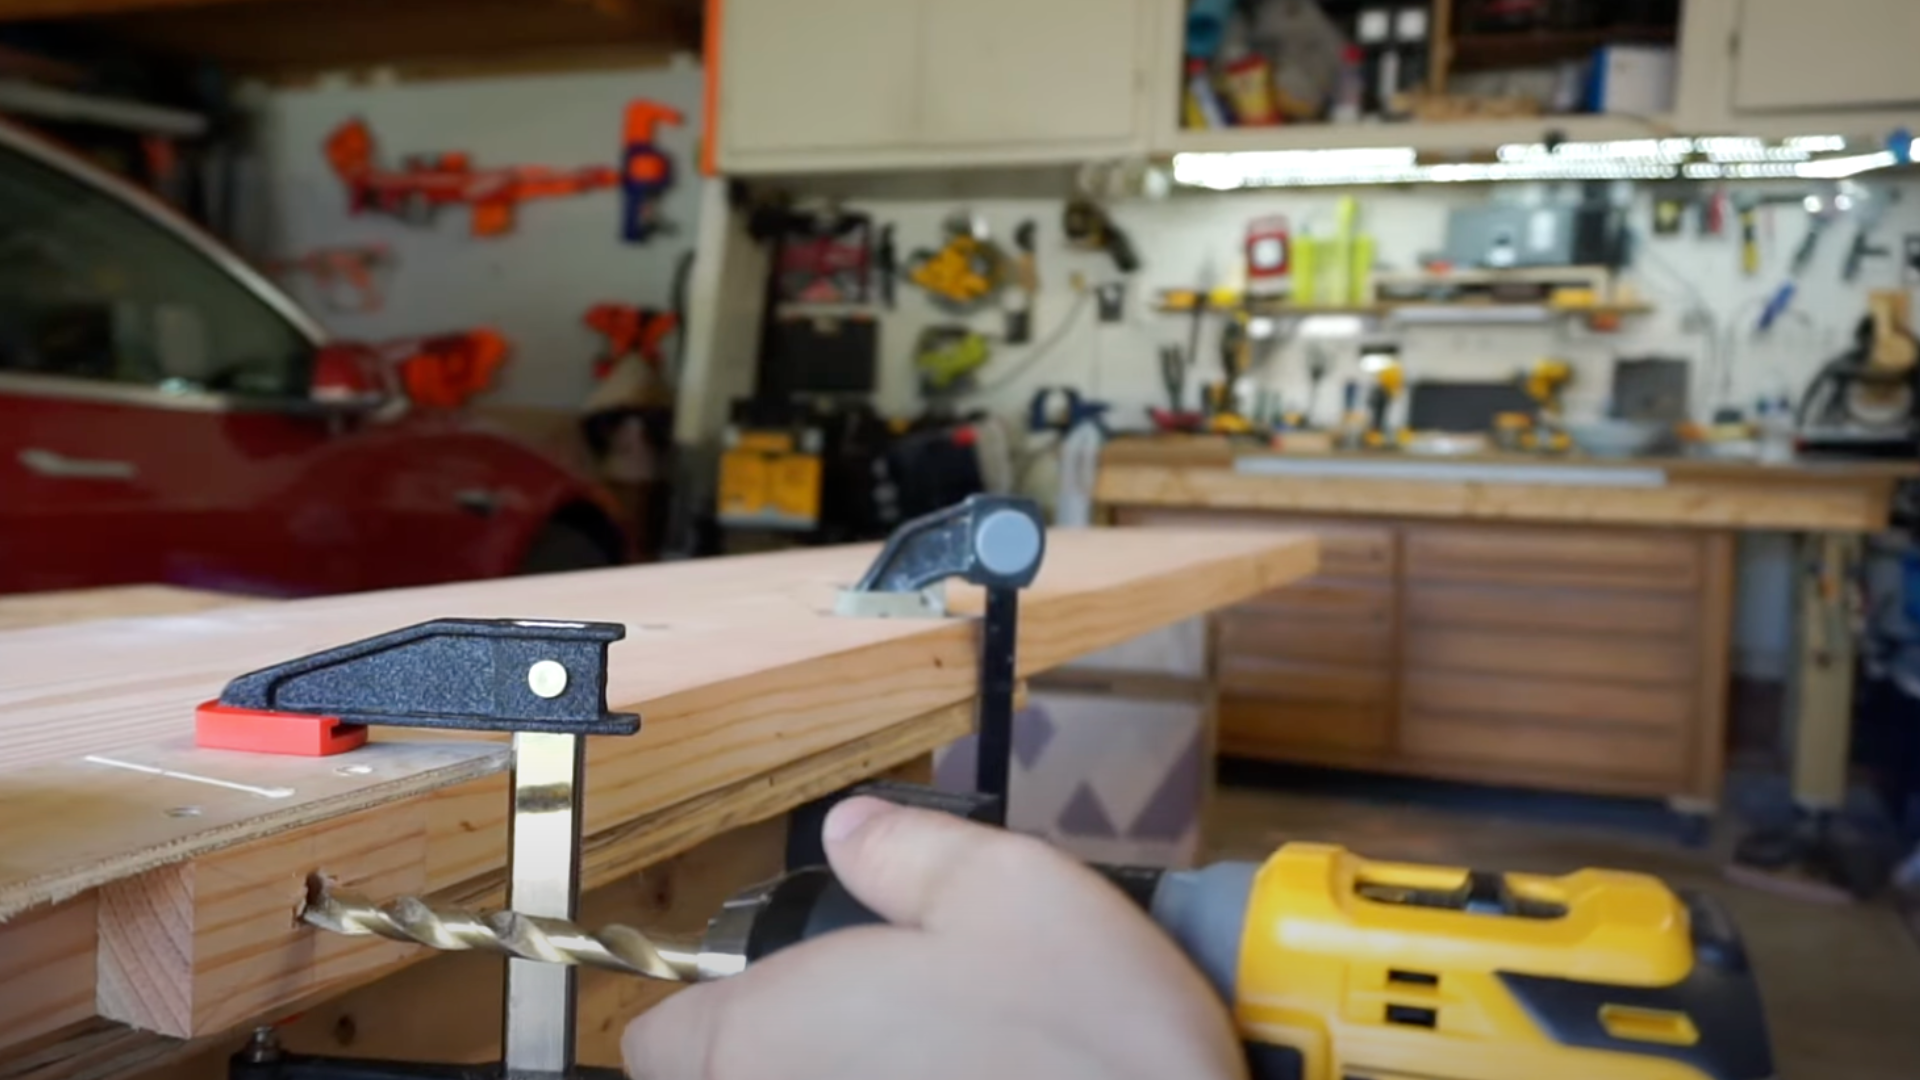
To create a wider desktop, the two prepared lumber pieces need to be securely glued together.
A simple yet effective dowel jig was created to help align the boards perfectly during the gluing process.
Once aligned, the boards are liberally coated with wood glue and then firmly clamped together.
Due to the considerable length of the boards, the gluing and clamping process was facilitated using a jaw horse and several clamps to apply even pressure across the entire surface.
This ensures a strong and seamless bond between the two pieces of lumber.
The desktop is then left for a full 24 hours to allow the glue to dry completely and achieve maximum strength before proceeding to the next steps.
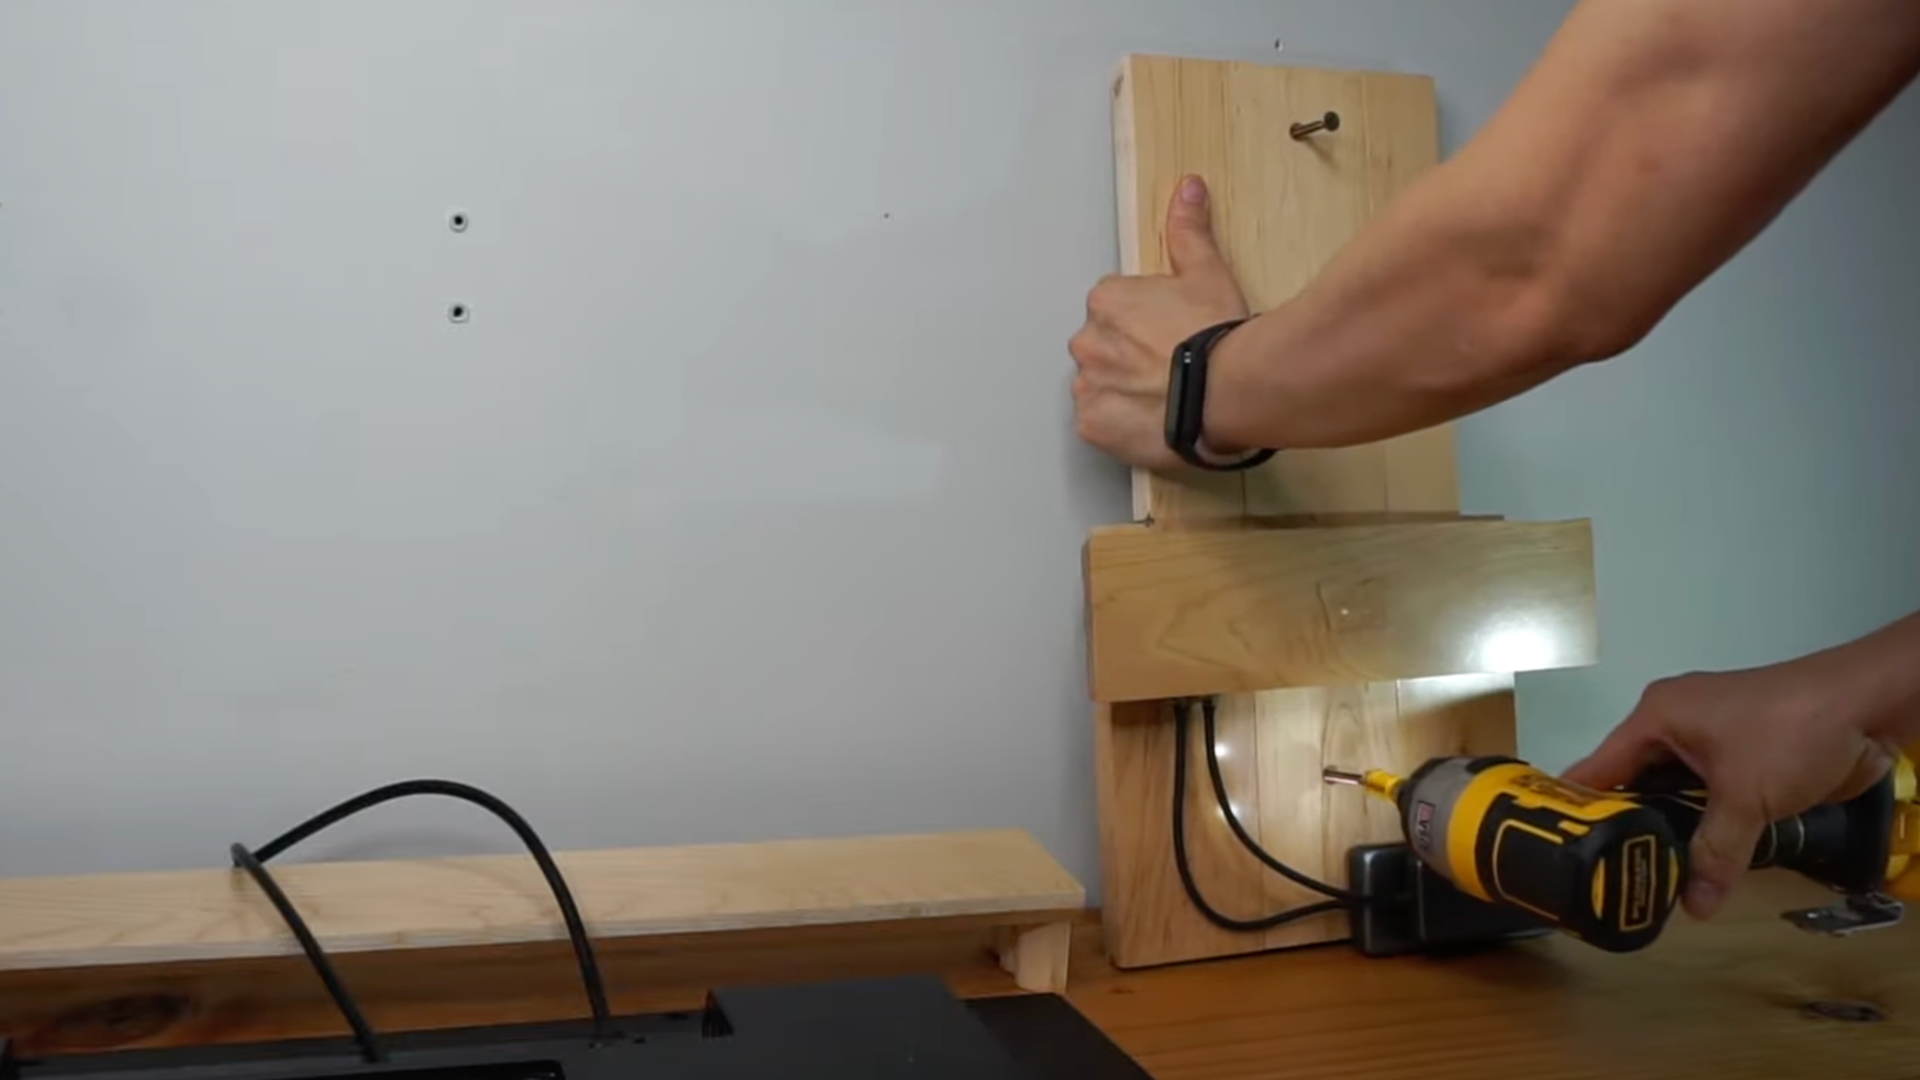
Step 3: Planning and Mounting the Desk

With the desktop panel now solid, the next stage involves planning its placement and mounting it to the wall.
The height of the desk in this project was intentionally determined by the height of an IKEA Alex drawer unit, suggesting potential future integration for added storage.
A laser level proves invaluable for ensuring the desk is perfectly level and securely attached to the wall studs.
Then, a strong magnetic stud finder is used to accurately locate all the studs behind the wall where the desk will be mounted.
The creator emphasizes the effectiveness of this particular stud finder, highlighting its reliability in locating the crucial support structures within the wall for a stable floating desk.
Step 4: Staining and Finishing the Wood
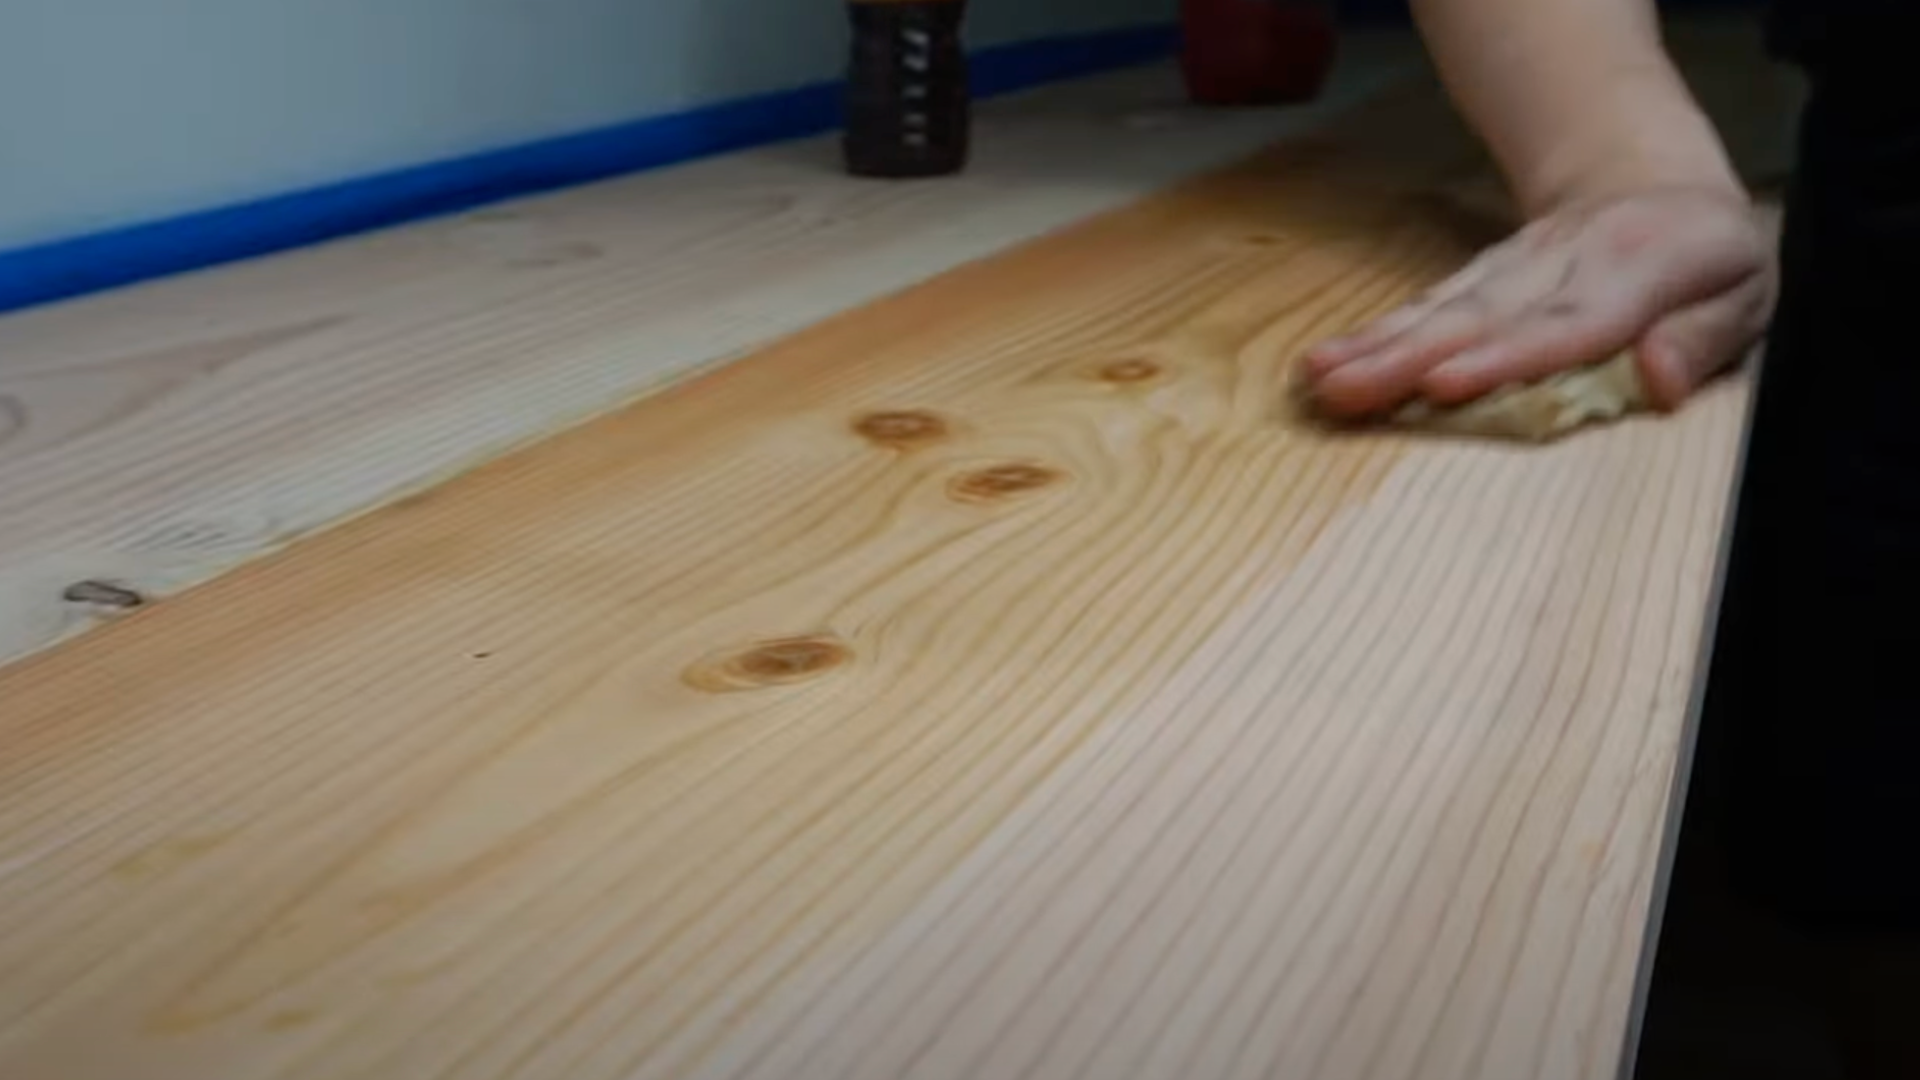
The desktop undergoes a staining and finishing process to enhance the natural beauty of the wood and provide protection.
In this project, the surface was stained with two light coats of coffee, chosen as an all-natural alternative to avoid toxic fumes indoors.
Following the staining, the wood was finished with Minwax paste wax, although this step wasn’t visually documented in the video.
This wax finish likely provides a protective layer, enhances the stain’s color, and gives the desktop a smooth and tactile surface.
The choice of natural stain and paste wax reflects a commitment to using less harmful materials in the home workspace.
Step 5: Adding Practical Features and Cable Management
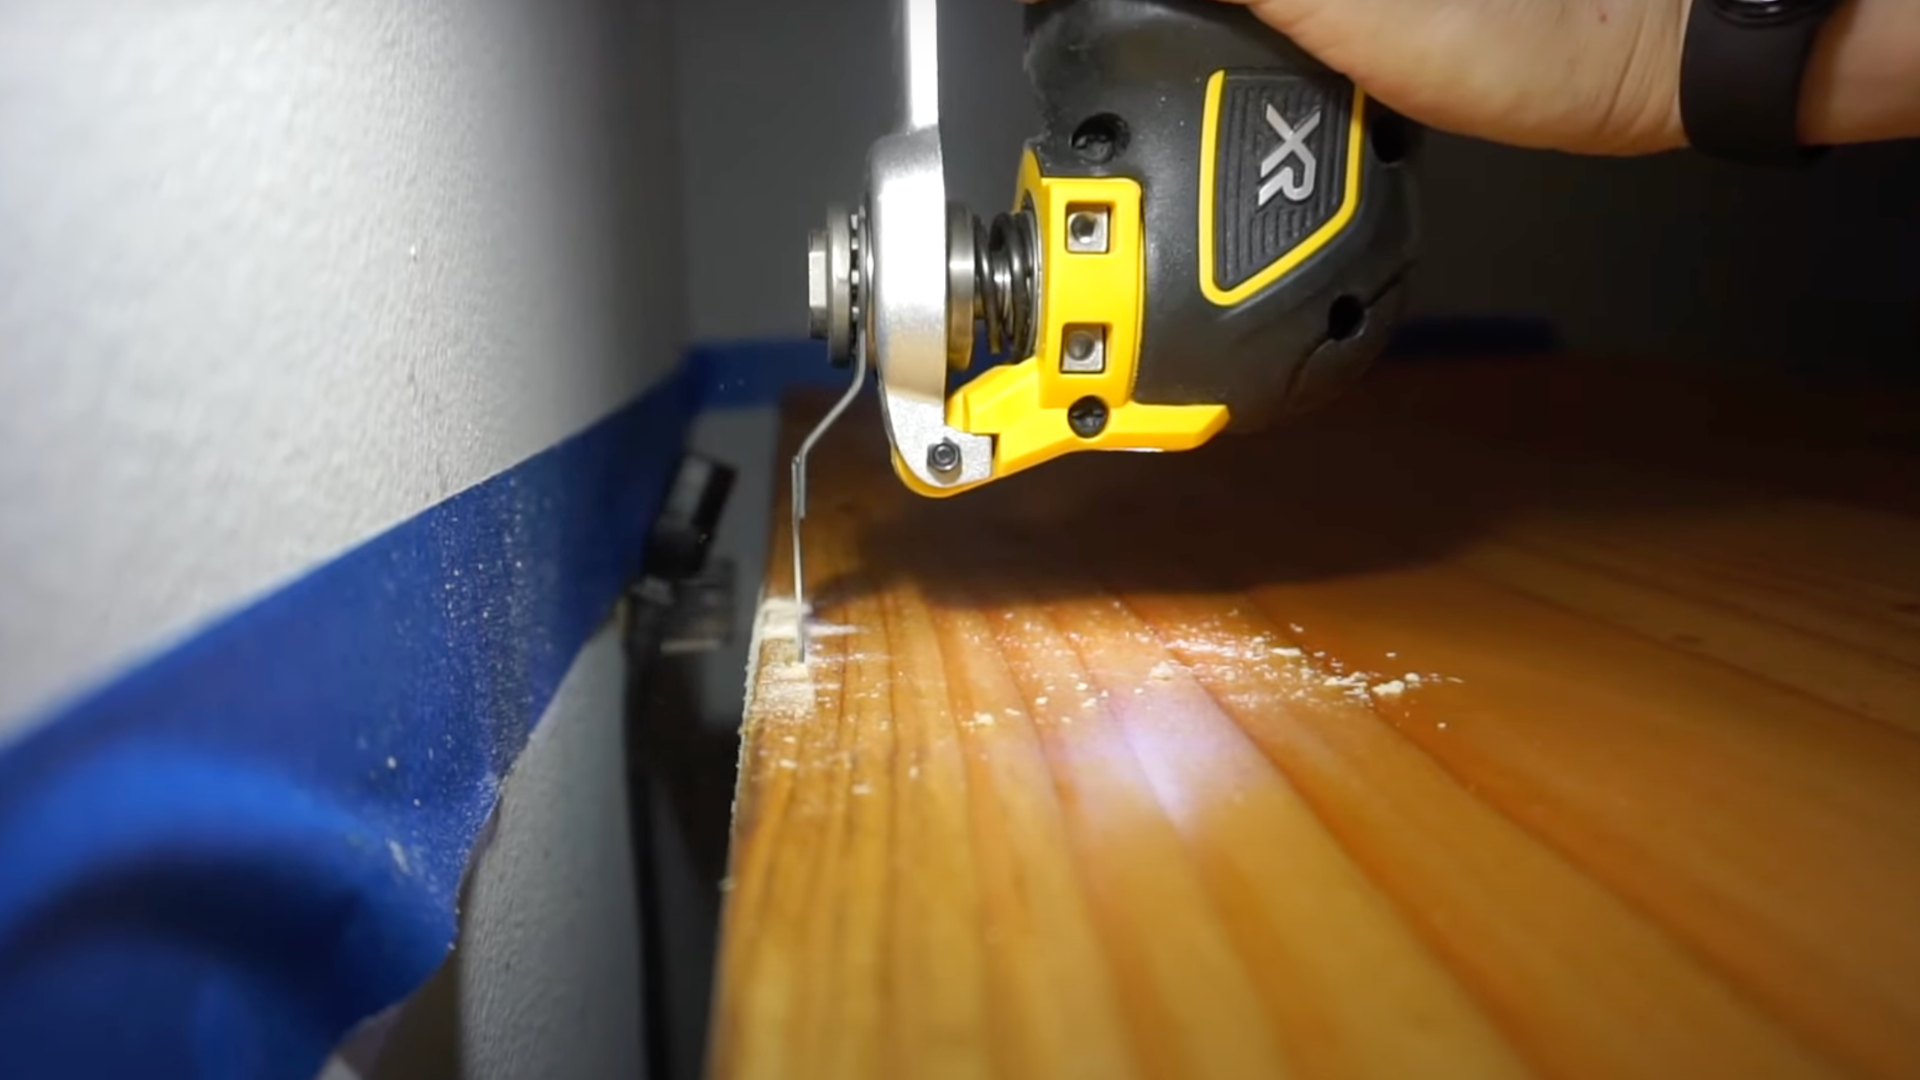
To accommodate cables, a small notch was carefully cut into the desktop using an oscillating tool.
The creator notes that this particular cut wasn’t perfectly planned and resulted in a slightly rough edge, even after sanding.
However, they point out that this area will fortunately not be visible once the desk is fully set up. Significant attention is paid to cable management to maintain a clean and organized workspace.
A quick template was created for mounting a power strip underneath the desk using screws.
All power cords, HDMI cables, and USB cables are neatly organized and concealed within a cable sleeve, contributing to the minimalist aesthetic and preventing clutter.
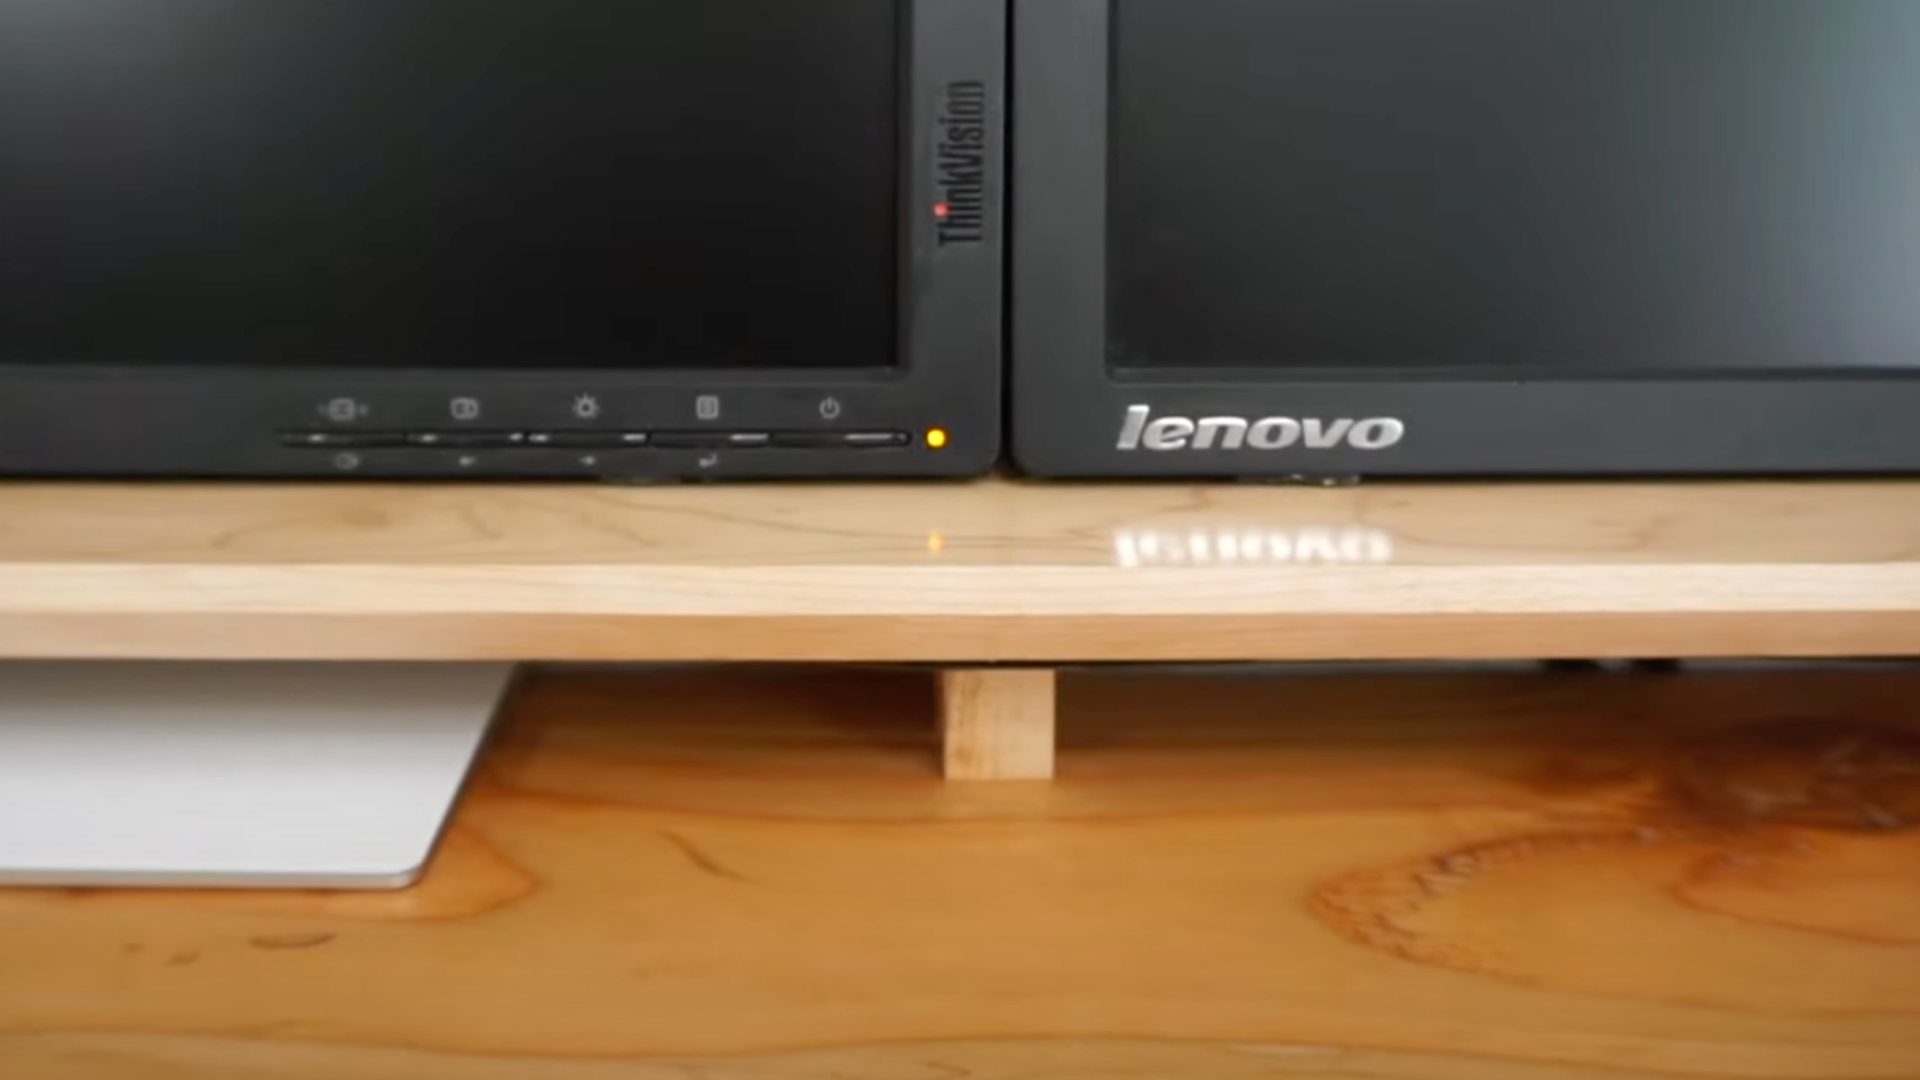
Step 6: Optimizing the Workspace with Accessories
To further enhance the functionality of the floating desk, several accessories were added.
A custom-built monitor stand was created to raise the monitors to an ergonomic eye level and slightly tilt them against the wall.
These are secured using double-sided tape. A MacBook Pro dock significantly improves the workflow by simplifying the connection and disconnection of external accessories.
A hard drive was also integrated later for use with Apple’s Time Machine.
The setup includes four USB ports, two SD card readers, and an additional four ports conveniently located behind the left monitor.
The only other items kept on the desk surface are a six-port USB charger and a wireless charging stand, reflecting a desire for convenience without sacrificing too much visible clutter.
Step 7: Under-Desk Storage and Lighting
Headphone storage is cleverly implemented under the desk to maximize the use of space and keep the desktop clear.
An external audio card DAC (Digital to Analog Converter) is also mounted underneath, providing quick access to high-quality sound through a pair of Sony headphones.
The under-desk headphone holder accommodates two pairs: a wireless Bose QC35 and a wired Sony MDR A1.
An LED strip is installed underneath the desk for ambient lighting, providing a decent glow at night.
The creator also mentions that everything else in the office is on casters, highlighting the flexibility and mobility of the overall workspace design.
This DIY floating desk project proves that you can create a stylish, functional, and organized workspace on a budget.
Follow this YouTube tutorial Guide by @ToolsElectroDIY and get ready to create your own sleek and space-saving workstation.
By following these steps and incorporating your creative touches, you can build a desk that perfectly suits your needs and aesthetic!
Maintenance Tips for a Long-Lasting Desk
Once you’ve built your floating desk, you’ll want to keep it looking good and working well. Here are a few simple tips to help your desk last a long time.
Cleaning Recommendations
- Dust regularly using a soft, dry cloth to prevent buildup.
- Use a damp cloth with mild soap for deeper cleaning if the desk is painted or sealed.
- Wipe spills immediately, don’t let water sit on the surface, as it can damage the wood.
- Avoid harsh cleaners or rough scrubbing tools that could scratch the finish.
Hardware Check
- Inspect the screws and wall attachments every couple of months.
- Tighten any loose screws with a screwdriver if the desk feels wobbly or starts to shift.
- Look for movement after heavy use. Quick fixes keep your desk safe and secure.
Conclusion
Building your floating desk is a smart and fun project that can make a big difference in your space. It’s a great way to save floor space and create a clean, modern look.
Plus, you can make it fit your room perfectly, whether it’s for work, study, or hobbies.
With the right tools and materials, you can finish this project in a weekend, even if you’re not a pro at building things.
Follow the steps, take your time measuring and planning, and secure it to the wall properly.
I found that once the desk was up, keeping it clean and checking the screws now and then helped it stay safe and sturdy.
Now that you know how to do it, you’re ready to build a custom floating desk that’s both useful and stylish. Give it a try, you might surprise yourself!