
Halloween isn’t just about candy and costumes; it’s also a time to choose your inner crafter and bring out some spine-tingling creativity.
If you’re hosting a haunted house, preparing your front lawn for trick-or-treaters, or simply looking to make your yard stand out, DIY lawn witches are a perfect seasonal project.
These are affordable, customizable, and incredibly fun to build.
With just a few common materials, many of which are probably hiding in your recycling bin, you can turn your lawn into a ghostly gathering place.
This project is an excellent opportunity to engage your kids, use your crafting skills, and add a personal touch to your Halloween decor.
Plus, nothing beats the satisfaction of seeing something spooky come to life from things you were about to toss away.
Why Make Lawn Witches?
Lawn witches are a playful yet chilling addition to your Halloween decorations. They bring your yard to life and add an interactive element that’s more fun than a store-bought setup.
Using recyclable materials and simple tools, you can craft something unique and environmentally friendly. You can use these lawn witches to spook your neighbors, surprise party guests, or simply show off your creativity.
No matter the reason, they’re sure to grab attention.
These are budget-friendly and easy to scale up. Plus, they pair perfectly with other spooky elements like pumpkins, fog machines, or eerie sound effects.
And since you’re using many items you already own, you’re also helping the environment by repurposing things like milk jugs and Amazon boxes.
Materials You’ll Need
Start by collecting your supplies. You’ll need:
- 1″ PVC pipes (10-ft length)
- Black gaffer’s or duct tape
- 1-gallon milk jugs
- Black sheer curtains or dark cloth
- 5-ft wooden garden stakes
- Armature wire
- Battery-powered LED puck lights
- Old Amazon boxes or black trash bags
Rummage through your recycling stash, you likely already have half of these at home. This project is all about using what you have and keeping costs low while boosting the spooky vibe of your yard.
Step-By-Step Guide to Making Lawn Witches
I’ll be honest, when I first made lawn witches, I didn’t think it would work.
But once I got started, it turned into one of my favorite fall DIYs. If you’re new to this, don’t overthink it. These steps will guide you through it clearly.
Step 1: Build the PVC Skeleton
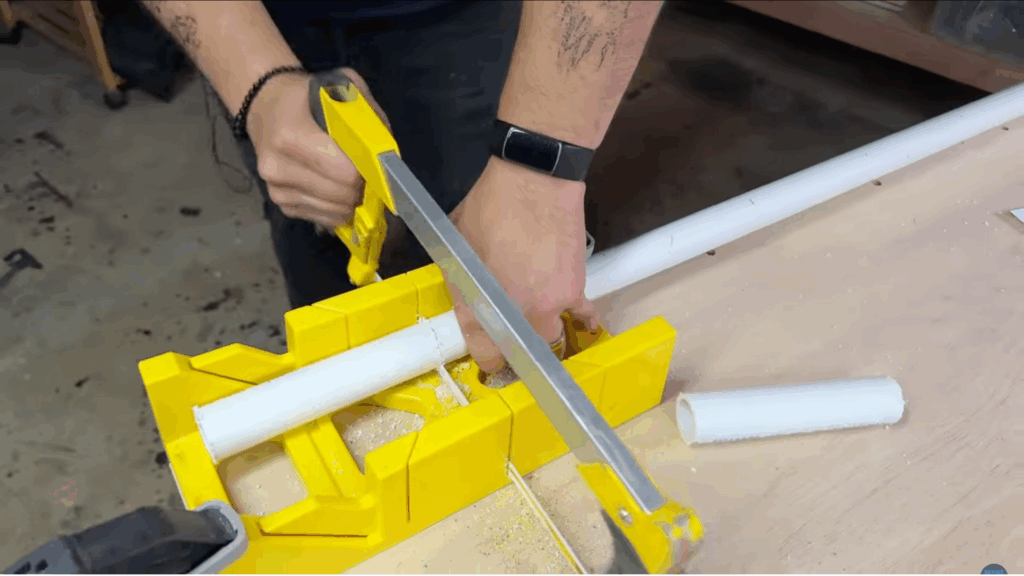
Cut the PVC into one 5-ft piece (spine), two 6-in pieces (shoulders), and one 2-in piece (neck). And assemble the structure using PVC elbows and T-joints.
Apply strong glue inside each joint and press firmly to hold. Let it dry fully.
This creates a solid, upright frame, the skeleton of your witch, that won’t wobble when you add fabric, props, or set it outdoors in the weather.
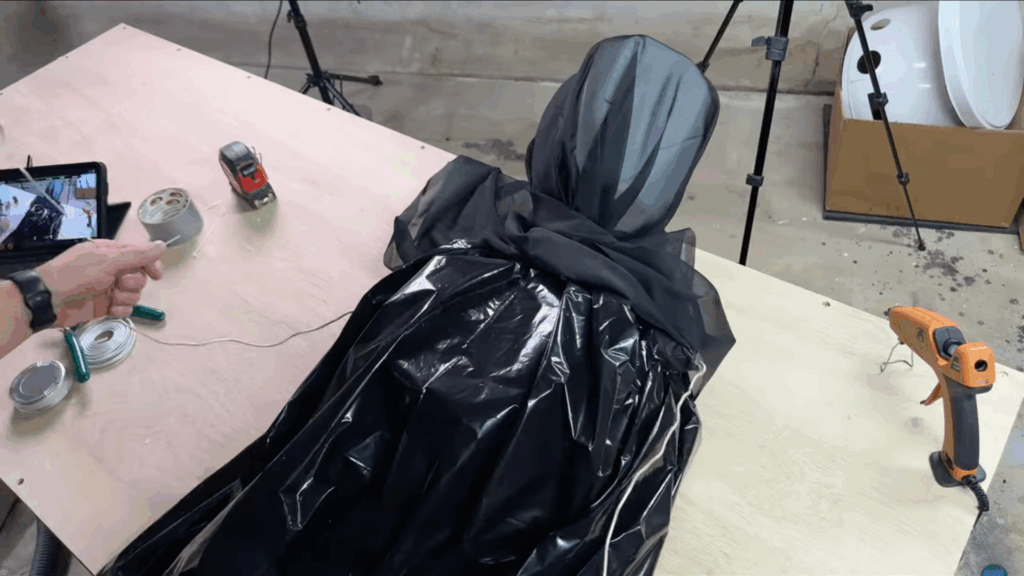
Step 2: Wrap the Body

Use a black trash bag or plastic sheeting to wrap around the skeleton and shape the body using gaffer’s tape to hold the material snug.
Avoid using white packaging, as it often shows through sheer fabrics. Go for darker or neutral tones instead.
This small step helps the figure look more natural and gives it a solid base before you start adding costume layers on top.
Step 3: Make the Head
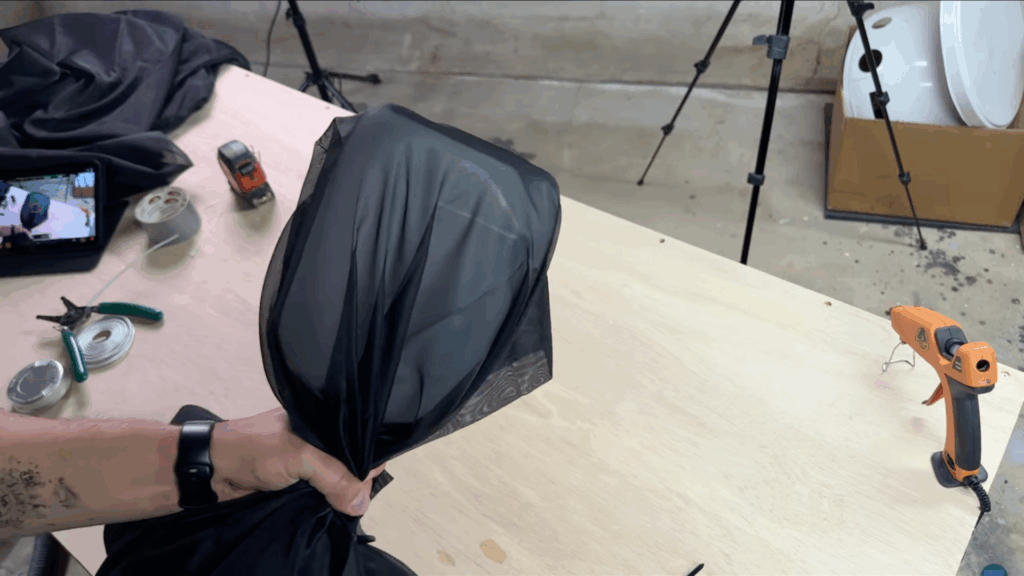
Now, to make the head take a 1-gallon milk jug, cut out a rectangular flap on the back to insert the LED light. And screw the jug onto a PVC male adapter.
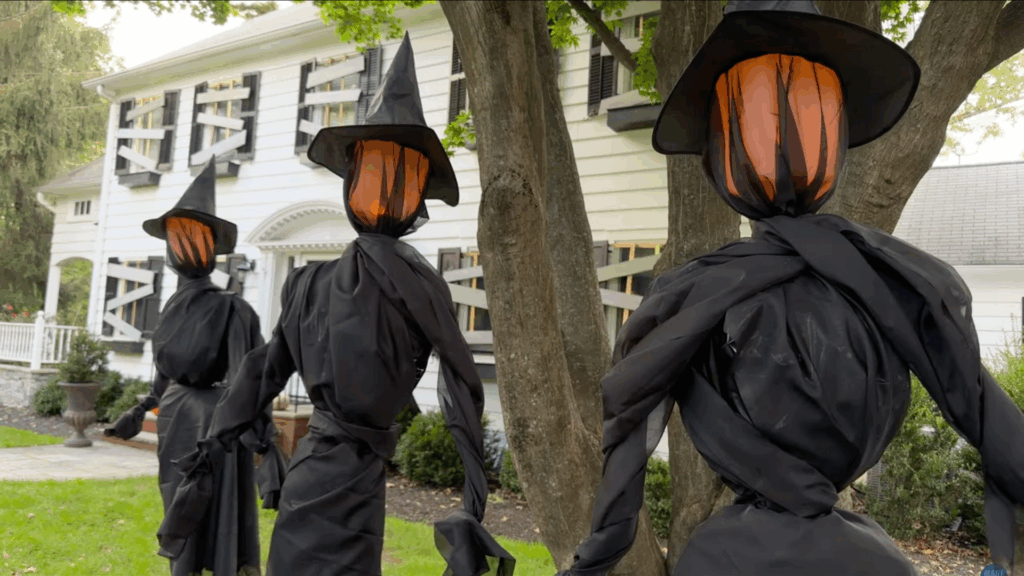
Wrap the milk jug with a black sheer curtain, letting the fabric drape loosely.
Then tie it snugly around the neck with string or wire. At night, the jug glows softly, creating an eerie, ghost-like head that really stands out.
Step 4: Add Arms
Use armature wire to form basic arms that bend at the elbows, and attach the wire to the shoulder joints or tape it along the side of the body.
You can even wrap the arms in leftover cloth or plastic to add texture and shape.
Since they’re flexible, you can bend them into different poses, reaching, pointing, or holding props, which makes the witch look more lifelike and dynamic.
Step 5: Mount the Witches
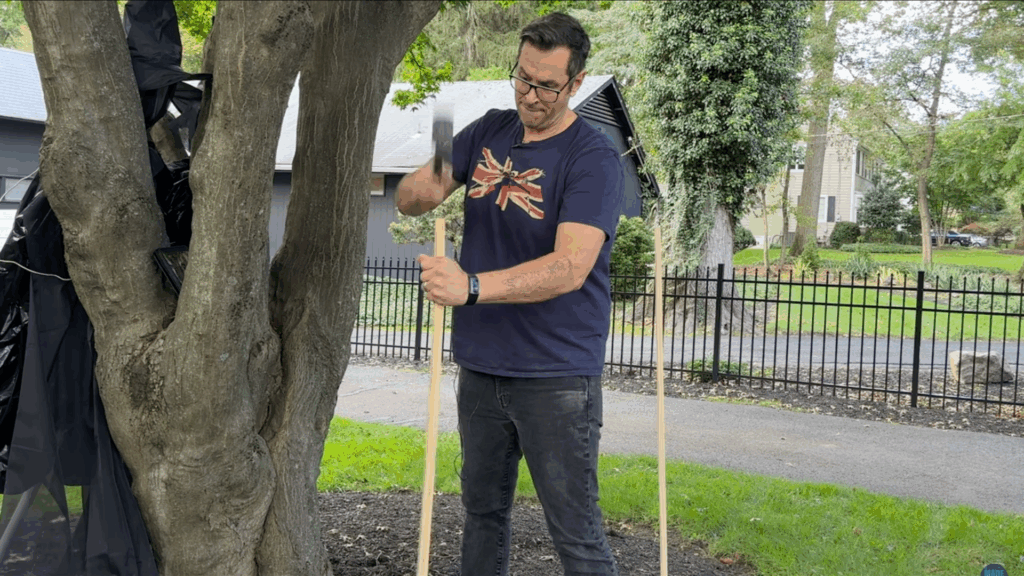
Pound a 5-foot wooden garden stake into the ground where you want your witch to stand.
Then slide the PVC frame down over the stake. It should sit snug and upright, no wobbling. This gives your witch a sturdy anchor.
Adjust positioning and level it out before you start draping the dress. Standing your witches upright at this stage lets you see their final stance and plan the next steps better.
Step 6: Drape and Light the Witches
Use black sheer curtains, tulle, or heavier fabric to create the witch’s dress. Wrap the fabric around the PVC skeleton like a cloak and secure with zip ties or tape.
Place battery-powered LED puck lights inside each milk jug head and close the flap securely.
Once turned on, the heads glow from within, soft, eerie, and just right for twilight. At dusk, your witches take on a haunting, magical presence.
For a more detailed understanding, watch “DIY Halloween Witches – It’s Wicked Easy!” by @MADE by AP.
Tips for a Great Witch Display
If you’re a Halloween enthusiast or someone who enjoys a touch of magic all year long, these tips will help you create a display that captures imagination and leaves viewers spellbound.
1. Start with a Solid Base
I learned quickly that a great witch display begins with choosing the right foundation. Your backdrop matters more than you might think.
I prefer using dark-colored tablecloths or vintage fabric that creates instant mystique without looking overdone. The key is selecting materials that feel authentic and capture the essence of a witch’s world.
Think deep purples, rich blacks, or muted forest greens that immediately set the mood.
2. Height and Layering Techniques
Varying heights keep things interesting. I stack old books, wooden crates, or vintage boxes to create different levels. Uneven surfaces draw the eye and make your display feel more natural.
Think like a storyteller – each item should have its own little stage. Imagine creating a landscape where each piece has room to breathe and tell its own secret.
Use cake stands, antique boxes, and small pedestals to lift some items, creating a three-dimensional experience that pulls viewers into your witchy world.
3. Lighting Magic
Lighting can completely change everything. I use battery-operated candles with flickering effects, string lights, or antique lanterns.
Soft, amber-toned lights create mysterious shadows that make viewers lean in closer. Place lights strategically to cast intriguing silhouettes. Consider using colored bulbs in deep purple or orange to add depth.
Candelabras with LED candles work wonders – they’re safe and create an immediate atmospheric effect that screams magical without being tacky.
4. Texture and Unexpected Elements
Surprise people. Mix textures like rough burlap, smooth glass potion bottles, and weathered wooden elements. I once added an old rusty key and a small antique mirror – unexpected details that made visitors stop and stare.
Think about combining materials that don’t typically go together. A delicate lace doily next to a rough stone. A polished crystal beside a worn leather-bound book.
These contrasts tell a story and keep people guessing about the witch behind the display.
5. Personal Storytelling
Your display should whisper a narrative. I include personal touches that make viewers curious. A handwritten spell page, a vintage photograph, or an unusual object that seems slightly out of place can spark imagination.
Consider adding small personal artifacts that suggest a witch’s life – perhaps a collection of herbs, a hand-drawn map, or an old compass.
These elements invite viewers to create their own stories about who this witch might be.
Customizing Your Lawn Witches
One of the best parts of this DIY project is how easy it is to make it your own. Every lawn witch you build can be unique, letting your personality and creativity shine through.
- Add personal flair with hats, scarves, or spooky face masks.
- Pose them in different positions to mimic dancing or spellcasting.
- Create a full scene: have them stir a cauldron or gather in a ritual circle.
- Add accessories like broomsticks, beads, or glow-in-the-dark eyes for extra realism.
- Vary their heights or tilt their heads to give them character and depth.
Whether you make three witches or a whole coven, a little imagination goes a long way.
How to Store Your Witches After Halloween?
Don’t toss your witches, store them!
- Disassemble the PVC frame for flat storage.
- Store milk jugs and fabric in labeled bins.
- Remove and store batteries from LED pucks to avoid leaks.
This makes next year’s setup a breeze. You can reuse most materials, and even improve the look with new accessories.
Conclusion
Every year, Halloween presents an opportunity to try something new and push your creative boundaries.
Building lawn witches isn’t just a way to dress up your yard; it’s a memory-making activity. If you’re decorating solo or making it a weekend project with the kids, this DIY allows you to put your stamp on Halloween.
What’s more, your homemade witches are a conversation starter. Neighbors will stop and admire your handiwork, kids will be delighted, or a little scared, in the best way.
And when the season’s over, you’ll have decorations you can proudly store and reuse, or redesign with new flair next year.
So grab that PVC pipe, dust off those old milk jugs, and get ready to build a Halloween display that’s equal parts spooky and special.
Not only will you craft some fantastic witches, but you’ll also craft a few new memories along the way.