
Wind damage to roofs is something I’ve personally experienced and something that many homeowners face.
Understanding how to identify and handle it is crucial for protecting your home. I’ve seen how strong winds during storms can damage roofs, causing leaks, structural problems, and expensive repairs.
Shingles can be torn off, flashing can be dislodged, and debris can puncture the surface of your roof, making it more vulnerable to water infiltration.
Catching wind damage early can save you a lot of trouble down the line. That’s why I put together this simple guide.
It covers the key signs to watch for, what steps to take if your roof has been affected, your repair options, and how to keep your roof safe in future storms.
Signs of Wind Damage on Your Roof
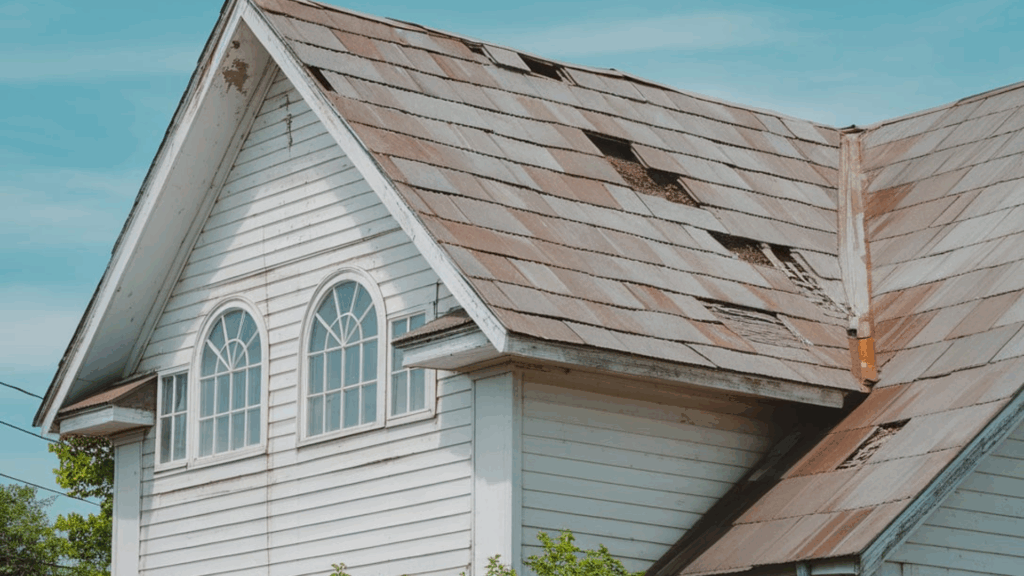
Wind damage often shows up as missing shingles, lifted edges, granule loss, or exposed decking, early signs of leaks or roof issues that need quick repair.
1. Missing or Loose Shingles
One of the first signs I’ve seen of wind damage is missing or loose shingles. High winds can tear shingles off your roof or cause them to lift, creating gaps.
I’ve learned that when shingles are missing, the roof deck is exposed, which leaves my home vulnerable to leaks.
Tip: After a storm, take a look at your roof from the ground to check for missing shingles. If you notice some have gone missing, it’s important to replace them as soon as possible.
2. Curling or Lifting Shingles
When winds are strong enough, they can cause shingles to curl at the edges, a sign that the shingles have been compromised. This could lead to future leaks if not addressed.
I’ve even seen wind lift shingles completely, exposing the underlayment beneath.
Tip: Look for shingles that appear curled or loose. If the damage is extensive, I suggest contacting a roofing professional to have the affected area replaced.
3. Granule Loss
Granules are sand-like particles on asphalt shingles that protect from UV rays and help keep them in place. I’ve noticed that high winds can wash these away, leaving the shingles exposed.
Finding granules in gutters or downspouts is usually a sign of granule loss, which can reduce your roof’s lifespan and protection.
Tip: If you notice an unusual amount of granules in your gutters, it’s time to inspect your shingles closely. Granule loss can shorten the lifespan of your roof significantly.
4. Damaged Flashing
In my experience, wind can also damage the flashing around chimneys, vents, and skylights.
Flashing is designed to keep water from getting underneath the shingles, but strong winds can bend or dislodge it, leaving these vulnerable areas exposed.
Tip: After a storm, check areas around vents and chimneys. Damaged flashing should be repaired or replaced immediately to prevent leaks.
5. Water Leaks or Stains
One of the most concerning signs of wind damage that I’ve dealt with is water leaks or stains inside the home.
If wind has lifted or removed shingles, it allows rainwater to enter, leading to interior damage. I’ve noticed wet spots or stains on ceilings, walls, or in the attic after storms.
Tip: If you see water stains, act quickly to identify the source of the leak. If you can’t find it yourself, I recommend calling a roofing professional for a thorough inspection.
6. Debris on the Roof
Debris like tree branches, leaves, or dirt can collect on your roof after a storm, and while it might seem harmless, it can be a warning sign.
Even if everything looks fine at first glance, that debris might be hiding damage underneath, such as cracked shingles, punctures, or weakened areas that could lead to leaks if left unchecked.
Tip: After a storm, I recommend clearing away any debris on your roof and inspecting it closely for any hidden damage.
Steps to Take if You Suspect Wind Damage
If I suspect wind damage, the first thing I do is inspect my roof for missing shingles, debris, or curling edges. I always check for interior leaks and document any damage with photos.
1. Conduct a Visual Inspection
Always start with a visual inspection from the ground, check for missing or curling shingles, and visible debris. Make sure to stay safe by avoiding climbing onto the roof.
If damage is visible, it’s a good sign that wind damage has occurred. A thorough professional inspection is often necessary for a complete assessment.
Use a pair of binoculars to get a closer look at areas that are difficult to see from the ground.
2. Check for Interior Damage
Wind damage may not always be immediately visible from the outside.
Check your attic for signs of water infiltration, looking for water stains, mold, or damp insulation, which could indicate a leak caused by wind damage.
Also, check the ceilings and walls inside my home for signs of moisture. If I see water damage in the attic or on my ceilings, I act quickly to stop the damage from worsening.
3. Document the Damage
I make sure to document any damage to my roof, especially if I plan to file an insurance claim. I take clear photos and videos of missing shingles, water stains, debris, and other visible damage.
The insurance provider requires this documentation to assess the extent of the damage and determine if it’s covered under my policy.
Take several angles of the damage, both close-up and wider shots, to fully capture the extent of the issue.
4. Make Temporary Repairs
If the damage is causing immediate water leaks, make temporary repairs to prevent further damage to your home.
Cover exposed areas with a tarp or roofing cement until a professional roofer can make the permanent repair. I always make sure to secure the tarp tightly so it won’t blow away during the next windstorm.
If you’re unsure how to apply a tarp, check online tutorials or ask for guidance from your roofing supplier.
5. Contact Your Insurance Provider
After I’ve assessed the damage, I contact my insurance provider to report the issue. Many policies cover roof repairs due to wind damage, but it’s important to check the details of my policy.
My insurance company will likely send an adjuster to assess the damage and may offer compensation based on their findings.
I make sure to be clear with my insurer about the damage and provide them with all necessary documentation to speed up the claims process.
6. Hire a Professional Roofer
Once the initial inspection is complete, I call in a professional roofer. They can perform a thorough assessment, identify all areas of damage (including those that are hard to see from the ground), and recommend repairs.
They will also ensure the roof is properly sealed and structurally sound.
I choose a roofer with experience in wind damage repairs since they’ll understand the specific issues that can arise from high winds.
Repairing Wind Damage: What You Can Do
For minor damage, DIY repairs might be sufficient, but extensive issues require professional help. A roofer will ensure proper sealing and structural integrity, preventing further damage and ensuring long-term roof protection.
If only a few shingles are missing, I find that replacing them can be a relatively simple task.
However, if the damage is more widespread or if you notice additional issues like curling or lifting, consider a full roof replacement.
For DIY enthusiasts, replacing shingles can be accomplished with the proper tools and materials. If you’re unsure, hiring a professional can ensure the job is done correctly.
Damaged flashing can be a major source of leaks. If my flashing is bent, cracked, or loose, it should be resealed or replaced. This step is essential to ensure my roof stays water-tight.
Always use high-quality sealant to ensure the flashing is sealed properly. Poor sealing can result in leaks later on.
If your roof has developed leaks, address them immediately to prevent water damage inside your home. Leaking roofs can lead to mold growth, wood rot, and extensive damage to the interior.
Make sure any leaks are sealed properly and use a moisture meter to verify that no hidden water is left in my home.
Preventing Wind Damage in the Future
These proactive measures can minimize the risk of wind damage, helping my roof withstand future storms and extend its lifespan.
- Regular Roof Inspections: Professional roofers can identify vulnerable areas, so you can repair them before the next storm. Schedule annual inspections and also check my roof after major storms.
- Secure Loose Shingles: I ensure that my shingles are properly installed and maintained. Over time, shingles can become loose, especially in high-wind areas. Securing them will prevent them from being lifted by the wind.
- Trim Overhanging Branches: Overhanging tree branches are a serious hazard during storms. Wind can turn these branches into projectiles, causing severe damage to my roof.
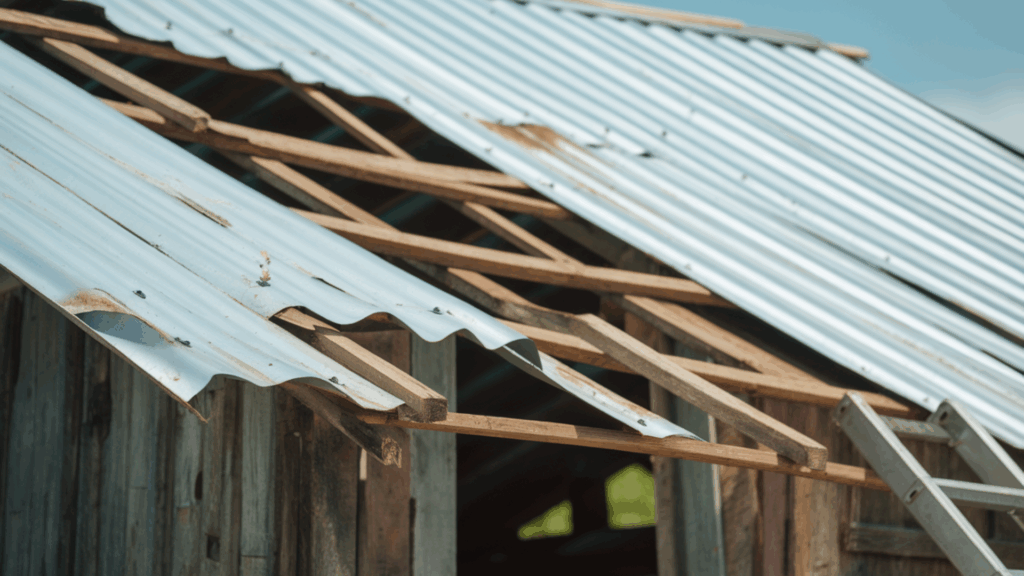
- Choose Wind-Resistant Roofing Materials: If you’re replacing your roof or building a new home, choose materials designed to withstand wind damage. Metal roofing or impact-resistant shingles offer added protection.
- Install Proper Ventilation: Adequate roof ventilation can help reduce pressure from wind beneath my roof, preventing wind uplift. It’s an essential part of maintaining a structurally sound roof.
Conclusion
I know how stressful wind damage can be, but taking action quickly makes a big difference.
Check your roof as soon as it’s safe. Look for missing shingles, lifted edges, or any debris. If something doesn’t look right, call a professional. Waiting too long can lead to more serious problems like leaks or mold.
Keep records of any damage and contact your insurance company if needed. Repairs might seem costly now, but they’re worth it in the long run.
I also suggest using stronger materials like metal roofing or impact-resistant shingles next time you upgrade.
Regular inspections and maintenance can help you stay ahead of damage. You don’t need to be an expert; you just need to stay alert and act fast.
I hope this guide helps you feel more confident in handling roof issues after a storm.