
Painting your Minneapolis home is more than a color refresh. It is your first shield against sun, humidity, and freeze–thaw cycles that test every inch of siding and trim.
This guide stays local and practical. We focus on climate-smart prep, the right products and finishes, and when to paint by season and even by time of day. You get clear steps, short checklists when helpful, and no filler.
We also help you decide between DIY and hiring a crew, with simple budget pointers to keep costs predictable. If you prefer a trusted hand, many homeowners partner with local pros to time the work and lock in durable results.
By the end, you will know how to plan the week, choose colors that look good in July greens and January snow, and maintain the win so your home wears its new coat longer.
What It Means For Paint – Thorough Prep: Protecting Your Home For The Long Haul
1. Inspection And Repairs
Do a slow lap around the house; look for anything that lets water in or weakens paint grip.
Press suspect boards and trim—soft spots call for replacement, not paint. Check for stucco cracks, loose siding, popped nails, and failed caulk at windows and doors.
Focus on the south and west walls because heat and UV punish finishes there first. If you see peeling, trace the cause: split caulk, missing flashing, or an open seam that lets moisture behind the film.
Make fixes before painting. Replace rotten wood, set and seal fasteners, and re-caulk joints with high-grade exterior acrylic so the new coat has dry, stable edges. Patch masonry and allow it to cure fully.
If the home predates 1978, assume old layers may contain lead and use lead-safe methods or hire an EPA lead-safe certified exterior painting company like Blue Painting that’s experienced with Minneapolis homes.
2. Surface Cleaning
Give the new coating a clean, dry base. Dirt, chalk, mildew, and winter salt block adhesion. Wash gently from the top down. Hand-scrub delicate areas with mild detergent. In shaded spots, use a mildew cleaner and rinse thoroughly.
Let everything dry. Wood and stucco store moisture after washing or storms. In humid weather, wait 24–48 hours before painting to prevent blisters or early peeling.
3. Scraping And Sanding
Remove failed paint and create a smooth, sound edge.
Address the worst faces first: sun-beaten south and west walls, areas under eaves, and spots that sat beneath old ice dams. Scrape any loose coating, then chase the edge until you reach firm paint.
Feather the transitions. Start with a coarser grit to knock down ridges, then switch to a finer grit so topcoats lay flat.
Control dust with a HEPA vacuum. For homes built before 1978, use lead-safe containment and skip dry sanding without capture.
Wipe surfaces clean. Remaining dust weakens adhesion. In humid weather, wait until the siding is fully dry before you prime.
3. Priming Bare Spots
Primer anchors the finish by sealing porous areas and giving topcoats a firm grip through Minneapolis freeze–thaw cycles.
Prime every bare or patched spot: sand-throughs, new wood, filled holes, and exposed metal. On wood, brush a high-quality exterior bonding primer into the grain, especially end grain and cut edges.
Match the primer to the material. Use stain-blocking formulas for cedar or redwood, rust-inhibiting primers for metal, and breathable masonry conditioners for chalky stucco or block.
Apply thin, even coats. Prime the same day you scrape so bare wood never sits overnight. Let the primer dry to the label’s spec (often 1–4 hours at 70°F and 50 percent humidity), then add finish coats while the surface remains clean and dry. In spring or fall, choose cool-temperature products and paint during the warmest midday hours.
Skip primer on sound vinyl unless the manufacturer recommends it. A clean, dull surface plus a vinyl-safe topcoat usually does the job.
5. Protecting The Surrounding Areas
Clear the perimeter. Move furniture, grills, and planters out of the splash zone. Trim shrubs so ladders or sprayers do not snag branches.
Mask with intent. Tape windows, lights, and hardware. Cover roofs, decks, and walks with drop cloths, and weigh the edges so wind cannot flip them. Use breathable covers on plants.
Control overspray. On breezy days, switch to a brush or roller, or set windbreaks to keep mist off glass and vehicles. Close windows and bag vents so dust and paint stay outside.
Finish with tidy details. Remove downspouts, house numbers, and mailbox lids, then label and bag the hardware. Careful prep delivers crisp lines and easier cleanup after the last coat dries.
Choosing The Right Paint For Minnesota
Go with Quality Exterior Acrylic
Minnesota weather punishes paint. Choose a premium 100 percent acrylic exterior line built to flex, breathe, and hold color through sun, humidity, and repeated freeze–thaw cycles. These films stay elastic in cold, resist summer swelling, and shed water without trapping it, which leads to stronger adhesion, better UV resistance, and fewer mildew issues on shaded walls.
Top-tier paint costs more per gallon, but it pays back in service life and truer color, especially on south and west exposures. Avoid contractor-grade bargain buckets. They chalk sooner, fade faster, and lose grip when seasons swing.
Low-Temperature Lines Extend the Season
Cold snaps do not have to stop you. Many premium exterior paints apply safely at 35 °F, opening work windows in April and stretching them into early October when days are cool but stable. Paint during the warmest hours: start after surfaces rise above the product minimum and finish early so the film sets before evening chill and dew.
Follow the label exactly; low-temp chemistry still needs dry substrates, clean surfaces, and proper recoat intervals. Prime bare wood the day you scrape, and spot-prime exposed metal before color coats. Use low-temp paint as a tool, not a shortcut. Do not coat cold, wet walls or paint against a falling forecast. Plan the week, check the dew point, and work with the weather.
Finishes that Last Outdoors
Sheen affects durability and appearance. For broad siding, satin is the smart default: lightly reflective, moisture-resistant, and easy to clean without highlighting waves or patches. If walls are rough, a true flat hides more but sacrifices washability. Trim needs added protection, so use semi-gloss on fascias, frames, and doors for a tighter surface that resists grime and sheds rain. Increase the sheen on horizontal ledges such as sills and cap trims to help water bead and run. Keep sheens consistent on each plane. Do not mix finishes on the same wall or within a trim run.
Surface-Specific Products
Match the coating to the substrate for maximum durability.
- Stucco or masonry. Use breathable systems. Acrylic masonry paint or elastomeric coating bridges hairline cracks and lets vapor escape. On chalky areas, start with a masonry conditioner.
- Wood. A high-quality acrylic latex works well, but cedar and redwood need a stain-blocking primer to lock tannins. Prime knots and end grain carefully, as these are common moisture entry points.
- Metal. Clean, de-chalk, and prime exposed steel or aluminum with a rust-inhibiting primer, then finish with an acrylic topcoat that keeps color without turning brittle.
- Vinyl. Vinyl moves with temperature and dislikes heat. Clean thoroughly, skip primer if the surface is sound, and choose vinyl-safe light colors to avoid warping (manufacturers publish approved palettes).
Not sure which surface you have? Bring clear photos and a small chip to a local paint desk for a quick, accurate product recommendation.
Siding Types And Exterior Surfaces
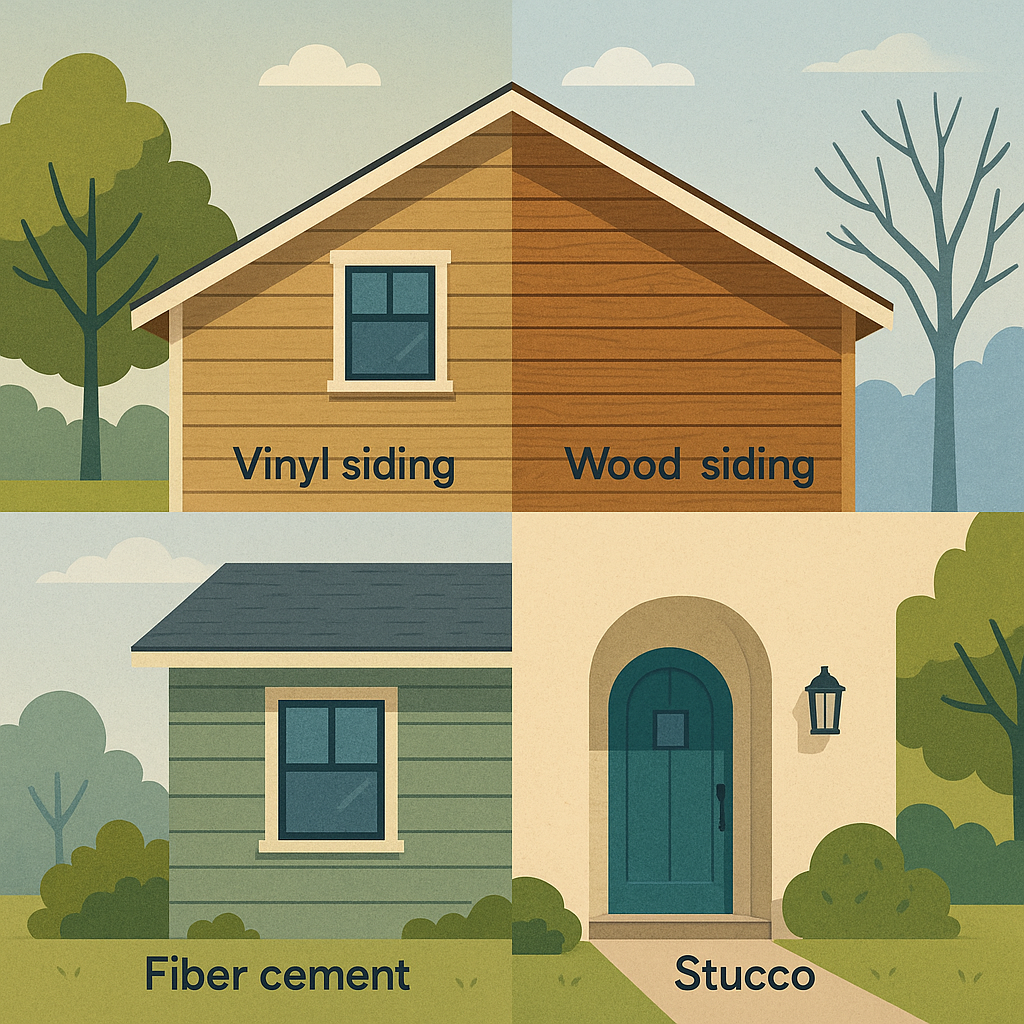
Wood Siding and Trim
Wood looks classic but needs steady care. In Minneapolis, expect repaints every 7–10 years, sooner on sun-baked south and west faces. Start at weak spots such as clapboard seams, window corners, and lower trim. Scrape to firm paint, sand smooth, and spot-prime the same day so bare grain is never left overnight.
Treat cedar and redwood with care. Knots and tannins can bleed through light colors, so apply a stain-blocking primer, then a premium acrylic topcoat that stays flexible through temperature swings. Re-caulk split joints and end laps before color. Pay close attention to end grain and cut edges, where moisture often creeps in and peeling starts.
Finish smart: satin on siding balances cleanability with forgiveness, while semi-gloss on trim sheds rain and reads crisp. Two even coats over sound prep help wood handle January cold and July sun with confidence.
Stucco
Stucco wears time well if it can breathe. Chase hairline cracks, fill with a compatible elastomeric or masonry patch, and let it cure. Wash chalk and mildew away; older stucco often powders, so lock it down with a masonry conditioner on chalky zones.
Choose coatings that move and breathe. High-quality acrylic masonry paint flexes through freeze–thaw cycles and lets vapor escape. On rough or cracked areas, an elastomeric topcoat bridges small flaws without trapping moisture. Stucco is thirsty, so plan extra material and work the coating into the profile. Many pros spray, then back-roll for even coverage.
Paint only when the walls are fully dry. After rain or washing, wait at least 24 hours, then paint during mild, dry weather and quit early so dew does not touch soft film. Done right, stucco lands on the long end of the repaint cycle.
Aluminum and Steel Siding
Metal Holds Paint Well Once Oxidation Is Handled. Wash to Remove Chalk, Rinse, and Let Panels Dry. Prime Bare or Scratched Spots with A Rust-Inhibiting Primer Before Color Coats.
Satin Is the Sweet Spot, Providing a Clean Look and Resistance to Grime without Spotlighting Small Dents. Quality Acrylic Systems Last Because Metal Does Not Swell Like Wood, Though the Sun Still Fades Color; Lighter Tones Show Less Chalking. Spray and Back-Roll to Press Paint Into Profiles, Work in Shade when Panels Are Hot, and Pause if Wind Carries Dust.
Vinyl Siding
Vinyl Can Be Painted if You Respect Heat and Movement. Wash Thoroughly, Rinse, and Let Panels Dry. Choose Vinyl-Safe Light Colors or A Manufacturer-Approved Palette Because Dark, Heat-Absorbing Shades May Warp Panels.
Skip Primer if The Surface Is Sound and Dull; Spot-Prime Repairs or Glossy Patches Only. Apply Two Thin Finish Coats so The Paint Flexes as The Siding Expands and Contracts. Do Not Seal Weep Holes or Lock Overlaps with Paint; Movement Is Built In. Work in Shade on Hot Days and Stop Early to Avoid Dew. Done Right, a Premium Acrylic on Vinyl Holds Color for 7–10 Years.
Brick and Stone
Brick Rarely Needs Paint, and Its Natural Finish Suits the Climate. if You Want a New Look, Keep the Surface Breathable. Test First: If Powder Transfers to Your Hand, Clean and Consider a Masonry Conditioner on Chalky Spots. Repair Mortar, Let It Cure, Then Coat.
Use Mineral Paint, Limewash, or A High-Permeability Masonry Acrylic so Vapor Pressure Does Not Push the Film Off. if You Choose Full Paint, Prime with A Masonry Primer and Plan for Ongoing Maintenance. Consider Staining or Whitewashing to Soften Color While Keeping Texture and Breathability. Natural Stone Usually Stays Uncoated; Smooth Faces Shed Paint Quickly. for Contrast, Paint Nearby Trim or Mortar Rather than The Stone Itself.
Concrete Foundations and Basements
A Tidy Foundation Frames the House. Scrub Off Dirt, Flaking Paint, and Efflorescence, Rinse, and Let the Surface Dry. if The Concrete Is Slick, Etch or Abrade It so Coatings Can Bond. Choose Breathable Masonry Products—foundation Paint, Mineral Coatings, or High-Perm Acrylic—so Vapor Pressure Does Not Pop the Film. Fix Drainage Before Painting Because Coatings Cannot Solve Leaks.
Spot-Prime Bare Block, Patched Mortar, and Hairline Cracks. Keep Layers Thin for A Stronger Bond. Stop Coatings Just Above the Soil and Pull Mulch Back so The Film Stays Dry. on Exposed Ledges, Use a Slightly Higher Sheen for Easier Cleaning and Better Water Shedding.
Pick a Recessive Color Such as Medium Gray or A Shade Deeper than The Body so The Base Looks Neat without Stealing Attention. a Well-Finished Foundation Lets the Siding Shine.
Best Time to Paint: Seasons and Weather Timing in Msp
- Spring: Late April–may: Wait until Nights Stay Above 40 °f and Afternoons Reach 50 – 70 °f. These Weeks Offer Lower Humidity, Steadier Sun, and Softer Light. Start After the Dew Burns Off, Work the Warmest Hours, and Quit Early so Fresh Film Sets Before Cool Evenings. Spring Weather Can Flip Fast, so Add Buffer Days, Extend Dry Times, Watch the Dew Point, and Rinse Pollen the Day Before You Coat.
- Summer: June–august: This Is the Prime Window. Daytime Highs Land in The 60s – 80s, and Nights Remain Stable. Heat and Humidity Slow Drying, so Follow Shade, Avoid Walls that Feel Hot to The Touch, and Keep a Wet Edge to Prevent Lap Marks. Begin Mid-Morning Once the Dew Lifts, Finish While Plenty of Daylight Remains, and Watch the Radar for Sudden Storms.
- Early Fall: September–early October – Humidity Drops, Bugs Retire, and Paint Levels Smoothly. Begin After Chill and Dew Lift, Then Coat During Mild Afternoons. Evenings Cool Quickly; Stop Early so Curing Continues After Sunset. Track Night Lows as Closely as Highs, and Aim for Stretches when Temperatures Stay Above the Product Minimum. Control Leaves by Clearing Gutters and Blowing Branches Before You Start.
- Winter: Not Recommended – Minnesota Winters Hold Surfaces Below Product Minimums, and Daily Freezes Halt Curing. Use This Season to Plan: Inspect, Scope Repairs, Choose Colors, and Book Spring Dates. Small Touch-Ups Are Possible Under a Heated Tent, but Full Exteriors Wait for Stable Spring Nights and Dry, Mild Days.
How Often to Repaint in Minneapolis and Maintenance Tips
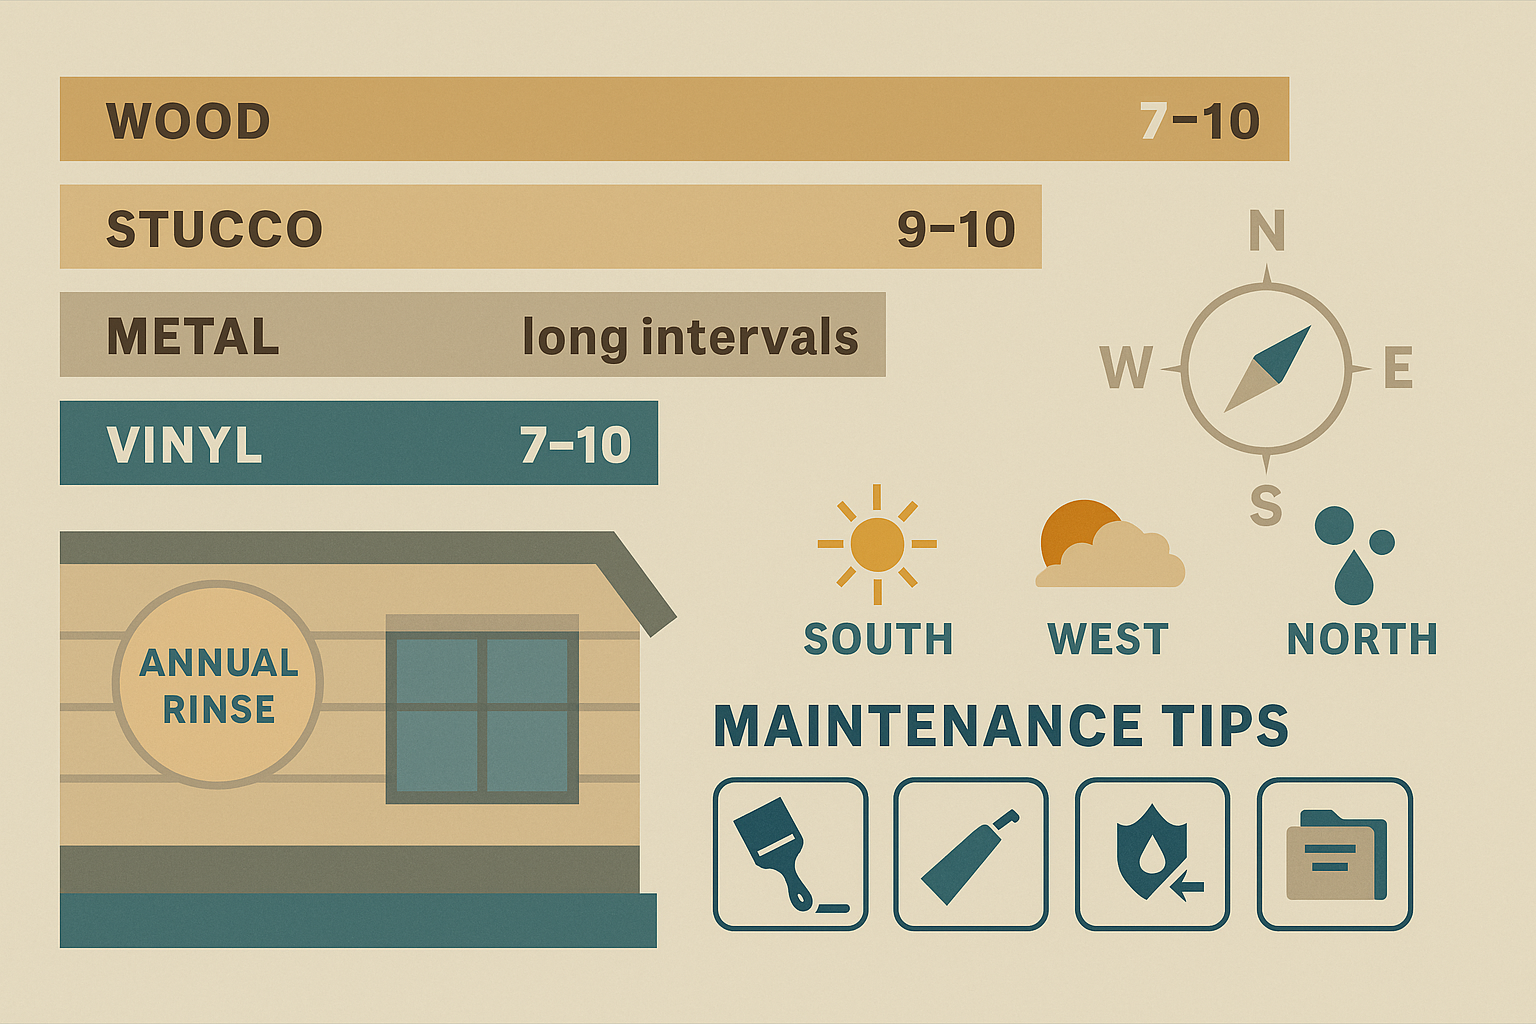
In Minneapolis, a Well-Prepped Premium Acrylic Exterior Usually Lasts 7–10 Years. Prep Quality and Sun Exposure Decide Where You Land.
- Wood. Needs the Closest Watch; South and West Faces Fade First. with Solid Repairs, Stain-Blocked Knots, and Two Even Coats, Most Wood Lands Near the Midpoint of The Range.
- Stucco. when Cracks Are Patched and Chalk Locked Down, Breathable Systems Often Reach the High End of A Decade.
- Metal (aluminum or Steel). De-Chalk and Spot-Prime, and Long Intervals Are Common.
- Vinyl. with Clean Panels and Vinyl-Safe Colors, Expect 7–10 Years if The Substrate Is Sound.
Orientation Matters as Much as Material. South Fades, West Bakes, and North Grows Mildew, so Plan Repaints by Your Most Exposed Elevation Rather than The Calendar.
Signs It Is Time to Repaint
- Curling Chips at Trim Edges or Hairline Splits at Clapboard Seams
- Chalky Residue on A Sunny Wall (pigment or Binder Breakdown)
- Bubbles or Blisters from Trapped Moisture
- Wood with Exposed Grain or Gray Weathering
- Open Caulk at Window Corners or Vertical Joints
- Mildew Returning After a Proper Wash
- Dull Body Color While Protected Areas Under Eaves Still Look Rich
Maintenance to Extend Paint Life
- Annual Rinse. Each Spring, Gently Wash Dust, Pollen, and Early Mildew, Especially on The North Side.
- Fast Touch-Ups. Scrape to A Firm Edge, Prime Bare Spots, and Apply Two Thin Coats from Labeled Leftovers.
- Caulk Check. Once a Year, Cut out Failed Beads and Apply Paintable Exterior Acrylic.
- Spot Refresh. Coat High-Wear Areas Such as Sills, Rails, Stair Risers, and Chimney Chases Before the Full Walls Need It.
- Keep Walls Dry. Trim Shrubs, Redirect Sprinklers, and Keep Soil or Mulch Off Lower Courses.
- Save Records. Keep Notes on Product Lines, Colors, Sheens, and Application Year, Along with At Least One Quart of Each Paint and Warranty Details for Quick Touch-Ups.
Diy Exterior Painting
Diy Suits Small, Reachable Homes and Flexible Schedules, Such as A Single-Story Rambler with Simple Trim. Remember that Exterior Work Means Days of Washing, Scraping, Sanding, Repairs, Priming, and Two Finish Coats. a Crew Divides This Across Several People; You Tackle It Solo and At the Mercy of The Forecast.
- Gear Matters. You Need Safe Ladders, Extension Poles, a Firm Footing, and High-Quality Brushes or Rollers. for Tall Peaks or Complex Facades, Plan Staging that You Feel Secure Using. Work Around Weather: Start After Dew Lifts, Follow Shade, Stop Early so Evening Damp Never Touches Fresh Film, and Allow Extra Dry Time when Humidity Rises.
- Do Not Cut Corners. Scrape to A Firm Edge, Prime Bare Spots the Same Day, and Use Premium 100 Percent Acrylic Paint; Lower-Grade Lines Fail Early. if Your Home Predates 1978, Assume Lead May Be Present and Work with Lead-Safe Methods. if Containment or Safety Feels Uncertain, Hire a Certified Pro for Prep and Finish What You Can Confidently.
Hiring Professionals
Call a Crew when The House Is Tall, the Facade Is Complex, or Your Calendar Is Tight. Pros Turn a Multi-Week Diy Into a Sequenced Project that Respects Weather and Keeps Quality Consistent.
You Benefit from Expertise at Tricky Edges: Rot Repairs, Failed Caulk, Cedar Bleed, Metal Oxidation, and Lead-Era Layers. Professionals Know Which Primer Matches Each Surface and When to Spray, Back-Roll, or Brush. Safety Is Covered, Including Ladders, Staging, Insurance, and Hazards Near Power Lines and Trees.
Weather Is Choreographed, Not Endured. Crews Time Coats Around Dew, Shade, Heat, Wind, and Storms for Tighter Adhesion and Smoother Sheen. Multiple Hands Wash, Scrape, Sand, Prime, and Coat in Parallel, so Your Home Spends Fewer Days Half-Painted.
Reputable Residential Painting Companies in Minneapolis Like Blue Painting document Products and Colors, Provide Workmanship Warranties, and Offer Returns for Early Touch-Ups.
Talk with At Least Two Reputable Local Crews. Compare Process and Professionalism as Much as Price. Walk the House Together and Point out Repairs, Tricky Elevations, and Add-Ons You Want Included. Ask Each Contractor to Specify the Paint Line and Sheen, Where Primer Goes, the Number of Coats on Every Surface, and What Is in Or out Of Scope.
Clarify the Weather Plan, Expected Crew Size, and Timeline. Require Proof of Insurance, and If Your Home Predates 1978, Ask for Epa Lead-Safe Certification. Confirm Cleanup (who Protects Landscaping and Removes Chips), Labeling of Leftover Cans, and The Workmanship Warranty, Including how First-Year Touch-Ups Are Handled. Read the Contract for Scope, Colors, Products, Payment Schedule, and The Change-Order Process Before Signing.
Smart Ways to Save without Sacrificing Results.
- Book Ahead During the Off-Season to Secure Better Pricing and Prime Spring Dates.
- Tighten the Scope Before Bids so You Avoid Mid-Project Changes.
- Bundle Nearby Work—garage, Fence, or Rails—so Everything Is Prepped in One Mobilization; Neighbors Sometimes Schedule Back-To-Back Jobs to Reduce Setup Costs.
- Do Light Prep You Can Handle Well, Such as Trimming Shrubs, Moving Furniture, and Gently Rinsing a Day Before the Crew Arrives (with Your Painter’s Approval). Leave Technical Prep to The Pros so Warranties Stay Valid.
- Ask About Paint Pricing. Some Contractors Pass Their Discounts Through, and Retailer Sales Help if The Product Line Is Approved.
- Finalize Colors Early and Stick with Them to Prevent Costly Delays. for Ideas and A Quick Framework on Palette Selection, See This Guide To exterior Paint Colors.
Budgeting and Pricing Your Exterior Paint Project
In Minneapolis, the Price Depends on Size, Height, and Condition. as A Starting Point, a 2,000 Square-Foot Two-Story Home Often Falls Between $3,000 and $8,000 for Professional Labor and Materials. Smaller One-Story Ramblers Commonly Run $1,500 to $3,000.
Large or Highly Detailed Homes Can Exceed $10,000, Especially when Prep Is Heavy. Many Estimators Translate a House Into Paintable Square Footage and Start Around $1.50 to $3.50 per Sq Ft, Then Adjust for Access, Height, and Scope. that Framework Helps You Spot Outlier Bids Before You Study the Fine Print.
Remember What You Buy. Labor Is the Biggest Share of The Invoice, While Premium Paint Is Smaller but Adds Years of Service Life. a Clear Scope that Includes Washing, Repairs, Primer Where Needed, and Two Finish Coats Often Explains a Higher—yet Fair—number. Ultra-Low Quotes May Hide Thin Prep or Weak Products that Cost More Later.
Conclusion
Exterior Painting Here Is Part Art, Part Weather Strategy. You Want a Home that Looks Sharp and Stays Protected Through Sun, Storms, and Deep Cold.
Start with What Lasts. Inspect and Repair, Wash, Scrape, and Sand to A Firm Edge, Then Prime Bare Spots. that Prep Is Where Years of Service Are Won.
Choose Products that Fit Minnesota. Premium Acrylics, the Right Sheen by Surface, and Low-Temp Lines for Shoulder Seasons Give You More Safe Days to Work and A Tougher Finish.
Time It Well. Paint During Stable Runs in Spring, Summer, and Early Fall. Follow the Shade, Mind Dew and Wind, and Stop Early so Fresh Film Sets Clean.
Pick Colors You Love in July and January. Test on More than One Wall, Keep the Palette Tight, and Use One Confident Accent to Pull It Together.
Maintain the Win. Rinse Once a Year, Touch up Early, and Watch Caulk Lines. when The Scope or Height Grows, Bring in A Seasoned Local Crew to Handle the Details.
Do that, and your house wears its new coat with pride, season after season.