
Cracks in basement walls often start small but can grow quickly. They may happen from soil pressure, water damage, or weak concrete.
These cracks can let in water, cause mold, or even affect the home’s structure. Many people feel unsure when they see a crack in the wall.
Should they worry? Can they fix it themselves? This blog explains how to spot different types of cracks and what tools are needed to fix them.
With the right steps, fixing basement wall cracks can be safe, easy, and help prevent bigger problems later.
What You Should Know About Wall Cracks
Cracks in basement walls are common, but they should not be ignored. Some cracks are small and harmless, while others can be signs of bigger problems.
It’s important to know what caused the crack and how serious it is before choosing how to fix it.
Cracks can let water into your basement, cause mold, or weaken the wall. They can form from soil pressure, poor drainage, settling, or even changes in temperature.
By learning the basics of wall cracks, you can take the right steps to protect your home. A proper basement wall repair can stop small issues from turning into costly damage.
Common Causes of Wall Cracks in Basements
Before fixing any wall, it helps to know what caused the crack. Knowing the cause helps you choose the right repair and avoid the same problem in the future.
1. Soil Pressure
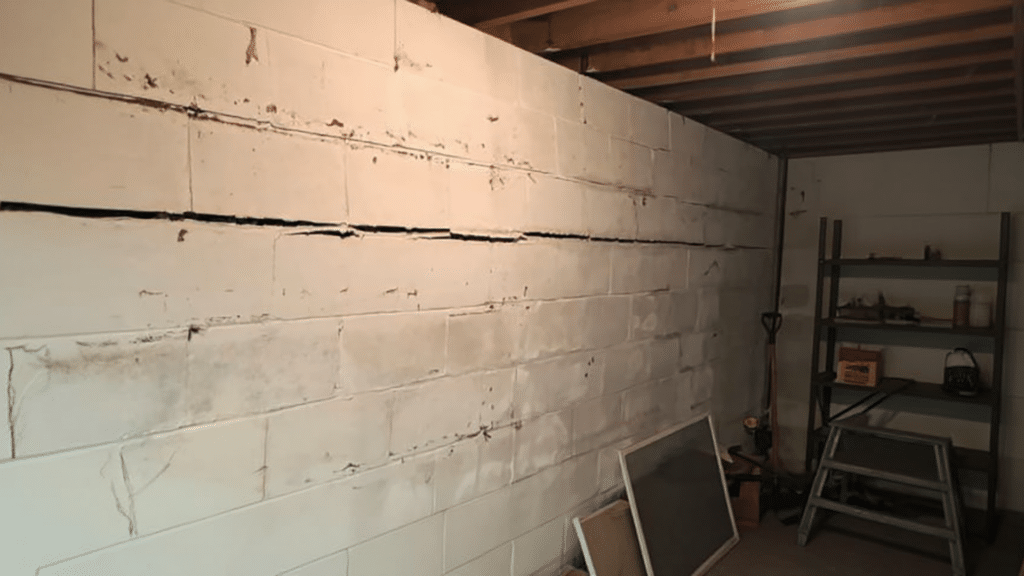
The ground around your home can change with the weather. When it rains a lot, the soil gets wet, heavy, and full of water. Wet soil pushes hard against the basement walls. This pressure can build up over time and cause cracks.
In some cases, the wall may even bend or bow inward. This is a common reason for wide or horizontal cracks in basement walls. If the soil around your home is clay or holds water, the risk is even higher.
2. Poor Drainage
If water doesn’t drain away from your home, it can collect around the foundation. This extra water soaks into the concrete or block walls. When water keeps sitting there, it weakens the wall and creates cracks.
Poor drainage may come from clogged gutters, missing downspouts, or ground that slopes toward the house instead of away. Fixing drainage can stop new cracks from forming after basement wall repair.
3. Temperature Changes
Concrete expands when it’s hot and shrinks when it’s cold. These changes in size are small, but they happen every year as the seasons change. Over time, this back-and-forth movement can cause the concrete to crack.
These cracks are often small and may not leak, but they should still be sealed to keep out moisture. If the area you live in has cold winters and hot summers, this kind of damage is more common.
4. Settling
Every home sits on soil that can shift or settle. Sometimes, the ground under one part of the house moves more than another. This uneven movement puts stress on the basement walls, causing them to crack.
Settling often happens in the first few years after a house is built, but it can also occur later due to erosion or poor soil. Cracks from settling are often diagonal or vertical and may get worse over time.
5. Poor Construction
Not all basement walls are built the same. If the builders used weak concrete, didn’t mix it properly, or skipped steps during construction, the walls may crack sooner than expected. In some cases, the wall is too thin or lacks the steel bars (rebar) that help it stay strong.
These problems make the wall weaker and more likely to crack under normal pressure. Cracks caused by poor construction may appear early, even when the home is new.
Types of Cracks and What They Mean
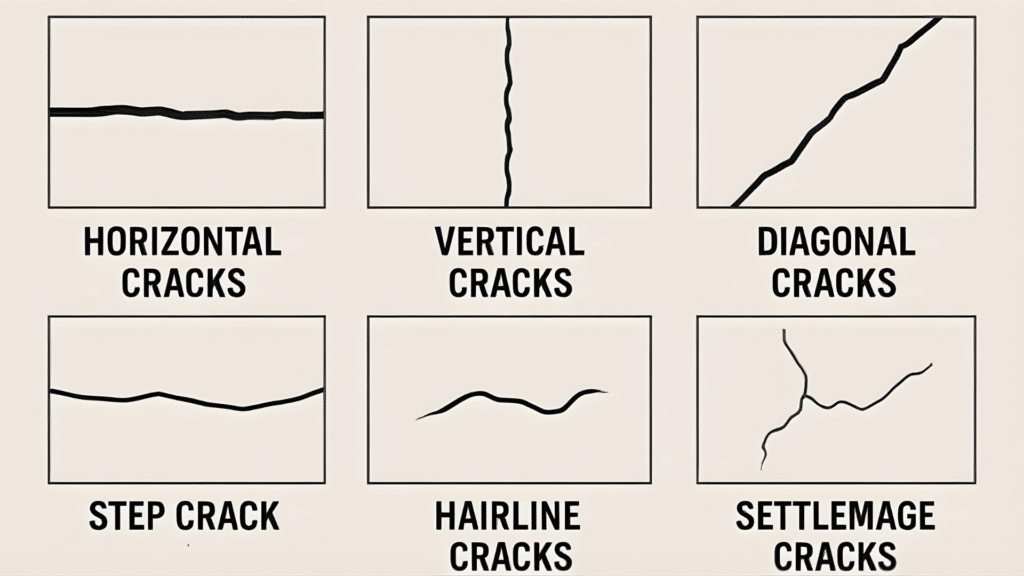
The table below explains the most common types of cracks, what causes them, and how serious they may be.
| Type of Crack | What It Looks Like | Common Cause | What It Means |
|---|---|---|---|
| Hairline Crack | Very thin, like a thread | Drying concrete, shrinkage | Usually not serious, seal to keep out moisture |
| Vertical Crack | Runs up and down | Settling, temperature change | Often harmless, but should be sealed |
| Diagonal Crack | Slants across the wall | Uneven soil pressure | May need attention if widening over time |
| Horizontal Crack | Runs side to side | Heavy soil or water pressure | It can be serious; the wall may bow or fail |
| Stair-Step Crack | Follows lines in block or brick walls | Soil movement, settling | Watch for movement or water leaks |
Tools and Products Needed
- DIY Foundation Crack Repair Kit
- Epoxy injection material (expands 20x its size)
- Injection ports and epoxy paste
- Caulking gun
- 4-inch diamond grinder
- Dewalt vacuum
- Safety glasses
Basement Wall Repair in Simple Steps
Fix cracks, stop leaks, and give your basement wall a clean new look, all in just a few hours.
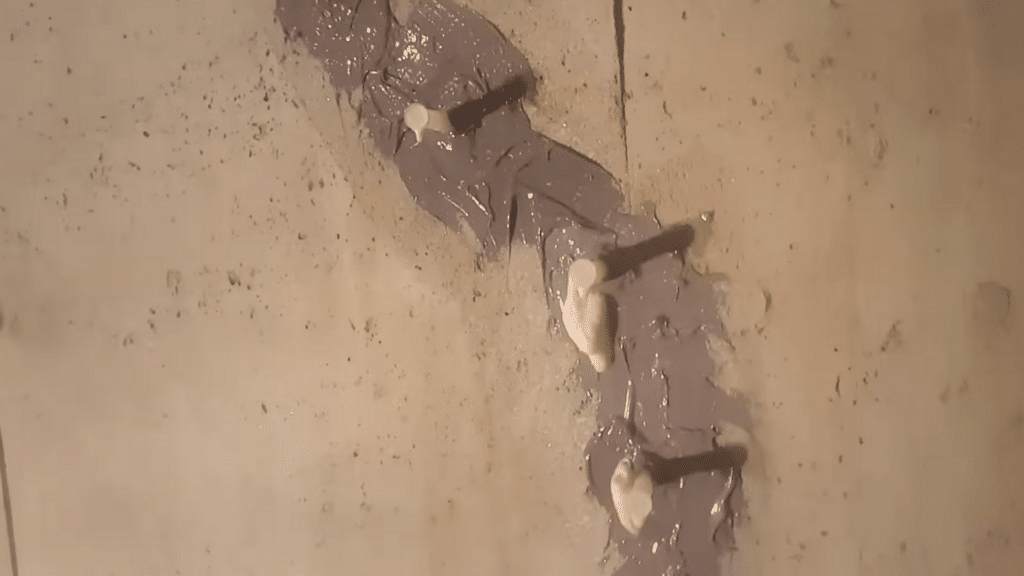
Step 1: Seal the Crack and Attach Injection Ports
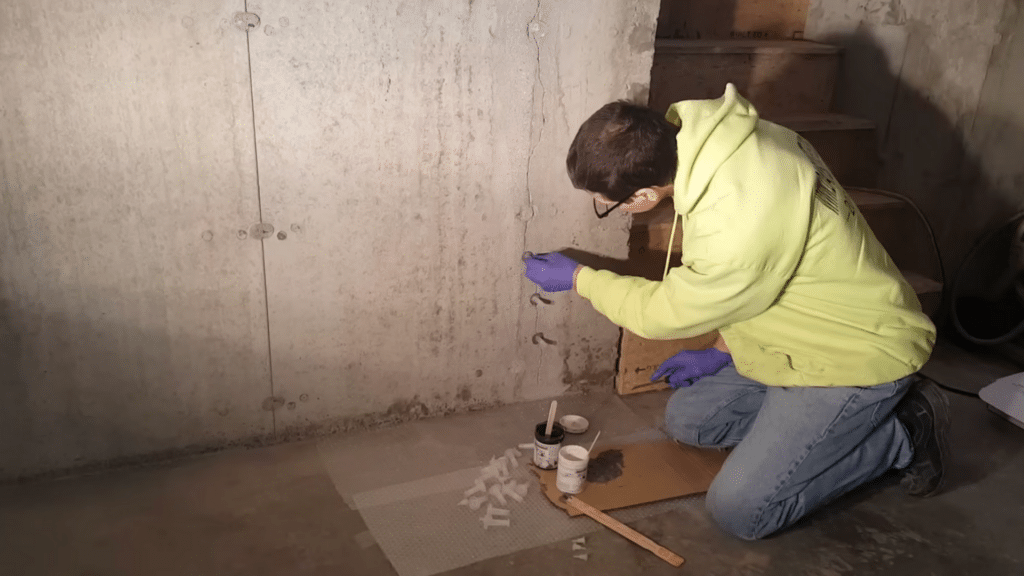
Start by applying epoxy paste over the crack using a putty knife. While the paste is still wet, press the plastic injection ports into the wall every 6–8 inches.
These ports allow you to inject repair foam deep into the crack. Make sure the ports are firmly attached and sealed around the edges with more epoxy paste to prevent any leaks during the injection process.
Step 2: Inject the Repair Foam from Bottom to Top
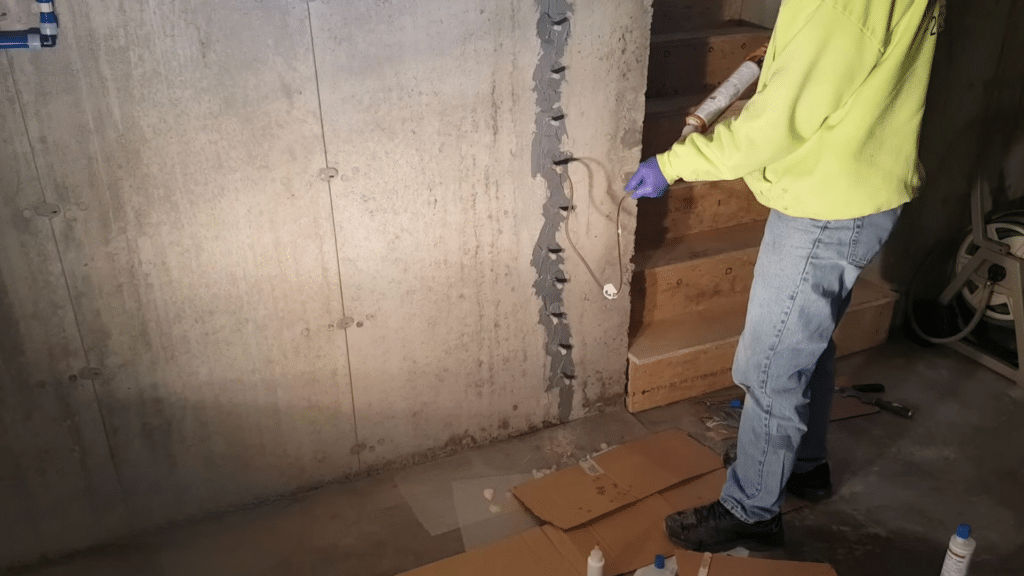
Connect the tube to the bottom port and slowly inject the foam. When foam starts coming out of the next port, move up and repeat. This ensures the crack is filled from the bottom up.
The foam expands 20 times its size, filling the entire crack and sealing it off. Work patiently, one port at a time, for the best results.
Step 3: Let the Foam Expand and Cure
Once the injection is complete, leave the wall undisturbed for 3 to 4 hours. The foam will continue to expand and harden, forming a waterproof barrier inside the crack.
During this time, avoid touching or pressing on the wall. Once cured, the foam forms a tight seal that blocks moisture, making the repair permanent and ready for finishing.
Step 4: Remove Injection Ports and Grind the Wall
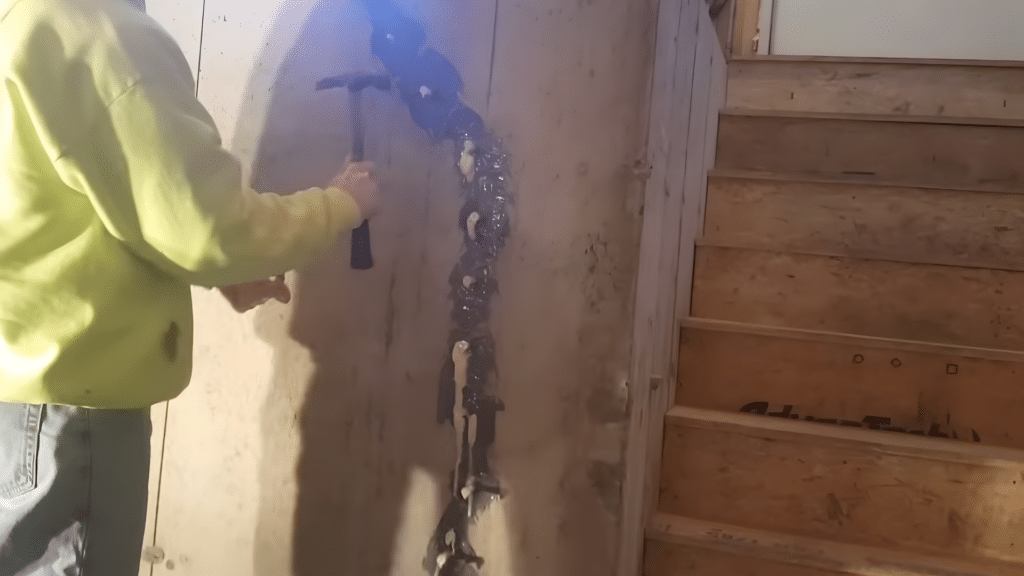
After the foam cures, tap the injection ports off using a hammer. Then, use a 4-inch diamond grinder and vacuum to smooth the repair area. Wear safety glasses to protect your eyes from dust.
Grinding makes the surface flat and clean, which is essential if you plan to paint or finish the wall. Make sure the area is completely smooth before moving on.
Step 5: Smooth and Finish the Wall
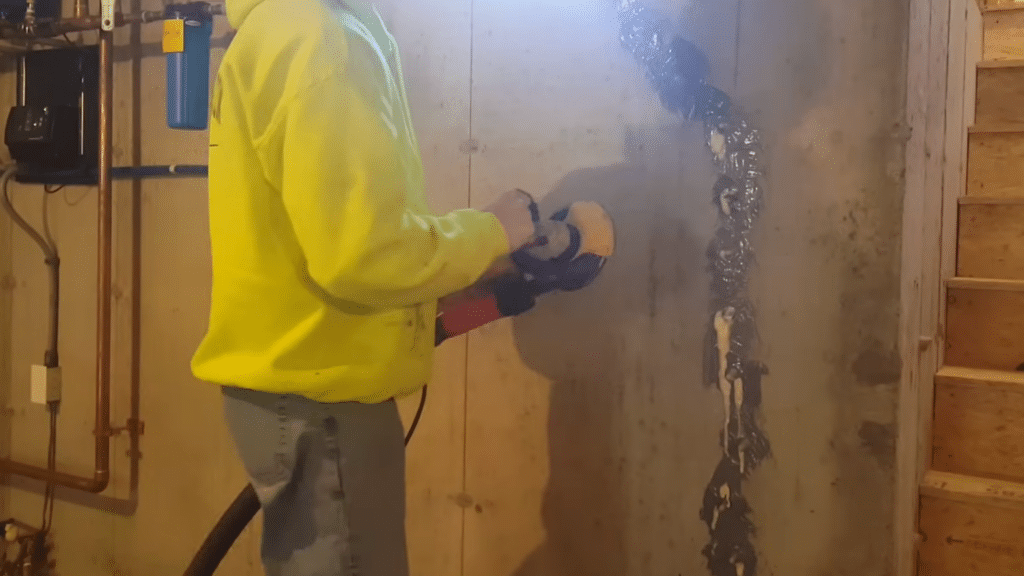
Use a 4-inch diamond grinder to smooth the repair area. Attach a vacuum to control dust. After grinding, you can paint over the area for a clean, finished look. The wall is now fully repaired and leak-free.
Once the wall is smooth and clean, apply paint over the repaired area to match the rest of your basement. This final step hides the repair and gives your wall a fresh look.
If you want a detailed guide, watch this YouTube tutorial by @mikedayconcrete:
Common Signs That a Crack Needs Attention
Here are warning signs that your basement wall crack may be severe:
- Crack is wider than 1/4 inch
- Crack is growing over time
- Water is leaking in
- The wall is bowing or leaning
- Cracks form in a stair-step pattern
- You see mold or water stains
If you notice any of these, it’s best to act fast.
Cost of Basement Wall Repair
The cost depends on the size of the crack and the type of fix needed.
| Repair Type | Approx. Cost |
|---|---|
| Crack filler (DIY) | $20 – $60 |
| Epoxy injection (DIY kit) | $70 – $150 |
| Hydraulic cement | $15 – $50 |
| Wall anchors (Pro install) | $800 – $2,500 per anchor |
| Full wall rebuild | $10,000+ |
Can You Do It Yourself or Call a Pro?
Not all cracks need expert help, but some definitely do.
DIY Repairs
Small cracks, hairline cracks, or simple leaks can be fixed with store-bought products. Many people can do these repairs in a weekend.
When to Call a Professional
Call a basement wall repair expert if:
- The wall is bowing
- The crack is large or deep
- Water keeps leaking even after repairs
- You’re not sure what caused the damage
- You need to install braces or anchors
To Conclude
Even the smallest basement wall crack can lead to water damage and weaken your foundation over time.
A clean, strong repair not only stops water, but it also makes your space safer and easier to finish or use. You don’t need to be an expert; follow clear steps and use the right materials to get the job done.
Don’t let a crack turn into costly damage. Tackle it early and take pride in a job well done.
Ready to get started? Gather your tools, plan your repair, and give your basement wall the fix it deserves today.