
Wood has a way of telling stories. Fresh lumber from the store looks clean and new, but it lacks character.
It doesn’t have that warm, lived-in feel that makes a space memorable. And aging wood isn’t some mysterious art form reserved for experts. It’s actually pretty straightforward once you know the basics.
The right techniques can turn ordinary boards into pieces that look like they’ve been around for decades.
This blog breaks down simple methods that work, without fancy tools or hard-to-find materials. Time to give that wood some personality.
Best Wood Types for Aging
| Wood Type | Why It Works | Best For |
|---|---|---|
| Pine | Soft grain absorbs stains easily | Beginner projects, furniture |
| Cedar | Natural oils create rich tones | Outdoor pieces, fencing |
| Oak | Prominent grain shows texture well | Flooring, heavy furniture |
| Barn Wood | Already weathered and aged | Accent walls, rustic decor |
| Poplar | Takes paint and stain evenly | Indoor furniture, cabinets |
| Douglas Fir | Strong with visible grain lines | Beams, structural pieces |
Safety Tips for DIY Wood Aging Projects
Working with chemicals and tools requires basic precautions. A few simple safety steps protect you from fumes, splinters, and accidents during the aging process.
- Wear gloves when handling stains, vinegar solutions, or steel wool to avoid skin irritation.
- Work in a well-ventilated area or outdoors to prevent inhaling chemical fumes.
- Use safety glasses to protect eyes from splashing liquids and flying wood particles.
- Keep a dust mask handy when sanding to avoid breathing in fine wood dust.
- Store all chemicals and stains in labeled containers, out of reach of kids and pets.
How to Age Wood Quickly at Home
Aging wood doesn’t have to take years. Several proven methods speed up the process and deliver results in hours or days, not decades.
1. How to Age Wood with Vinegar and Steel Wool
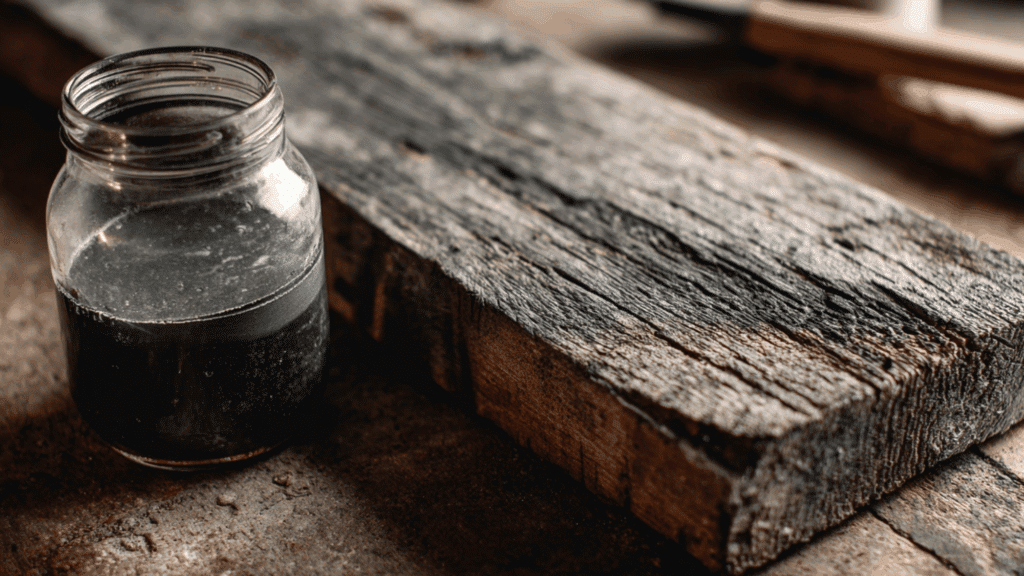
This chemical reaction creates instant gray tones that mimic decades of weathering. The tannins in wood react with steel wool dissolved in vinegar, producing authentic-looking aged wood.
Materials Needed: White vinegar, Steel wool (0000 grade works best), Glass jar with lid, Paintbrush or foam brush, and Gloves
Step-by-Step Process:
- Tear steel wool into pieces and place in a glass jar, then cover with white vinegar.
- Let the mixture sit for 24 hours until the steel wool dissolves and the liquid turns dark.
- Sand the wood lightly to open the grain and remove any finish or coating.
- Apply the vinegar solution with a brush in even strokes across the wood surface.
- Let dry for 2-4 hours and apply additional coats for darker, more aged tones.
Drying and Final Look: The wood grays within minutes but continues darkening as it dries. Results vary by wood type. Pine and cedar show the most dramatic aging, while hardwoods develop subtler tones.
2. How to Age Wood Using Sandpaper and Tools
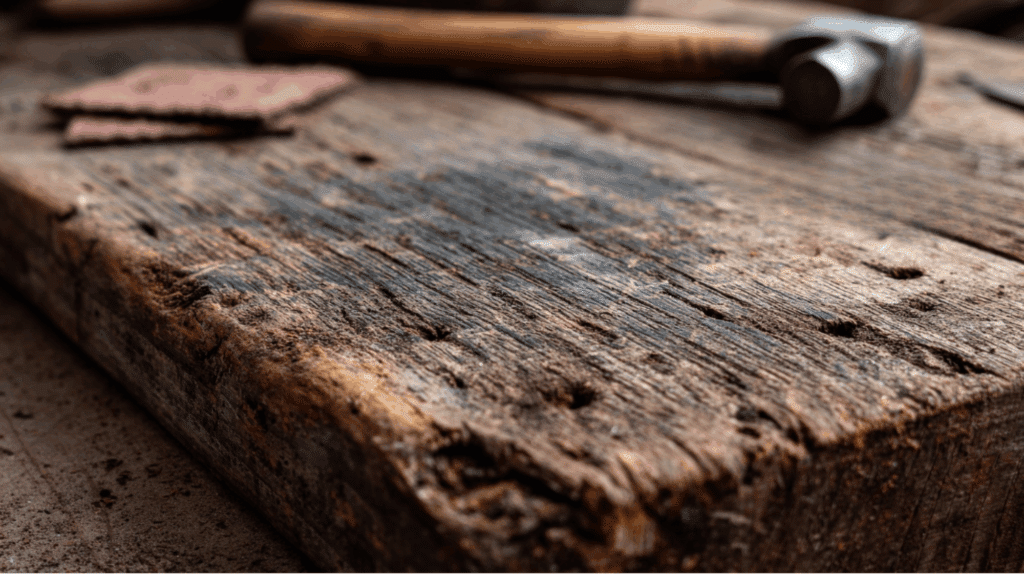
Physical distress adds dents, scratches, and worn edges that replicate years of use. This hands-on method gives complete control over where aging appears and how much character to add.
Materials Needed: Sandpaper (60, 80, and 120 grit), Hammer or mallet, Chain or rope, Wood screws or nails, Power sander
Step-by-Step Process:
- Start with 60-grit sandpaper on edges and corners where natural wear is most likely to occur.
- Hit the surface at random with a hammer, a chain, or screws to create dents and dings.
- Drag a chain across the wood to add scratches and gouges for texture.
- Sand again with 120-grit paper to smooth rough spots while keeping the distressed look.
- Focus on high-traffic areas like table edges, chair legs, and drawer fronts.
Hand Distressing vs Power Tools: Hand tools offer more control and prevent over-distressing. Power sanders work faster but can remove too much material quickly. Mix both methods for the most realistic results.
3. How to Age Wood with Paint and Stain
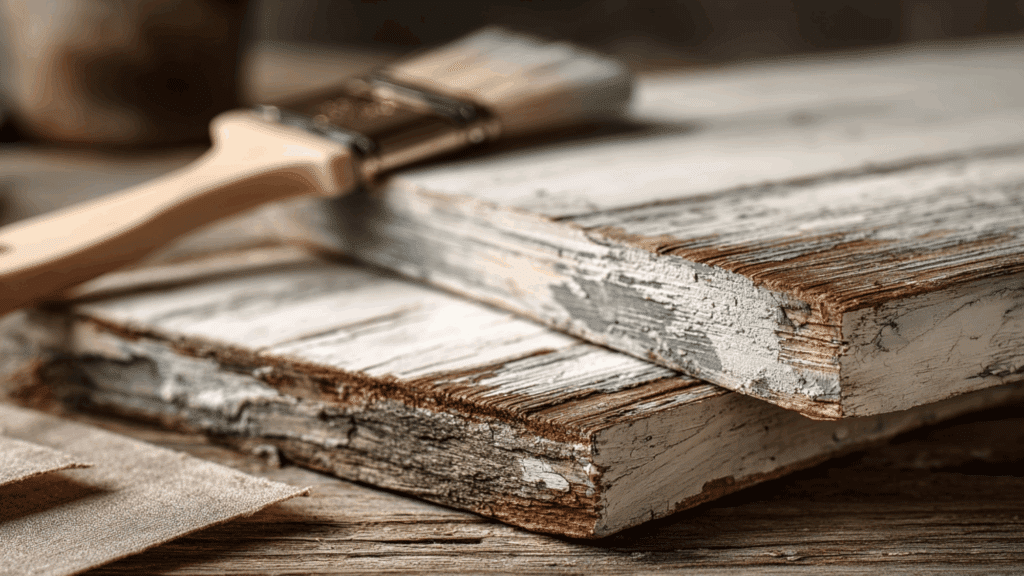
Layering colors mimics how painted wood chips and fades over time. This technique works great for furniture and creates a vintage farmhouse look with depth and dimension.
Materials Needed: Gray or white paint, Dark stain, Paintbrushes, Sandpaper (120 and 220 grit), Clean rags
Step-by-Step Process:
- Apply a coat of dark stain as the base layer and let it dry completely.
- Paint over the stain with gray or white paint in random, uneven strokes.
- Let the paint dry, then sand through it in spots to reveal the darker stain beneath.
- Apply a second color in thin layers, then distress again for a weathered, chippy finish.
- Wipe with a damp rag to blend colors and soften harsh lines between layers.
Layering Paint for an Aged Finish: Start dark, then add lighter colors on top. Sand between coats where natural wear happens: edges, corners, and raised details. Dry brushing adds a streaky texture that looks sun-faded.
4. How to Age Wood Naturally (Sun, Water, and Time)
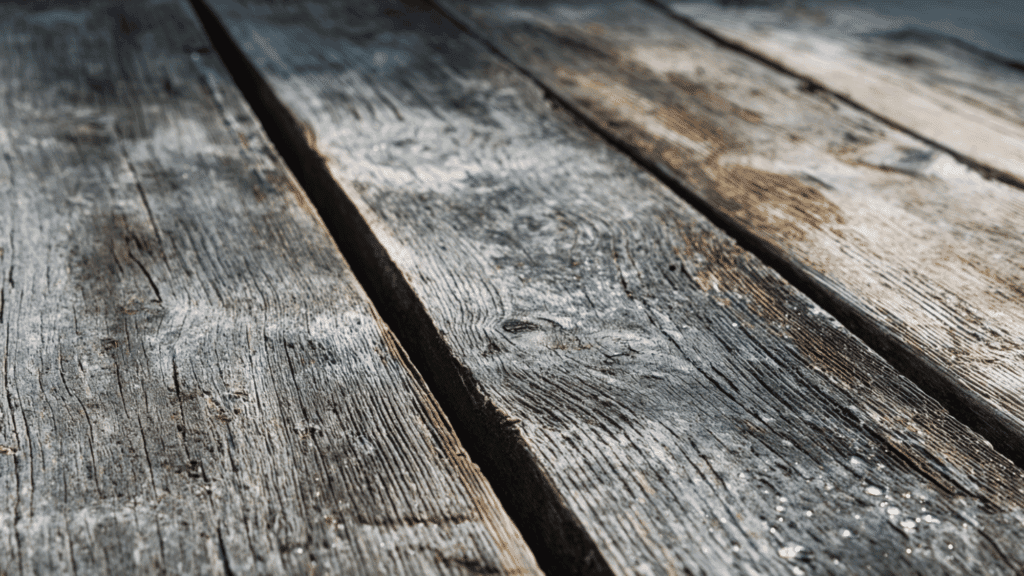
Nature does the work with this zero-chemical method. Sunlight, moisture, and weather slowly break down wood fibers and fade color, creating authentic aging that can’t be faked.
Materials Needed: Untreated wood, Outdoor space with sun exposure, Water (rain or hose), Wire brush, Patience
Step-by-Step Process:
- Place wood outdoors in direct sunlight where it gets rained on regularly.
- Wet the wood occasionally if rain is scarce to speed up the weathering process.
- Brush the surface with a wire brush after a few weeks to remove loose fibers.
- Flip or rotate the wood every couple of weeks for even aging on all sides.
- Wait 2-6 months, depending on climate and desired level of weathering.
How Long Does It Take: Climate matters. In hot, sunny areas with regular moisture, wood ages in 2-3 months. Cooler or drier climates take 4-6 months or longer for noticeable results.
Common Mistakes to Avoid When Aging Wood
Small errors can ruin the aged look or damage the wood. Knowing what not to do saves time, materials, and frustration during the process.
- Don’t skip sanding before applying treatments; sealed or glossy wood won’t absorb stains or chemicals properly.
- Avoid over-distressing in random spots; focus wear on edges and high-traffic areas for realistic results.
- Never rush the drying process between coats, or the finish will look blotchy and uneven.
- Don’t use too much vinegar solution at once; multiple thin coats create better depth than one heavy application.
- Avoid aging all pieces identically in a set; varied weathering levels look more natural and authentic.
How to Seal and Protect Aged Wood
Aging wood takes effort, so protecting that finish makes sense. Without a proper seal, the aged look can fade, chip, or get damaged from regular use and handling.
Sealing locks in the color and texture while adding durability for years to come.
But the wrong sealer can make aged wood look too shiny or new, killing the rustic vibe completely. Choosing the right product matters.
Matte and satin finishes preserve the weathered appearance better than high-gloss options.
Indoor and outdoor pieces need different protection levels, too. A good seal keeps the aged character intact while standing up to wear and tear.
Conclusion
Aged wood brings instant warmth and history to any space. The methods covered here, from vinegar solutions to natural weathering, all deliver solid results.
Pick the technique that fits the timeline and look needed for the project.
Don’t forget to seal the finish so all that work lasts. Start with scrap pieces first to test results before committing to the final project. Small experiments prevent big mistakes.
Now it’s time to grab some wood and get started. That rustic, weathered look is closer than it seems.