
Painting a popcorn ceiling can feel like one of those home projects that looks simple until you actually start.
The texture can make painting harder, and using the wrong tools or techniques may lead to uneven coverage, drips, or even damaged texture.
I have learned that a little preparation goes a long way when working on this type of ceiling.
This guide covers the best popcorn ceiling painting techniques, including preparation tools, paint selection, and methods for smooth, even coverage.
You will also learn common mistakes to avoid when spraying works better than rolling and how to maintain results.
If you are planning to update an old popcorn ceiling, this article will help you get better results with less frustration.
Common Challenges when Painting Popcorn Ceilings
Painting popcorn ceilings can be challenging because the textured surface reacts differently from smooth drywall during preparation and paint application.
Without proper tools and techniques, the texture may loosen, coverage can appear uneven, and cleanup often becomes more difficult.
Proper preparation helps reduce these issues and improves the final appearance while protecting the existing ceiling texture.
- Loose texture: Older ceilings may flake during painting.
- Uneven coverage: Texture creates hard-to-reach areas.
- Drips and splatters: Overhead painting increases paint mess.
- Water stains: Old stains may bleed through paint.
- Textured recesses: Deep areas often miss proper coverage.
Preparing a Popcorn Ceiling Before Painting
Proper preparation is one of the most important parts of painting a popcorn ceiling. A well-prepared surface helps paint adhere evenly, reduces the risk of texture damage, and creates a cleaner, longer-lasting finish.
Before painting, carefully inspect the ceiling for cracks, water stains, bubbling paint, or loose texture that may need repair.
Dust, cobwebs, and debris should be removed gently using a soft duster or vacuum brush attachment.
Protect floors, furniture, and walls with drop cloths and painter’s tape to minimize cleanup.
If the ceiling has stains, repair patches, or has not been painted for many years, applying a suitable primer is recommended.
Allow all cleaned, repaired, or primed areas to dry completely before painting to prevent bubbling, ng poor adhesion, and uneven paint coverage.
Tools and Materials Needed to Paint a Popcorn Ceiling
You only need a few basic tools and supplies to paint a popcorn ceiling successfully.
- Paint roller with a thick nap cover
- Extension pole
- Ceiling paint
- Paint tray
- Painter’s tape
- Drop cloths
- Stepladder
- Safety glasses
How to Paint a Popcorn Ceiling?
Painting a popcorn ceiling is easier when you follow a clear process that protects the texture and helps achieve smooth, even coverage.
Step 1: Clean and Caulk the Ceiling Edges
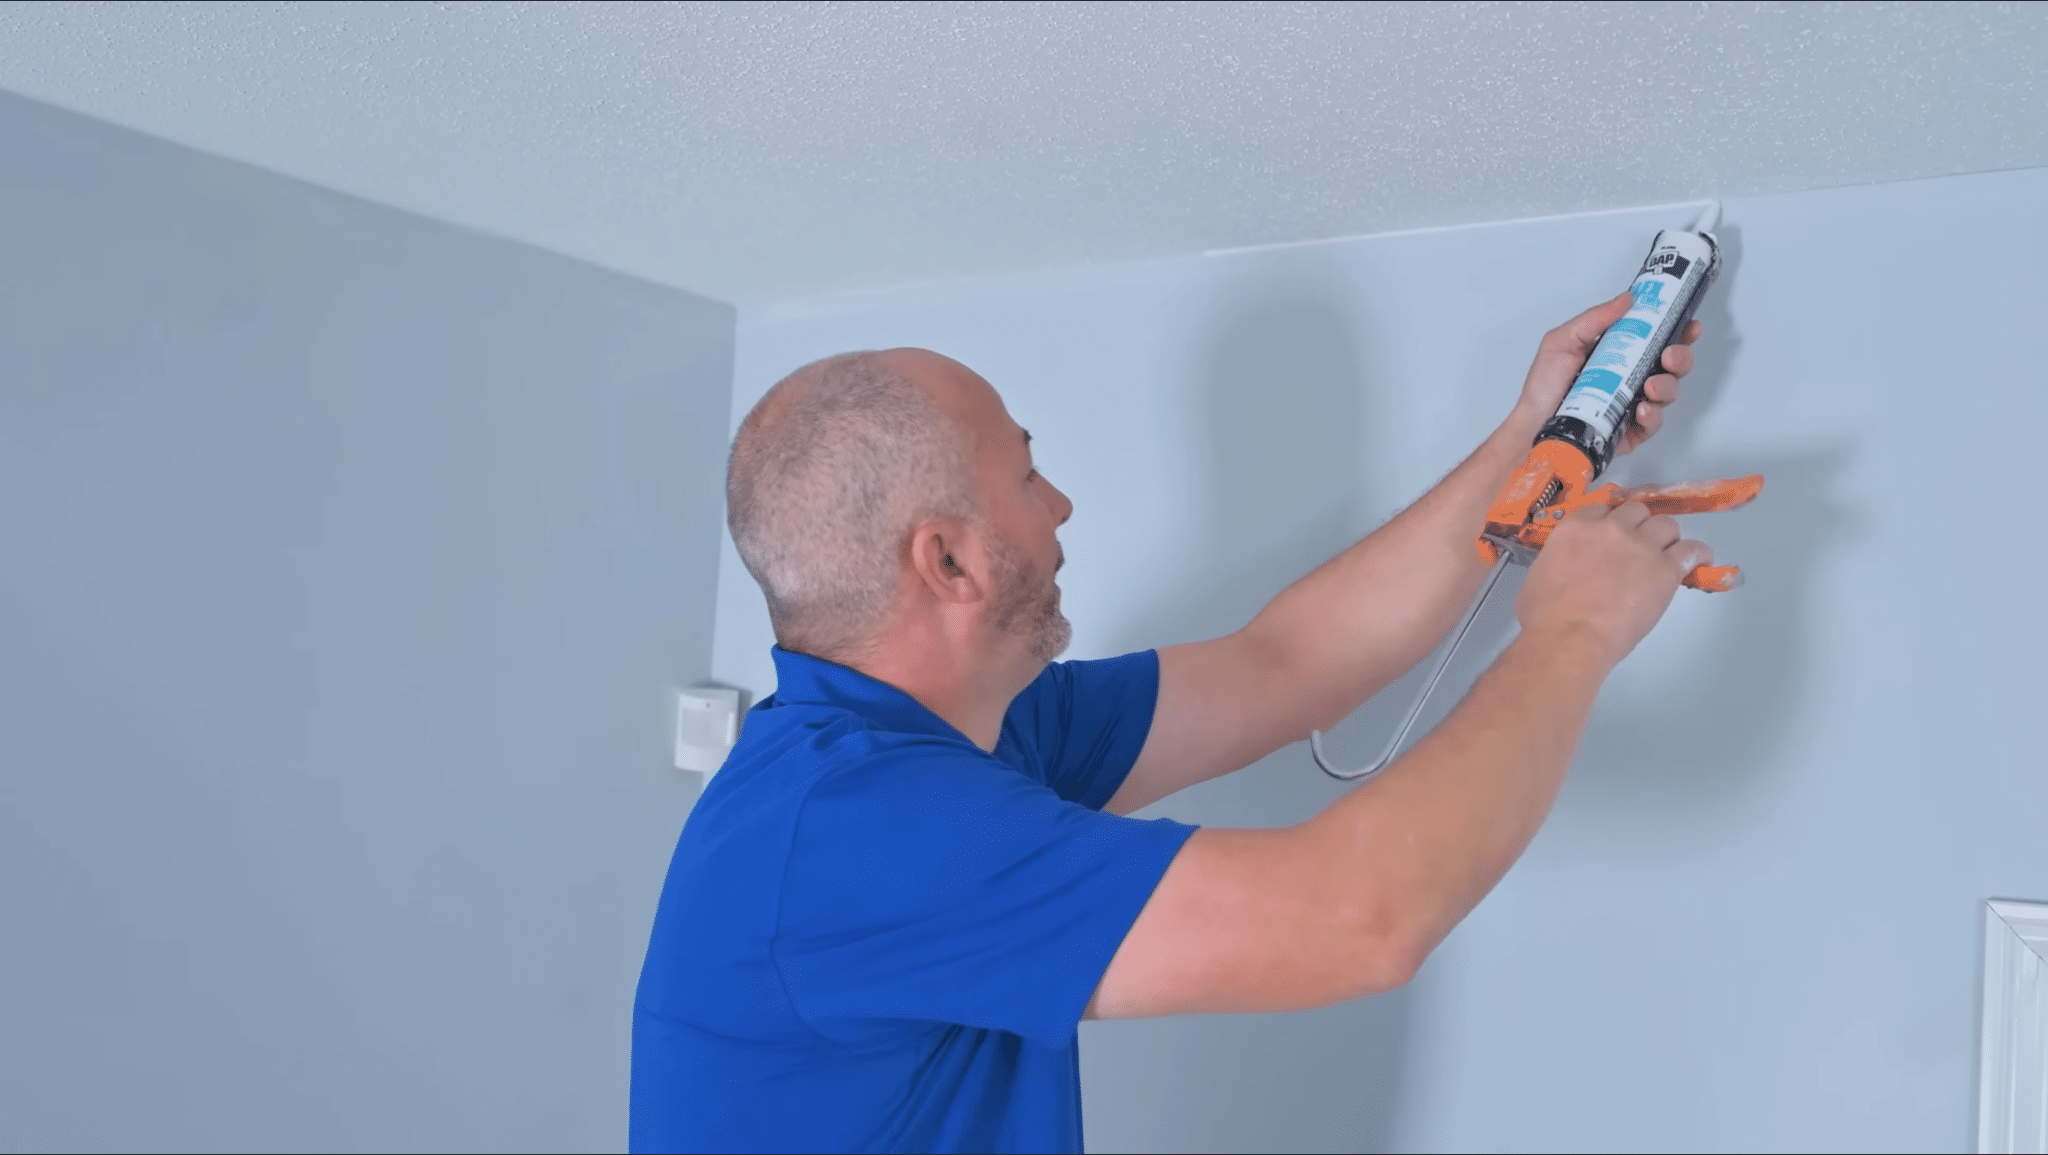
Start by cleaning away any loose ceiling texture where the ceiling meets the walls. Use your finger or a small tool to remove any buildup and create a smooth edge.
Next, apply a thin bead of fast-drying caulk along the joint. Smooth the caulk carefully with your finger to create a neat, even line.
This simple step helps create a clean transition between the wall and ceiling, makes painting easier, and gives the finished room a more polished and professional appearance.
Step 2: Remove Excess Texture Near the Walls
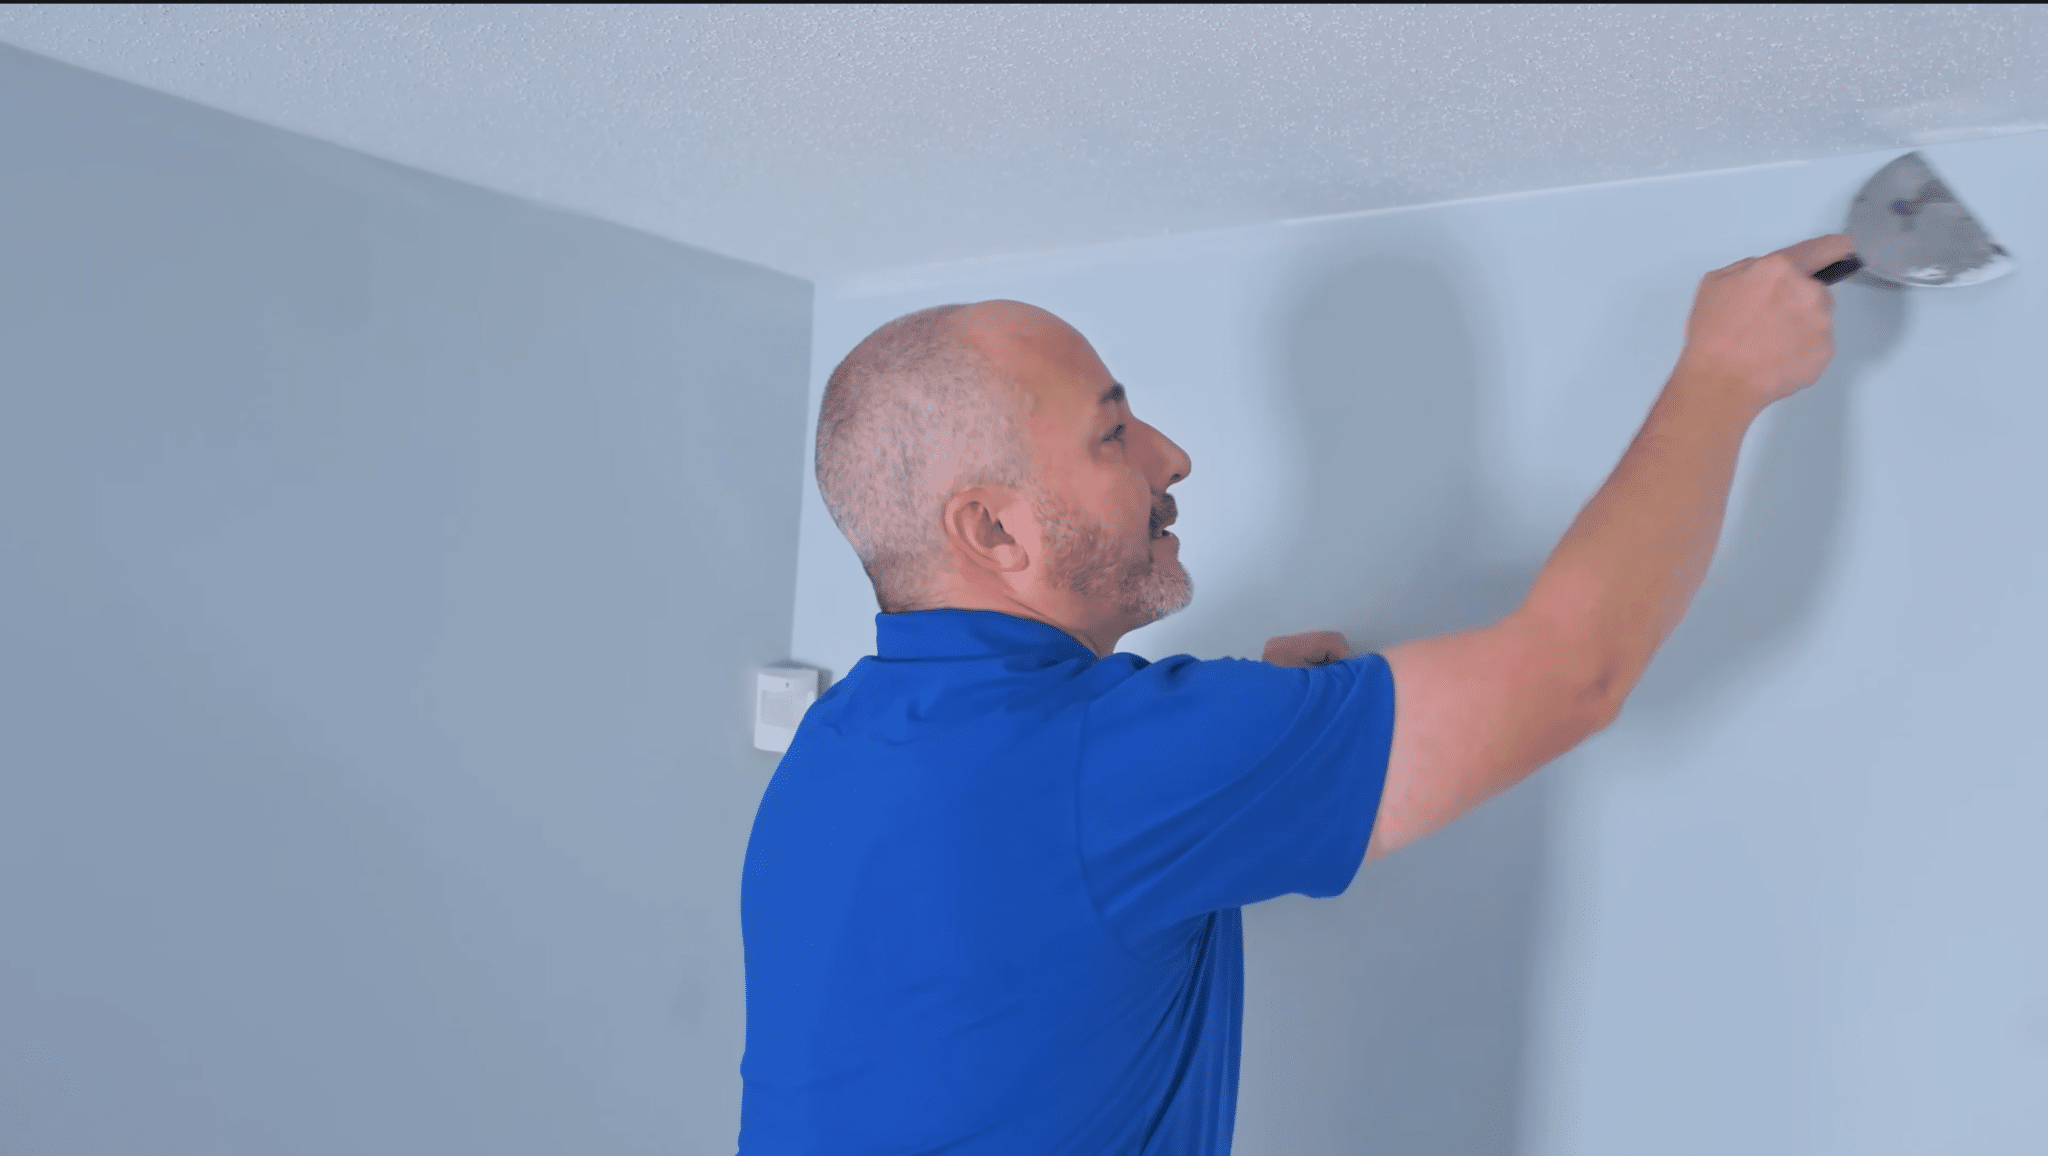
If the ceiling has been painted before, use a putty knife to scrape away any texture that extends onto the wall.
Removing these raised areas helps create a cleaner edge and keeps your brush from catching while painting. After smoothing the surface, check the corner for gaps or uneven spots.
Apply a small amount of caulk where needed and smooth it out.
Taking a few extra minutes on this step improves painting control and helps create a neat, professional-looking finish.
Step 3: Paint the Outer Edge First
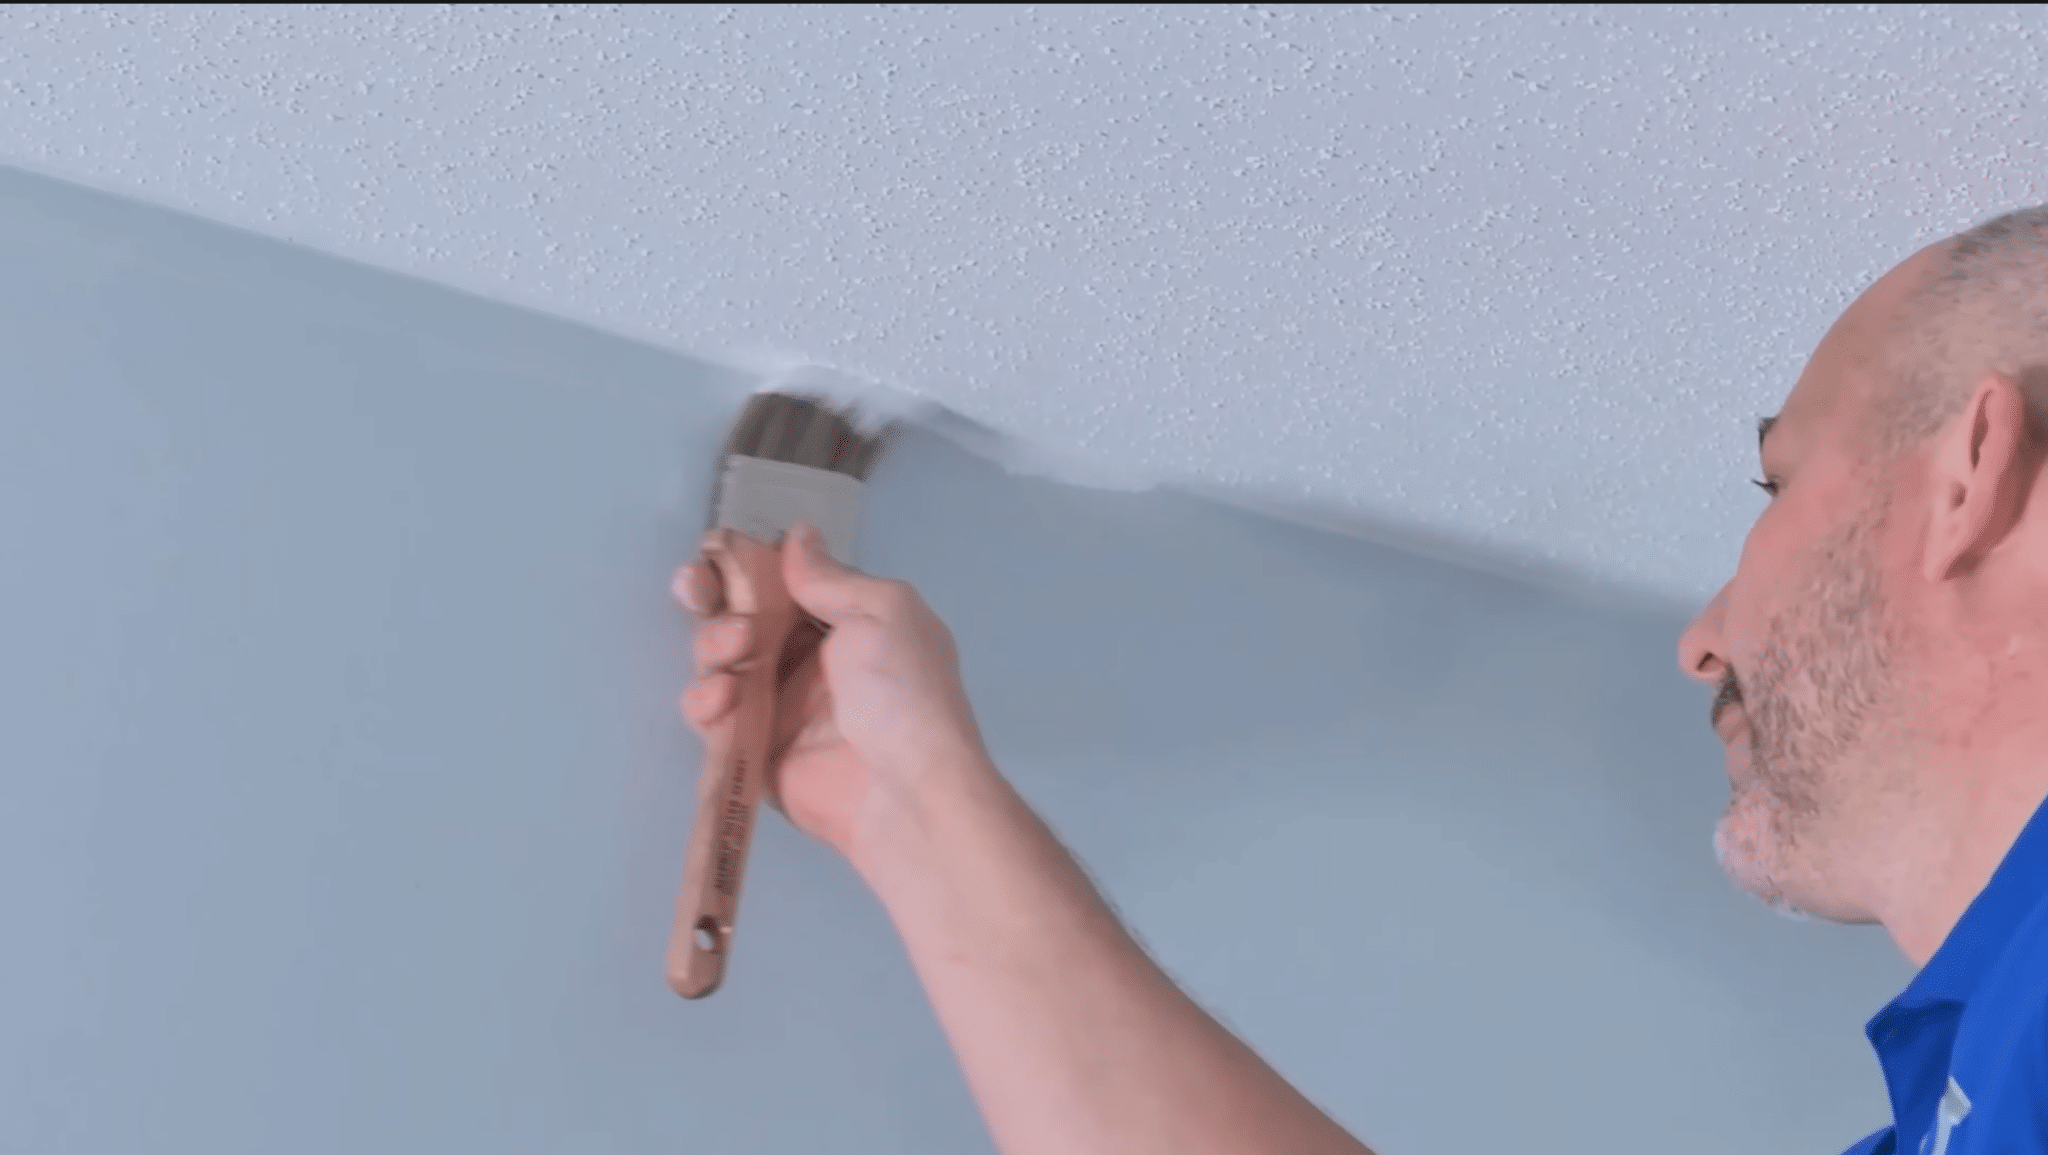
Use a brush and flat ceiling paint to cover the outer inch of the ceiling. Focus on hiding any wall color that may have extended slightly onto the ceiling surface.
Work gently because the popcorn texture can break off if brushed too aggressively.
A few light strokes are enough to cover the edge without damaging the texture. This step creates a clean border and prepares the ceiling for rolling.
Step 4: Prepare and Load the Roller Properly
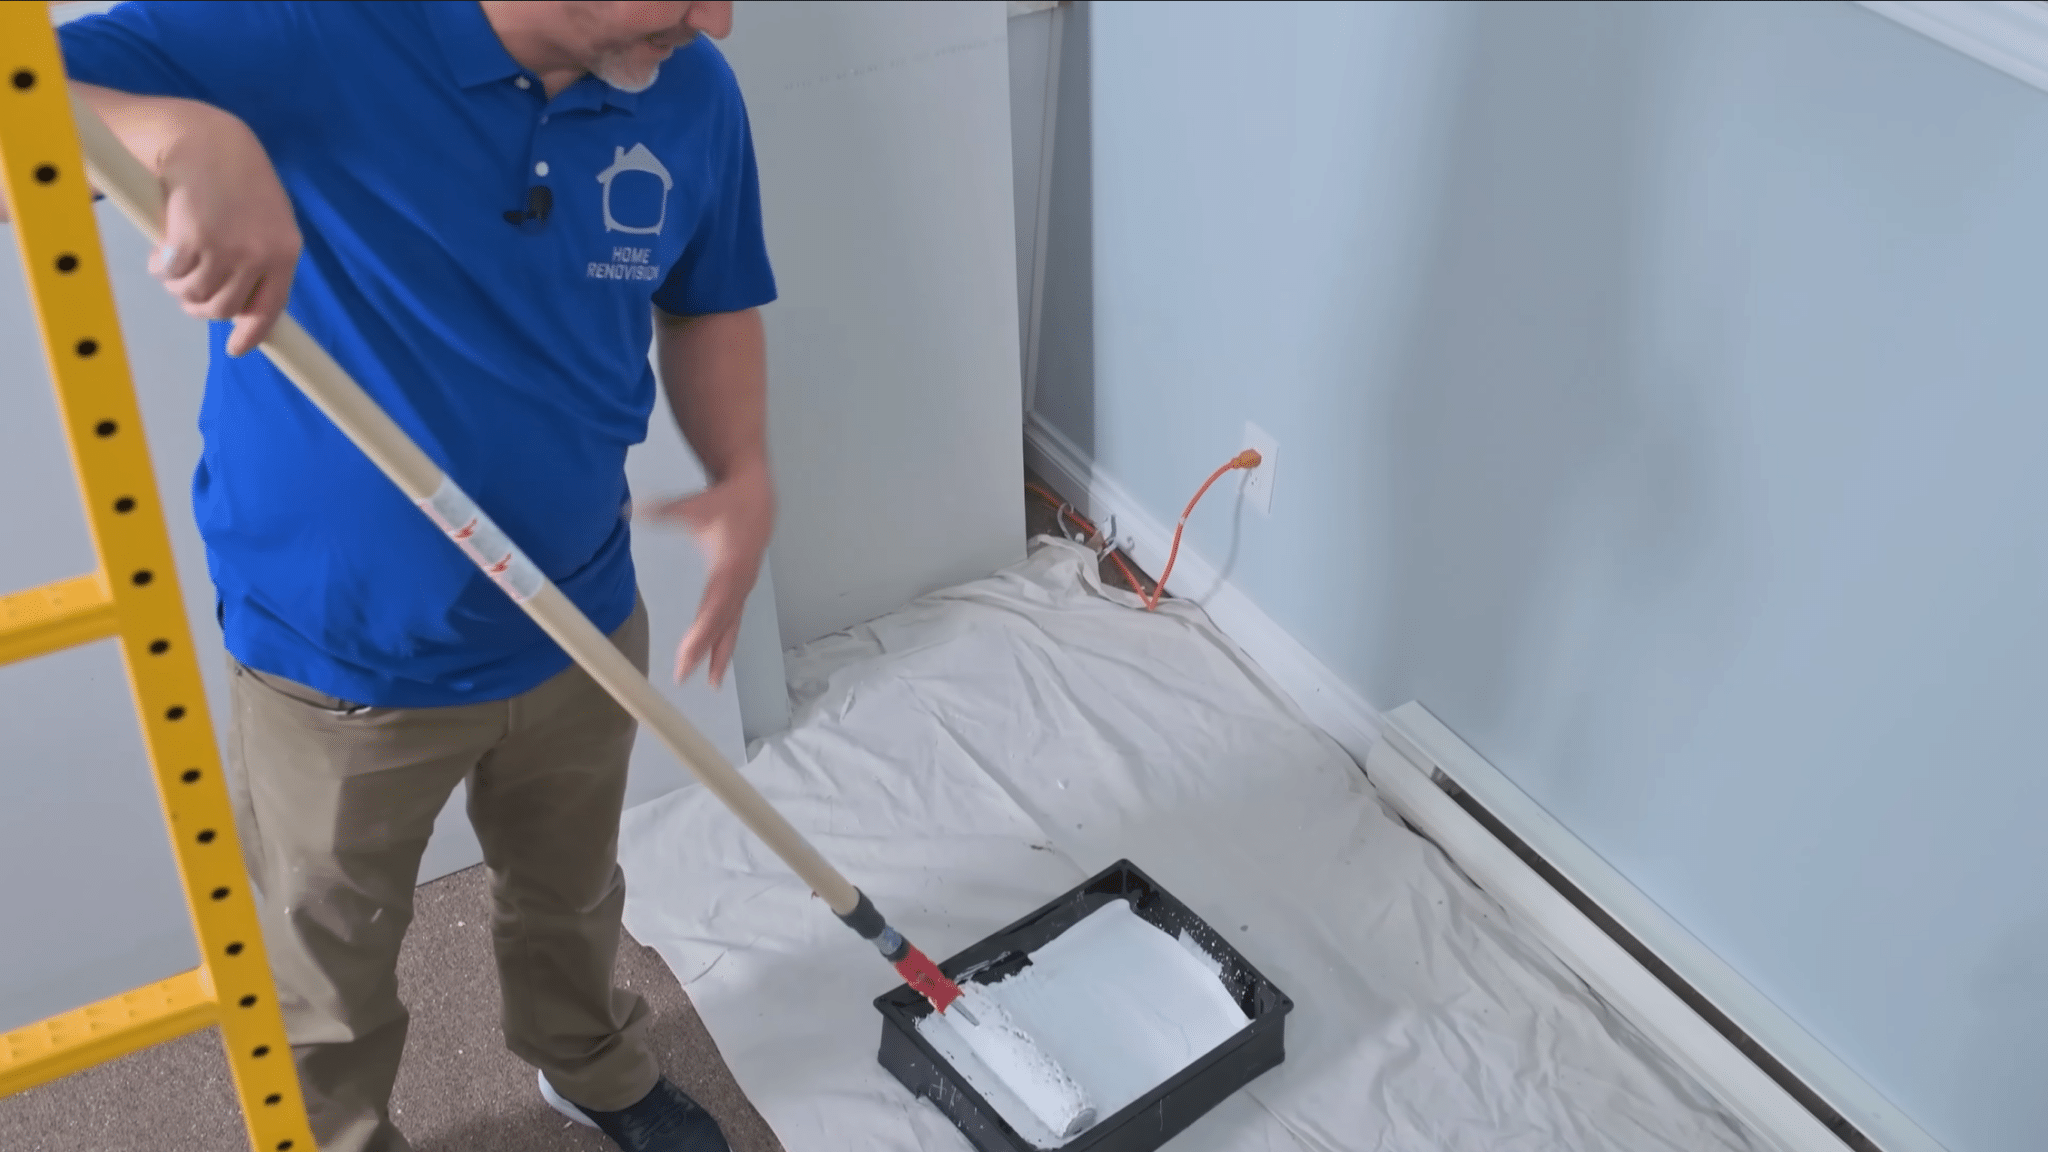
Attach your roller to an extension pole and load it thoroughly with paint. Continue rolling in the tray until it is fully saturated and no dry material is visible.
A properly loaded roller distributes paint more evenly and helps prevent patchy coverage.
Taking the time to fully load the roller before starting will make the application process smoother and improve the overall finish on the ceiling.
Step 5: Avoid Using a Standard Rolling Pattern

Applying paint in straight rows with a standard roller may seem like the easiest method, but it often leaves visible lines and a flattened texture.
These marks can become noticeable when sunlight enters the room at certain angles.
Popcorn ceilings require a different approach because preserving the texture is just as important as covering the surface.
Understanding this common mistake can help you avoid an uneven and disappointing finish.
Step 6: Choose a Split Foam Roller
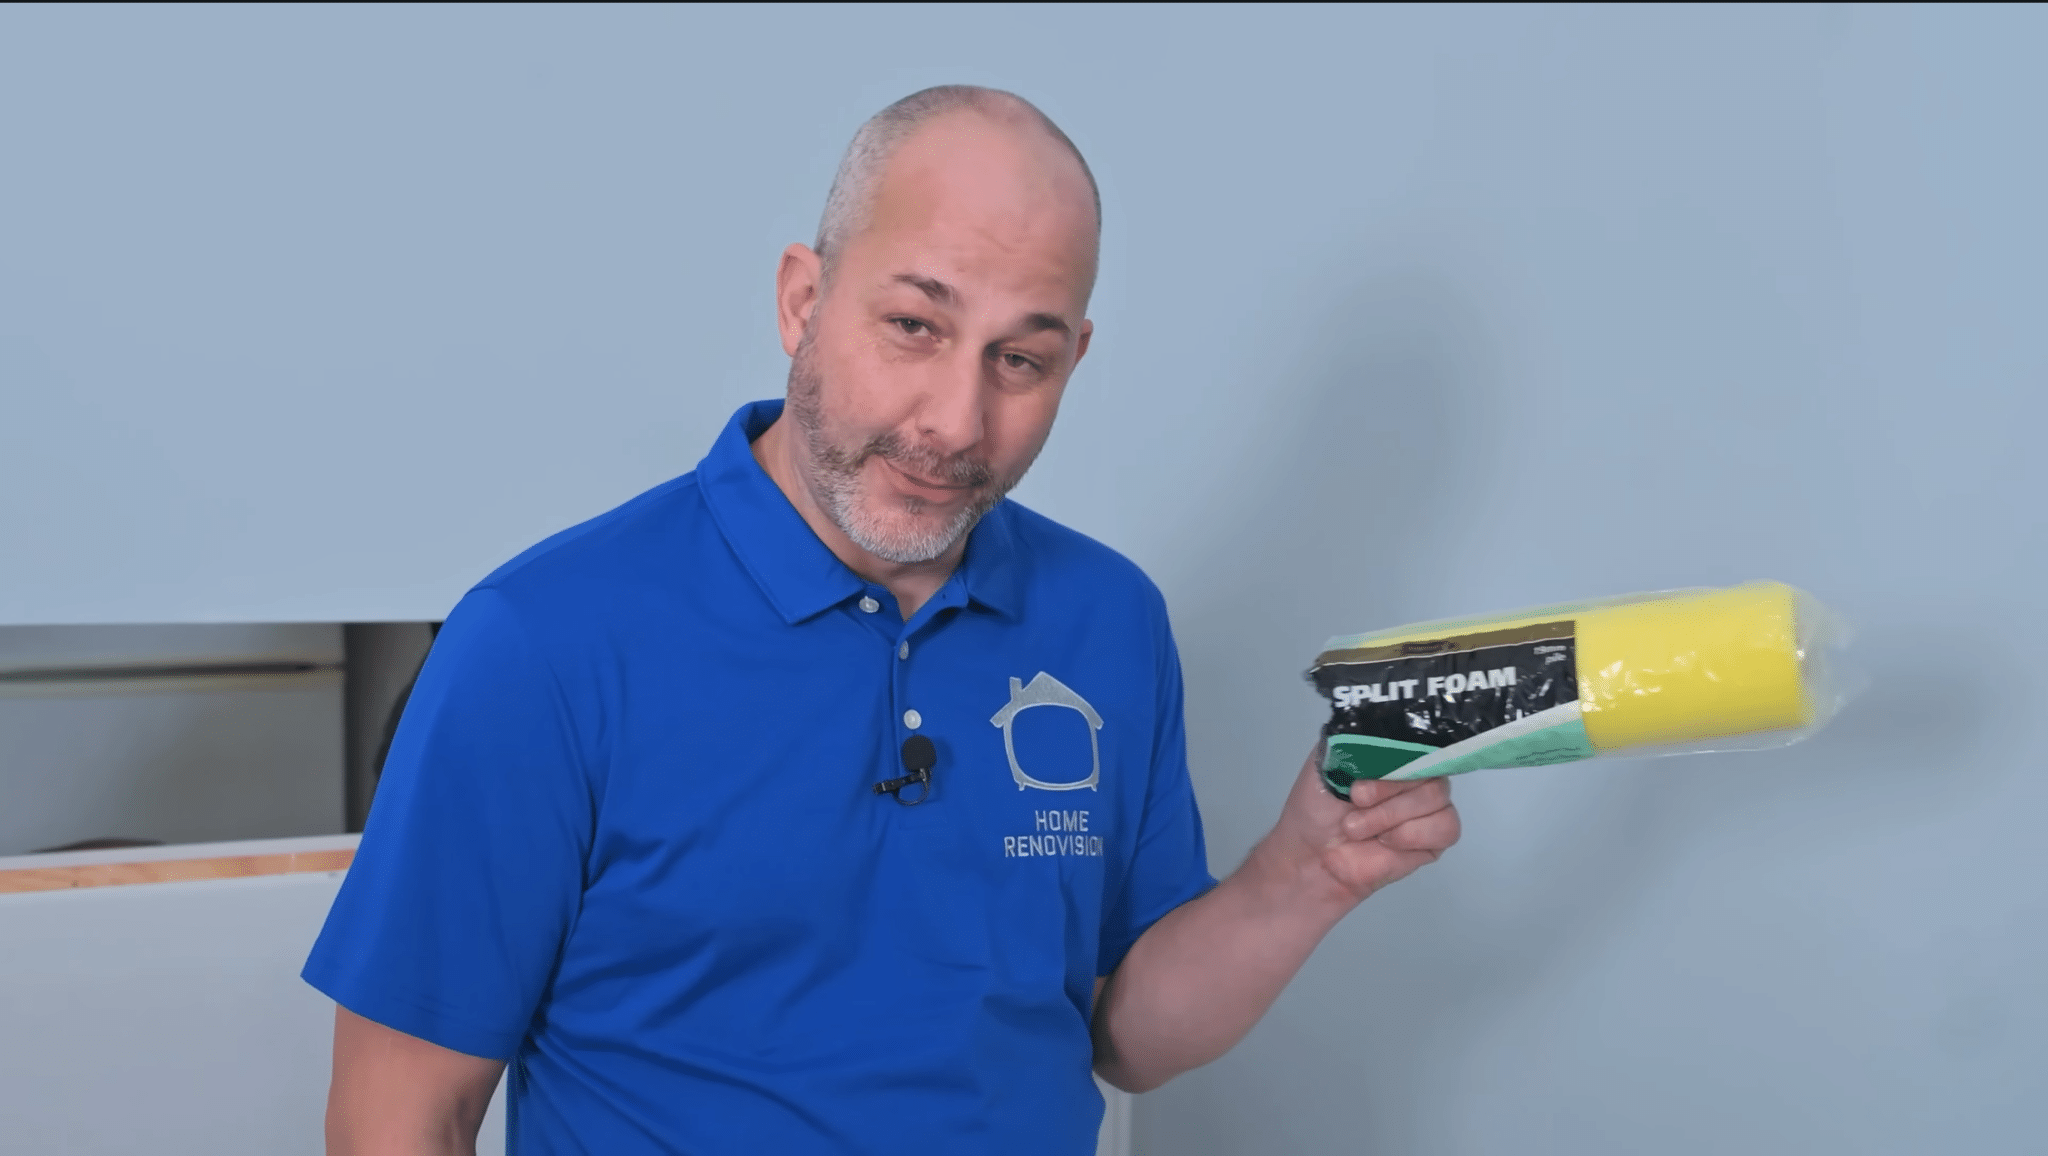
A split foam roller is one of the best tools for popcorn ceilings. The cuts in the foam allow the roller to move around the texture rather than pressing into it.
This helps preserve the ceiling’s appearance while providing even paint coverage.
Unlike standard rollers, split foam rollers reduce the risk of flattening textured areas. They are widely available and work well on many textured ceiling surfaces.
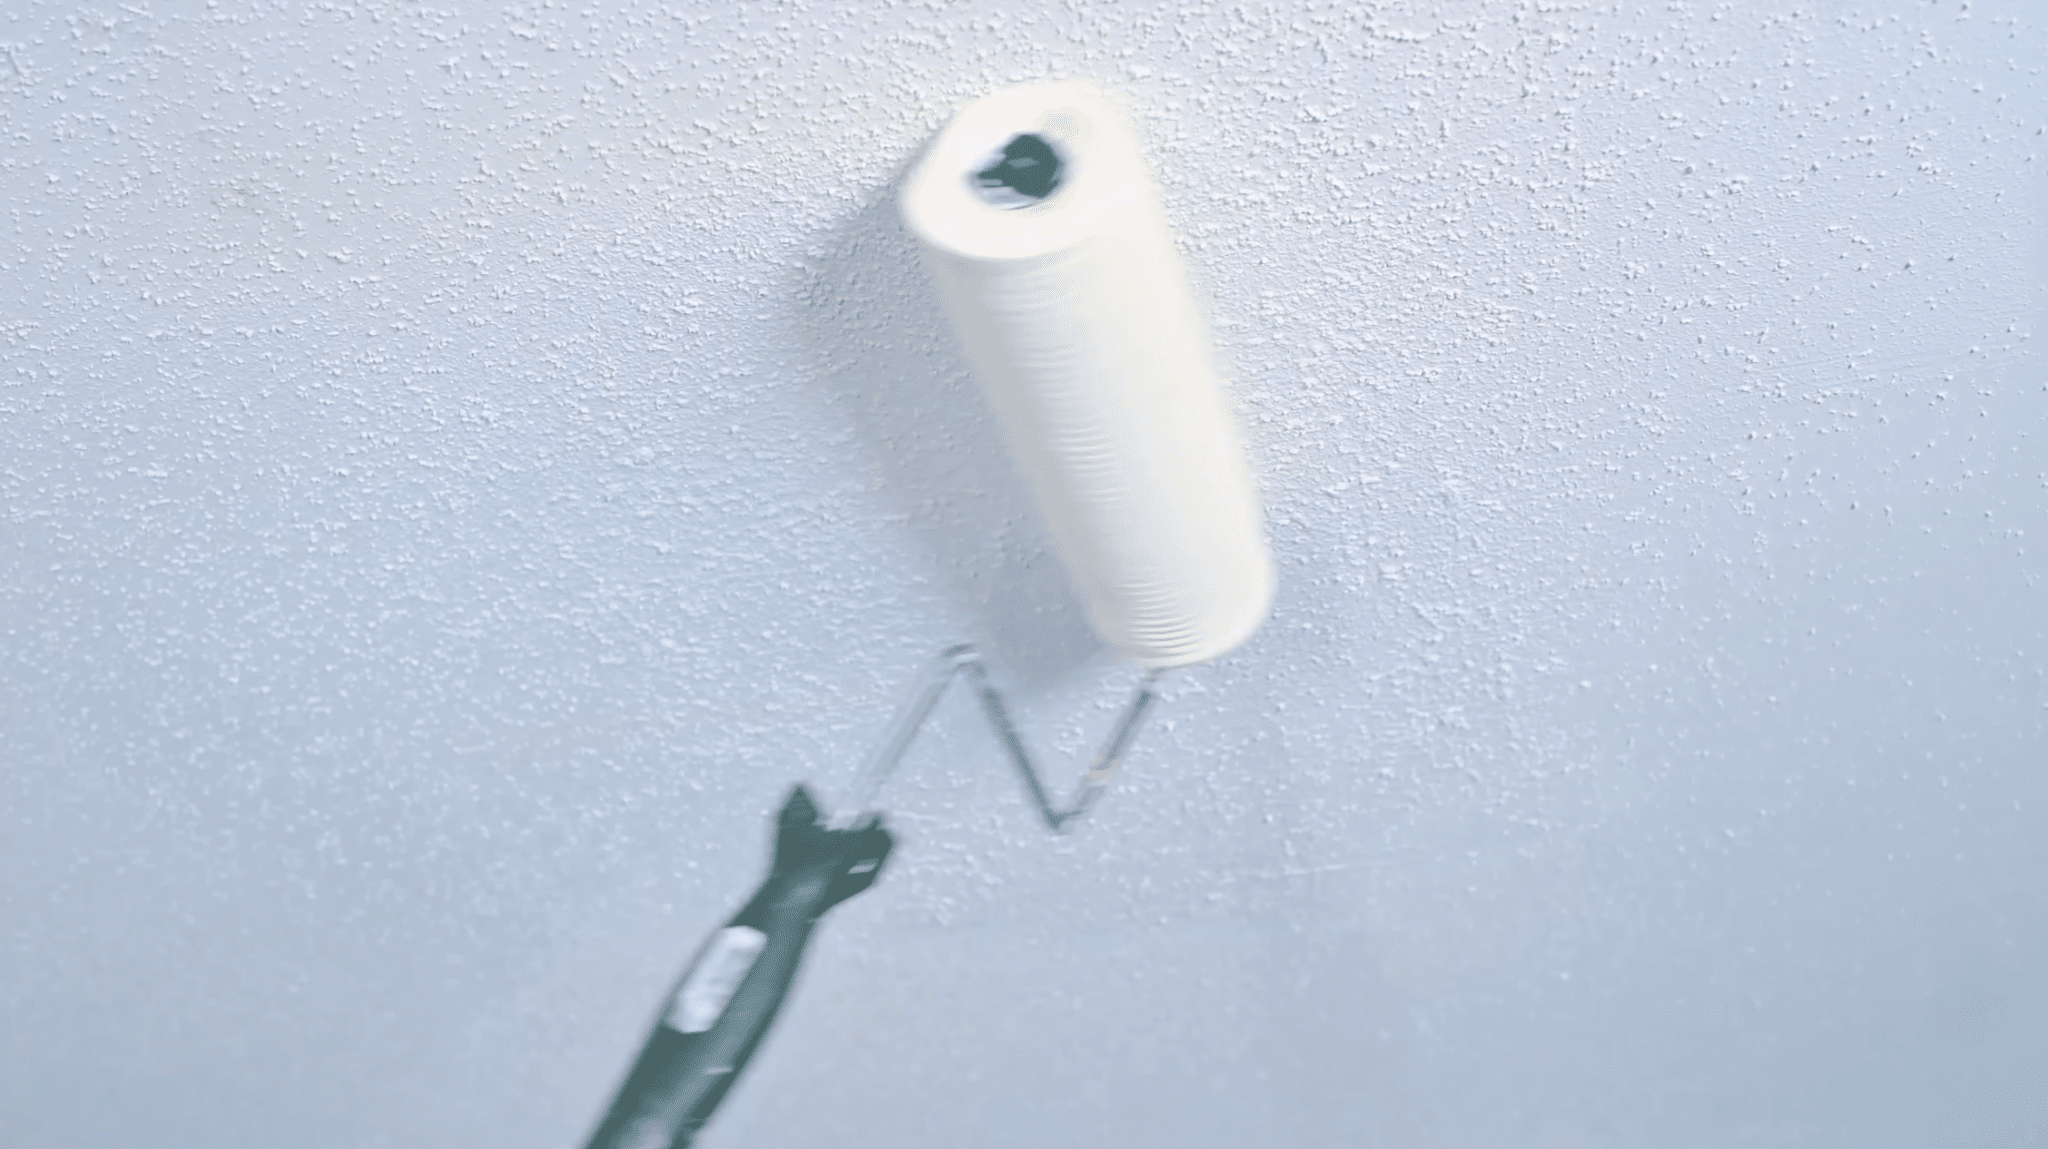
Step 7: Roll the Paint with Light Pressure
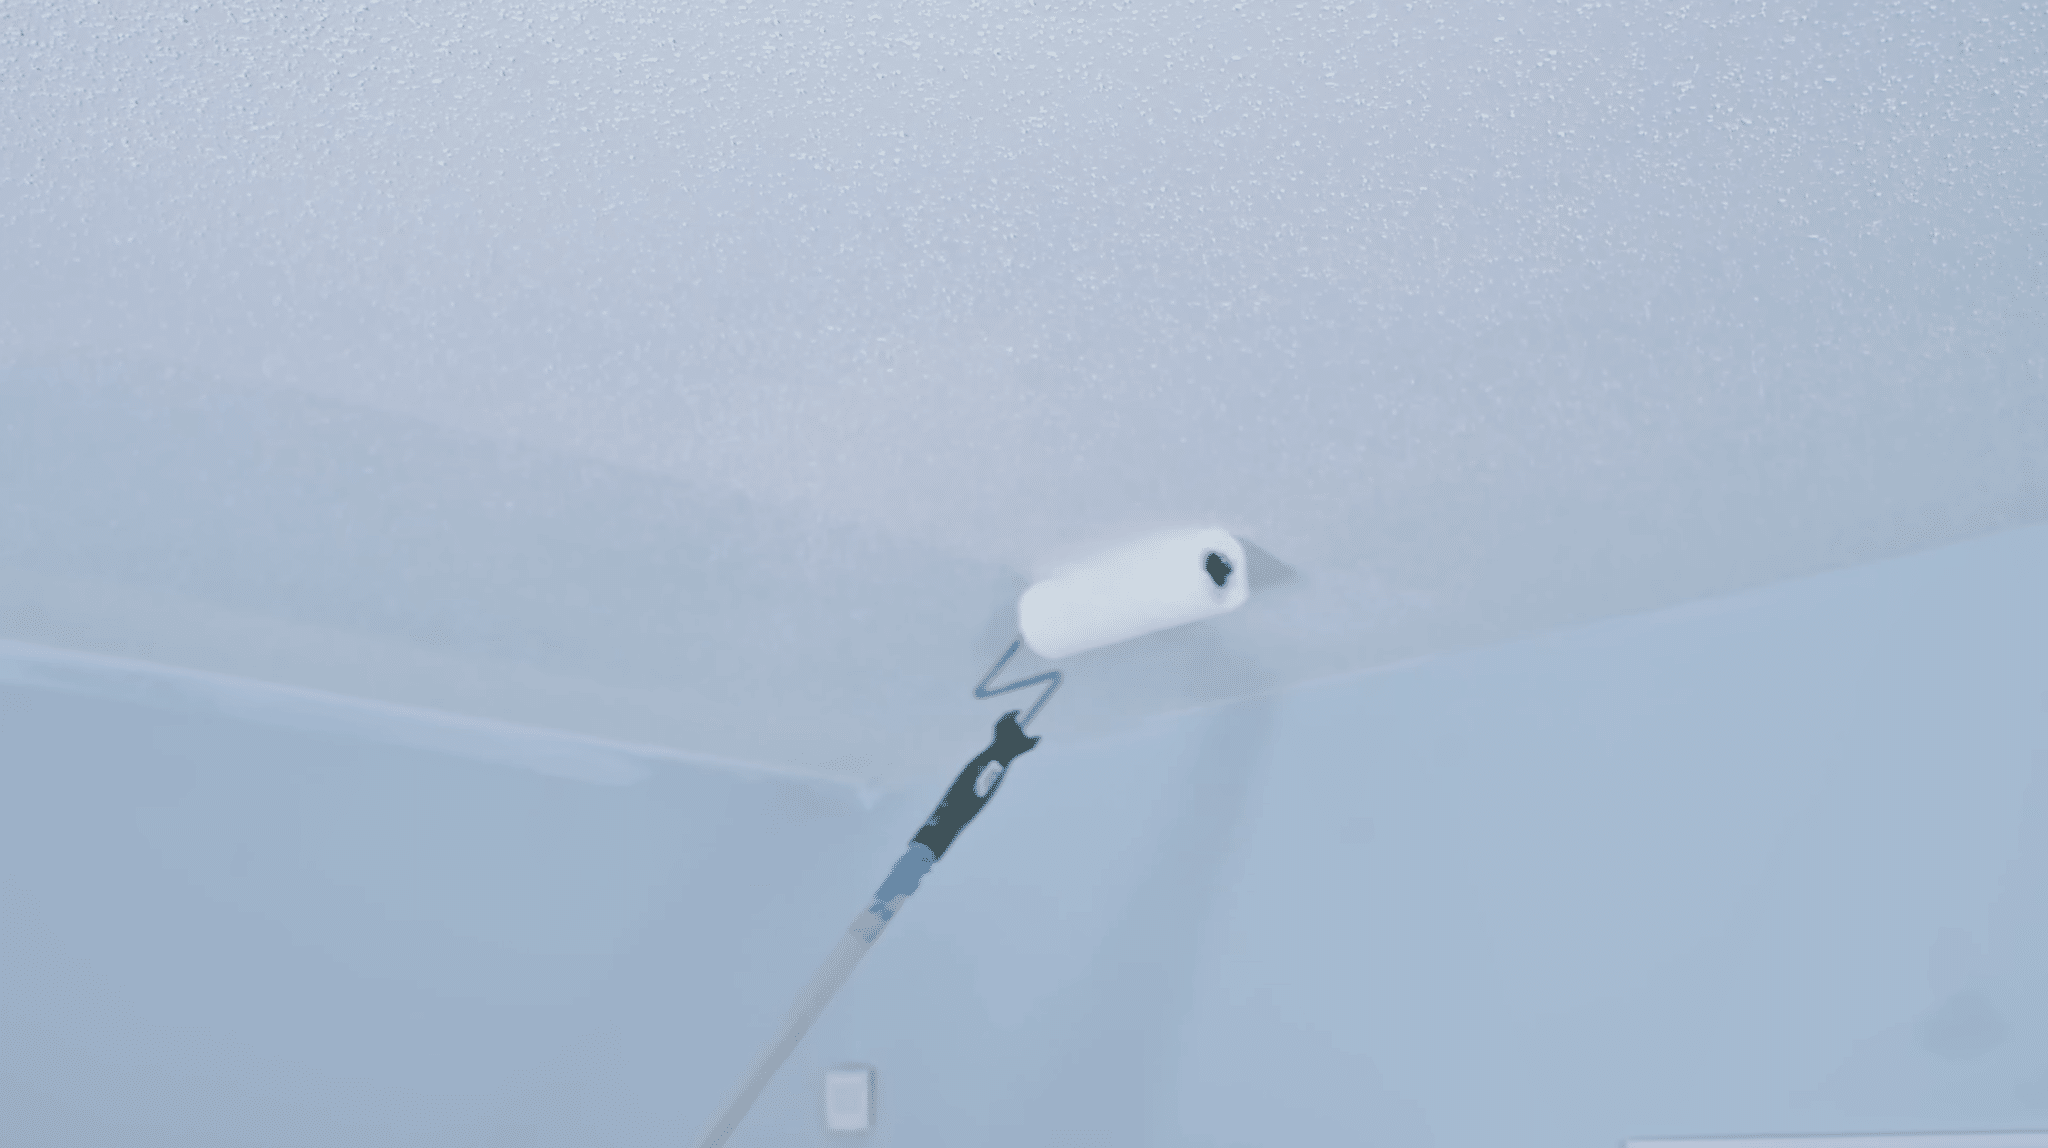
Once the roller is loaded, begin applying paint using light and steady pressure. Let the roller glide across the ceiling without forcing it into the texture.
Excess pressure can cause drips, flatten popcorn texture, and leave uneven marks behind.
The goal is to coat the surface evenly while preserving texture, as gentle rolling reduces damage and creates a more consistent finish.
Step 8: Cover Stains and Repaired Areas
As you continue painting, make sure to cover any stained or repaired sections of the ceiling. A fresh coat of paint helps blend patched areas into the surrounding texture and creates a more uniform appearance.
These areas may absorb paint differently at first, but they generally become less noticeable as the coating dries.
Careful coverage ensures the repaired sections do not stand out from the rest of the ceiling.
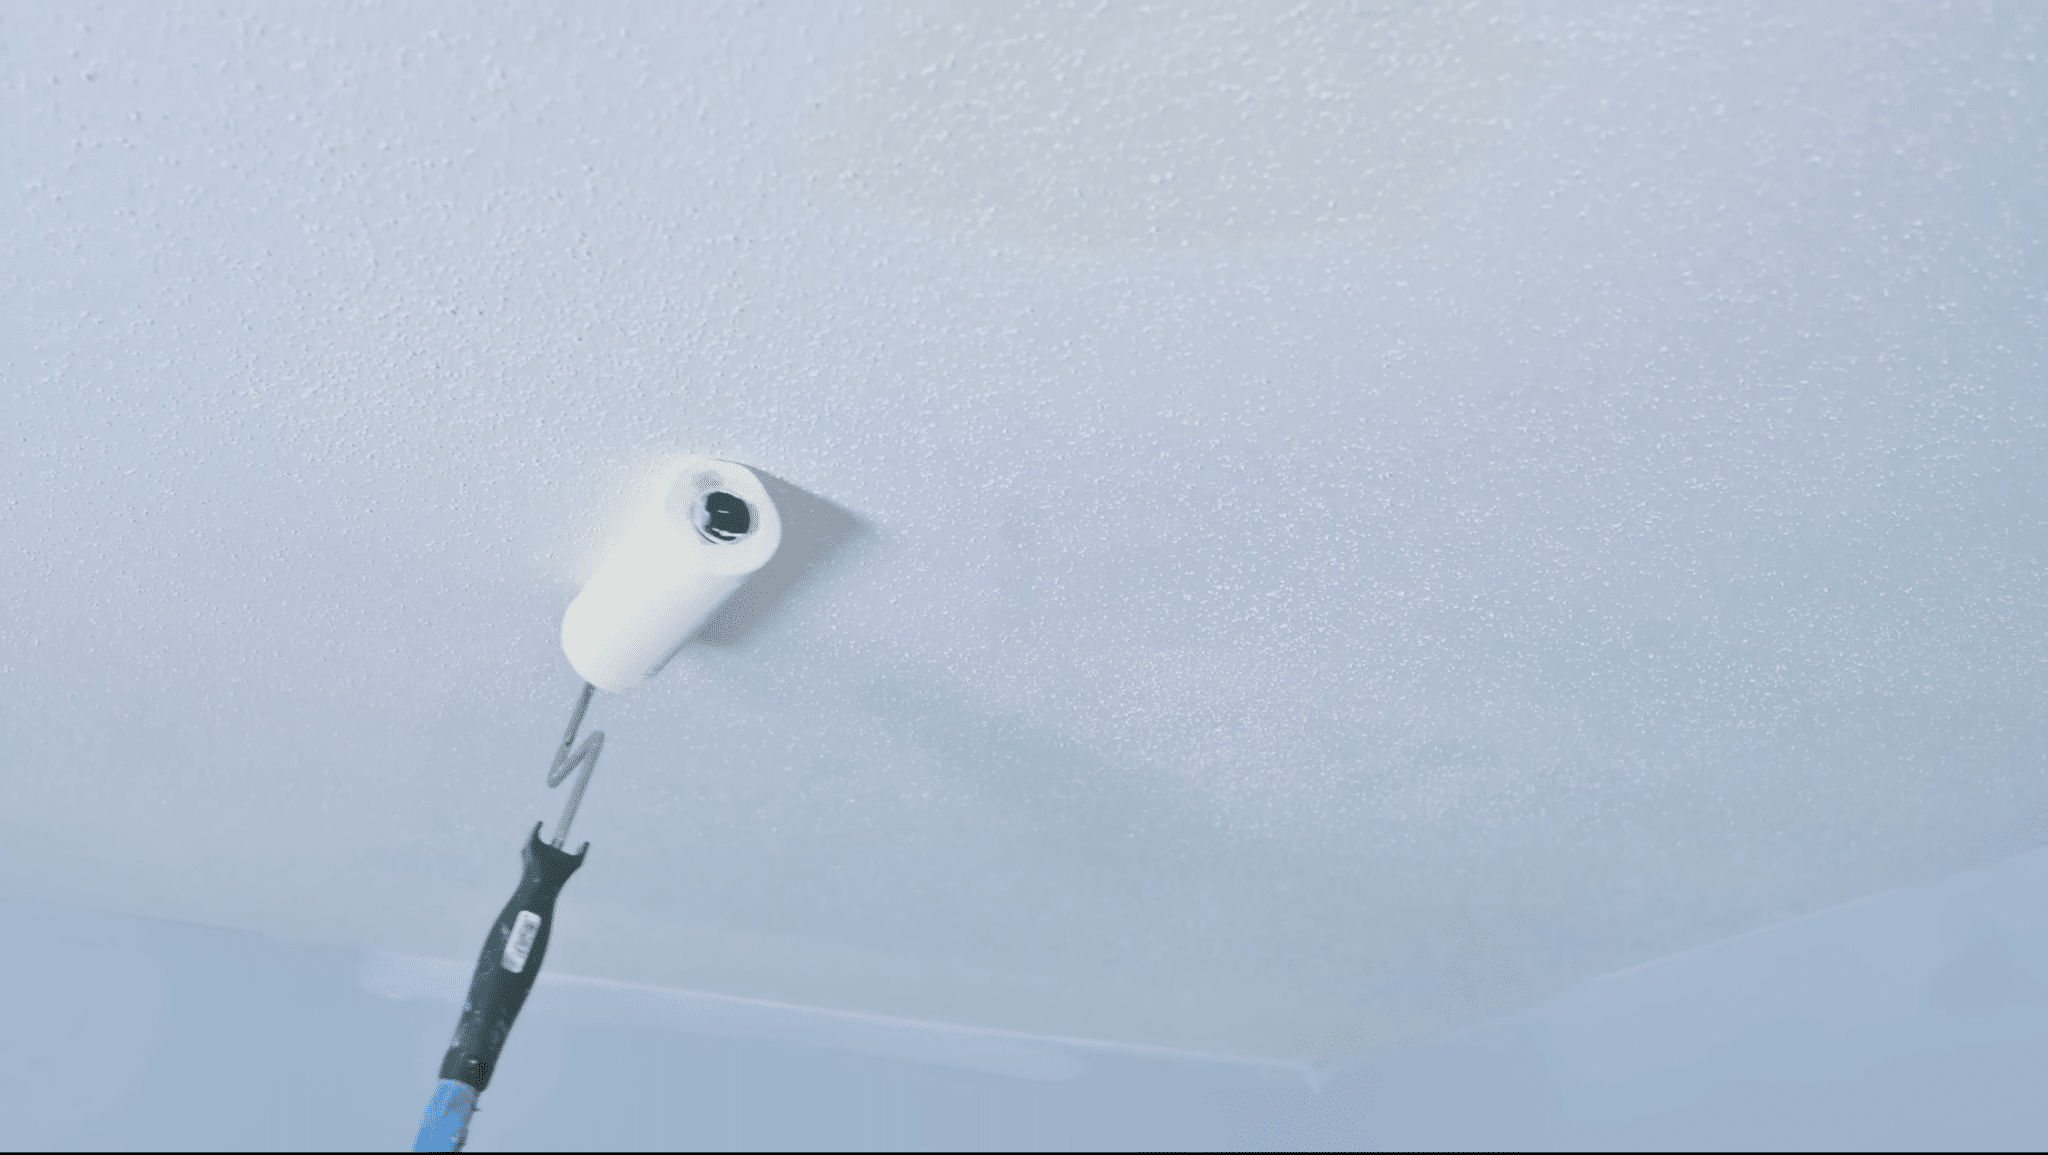
Step 9: Protect the Texture During Application
Continue painting with smooth strokes and minimal pressure. If you press too hard, the roller can leave marks and flatten parts of the popcorn texture.
These damaged spots may remain visible even after the paint dries.
Allow the roller to do the work while you guide it across the surface. Maintaining a gentle touch throughout the project helps preserve the texture and creates a more professional-looking result.
Step 10: Inspect the Finished Ceiling

After the paint has been applied, step back and inspect the ceiling from different areas of the room.
Check for thin spots, uneven coverage, or sections where the texture may have been disturbed. Touch up any missed areas while the paint is still workable.
A properly painted popcorn ceiling should have a consistent color and retain its original texture.
A final inspection helps ensure the project looks clean and complete.
This tutorial is based on a helpful video by Home RenoVision DIY. You can check out the original video on their YouTube channel here or watch it below.
How Much Does It Cost to Paint a Popcorn Ceiling?
Painting a popcorn ceiling can vary in cost depending on the room size, ceiling condition, and the painting method used.
Homeowners who choose a DIY approach usually spend less, with costs mainly covering paint, primer, rollers, drop cloths, and other basic supplies.
Hiring a professional increases the overall expense but can save time and often delivers more consistent results, especially on large or heavily textured ceilings.
Extra costs may apply for repairs, stain treatment, extra prep work, or additional paint coats.
Using a paint sprayer can also affect the final price due to equipment rental or labor requirements.
Getting several estimates and assessing the ceiling’s condition beforehand can help you plan a realistic budget during the project.
Should You Paint or Remove the Popcorn Ceiling?
Deciding whether to paint or remove a popcorn ceiling depends on its condition, budget, and appearance, as well as long-term renovation plans.
- Is the texture damaged? Extensive cracking, peeling,g or loose texture may make complete removal a better long-term solution.
- Are there water stains? Minor stains can be painted, but widespread damage may require removal and repairs.
- What is your budget? Painting costs less than removal and usually requires less labor and preparation work.
- Do you want a modern look? Removal creates a smoother ceiling that many homeowners prefer in updated spaces.
- Was the ceiling tested for asbestos? Older popcorn ceilings should be tested before removal to ensure safety.
- How much maintenance is needed? Painted ceilings are easier and less expensive to refresh when compared with removal.
- Are future renovations planned? Ceiling removal may make sense if larger remodeling projects are already scheduled.
Roller vs Paint Sprayer
Both rolling and spraying can produce good results, but each method offers different advantages in coverage, preparation time, cost, and ease.
| Feature | Using a Roller | Using a Paint Sprayer |
|---|---|---|
| Best For | Small to medium rooms | Large rooms and deep textures |
| Coverage | Good with proper technique | Very even and consistent |
| Preparation | Minimal setup required | Extensive masking required |
| Speed | Slower application | Faster application |
| Texture Protection | Requires light pressure | No direct contact with texture |
| Cost | Lower equipment cost | Higher equipment or rental cost |
Common Mistakes to Avoid
Avoiding common painting mistakes can help protect popcorn ceiling texture, improve coverage, and create a smoother, longer-lasting finish.
- Too much paint: Oversaturating the texture can cause sagging, detachment,t and uneven drying across the ceiling surface overall.
- Excess roller pressure: Pressing too hard damages texture and may leave visible bare spots requiring touch-up work.
- Skipping primer: Missing primer often causes poor adhesion, uneven coverage, and stains showing through finished paint.
- Ignoring stains: Water stains require a stain-blocking primer before painting to prevent discoloration from returning later.
- Painting over debris: Dust, cobwebs,s, and loose particles reduce paint adhesion and affect overall finish quality.
- Rushing drying times: Allow each coat to dry completely to help prevent peeling streaks and uneven coverage.
How to Choose the Right Paint for Popcorn Ceilings?
The paint you choose affects the final appearance, durability, coverage, and ease of application.
|
Finish |
Best For |
Coverage |
Not Ideal For |
|---|---|---|---|
|
Flat / Matte |
Most living areas, bedrooms, and hallways |
Excellent; hides imperfections best |
High-humidity areas |
|
Ceiling White (Flat) |
General ceiling use: most common choice |
Very good; slightly thicker formula |
Coloured walls need contrast |
|
Stain-Blocking Flat |
Ceilings with existing water stains |
Good; stops bleed-through in one coat |
Budget-conscious projects without stains |
|
Flat + Primer (2-in-1) |
Clean ceilings that need refreshing |
Moderate; may need two coats on a porous surface |
Stained or heavily discolored ceilings |
|
Bathroom / Kitchen Ceiling Paint |
Rooms with high humidity and steam |
Good; mould and mildew resistant formula |
General living areas where sheen is unwanted |
Maintaining a Painted Popcorn Ceiling
A painted popcorn ceiling can stay in good condition for many years with regular maintenance and prompt attention to minor issues.
Dust and cobwebs should be removed every few months using a soft brush or a vacuum with a brush attachment. Avoid using water or damp cloths, as moisture can soften the texture and cause it to break away.
Proper ventilation in bathrooms and kitchens helps reduce moisture buildup and prevents staining.
Repair roof or plumbing leaks quickly, then use stain-blocking primer before touching up affected areas with matching ceiling paint.
Small repairs can be completed with a thick nap roller, while most popcorn ceilings need repainting every five to ten years.
What Reddit Users Say on How to Paint a Popcorn Ceiling?
Homeowners on Reddit discussing popcorn ceilings often have different opinions, but several useful themes appear repeatedly.
Many people remove the texture before painting, especially in small rooms. Others point out that older ceilings frequently hide dips, uneven surfaces, and imperfections that become visible once the texture is removed.
Several homeowners suggest installing crown molding or simple trim around the ceiling perimeter to create a cleaner look and hide rough edges.
Minor ceiling flaws often need little repair since paint helps hide them. Check the ceiling’s condition before starting.
Good preparation, realistic expectations, and choosing the right approach for your space often produce the best long-term results.
DIY vs Hiring a Professional
Painting a popcorn ceiling yourself is genuinely achievable for most homeowners with basic DIY confidence.
|
Factor |
DIY |
Professional |
|---|---|---|
|
Cost |
$50–$150 in materials for an average room |
$200–$600+ per room, depending on size and condition |
|
Time |
Half a day to a full day, including prep and drying |
Typically completed in a few hours by an experienced crew |
|
Skill Level |
Moderate; manageable with the right tools and patience |
High professional results with specialist equipment |
|
Risk of Texture Damage |
Higher if the technique is rushed or the tools are incorrect |
Lower with experienced painters using proper methods |
|
Best When |
Budget is a priority, and you are comfortable with ceiling work |
Ceiling is large, heavily stained, or asbestos concerns exist |
Conclusion
Painting a popcorn ceiling is easier with the right tools and approach. Clean the surface, protect the room, use the right paint, and apply it carefully for a smooth, even finish.
Both rolling and spraying work well, but the best option depends on your ceiling, room size, and skill level.
Remember that patience is often the key to success, especially when working with textured surfaces that require extra care.
With proper maintenance, your freshly painted ceiling can continue looking clean and bright for years.
Have you painted a popcorn ceiling before, or are you planning your first project? Share your tips, challenges, or experiences in the comments below and join the conversation.
Frequently Asked Questions
Can You Paint a Popcorn Ceiling without Removing the Texture?
Yes, most popcorn ceilings can be painted successfully without removing the texture when proper tools and techniques are used.
What Type of Roller Works Best on Popcorn Ceilings?
A thick-nap roller between three-quarters and one inch works best for reaching textured areas evenly.
Is Spraying Better than Rolling a Popcorn Ceiling?
Spraying provides more even coverage, while rolling requires less preparation and works well in smaller rooms.
How Long Does It Take to Paint a Popcorn Ceiling?
Most homeowners can complete preparation, painting, and drying in an average room within one day.
Do Popcorn Ceilings Need Primer Before Painting?
Primer is recommended for stained, repaired, or older ceilings to improve adhesion and prevent bleed-through.