
Getting tired of shoes, bags, and coats scattered all over your entryway? A mudroom bench might be exactly what you need.
This simple piece of furniture gives you a place to sit while taking off your shoes and offers storage for all those items that tend to pile up at the door.
I built my own mudroom bench last month when I couldn’t find one that fit my space perfectly. The good news? You can do it too!
In this tutorial, I’ll show you how to build a sturdy, useful mudroom bench from start to finish. You’ll learn which materials to buy, the tools you’ll need, and every step of the building process.
As a woodworker with five years of experience, I’ve made this guide clear and simple enough for beginners. Let’s get your entryway organized!
Planning Your Mudroom Bench Layout
First, grab a measuring tape. I always start by checking how much space I have to work with. You should measure the width, depth, and height of your planned bench area.
Think about how many people will use the bench at once. For my family of four, I made a bench 48 inches wide.
Consider what you need to store. Do you want cubbies for shoes? Drawers for hats and gloves? I added three open cubbies under my bench for boots.
Don’t forget about hooks! I mounted a row above my bench for coats and bags. This combo works perfectly for my small entryway.
Sketch your ideas on paper before buying materials. This helps avoid costly mistakes later.
Essential Tools and Materials for The Project
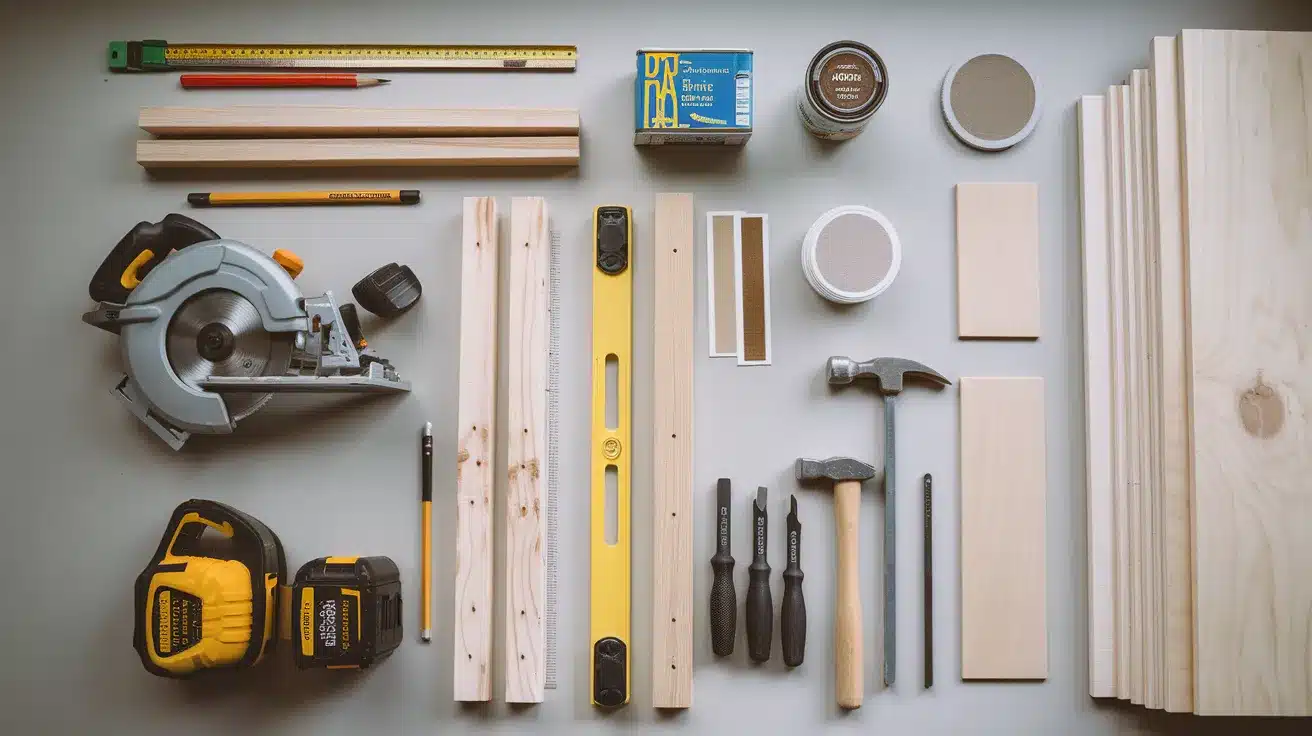
Let’s gather everything you’ll need before starting. I find that having all tools and materials ready makes the whole project go much smoother.
Tools You’ll Need
- Measuring tape and pencil
- Circular saw or miter saw
- Drill with various bits
- Sander (electric makes it easier, but hand sanding works too)
- Level
- Hammer
- Screwdriver set
Materials for Your Bench
- 2×4 lumber for the frame (I used 6 pieces)
- 1×12 pine boards for the bench top and sides
- Plywood for backs and bottoms of cubbies
- Wood screws (1½-inch and 2½-inch)
- Wood glue
- Sandpaper (medium and fine grit)
- Paint or stain of your choice
- Clear polyurethane for protection
Want to add comfort? You might also want fabric and foam for a cushion. I made mine with 2-inch foam and stain-resistant fabric that matches my home.
Remember: Quality materials make a difference. I spent a bit more on good wood and saved myself headaches during building.
Step-By-Step Guide to Building the Bench Frame
Building a sturdy bench frame is the foundation of a successful bench project. Take your time with these steps to ensure proper alignment and stability. Gather all your materials and tools before beginning, and work in a well-ventilated area with adequate lighting.
Step 1: Measure and Cut Your Wood
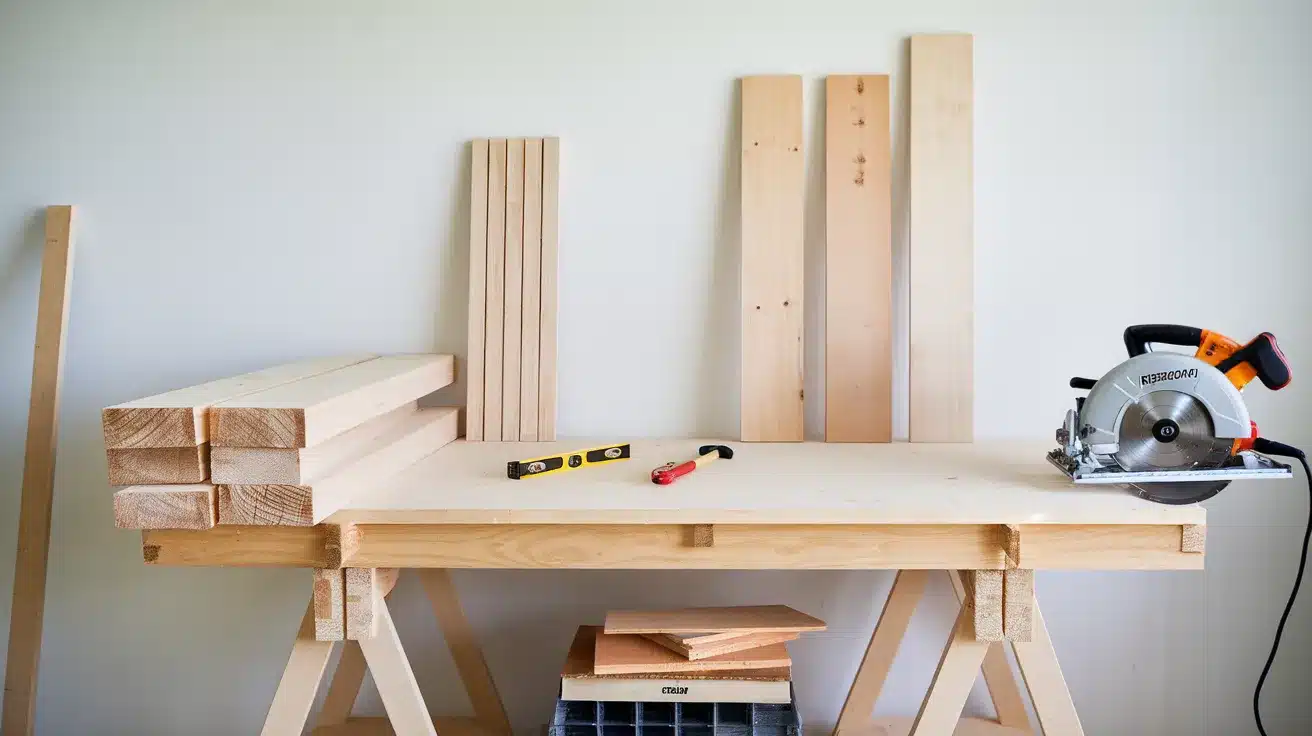
Mark all your measurements on the 2×4 lumber. Double-check each measurement before cutting. I always follow the old saying: “Measure twice, cut once.”
For a standard bench, cut two 16-inch pieces for the front legs, then two 16-inch pieces for the back legs and four pieces to match your desired width for the top and bottom supports.
Step 2: Assemble the Basic Frame
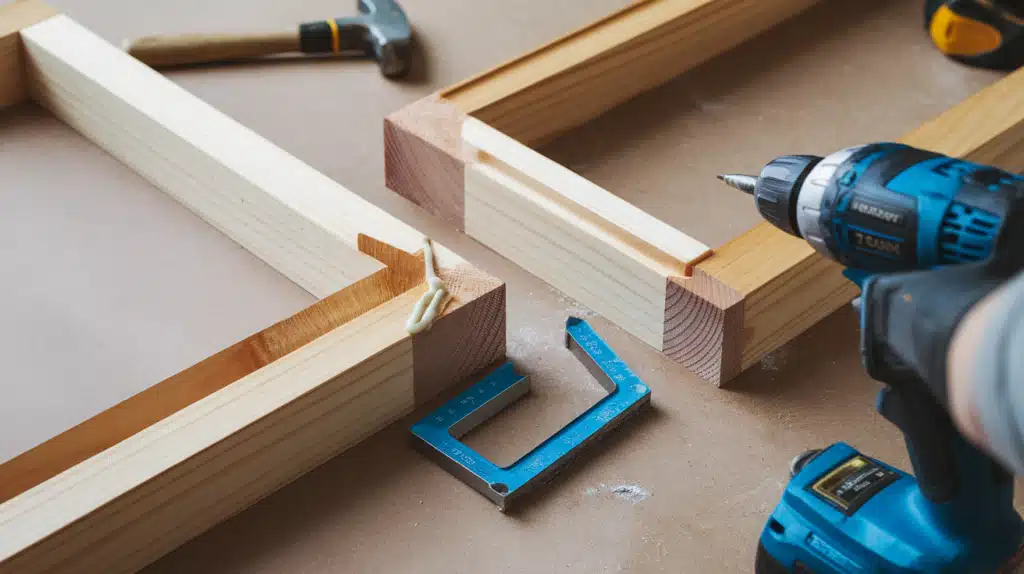
Start by creating two rectangle frames – one for the top and one for the bottom. Use wood glue at each joint, then secure with screws.
Check for square corners! I use a speed square to make sure everything lines up right. If your frame isn’t square now, your whole bench will be wobbly later.
Step 3: Attach the Legs
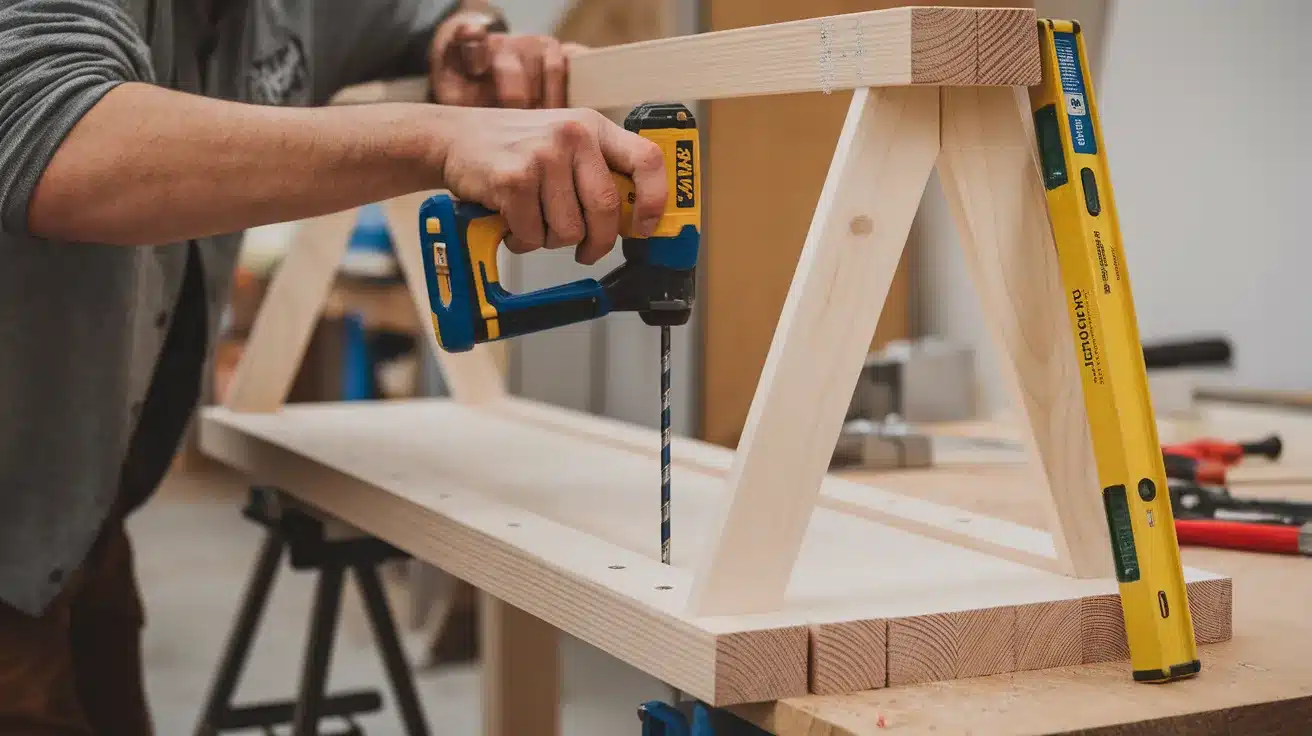
Position each leg flush against the corner of your frame, ensuring they’re perfectly vertical with a level. Pre-drill to prevent splitting, then insert screws through the frame into the leg.
For crucial stability, add cross-support screws by drilling from the opposite direction (through the leg into the frame). This creates a significantly stronger connection than one-way screws alone. Check that all legs remain vertical and tighten any loose screws before proceeding.
Step 4: Check Everything
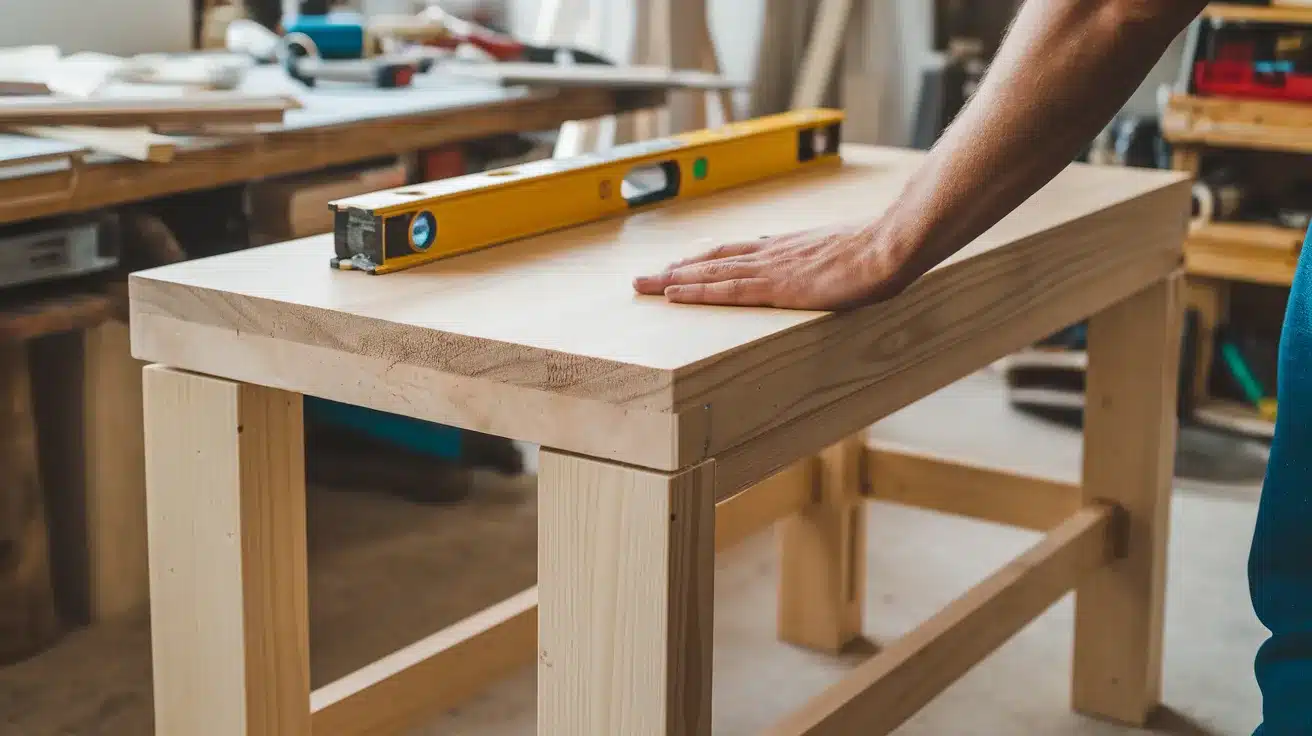
Stand your frame up and place it where it will go. Use a level on both the top and sides. Your frame must be level and stable before moving on. I wiggle mine to test for any wobbling.
If needed, add cross braces between legs for more support. This is especially helpful for longer benches.
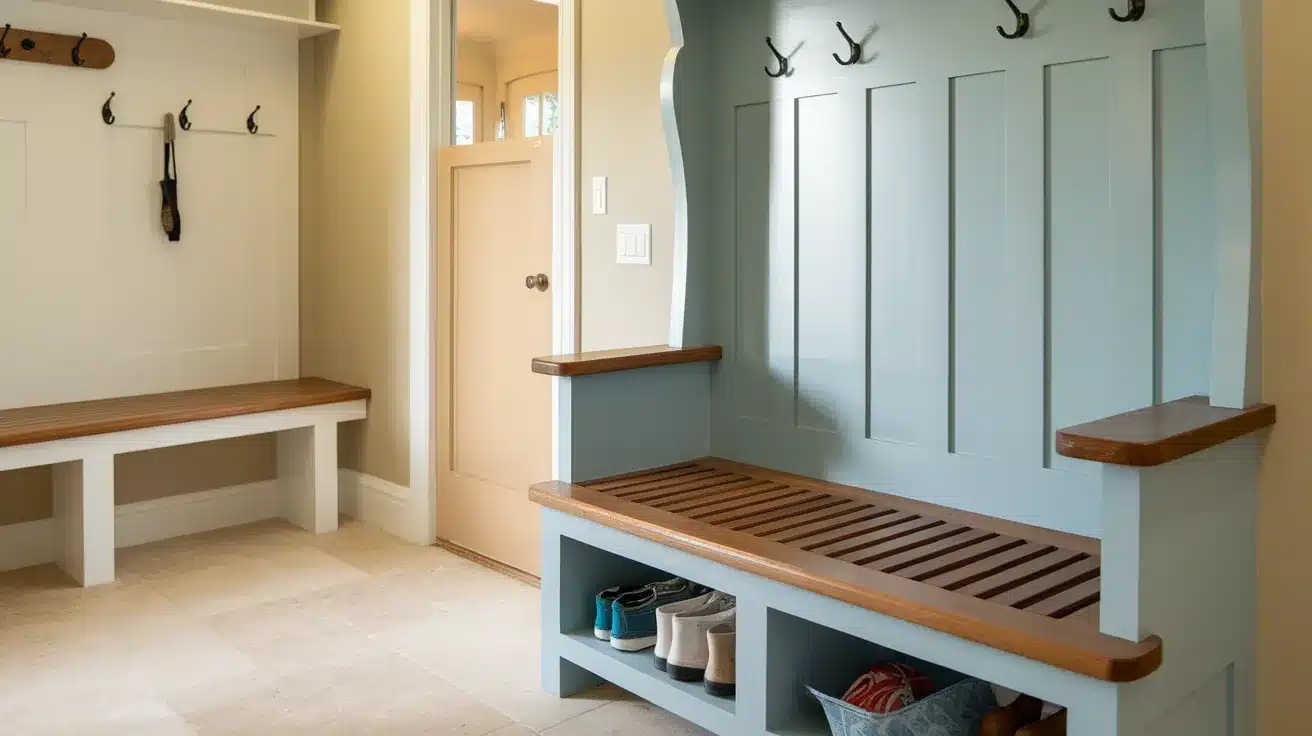
Adding Storage: Cubbies, Drawers, or Baskets
Enhance your furniture with functional storage solutions that combine practicality with style.
The right storage addition can transform a simple piece into a multi-purpose organizational hub for your home. Consider your specific storage needs and aesthetic preferences before choosing between these options.
| Storage Type | Pros | Cons | Installation Tips |
|---|---|---|---|
| Cubbies |
• Simple to build • Open access to items • Good for shoes and boots • Less expensive |
• Items remain visible • Can look messy • Limited protection from dust |
I build mine with dividers made from 1×12 boards. Cut to size, attach with screws, and add a plywood back for stability. |
| Drawers |
• Hides clutter • Keeps items dust-free • Looks more finished |
• More complex to build • Requires drawer slides • More expensive • Takes longer |
You’ll need drawer slides and fronts. I recommend pre-made drawer boxes for beginners. Attach slides to the frame first, then mount drawers. |
| Baskets |
• Fastest option • No building needed • Easy to remove and clean • Can be replaced |
• Less custom looking • Limited sizes available • Can be pricey |
Simply build shelf dividers and slide baskets in. I use baskets in my kids’ cubbies for small items like gloves and hats. |
My recommendation? Mix and match! I use open cubbies for shoes and baskets above for smaller items.
Finishing Touches: Paint, Stain, and Cushion Ideas
The final steps make all the difference. After building your bench, it’s time to make it look good and feel comfy.
For the wood finish, you have two main choices. Paint works well if you want a pop of color or to match your walls. I painted mine white to brighten my small entryway. Stain shows off the wood grain and gives a more natural look.
For your cushion: I used 2-inch foam cut to the size of my bench top. Wrap it with batting, then cover with fabric. I picked a tough, washable fabric since this spot gets lots of use.
Try adding small touches like decorative hooks or a matching wall shelf. These extras help your bench fit perfectly with your home’s style.
Troubleshooting Common DIY Bench Mistakes
Even experienced DIYers encounter challenges when building benches. Recognizing and fixing these common issues will save you time and frustration while ensuring your project turns out beautifully.
Most bench problems are completely fixable with the right approach and a bit of patience.
1. Uneven Cuts
When I first started woodworking, my cuts were often crooked. To fix this, mark your cutting lines clearly with a square tool.
If you’ve already made an uneven cut, you can sand it down or trim it again. Using a cutting guide with your saw helps prevent this problem entirely.
2. Wobbly Bench
A wobbly bench is frustrating and unsafe. Check if all four legs touch the ground at the same time. I fixed mine by adding thin shims under the short leg.
Another option is to trim the longer legs slightly. Make small adjustments until your bench sits flat.
3. Gaps in Joints
I’ve had gaps show up between wood pieces that should fit tightly. Fill small gaps with wood filler that matches your stain or paint color.
For larger gaps, you might need to remake that piece. In the future, make sure your wood is straight before cutting and use clamps when joining pieces.
4. Splintery Edges
No one wants splinters from sitting on their bench. If your edges feel rough, sand them thoroughly with progressively finer sandpaper.
I start with 80-grit and work up to 220-grit for a smooth finish. Pay extra attention to the top edges where hands and legs will touch.
5. Paint or Stain Problems
Blotchy finishes happen when wood absorbs stain unevenly. Apply a pre-stain wood conditioner first.
For drips or uneven paint, lightly sand between coats. I learned to apply thin coats rather than one thick one for the best results.
Conclusion
Building your own mudroom bench isn’t as hard as it might seem. I’ve covered planning your space, gathering materials, building the frame, adding storage, and putting on those final touches that make it yours.
The best part? You now have a useful piece of furniture that fits your space perfectly. My bench has kept my entryway clean for months now, and I smile every time I see it.
I hope this guide gives you the confidence to try building one yourself. Even if you’re new to DIY projects, take it one step at a time. You might be surprised by what you can create!
Have you built your own mudroom bench? I’d love to see how it turned out! Share a photo in the comments below or tag us on social media with #MyDIYBench.