Close Menu
Opple House
    What's Hot

    Types Of Gutters: Gutter Styles & Materials

    July 7, 2025

    13 Popular Residential Roof Types for Your Home

    July 7, 2025

    Will Solar Panels Damage My Roof?

    July 7, 2025

    How to Plan Roofing for New Construction Projects

    July 7, 2025

    How to Accurately Measure Roof Pitch?

    July 7, 2025

    Slate Roof Lifespan: What You Need to Know

    July 7, 2025
    Facebook Instagram
    Facebook Instagram
    Opple House
    • Home Decor
    • Interior Design
    • Home Improvement
    • DIY & Crafts
    • Gardening
    • Real Estate
    Opple House
    Home » Blog » DIY Pothole Repair: A Step-by-Step Guide for Private Property
    Renovation

    DIY Pothole Repair: A Step-by-Step Guide for Private Property

    Michael ThompsonBy Michael ThompsonJune 16, 20254 Mins Read
    Facebook Twitter Pinterest LinkedIn WhatsApp Reddit Tumblr Email
    DIY Pothole Repair: A Step-by-Step Guide for Private Property
    Share
    Facebook Twitter LinkedIn Pinterest Email

    Potholes are one of those things that seem to appear overnight—often in the most inconvenient spots. Whether it’s your driveway, a private road, or a business yard, these craters can damage vehicles, create tripping hazards, and get worse over time if not dealt with properly.

    While major roads and highways must be maintained by local authorities, if a pothole appears on your private property, you can legally fix it yourself. And with the right tools and materials, it’s more straightforward than you might think.

    Important Note Before You Start

    It’s crucial to point out that DIY pothole repair is only permitted on private land. Public roads, pavements, and highways are the responsibility of your local council or Highways Agency, and it is illegal for individuals to attempt repairs on public land. Always check if the surface you’re repairing falls under your ownership or lease before getting started.

    Step 1: Clear Out the Pothole
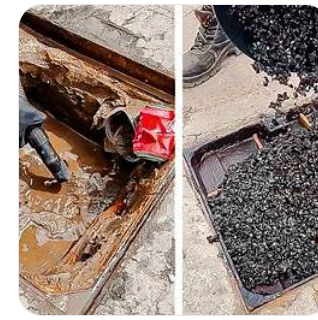
    Clear Out the Pothole

    Start by removing all debris from the pothole. That includes loose tarmac, stones, dust, weeds, and standing water. You want a clean, dry surface so the materials you apply later will adhere properly. Using a stiff brush or even a blower can help get rid of stubborn bits. If the hole is damp, try drying it out with old rags or leave it to air dry for a few hours before continuing.

    Step 2: Cut a Clean Edge (If Possible)

    While not always essential, cutting a neat square or rectangle around the pothole can help your repair last longer. Jagged edges are more likely to fail over time, so creating a tidy border gives the cold lay tarmac something solid to bind to.

    See also  Top 5 Neighborhoods to Live in Boise for Young Professionals

    You can do this with a bolster chisel and hammer or an angle grinder if you’re experienced and have the right PPE. The idea is to create vertical edges that hold the new material firmly in place.

    Step 3: Apply Cold Joint Sealer

    Before filling in the hole, run a bead of bitumen cold joint sealer around the edges of the prepared hole. This acts like a glue between the existing road surface and your new tarmac. It helps prevent water ingress and stops the patch from working loose over time. You can use a brush or nozzle depending on the type of sealer you’ve bought—just make sure the entire edge is coated evenly.

    Step 4: Fill with Cold Lay Tarmac
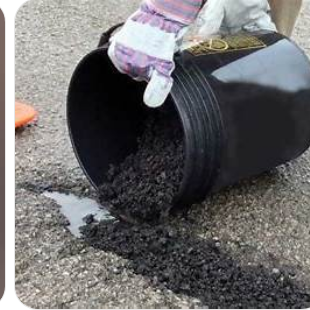
    Fill with Cold Lay Tarmac

    Now it’s time to fill the hole. Pour in your cold lay tarmac, slightly overfilling the hole so you can level it off. Use a rake or shovel to spread the material evenly so it matches the height of the surrounding surface.

    Take your time with this step—an uneven patch not only looks messy but can also affect vehicle movement or encourage water pooling, which leads to future damage.

    Step 5: Compact the Surface

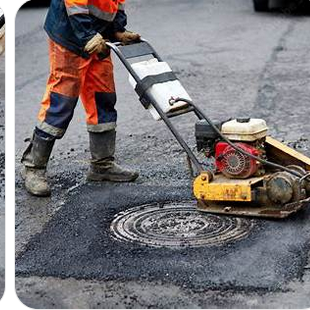
    Once your tarmac is level, it’s time to compact it. You can use a punner (tamper) for small patches, applying firm, even pressure across the surface. For larger jobs, a vibrating compaction plate will give better results and a longer-lasting finish.

    Make sure the surface is flush with the surrounding area. After compacting, give it a few hours (or follow the product instructions) before driving over it to allow everything to settle properly.

    See also  Navigating the Permitting Process During a Renovation

    Where to Find the Right Materials

    For a job like this, having the right gear makes all the difference. From cold lay tarmac to joint sealers and compaction tools, Ready Set Supplied offers a range of products that can help you get the job done efficiently and professionally. Whether you’re patching up a private driveway or sorting a neglected car park, they’ve got the essentials to make the process smoother.

    DIY pothole repair might sound intimidating, but with a bit of preparation and the right materials, it’s a highly achievable weekend project. It’s not just about fixing a hole—it’s about protecting your vehicles, improving safety, and taking pride in maintaining your property.

    Related posts:

    1. 6 Benefits of Combining Professional Painting and Quality Tiling in Queenslander Home Makeovers
    2. Understanding HVAC in Abilene, TX: Tips for Local Homeowners
    3. 10 Ways to Freshen Up Your Home Exterior
    4. Contractor Red Flags: Spotting Signs of a Potential Remodeling Disaster
    pp
    Share. Facebook Twitter Pinterest LinkedIn WhatsApp Reddit Tumblr Email
    Michael Thompson
    Michael Thompson
    • Website

    Michael Thompson, 38, is a dynamic professional in the field of home remodeling, with a focus on integrating technology into traditional renovation practices. Holding a Bachelor’s degree in Architecture, he started his career in the bustling construction sector. He has worked with several renowned architectural firms, contributing to diverse residential projects. He became a part of our team, bringing fresh, tech-savvy perspectives to home renovation. His passion extends beyond work as he often volunteers for community renovation projects and enjoys woodworking in his spare time.

    Related Posts

    Tips July 7, 2025

    Elevate Your Dubai Vacation: Transforming Your Trip

    Kitchen & Bathroom July 7, 2025

    Hot Deals on Second-Hand Jacuzzis: Your Ideal Hot Tub for Less at Take a Break!

    Exterior Design July 7, 2025

    Shneor Tzeiger’s Revolutionary Concrete Mastery Method Changes Everything About Wall Design

    Home Accessories July 5, 2025

    Styling Your Kitchen with Olive Wood and Stoneware Essentials

    Lifestyle July 5, 2025

    Top 5 Neighborhoods to Live in Boise for Young Professionals

    Guides July 5, 2025

    How a Strong Online Directory Listing Powers Local Electricians’ Visibility

    Leave A Reply Cancel Reply

    Don't Miss
    Home Improvement July 7, 2025

    Types Of Gutters: Gutter Styles & Materials

    Are you unsure about which gutters are best for your home? Choosing the right gutters…

    13 Popular Residential Roof Types for Your Home

    July 7, 2025

    Will Solar Panels Damage My Roof?

    July 7, 2025

    How to Plan Roofing for New Construction Projects

    July 7, 2025
    Stay In Touch
    • Facebook
    • Instagram
    About Us
    About Us

    We strive to provide high-quality, stylish home decor pieces to help you create the perfect look for your unique space. Our blog offers helpful tips and tricks to bring your dream home to life!

    Email Us: sophia@opplehouse.com

    Our Picks

    Types Of Gutters: Gutter Styles & Materials

    July 7, 2025

    13 Popular Residential Roof Types for Your Home

    July 7, 2025

    Will Solar Panels Damage My Roof?

    July 7, 2025

    Design Secrets Delivered to Your Inbox!

    Join 10,000+ home enthusiasts who receive weekly inspiration, DIY guides, and exclusive decor tips. Plus, get a free e-book

    Facebook Instagram
    • About Us
    • Contact Us
    • Privacy Policy
    © 2025 OppleHouse.

    Type above and press Enter to search. Press Esc to cancel.