


If you’re looking to add a touch of style and privacy to your windows, hanging curtains over existing blinds can be a game-changer.
I know it might seem tricky at first, but in this guide, I’ll walk you through the simple steps to hang curtains over blinds, and whether to drill or opt for a no-drill solution.
I’ll also share tips on how to make your space look clean and polished while giving you the flexibility to control light and privacy.
Whether you’re drilling into studs or keeping every wall intact, there’s a method here that works for your setup.
Why Choose Curtains Over Blinds?
Adding curtains over blinds can give your windows a fresh look while still keeping the benefits of your blinds.
Curtains offer extra privacy and light control, letting you adjust the room’s atmosphere if you want.
If you’re worried about the extra work, there are plenty of ways to hang curtains without drilling, saving you time and effort.
Layering curtains over blinds creates a small air pocket between the two treatments that slows heat transfer through the glass; useful in winter for retaining warmth and in summer for blocking radiant heat from direct sun exposure. Heavier curtain fabrics and cellular shades amplify this effect the most.
Plus, you can switch up your curtain styles without touching your blinds, making it a simple way to change the feel of a room.
Whether your goal is extra privacy, better light control, or a quick style refresh, hanging curtains over your existing blinds is a practical solution that doesn’t require starting from scratch.
How to Install Curtains Over Blinds without Drilling?
If you’re not keen on drilling holes in your walls, there are still plenty of ways to hang curtains over your blinds.
Tools and Materials You’ll Need for Hanging Curtains
- Curtain Rods
- Curtain Hooks or Rings
- Brackets
- Measuring Tape
- Screws
- Drill
- Adhesive Hooks
- Tension Rods
With these essential tools and materials, you’re all set to hang beautiful curtains effortlessly
1. Use Adhesive Hooks for a Damage-Free Hold
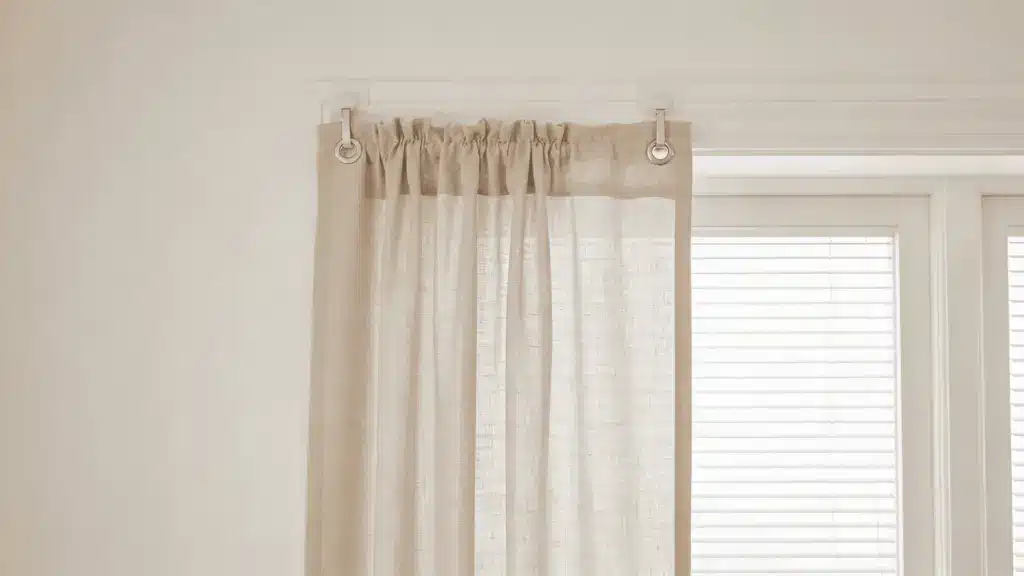
Adhesive hooks are a simple way to hang curtains without making holes in your walls. They’re easy to use and peel off cleanly when you no longer need them.
They work best with lightweight curtains and are a great option if you rent your home or just want to avoid any wall damage.
Step-by-Step Instructions:
- Wipe the wall with a dry cloth to clean the spot.
- Measure the window and mark where each hook should go.
- Check that the hooks are evenly spaced.
- Peel off the adhesive backing carefully.
- Press each hook firmly onto the wall for 30 seconds.
- Place the curtain rod on the hooks.
- Hang your curtains and adjust them evenly.
Tip: Wait 1–2 hours after sticking the hooks before hanging anything. This gives the adhesive time to bond properly so the hooks don’t slip.
2. Use Tension Rods for a Tool-Free Fit
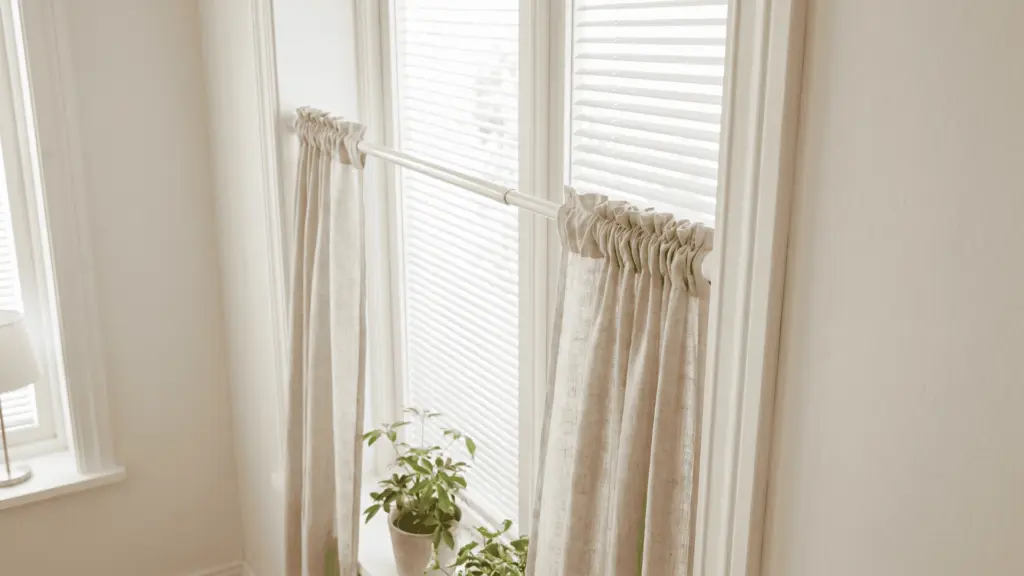
Tension rods are one of the easiest ways to hang curtains with zero drilling. They use pressure to stay in place, so no tools or wall damage needed.
Why It Works: The rod expands to press against both sides of the window frame. That pressure is what holds it in place no screws, no brackets, nothing attached to the wall.
Step-by-Step Instructions:
- Measure your window frame from side to side.
- Place the tension rod inside the frame.
- Twist and adjust the rod until it fits snugly and doesn’t move.
- Slip your curtains onto the rod and adjust them evenly.
Note: Tension rods work best with lightweight curtains. Heavy fabric can cause slipping over time, so consider headrail brackets for a more secure hold.
3. Snap Curtains in Place with Magnetic Ties
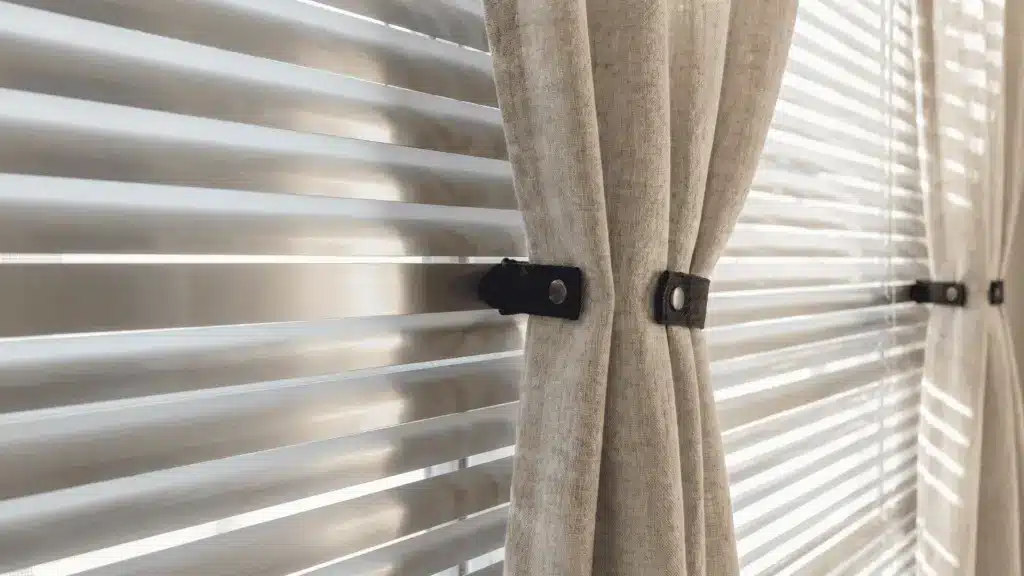
Magnetic curtain ties use paired strips one on the curtain edge, one on the blind slat that snap together to hold your curtain flat against the blind.
Works Well With: Lightweight fabric and metal blinds. The magnets grip cleanly on metal slats, keeping curtains in place without any rod, bracket, or adhesive.
Steps:
Step 1 – Attach Ties: Fix magnetic strips to the top of your curtains.
Step 2 – Place on Blinds: Align the magnets onto the blind slats.
Step 3 – Adjust: Move curtains into your preferred position.
This method works without any rod or bracket, making it the simplest setup on this list. Best for lightweight curtains on metal blinds only.
4. Clip Headrail Brackets to Your Existing Blinds
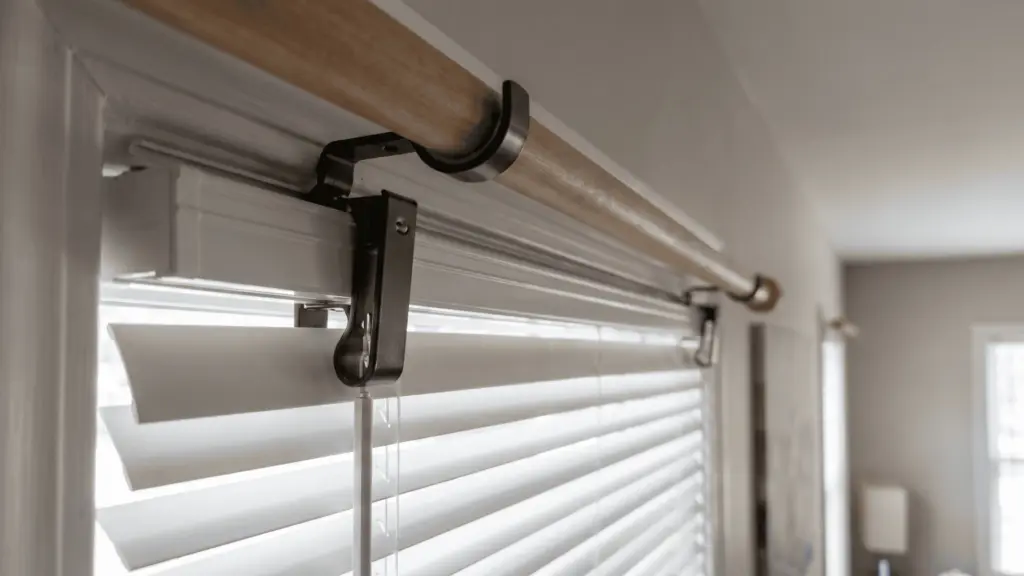
Headrail brackets are clips that attach directly to the metal bar at the top of your existing blinds. They carry the full weight of the rod and curtains without touching the wall at all.
Best For: Homes where drilling isn’t an option but you still need a secure, sturdy hold. Works with both inside-mounted and outside-mounted blinds.
Step-by-Step Instructions:
- Look at how your blinds are mounted, flush inside the frame or sticking out from the wall.
- For vertical blinds pick deep-projection brackets (5–6 inches). For standard horizontal blinds, 3–4 inches is enough.
- Slide each bracket onto the headrail near both ends and tighten the screw until firm.
- For wider windows, add a third bracket in the center to stop the rod from sagging.
- Place the rod in the brackets and hang your curtains.
Quick Tip: Always tighten the set screws firmly before hanging anything. Loose brackets can shift and cause the rod to drop unexpectedly.
Using Curtain Rods and Hooks for a Secure Fit
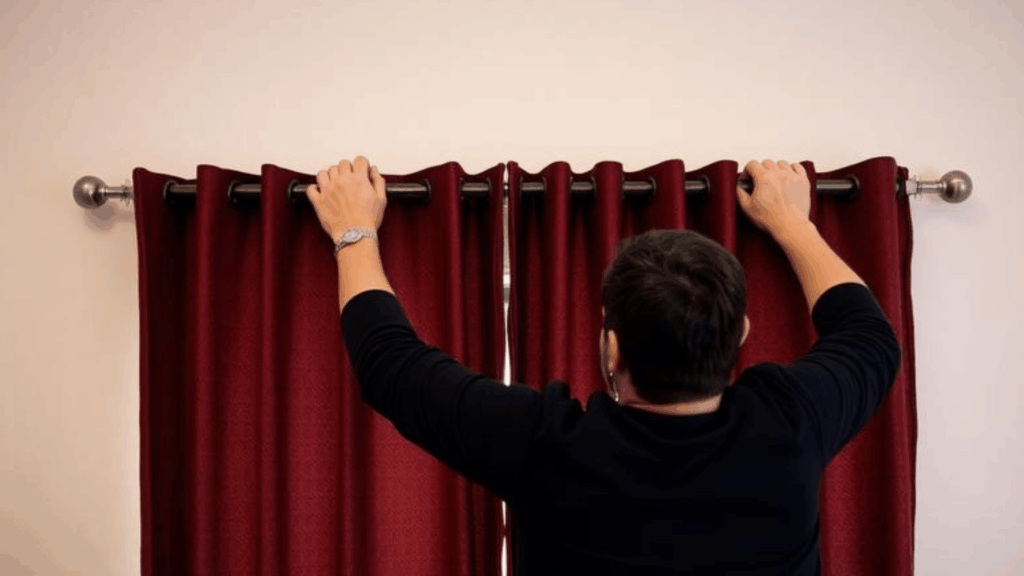
Getting your curtain rod setup right makes a big difference. The right hardware keeps everything steady, straight, and looking great without anything sagging, snagging, or falling down.
1. Choose the Right Rod and Hooks
Start with the rod since it holds everything else up.
- Heavy curtains like velvet or blackout panels need a metal or iron rod. These are strong enough to hold the weight without bending.
- Light curtains and sheers work fine on a thinner rod.
Match your hooks to your curtain style too.
- Pinch pleat hooks work best for fancy or formal curtains
- Ring clips are great for everyday curtains and slide open and closed easily
- Café hooks are perfect for light and casual curtain styles
Quick tip: When you are not sure, go with the stronger rod. A rod that is too weak is usually the first thing that breaks.
2. Get the Projection Right
Projection is how far your rod sticks out from the wall. If it does not stick out far enough, your curtains will keep catching on the blinds every time you open or close them.
- Measure from the wall to the front of your blinds
- Add at least 1 inch to that number
- That is the smallest projection your brackets should have
Regular horizontal blinds need 3 to 4 inches. Vertical blinds or big bulky headrails need 5 to 6 inches.
3. Install and Space Your Brackets
This is where most people go wrong. Brackets that are not put in correctly cause rods to sag or fall off the wall.
- Try to screw your brackets into wall studs whenever you can
- No stud there? Use wall anchors and check the weight limit on the package
- Put each bracket 2 to 4 inches outside the window frame on both sides
- If your window is wider than 60 inches, add a center bracket so the rod does not dip in the middle
Quick tip: Do not use anchors that are too small since that is the most common reason rods end up falling.
4. Check the Weight Limit and Rod Height
Before hanging anything, make sure your rod, brackets, and hooks can all handle the weight of your curtains. For heavier curtains, look into getting a double rod or stronger hardware.
Also mount the rod at least 4 inches above the top of the window frame. This keeps it clear of the blind’s headrail and makes your window look bigger and taller.
5. Test the Blind Clearance
Open and close your curtains a few times. The fabric should move smoothly in front of the blinds without rubbing or catching on the slats. If it does catch, move the rod out further or switch to brackets with a deeper projection.
Tips for Achieving a Clean Look with Curtains and Blinds
When combining curtains with blinds, the goal is to create a polished, cohesive look that enhances your space without making it feel cluttered.
1. Choose Complementary Colors

To create harmony between your curtains and blinds, choose complementary colors.
Neutral shades like white, beige, or gray are versatile and can blend seamlessly with most blinds.
If you’re going for a bolder look, opt for contrasting colors that complement each other, such as navy curtains with light gray blinds.
Avoid matching colors exactly, as it can make the space feel flat. Instead, choose hues within the same color family for a more balanced effect.
2. Balance Patterns and Textures

When selecting curtains, consider their pattern and texture in relation to the blinds.
If your blinds are plain, you can experiment with patterned curtains, such as stripes, florals, or geometric designs.
On the other hand, if your blinds have a bold pattern, opt for solid-colored curtains or subtle textures like linen or cotton to avoid visual overload.
Mixing textures, such as pairing sleek blinds with soft, flowing curtains, can also add depth and interest to the room.
3. Consider Curtain Length and Style

The length and style of your curtains can make a big difference in how they pair with your blinds.
For a sleek, modern look, choose floor-length curtains that touch the floor or hover slightly above it.
Sheer curtains over blinds are also a great option for a soft, airy feel, while heavier curtains provide more privacy and insulation.
Tiebacks or curtain rings can also help keep the curtains neatly in place, enhancing the overall clean appearance.
4. Get the Width Right
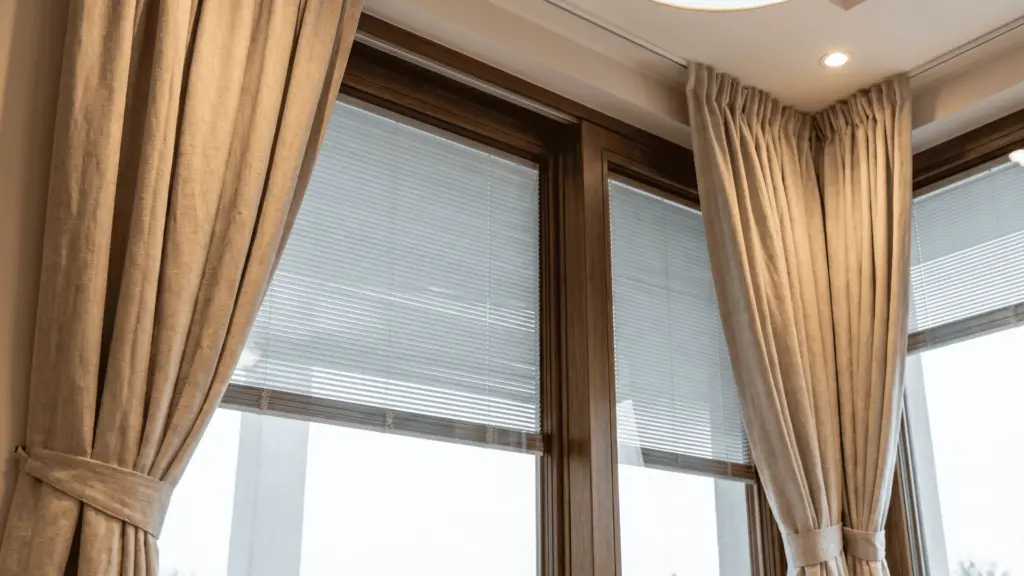
Length gets most of the attention, but width matters just as much. For curtains to look full and cover the window properly when drawn, each panel needs enough fabric to gather.
A good starting point: the combined width of your curtain panels should equal roughly twice the width of your window or rod.
So for a 48-inch window, aim for curtains totaling about 96 inches of fabric width. Panels that are too narrow will look flat and leave gaps at the sides when closed.
5. Layering Curtains and Blinds

If you’re layering curtains over blinds, consider the function each layer will serve.
Use blinds for privacy and light control, while the curtains can add texture, color, and style.
For a clean look, ensure the curtains are hung slightly away from the window frame to let the blinds show through when needed.
Keep the curtains pulled neatly when not in use to avoid a messy appearance.
Common Mistakes to Avoid When Installing Curtains
Paying attention to small details can prevent an uneven or cluttered look. Proper planning helps achieve a neat and functional finish.
| Mistake | What Happens | How to Fix It |
|---|---|---|
| Incorrect Measurements | Curtains may look too short, too long, or fail to cover the window properly. | Measure width and height carefully; extend the rod beyond the window frame |
| Wrong Rod Length | Makes the setup feel cramped or disproportionate | Choose a rod wider than the window for better balance |
| Weak Installation | Rods may sag or fall, especially with heavy curtains | Use wall studs or anchors and secure brackets tightly |
| Ignoring Curtain Compatibility | Curtains may not hang or slide properly | Match the curtain type with the correct rod and hooks |
| Uneven Placement | Curtains appear crooked or messy | Use a level and measure both sides equally |
| Skipping Final Adjustments | Curtains may bunch unevenly or look unfinished | Adjust folds, align lengths, and balance both sides after installation |
How to Adjust Your Curtains for Maximum Privacy?
Once your curtains and blinds are both installed, the real control comes from how you use them together.
Hang your curtains slightly wider than the window frame to block light gaps on the sides. For better privacy, opt for heavier or blackout curtains that prevent outside views.
If you’re using sheer curtains, consider layering them with thicker curtains for a more flexible solution. This allows you to adjust the lighting level while maintaining privacy.
When combining curtains with blinds, position the curtain rod above the blinds so the blinds remain fully functional without obstruction.
During the day, keep the blinds open for natural light and pull the curtains to maintain privacy. At night, close both the blinds and curtains for total coverage.
This combination gives you full control over privacy, light, and temperature, creating a comfortable and practical living space.
Creative Ideas for Layering Curtains and Blinds
Layering curtains over blinds is a great way to enhance both the style and functionality of your window treatments.
- Sheer Curtains & Wooden Blinds: Soften the straight lines of wood or faux-wood slats with light fabrics that scatter sunlight.
- Blackout Drapes & Roman Shades: Maximize darkness and heat insulation by pairing thick fabric with flat roller or roman styles.
- Bold Floral Linens & Neutral Bases: Add visual interest by placing a vibrant pattern over a solid, quiet blind.
- Neutral Drapes & Dark Hardware: Create a sharp, modern look by placing soft grays or whites against black blinds.
- Velvet Panels & Metal Rollers: Combine heavy, light-catching fabric with industrial or cloth shades for a high-end finish.
- Vibrant Solids & Beige Slats: Add life to a neutral space by using bright colors like turquoise or mustard as a top layer.
How to Maintain Curtains and Blinds Together
Caring for both curtains and blinds is essential to ensure they remain in good condition and last for years.
| Maintenance Task | Curtains Care | Blinds Care |
|---|---|---|
| Regular Dusting | Vacuum with upholstery attachment or dust with a microfiber cloth. | Dust slats with a microfiber cloth or duster. Wipe each slat individually. |
| Washing Curtains | Check the care label. Machine wash or hand wash, depending on fabric type. Dry clean for delicate fabrics. |
Wooden or faux-wood blinds: Use a dry cloth. Fabric blinds: follow the care label for washing. |
| Cleaning Blinds | Hand washes delicate fabrics or dry clean. Regularly vacuum for dust. |
Use a damp cloth or wet wipes for metal/plastic blinds. For fabric, follow care instructions. |
| Spot Cleaning | Spot clean stains with fabric-safe cleaner. Use a clean cloth to blot, not rub. |
Spot clean with a damp cloth and mild detergent for marks or stains. |
| Routine Inspections | Inspect for frayed edges or loose threads. Repair or replace if necessary. |
Check for broken slats or loose parts. Repair immediately to avoid further damage. |
| Air Drying and Proper Hanging | Air-dry after washing; hang or lay flat. Avoid heat to prevent shrinkage. |
Close the blinds and allow them to dry naturally after cleaning. |
Wrapping It Up
Incorporating both curtains and blinds into your windows doesn’t have to be complicated.
By following these simple tips for installation, maintenance, and styling, you can create a comfortable, functional, and stylish space that works for you.
If you are looking to add privacy, control light, or refresh the look of your home, the right combination of curtains and blinds can make a huge difference.
Remember to regularly clean and inspect your window treatments to keep them in top shape for years to come.
Frequently Asked Questions
Can You Hang Curtains Over Blinds Without Removing Them?
Yes, curtains can be added over existing blinds without taking them down, making it a quick way to upgrade style and function.
Do Curtains Over Blinds Help With Room Temperature?
Layering both can improve insulation, helping keep rooms warmer in winter and cooler in summer.
What Type of Curtains Work Best Over Blinds?
Sheer panels work well over blinds when you want to diffuse light while keeping the blind’s light control intact. Heavier or blackout panels are better when privacy is the priority and the blinds alone aren’t enough. For the fullest coverage, make sure your panels total about twice the window width regardless of fabric weight.
Should Curtains Cover the Blinds Completely?
They don’t always need to cover fully, but wider placement helps block side light gaps and improves privacy.
Is It Better to Layer Curtains With Blinds for Style?
Combining both adds depth, texture, and flexibility, making windows look more finished and visually balanced.