
A ceiling fan that wobbles, shakes, or makes extra noise can quickly become frustrating. In many cases, the fix is simpler than you might think.
Over the years, I’ve seen that a few basic adjustments can often solve the problem without the need for expensive repairs or replacement parts.
In this guide, you’ll learn the common causes of fan wobble, simple steps to fix it, and practical tips that actually work.
You’ll also find advice from homeowners and DIY enthusiasts on online forums, where people share real experiences and solutions.
By the end of this article, you’ll know how to identify the issue, make the right adjustments, and keep your ceiling fan running smoothly for years to come.
Why Do Ceiling Fans Become Unbalanced?
Several factors can affect a ceiling fan’s balance over time, causing it to wobble, shake, or operate less efficiently.
- Dust Buildup on Fan Blades: Dust accumulates unevenly across blades, adding extra weight to certain areas and disrupting the fan’s balance.
- Loose Screws and Hardware: Screws securing blades, brackets, or mounting components can gradually loosen, causing movement and wobbling.
- Blade Misalignment: Fan blades may shift slightly out of position, creating uneven spacing and causing instability during rotation.
- Warped or Damaged Blades: Exposure to moisture, heat, or age can warp blades, affecting weight distribution and smooth operation.
- Bent Blade Arms: Blade arms can bend due to accidental impacts or wear, causing some blades to sit higher or lower.
- Improper Fan Installation: A fan mounted on an unsuitable electrical box or a loose support structure may wobble continuously.
- Worn Internal Components: Older fans may develop worn bearings or motor parts that create vibration and balance issues.
- Temperature and Humidity Changes: Seasonal weather conditions can cause blade materials to expand, contract, or slightly change shape over time.
Tools and Supplies Needed to Balance a Ceiling Fan
Having the right tools on hand makes the balancing process easier and helps you complete each step safely and accurately.
- Microfiber cloth or duster
- Step ladder
- Phillips head screwdriver
- Measuring tape or ruler
- Ceiling fan balancing kit
- Balancing clip
- Adhesive balance weights
- Replacement fan blades (optional)
- Replacement blade arms or blade irons (optional)
- Flashlight (optional)
How to Balance a Ceiling Fan Like a Pro?
An unbalanced ceiling fan can cause annoying wobbling, excessive noise, and even create safety concerns over time.
Step 1: Clean the Fan Thoroughly
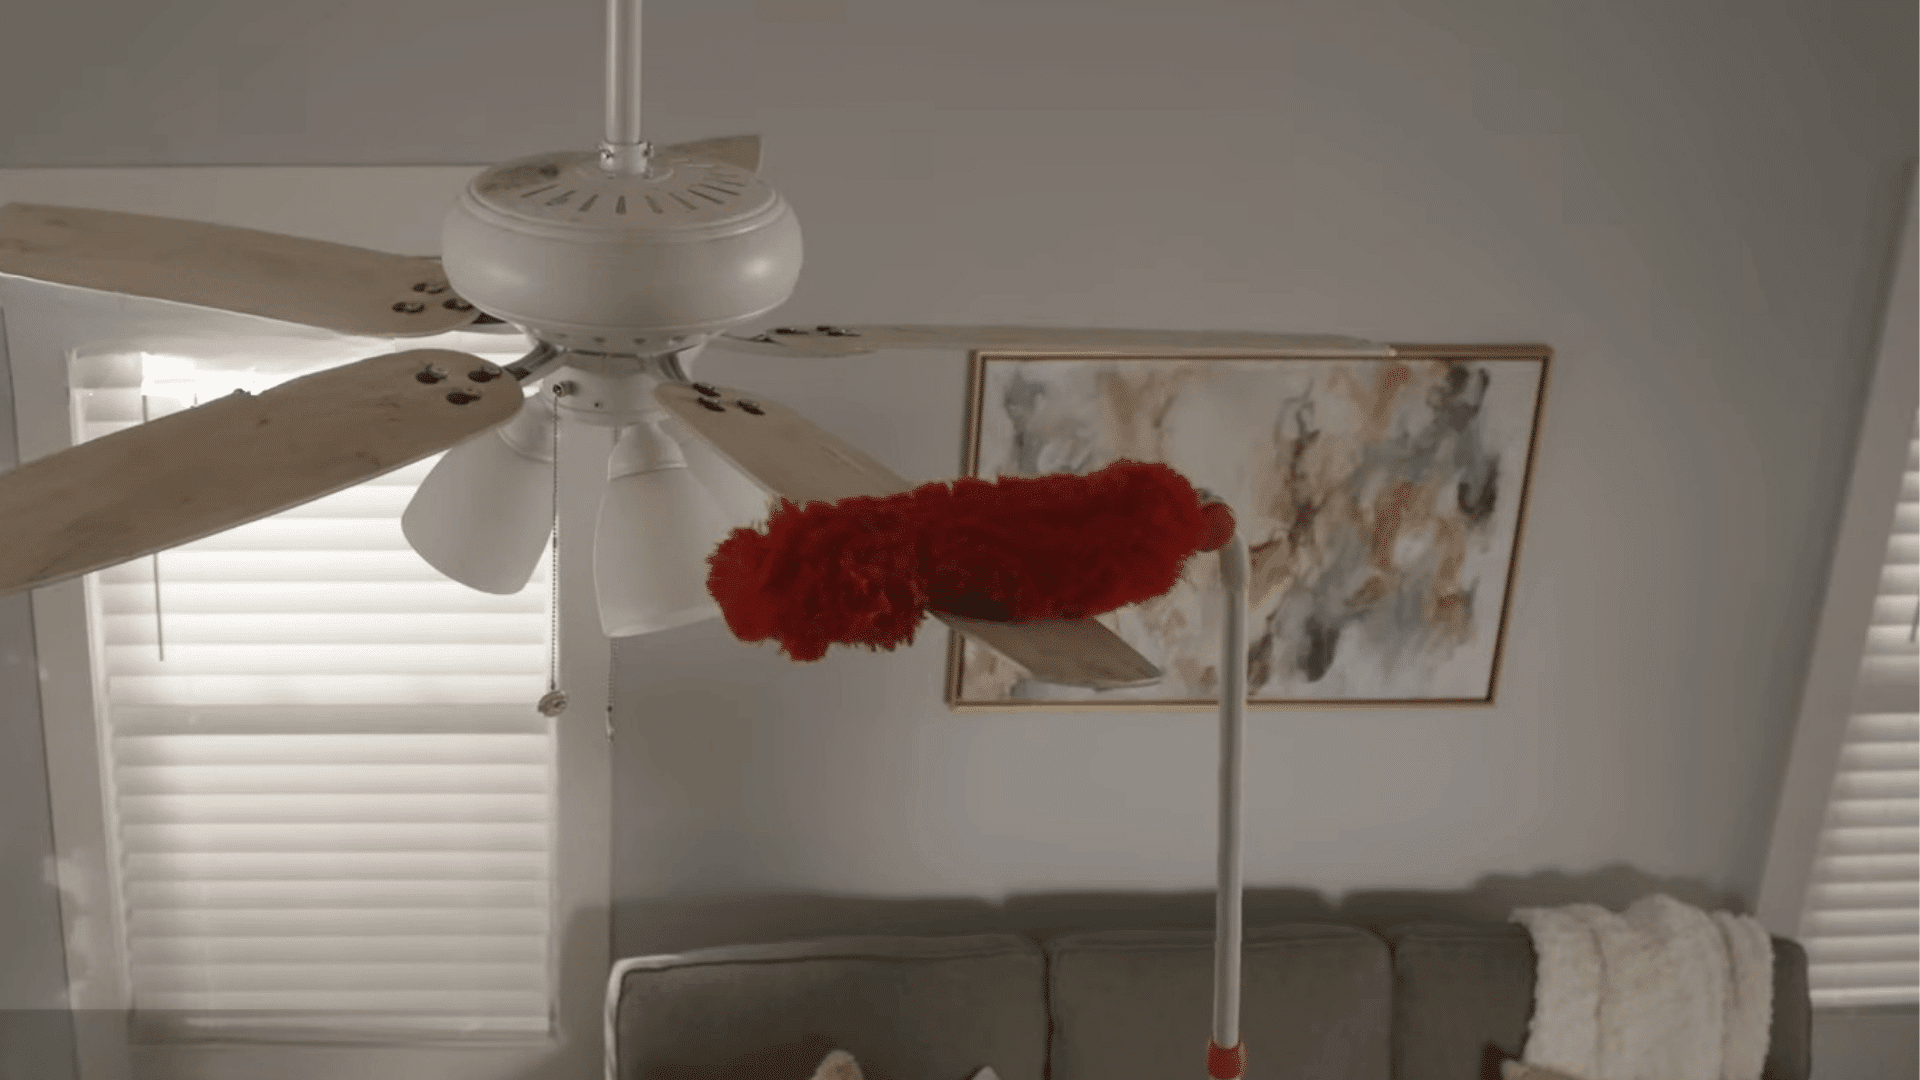
Dust, grime, and debris often build up on ceiling fan blades and around the motor over time.
When dirt collects unevenly, it can affect the weight balance of the blades and cause the fan to wobble during operation.
Before making any adjustments, thoroughly clean the fan using a microfiber cloth or duster.
Be sure to wipe both sides of each blade and remove any dirt from the motor housing for the best results.
Pro Tip: Clean both the top and bottom surfaces of every blade, as hidden dust on top often causes imbalance.
Step 2: Check the Fan Mounting
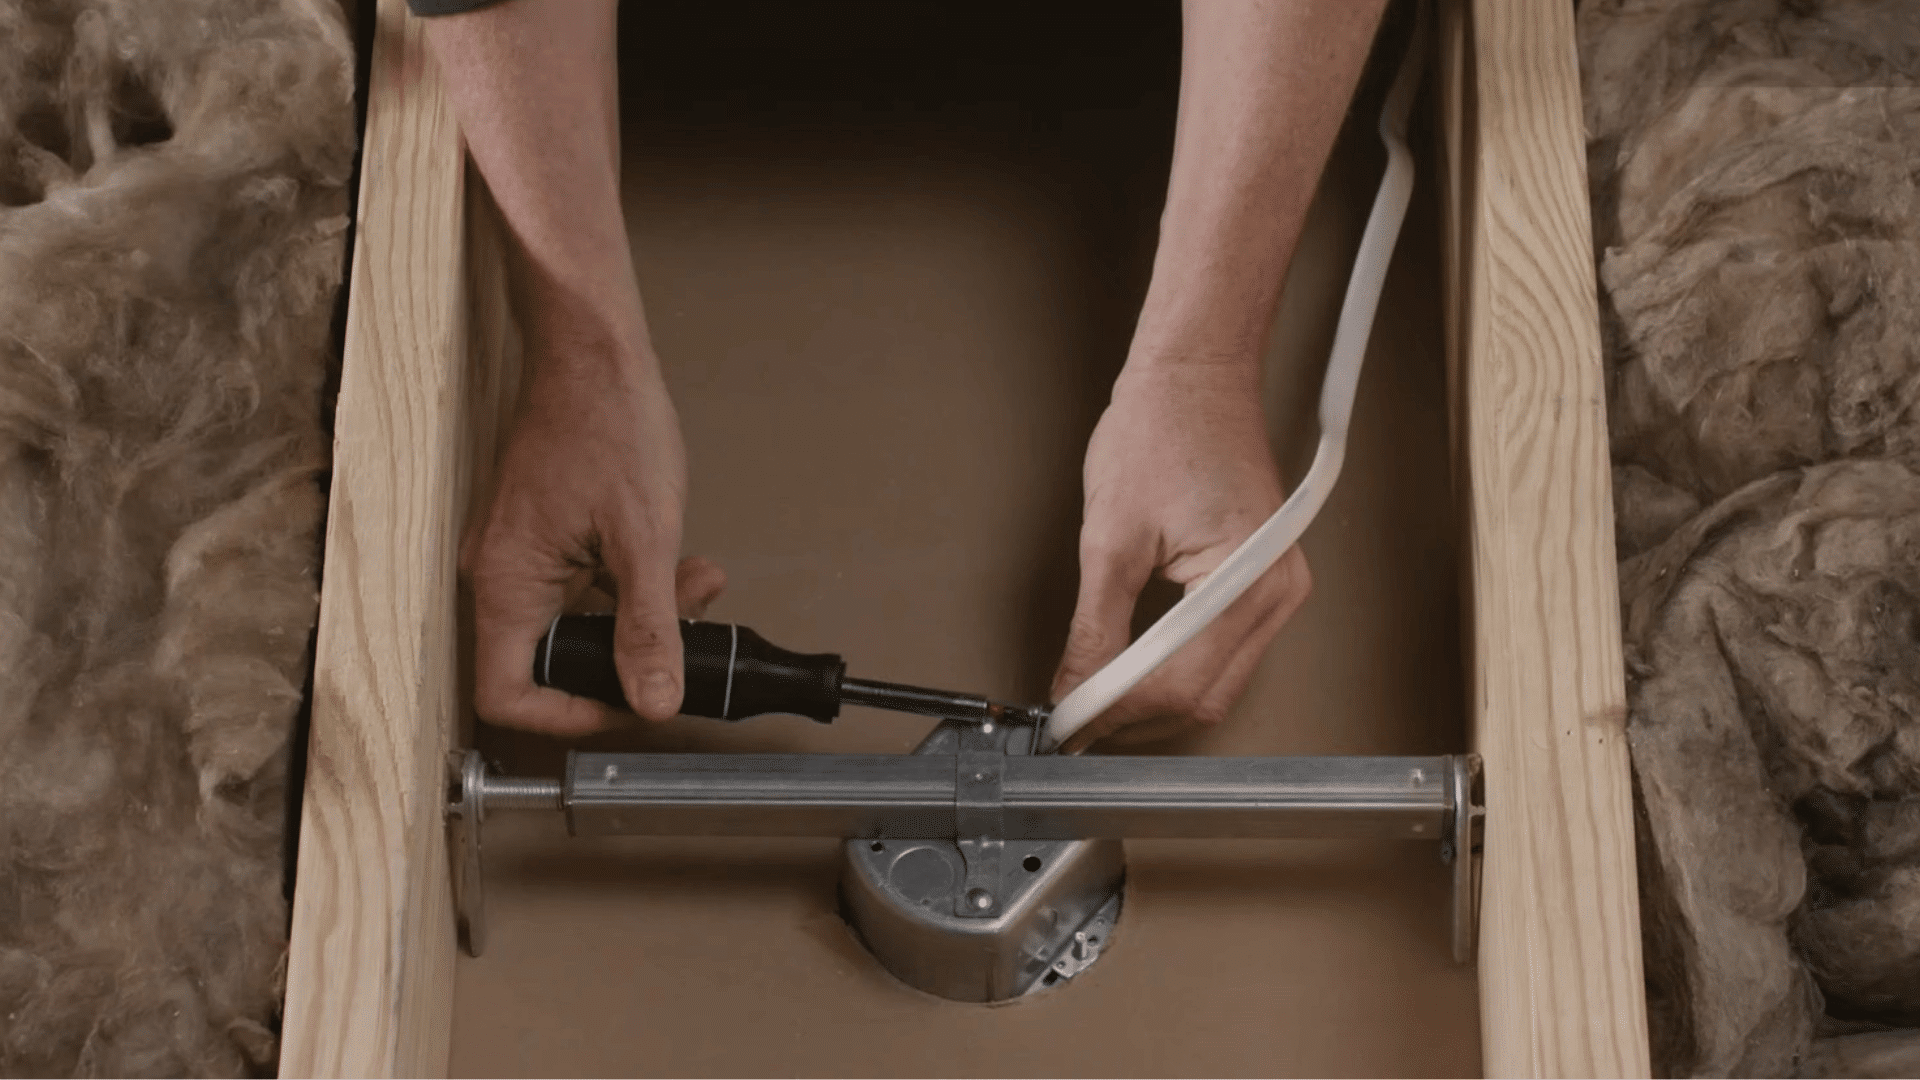
Take a close look at how the ceiling fan is mounted to the ceiling. It should be attached to a fan-rated electrical box and securely supported by a brace or crossbeam.
Check the mounting bracket by gently wiggling it with your hand. If you notice any movement, tighten the mounting screws using a screwdriver.
A secure mounting system helps reduce wobbling and improves the fan’s overall stability.
Pro Tip: Turn off the power before inspecting the mounting hardware to ensure a safer working environment.
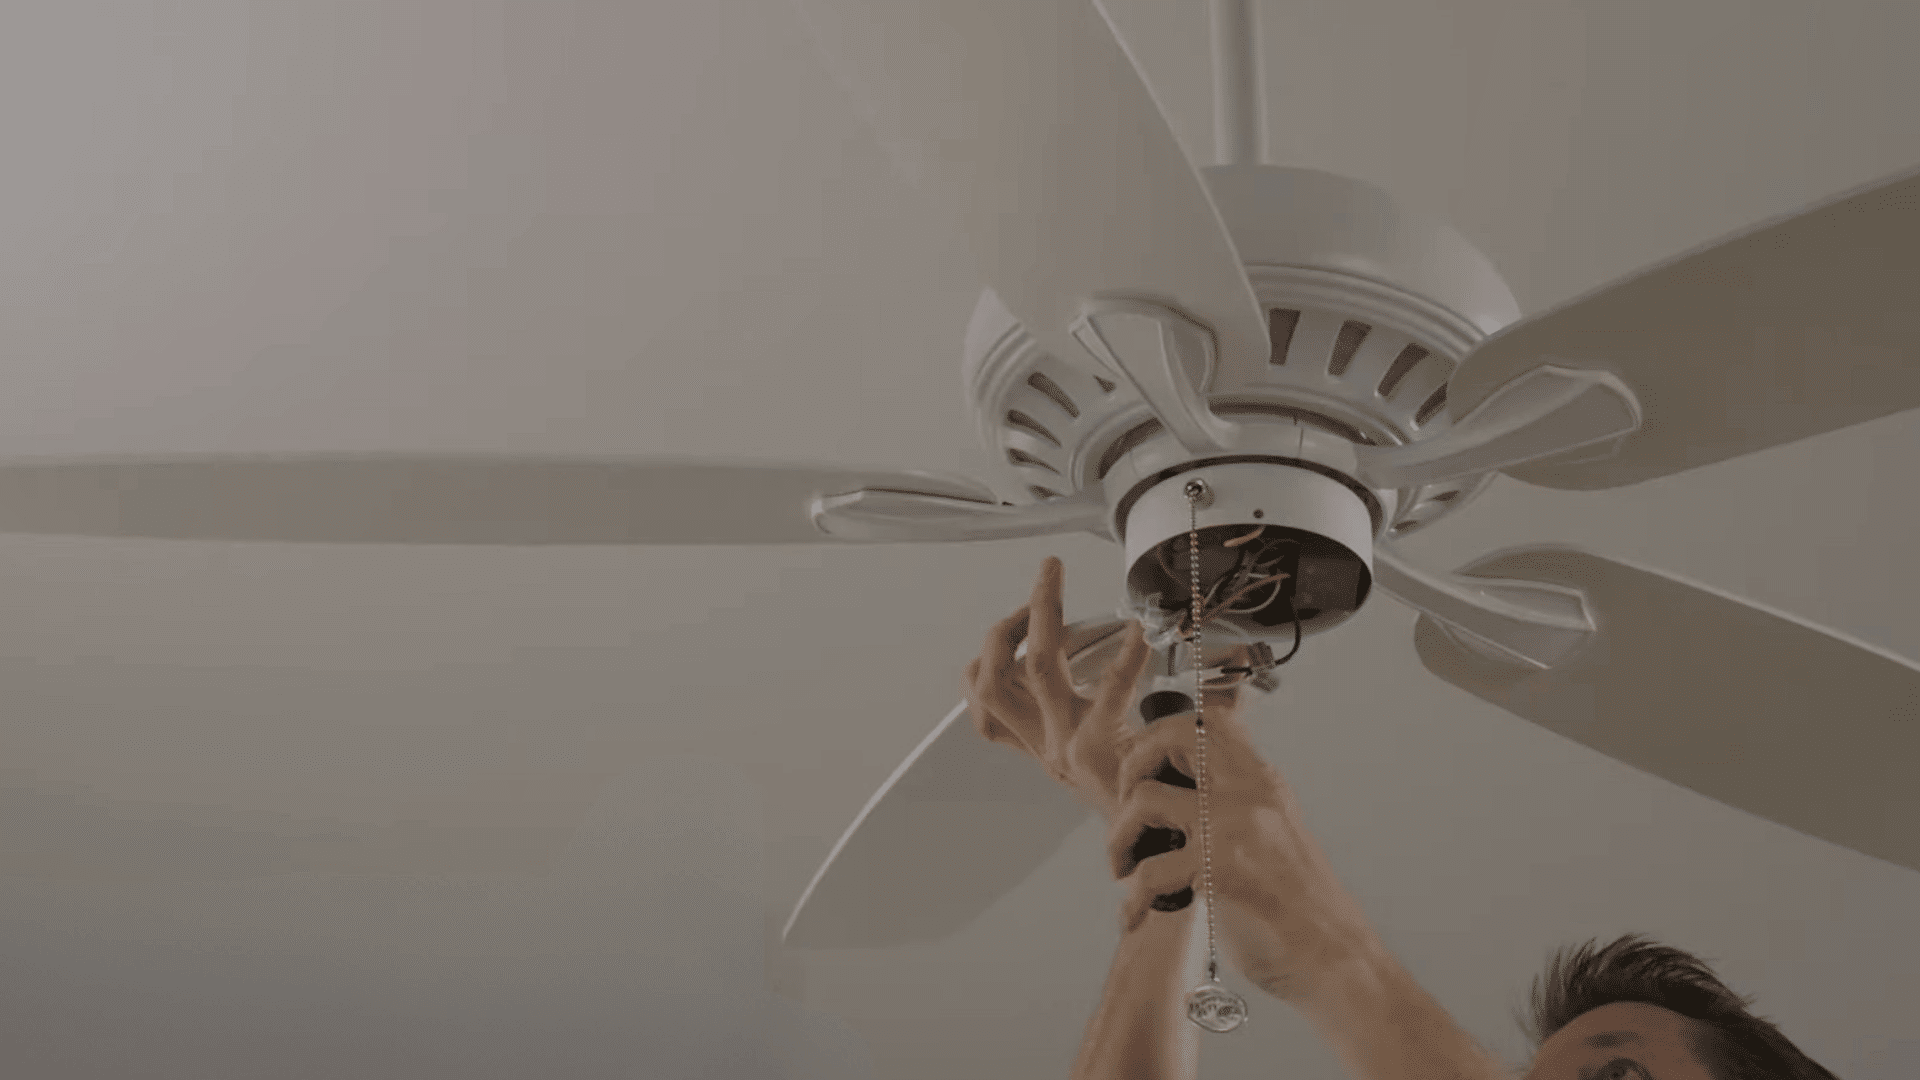
Step 3: Inspect the Hanger Ball and Downrod
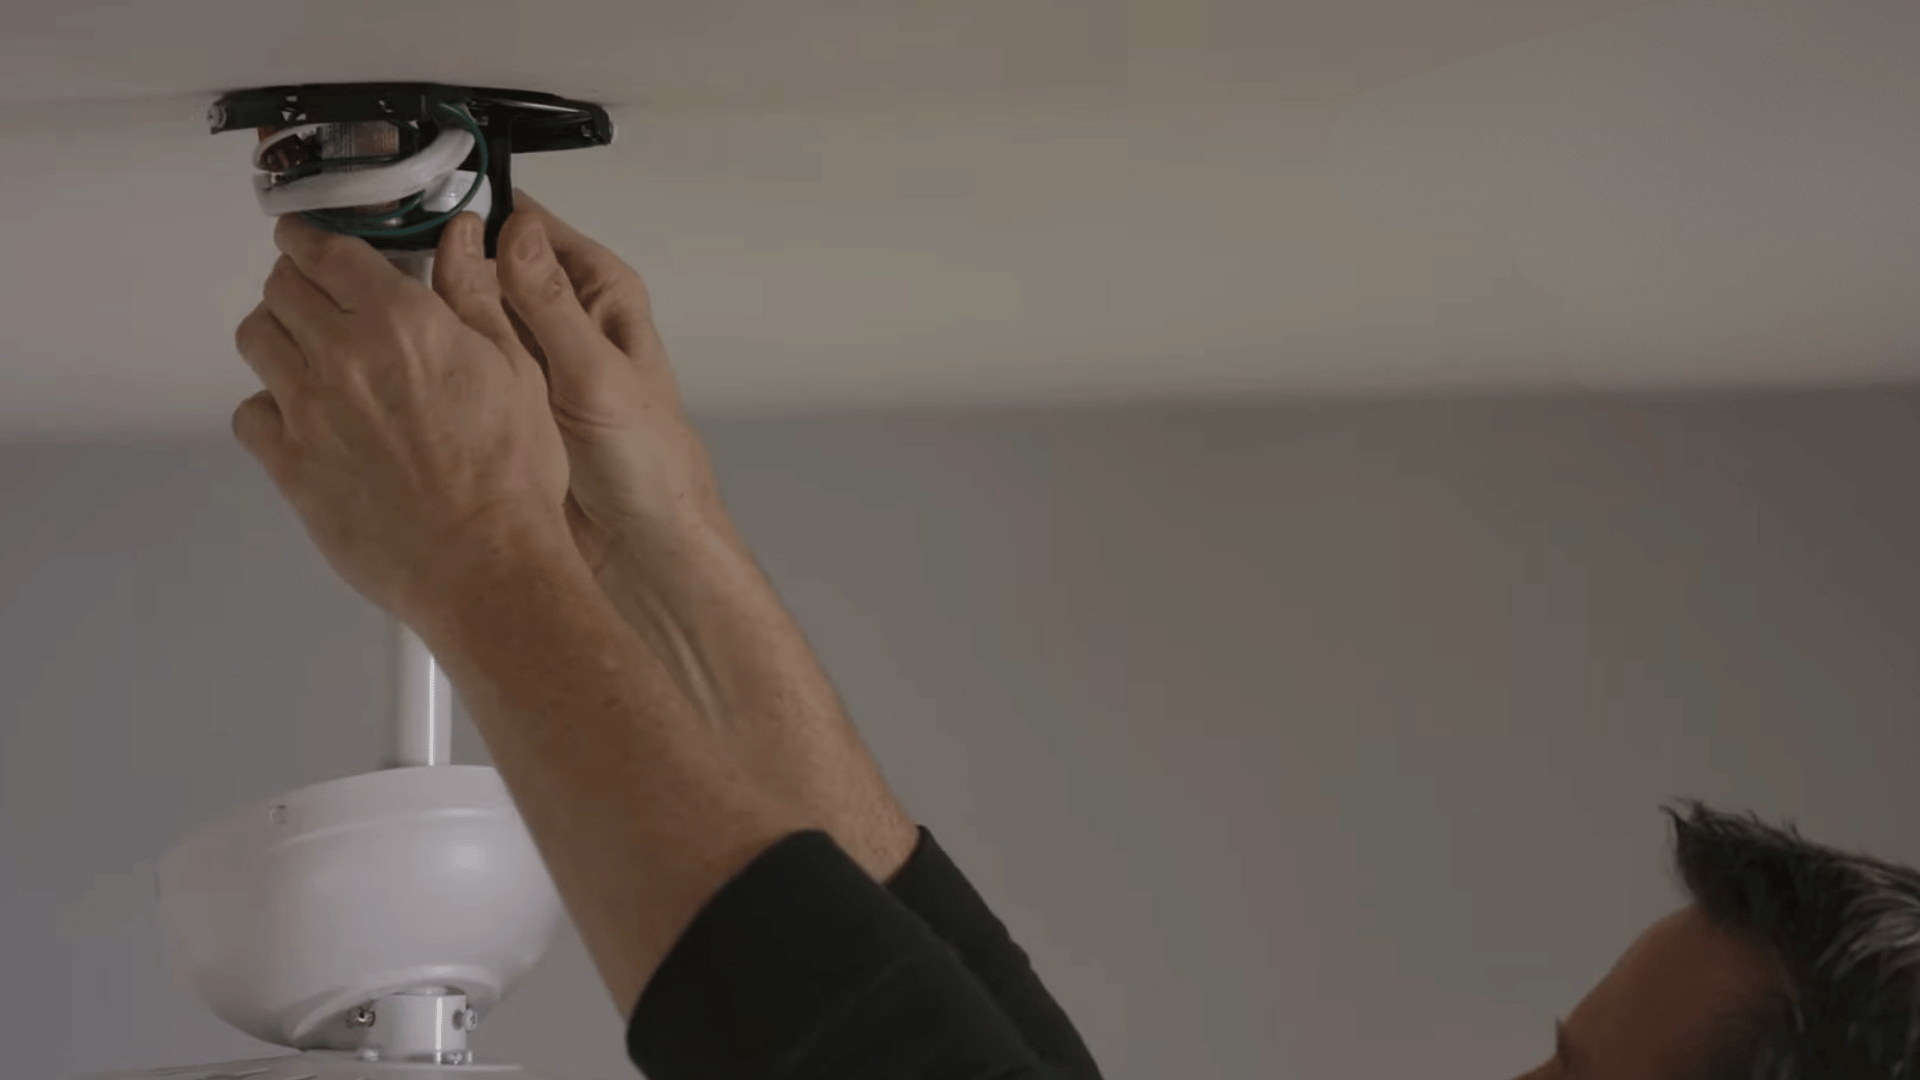
Inspect the hanger ball at the top of the fan and ensure it sits properly in its mounting groove.
A misplaced hanger ball can create unnecessary movement and wobbling. Next, check the downrod support screws and tighten any that appear loose.
After completing the inspection, reattach the canopy cover and tighten its screws securely.
These simple adjustments can improve stability and help the fan operate more smoothly.
Pro Tip: Test the fan after tightening each component so you can identify exactly which adjustment made a difference.
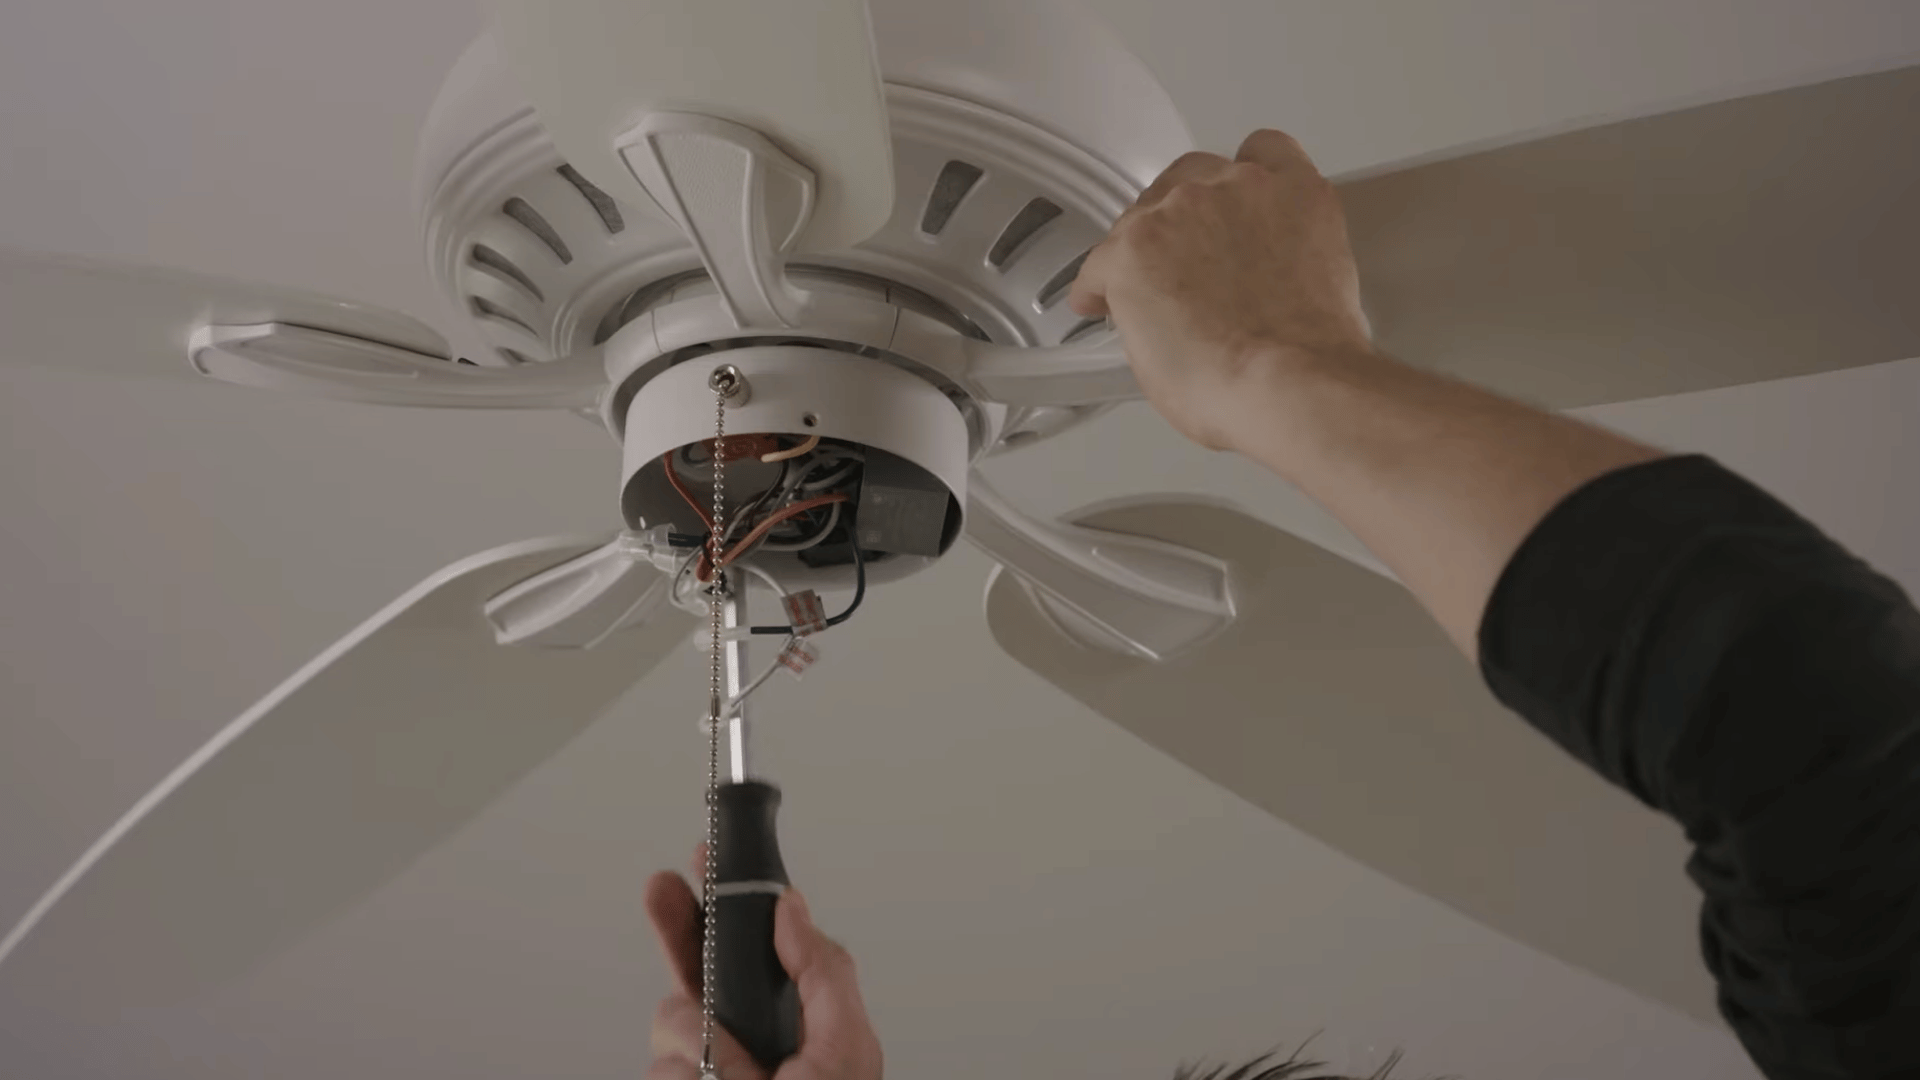
Step 4: Tighten the Switch Housing and Light Kit
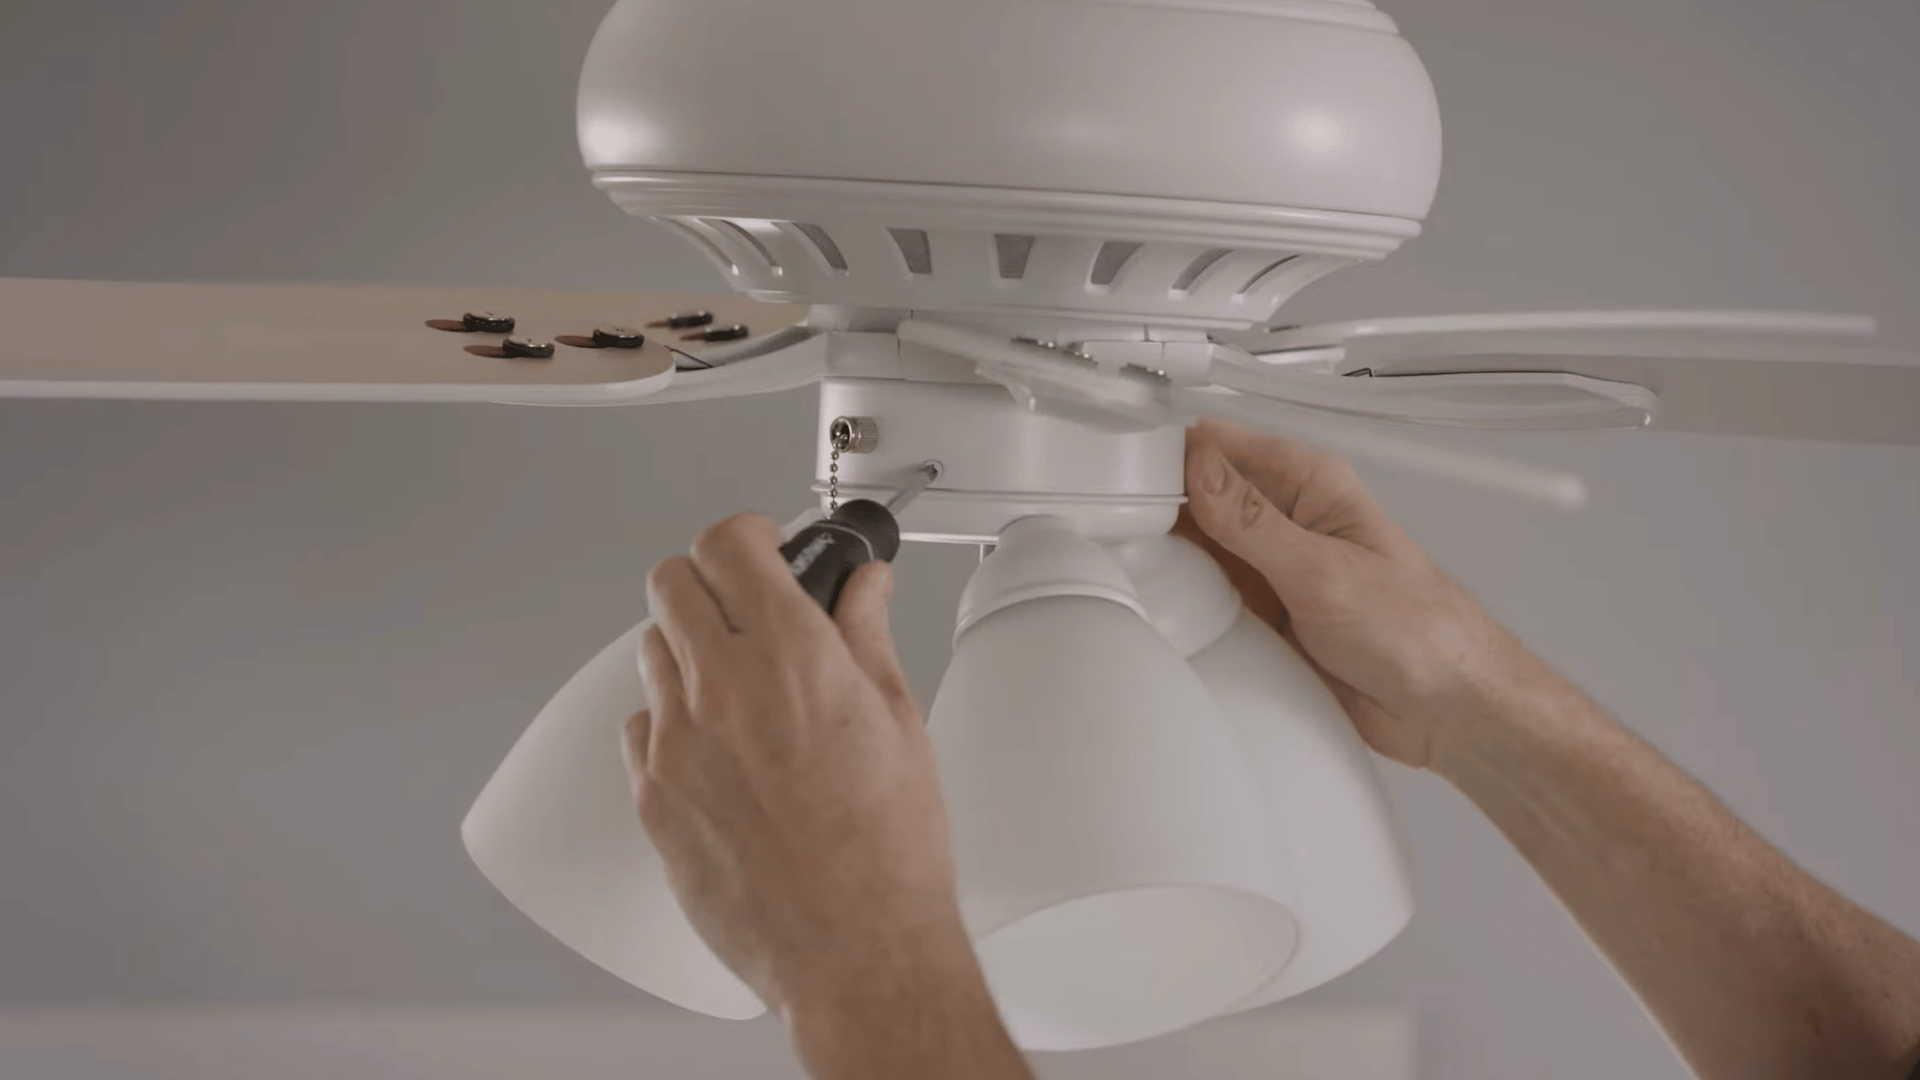
Check the switch housing and light kit assembly located beneath the fan motor. These parts should fit tightly together and sit flush without visible gaps.
If you notice looseness or movement, inspect the connecting screws and tighten them carefully.
Loose light kit components can create vibration that contributes to fan wobble and unwanted noise. Once tightened, run the fan again to see if the stability has improved.
Pro Tip: Hold the light kit gently while tightening screws to avoid placing extra strain on the fixture connections.
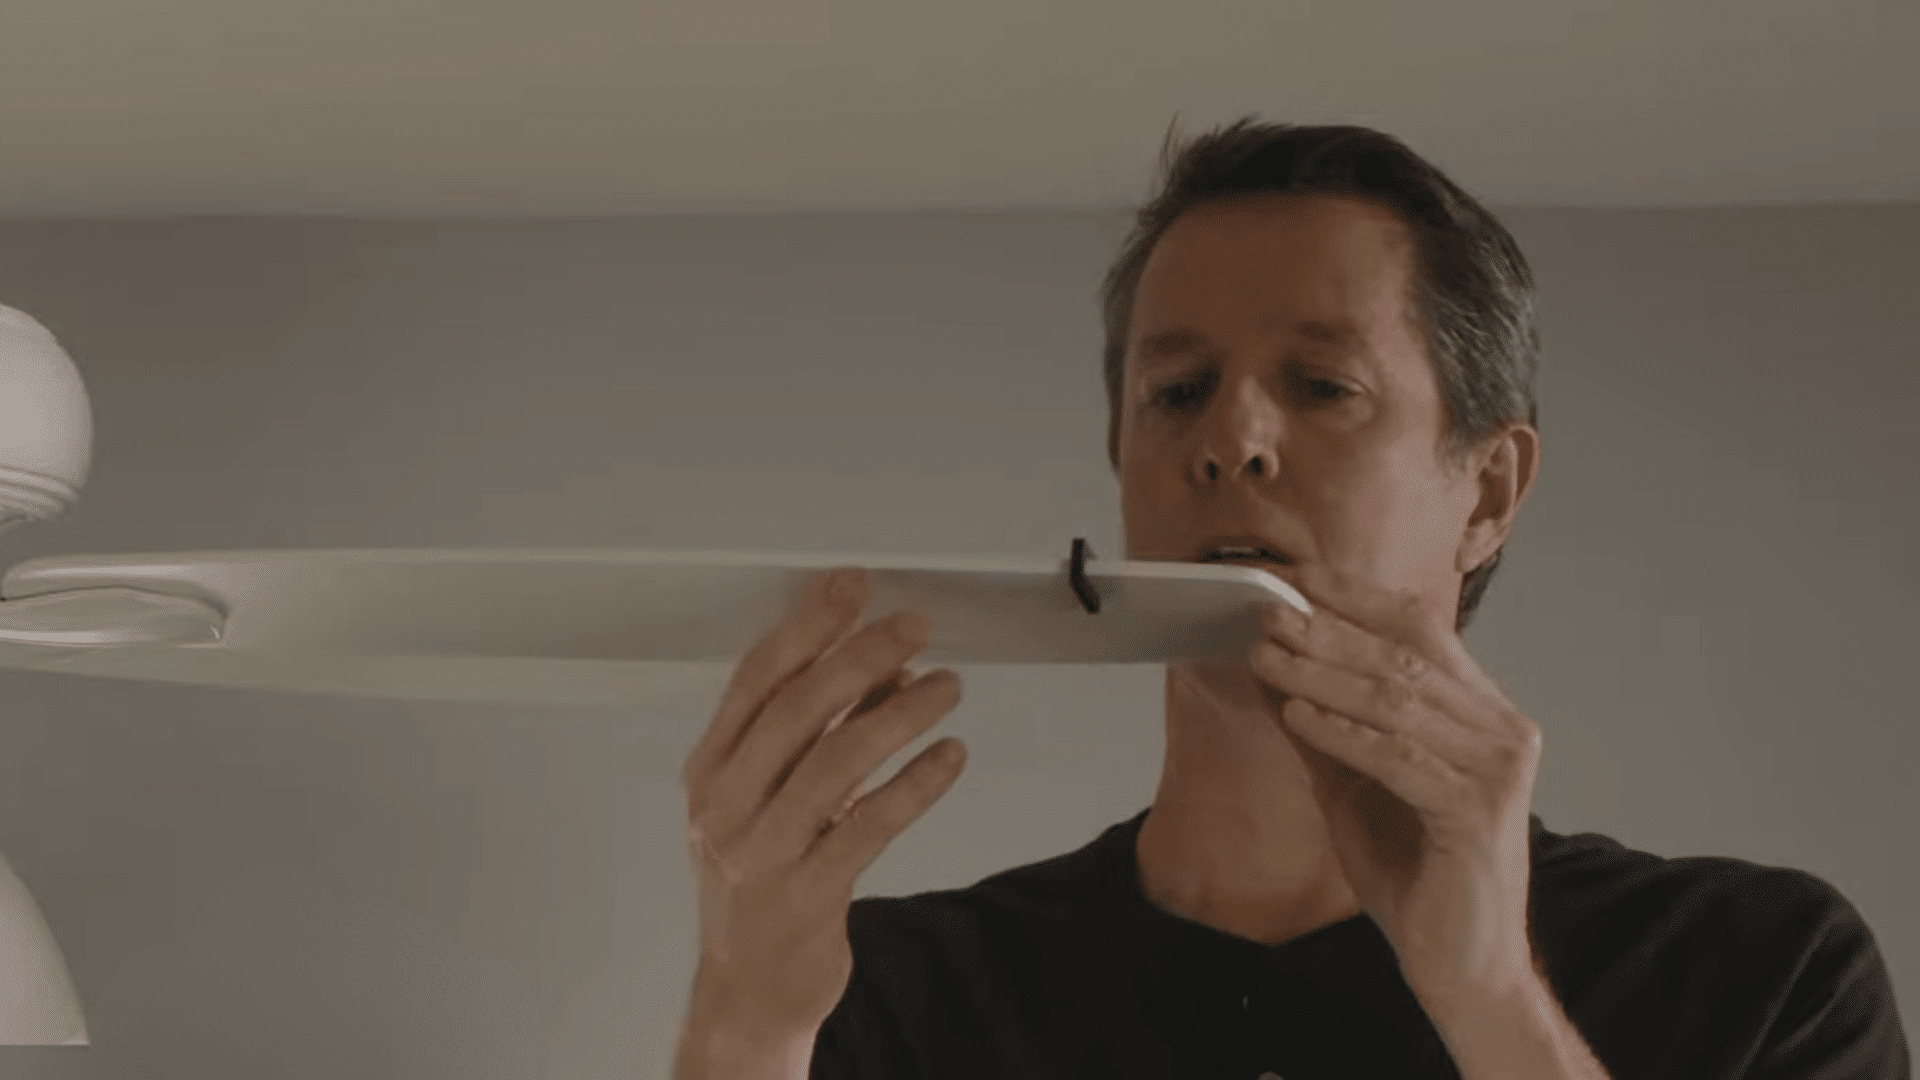
Step 5: Measure Blade Alignment
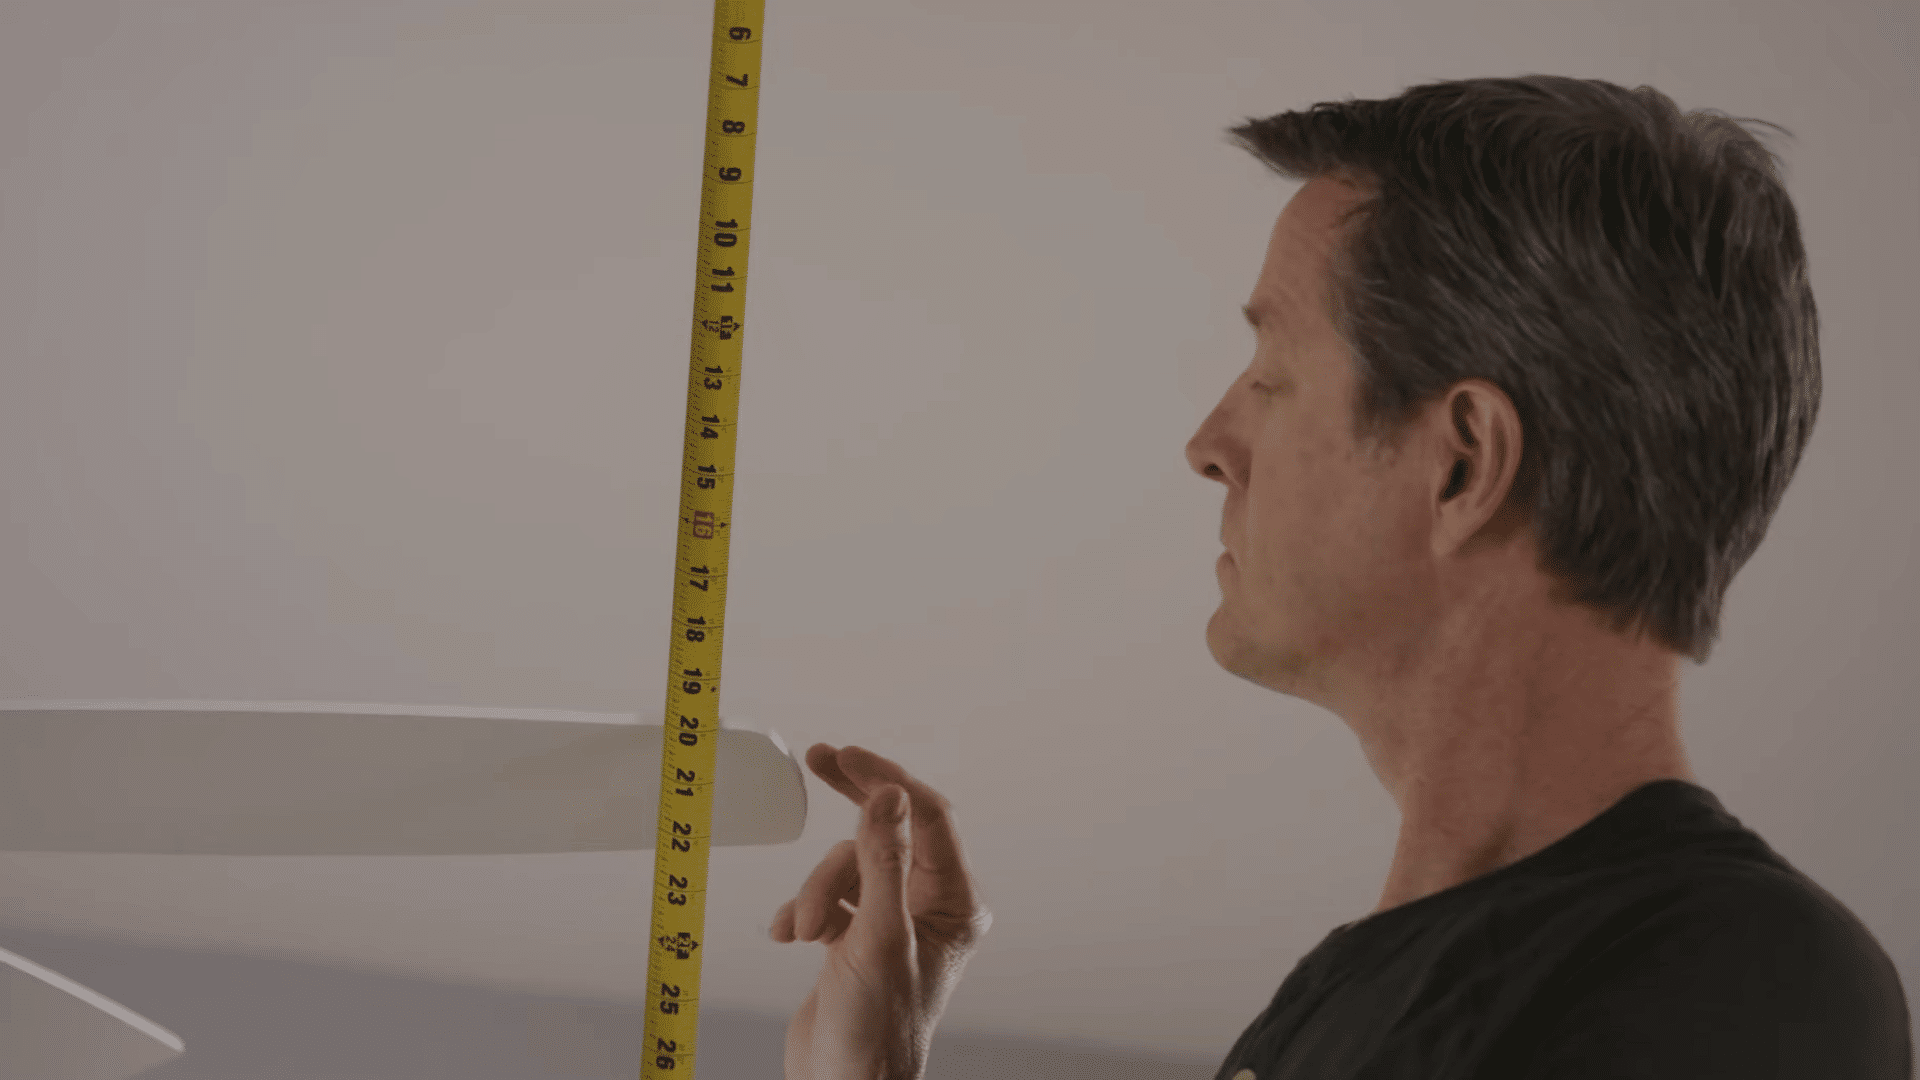
If your ceiling fan continues to wobble, inspect the blades for alignment issues. Measure the distance from the tip of each blade to the ceiling and compare the results.
Every blade should sit at the same height. If one blade is noticeably higher or lower than the others, it may be sagging or out of alignment.
Even a small difference can affect balance and cause unwanted movement while the fan is running.
Pro Tip: Rotate the fan by hand and measure each blade from the same spot on the ceiling for the most accurate comparison.
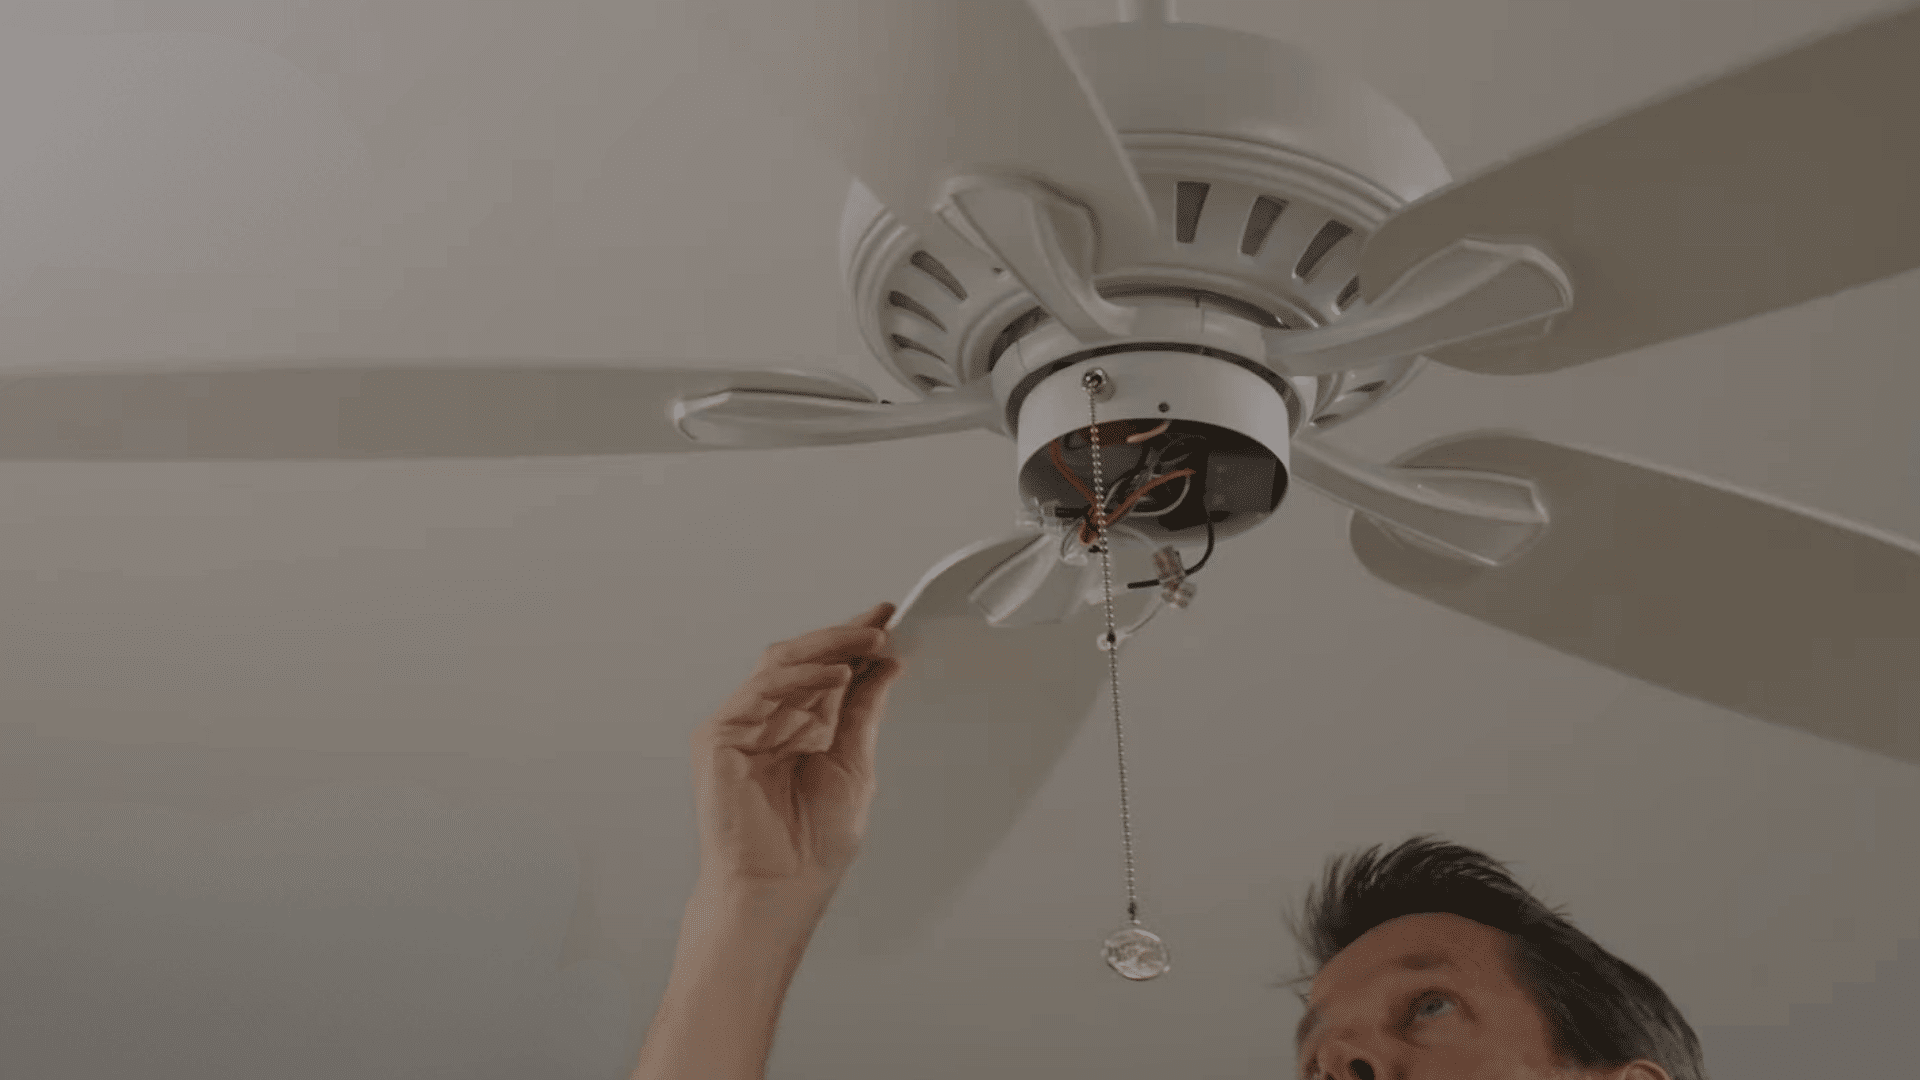
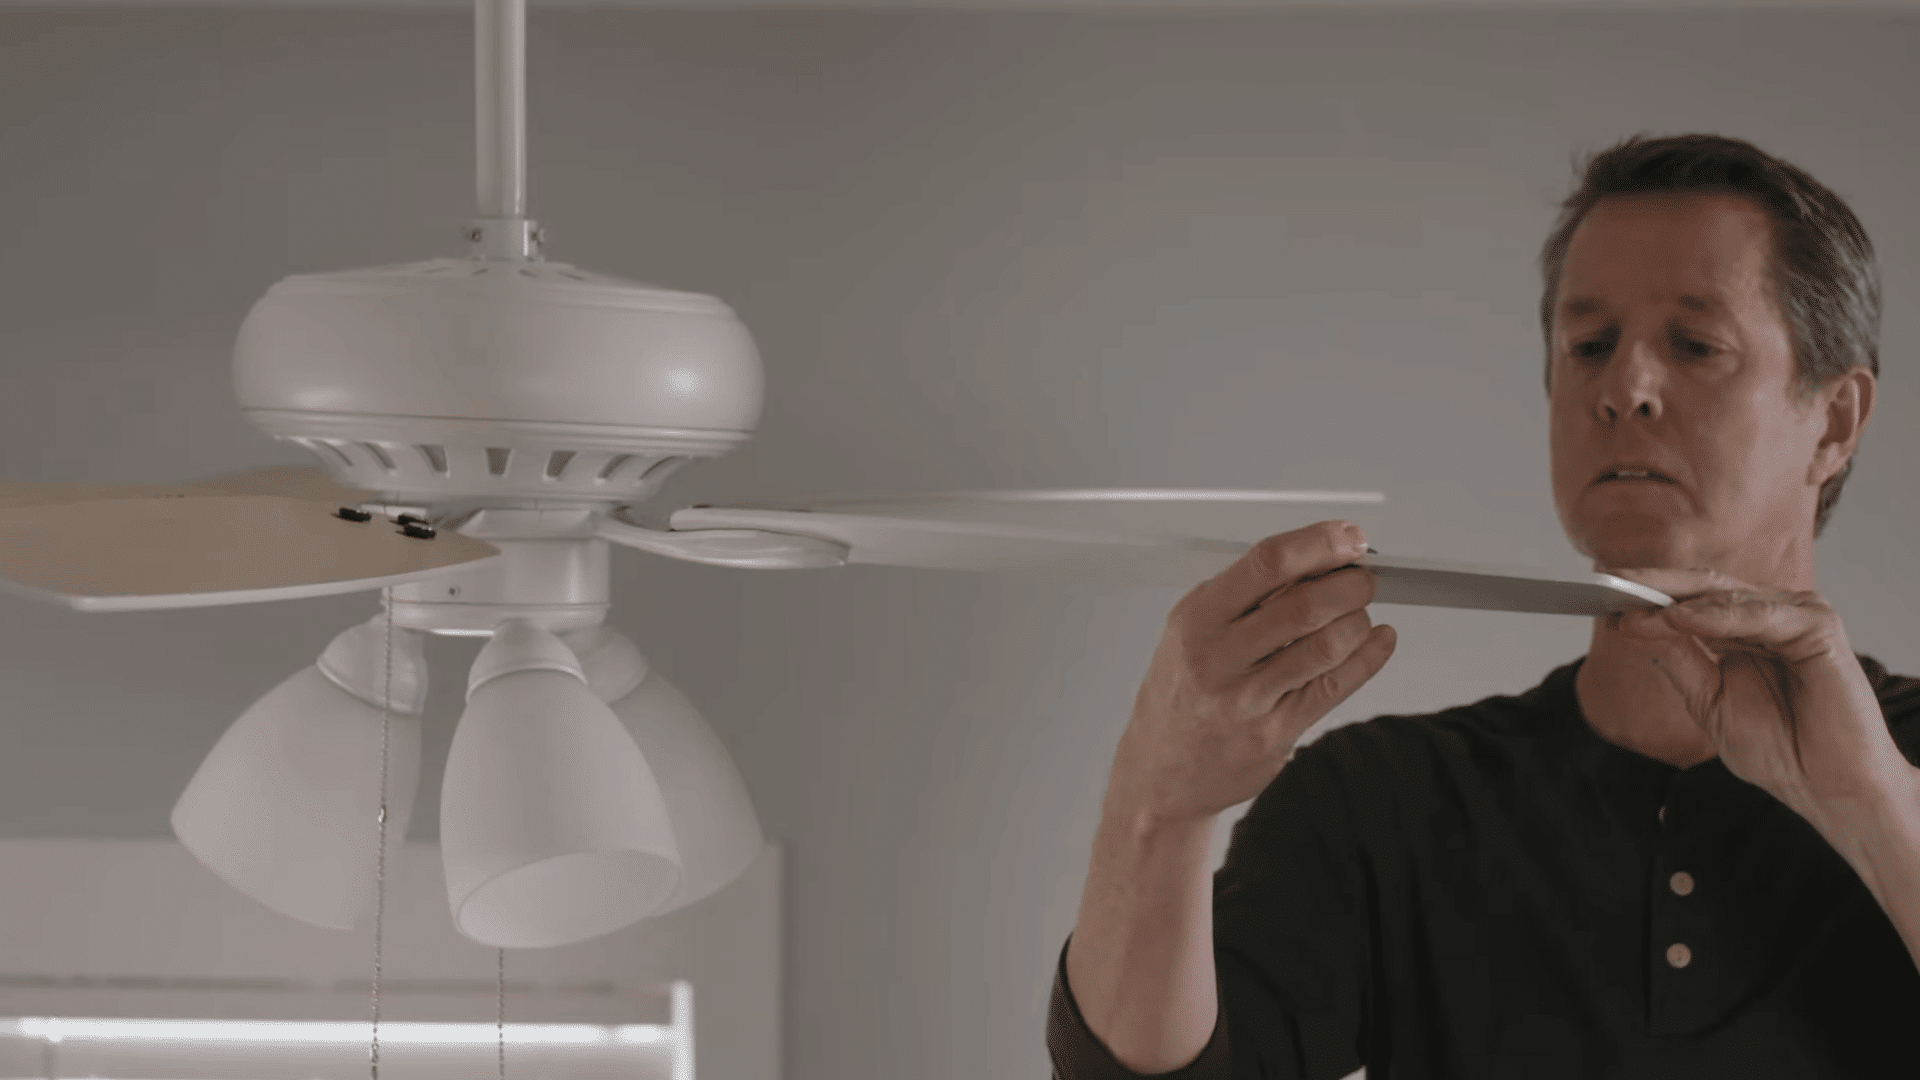
Step 6: Tighten Blade Mounting Screws
If one blade sits lower than the others, check the mounting screws that connect it to the motor housing.
Loose screws can make the blade droop slightly and throw off the fan’s balance. Tighten each screw carefully without forcing it.
After that, measure the blade heights again to see if they match. Then, turn the fan on and watch for any remaining wobble or uneven movement.
Pro Tip: Tighten screws evenly so the blade stays level instead of shifting to one side.
Step 7: Check for Bent Blade Arms
If the blade mounting screws are already secure, inspect the blade arms, also known as blade irons.
These metal brackets connect the blades to the motor and can sometimes bend due to wear or accidental impact.
Even a slight bend can affect blade alignment and cause the fan to wobble. Carefully check each blade arm for visible differences.
If you find any damage, replacing the affected blade arm is usually the best solution.
Pro Tip: Compare all blade arms side by side to spot small bends that may not be obvious at first glance.
Step 8: Replace Warped Fan Blades
Warped fan blades can be difficult to fix and often continue causing balance issues even after adjustments.
Inspect each blade for signs of twisting, bending, or uneven shape. If you notice visible warping, replacing the affected blades is usually the most effective solution.
While making replacements, also check the blade arms for wear or damage.
Replacing worn blade arms at the same time can help restore proper alignment and improve overall fan performance.
Pro Tip: Always replace blades with matching models to maintain consistent weight, size, and balance across the fan.
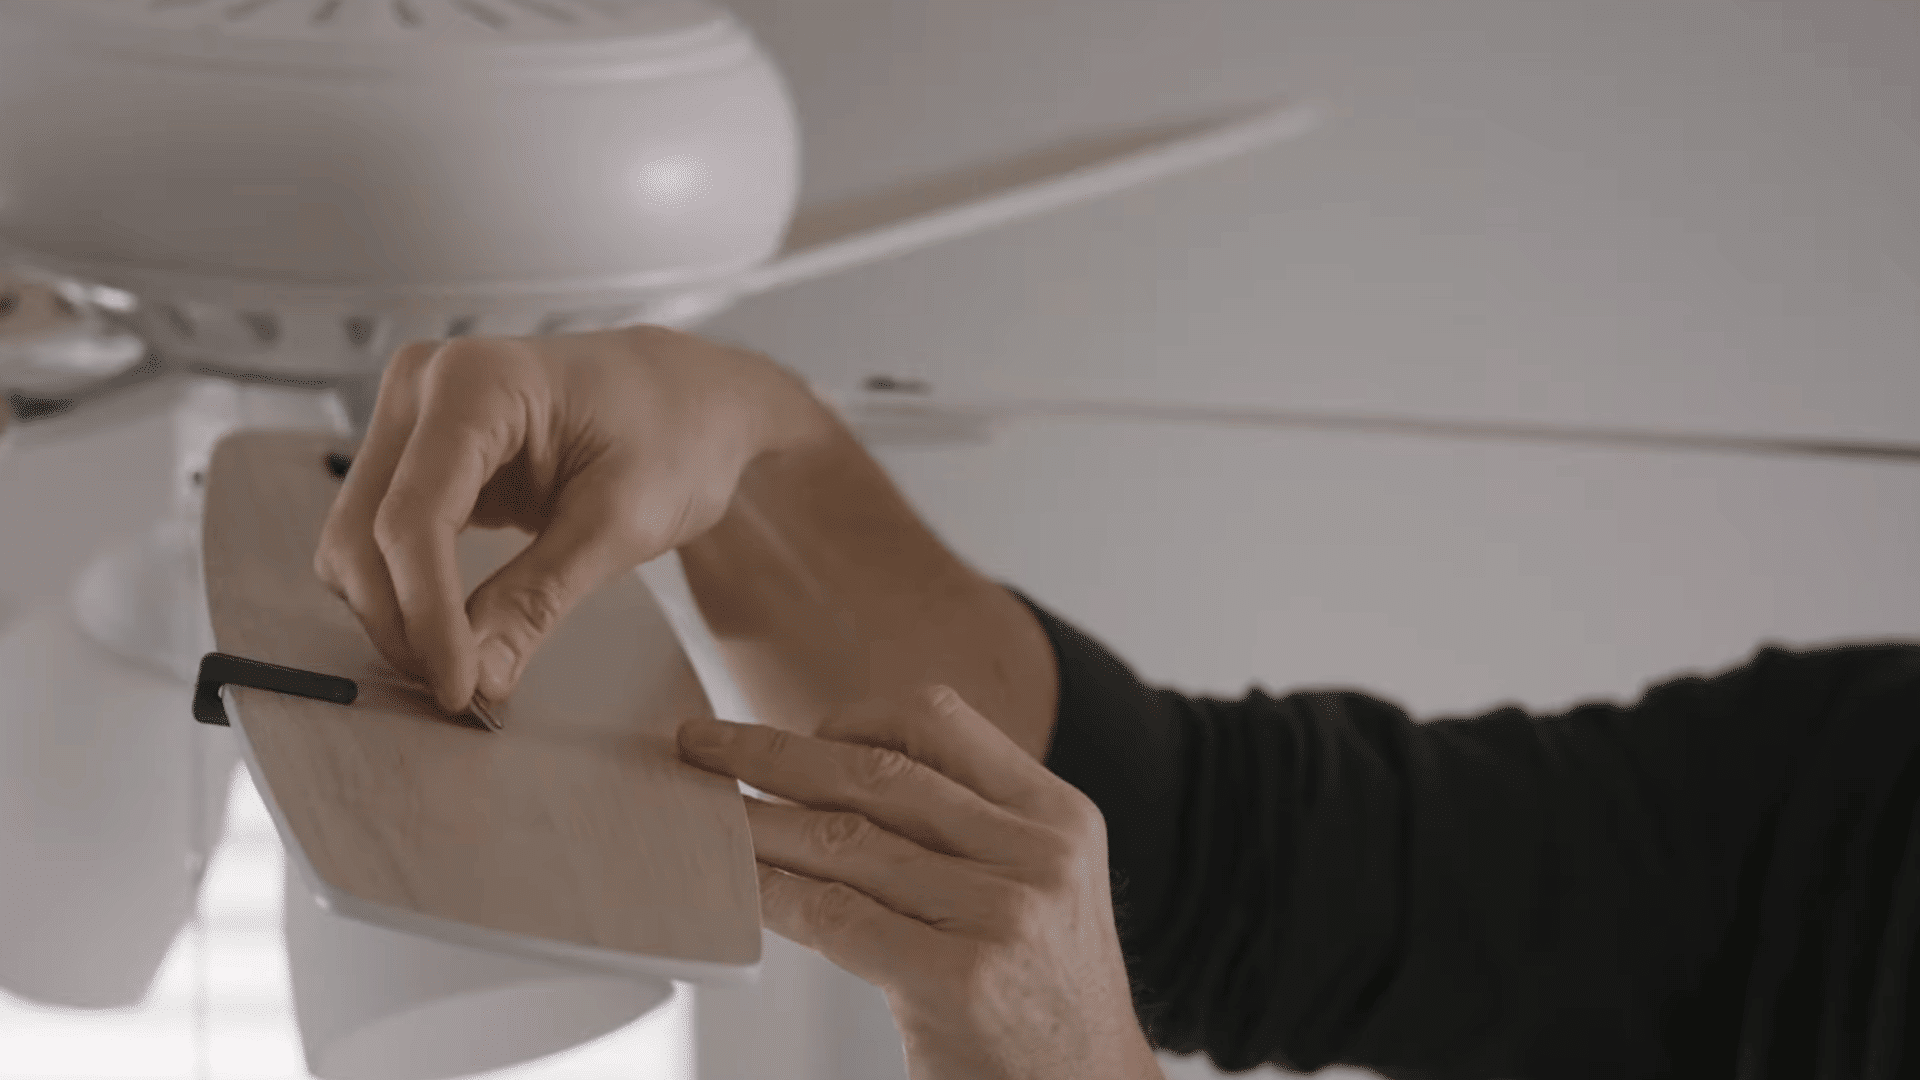
Step 9: Use a Ceiling Fan Balancing Kit
Attach the balancing clip from the ceiling fan balancing kit to one blade about halfway along its length.
Turn the fan on and observe whether the wobble becomes less noticeable. If there is no improvement, move the clip to the next blade and repeat the test.
Continue checking each blade until you find the one affecting the fan’s balance. This process helps identify the source of the wobble before adding permanent weights.
Pro Tip: Test the fan at the same speed each time to ensure accurate and consistent results.
Step 10: Fine-Tune the Clip Position
Move the balancing clip along the problem blade in small increments, about an inch at a time. After each adjustment, turn the fan on and check whether the wobble improves.
Keep moving the clip until you find the spot where the fan runs the smoothest.
This helps you locate the best position before adding a permanent balance weight.
Pro Tip: Make one adjustment at a time so you can clearly see which position reduces the wobble most.
Step 11: Install the Balance Weight
Once you identify the position that provides the smoothest operation, attach the balancing weight permanently to that area of the blade.
Follow the kit instructions to secure the weight properly, then remove the testing clip.
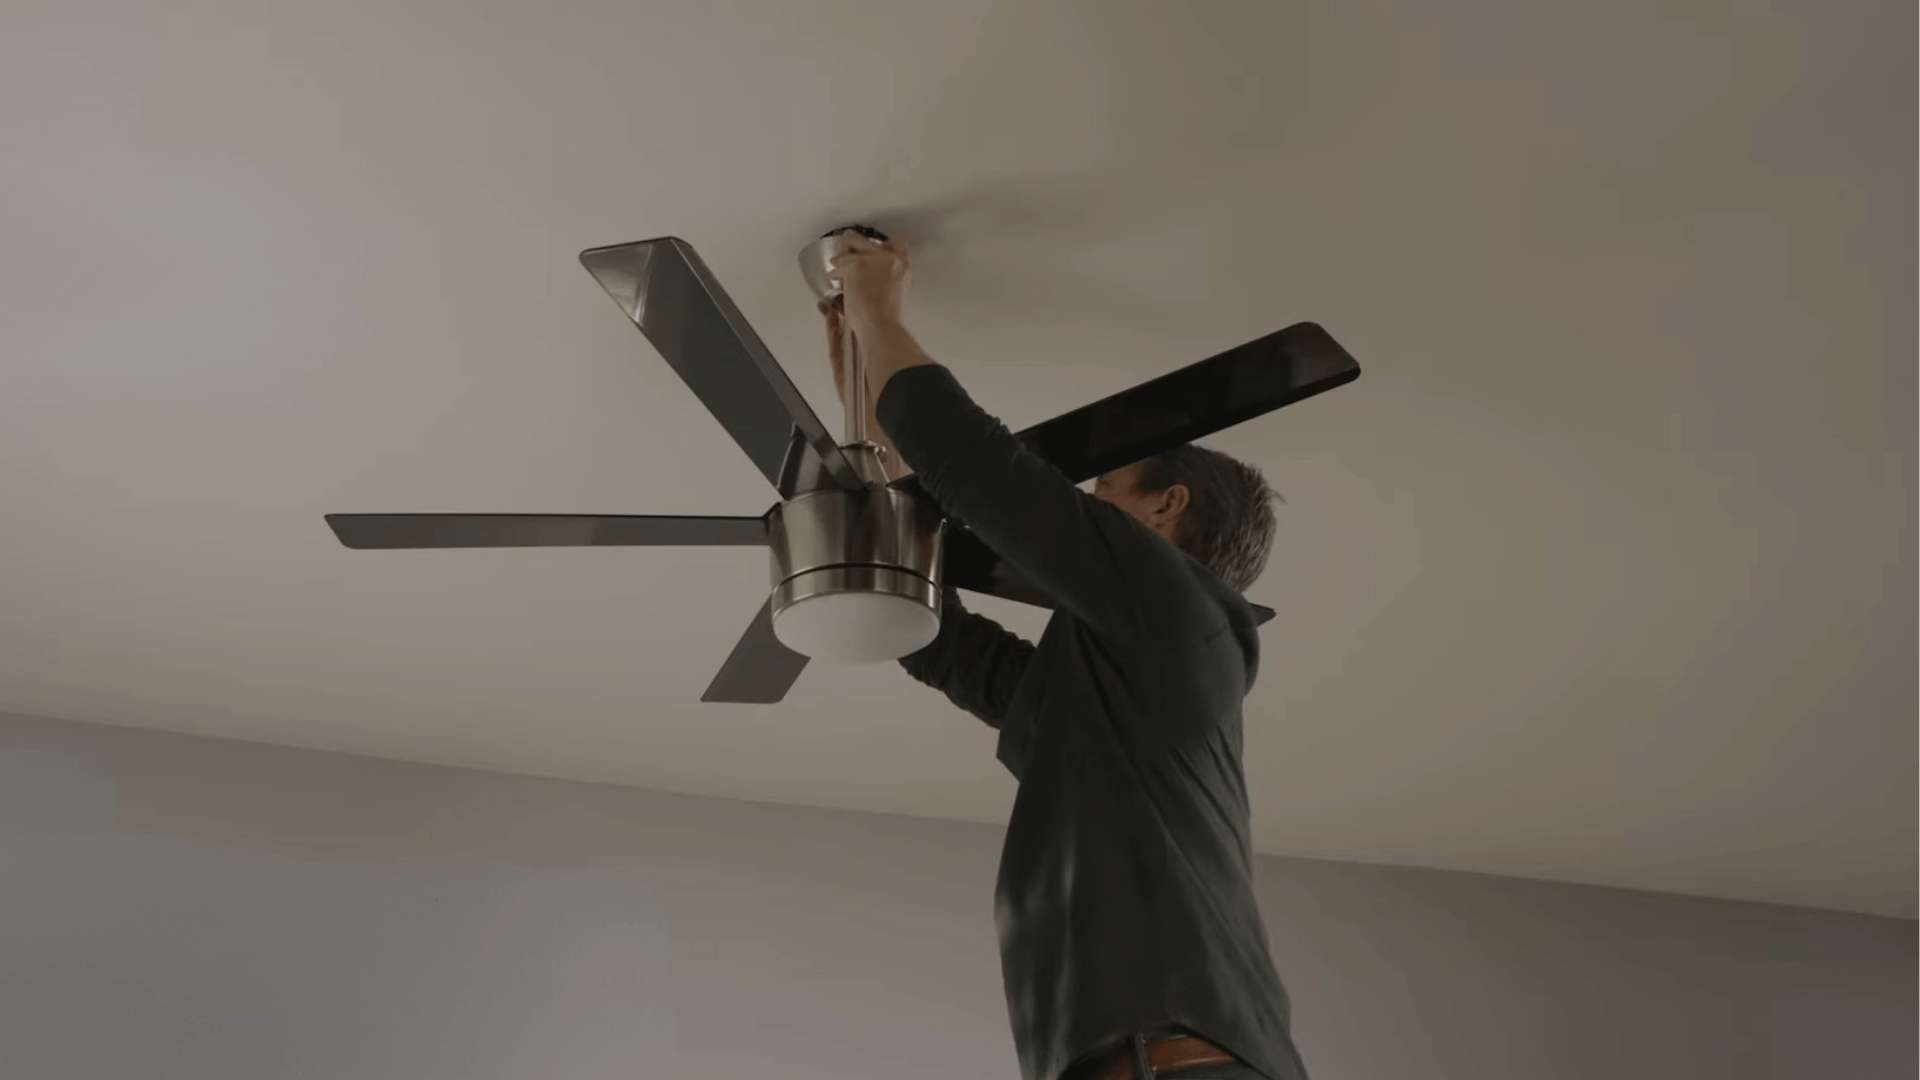
After installation, run the fan at low, medium, and high speeds to ensure the wobble has been corrected.
Testing multiple speeds helps confirm that the fan remains stable under different operating conditions.
Pro Tip: Clean the blade surface before attaching the weight to help the adhesive stick more securely.
Step 12: Consider Replacing an Older Fan
If your ceiling fan is more than ten years old and continues to wobble after balancing attempts, the problem may be caused by worn internal components.
Aging motors, bearings, or other mechanical parts can create vibrations that are difficult to fix with simple adjustments.
In these situations, replacing the fan may be more cost-effective and reliable than investing additional time and money in repeated repairs.
Pro Tip: Compare the cost of replacement parts with the price of a new fan before deciding on further repairs.
This tutorial is based on a helpful video by The Home Depot. You can check out the original video on their YouTube channel here or watch it below.
How to Use a Ceiling Fan Balancing Kit?
A balancing kit helps identify the source of fan wobble and correct uneven weight distribution across the blades.
- Attach the Balancing Clip to a Blade: Place the clip halfway along one blade to temporarily adjust the weight distribution and test whether the wobbling improves.
- Turn the Fan On and observe: Run the fan at a consistent speed and watch carefully to see if the wobble becomes less noticeable.
- Test Each Blade Individually: Move the clip from blade to blade, repeating the test until you identify the blade causing imbalance.
- Locate the Problem Area on the Blade: Slide the clip along the problematic blade in small increments, testing after each adjustment.
- Find the Smoothest Operating Position: Continue repositioning the clip until the fan runs with minimal vibration and the least amount of wobble.
- Attach the Balance Weight Permanently: Place the adhesive weight where the clip worked best to permanently correct the blade imbalance.
- Remove the Testing Clip: After securing the weight, remove the clip since it is no longer needed for balancing.
- Test the Fan at Different Speeds: Run the fan on low, medium, and high settings to confirm stable operation across all speeds.
Reddit Users on Fixing a Ceiling Fan
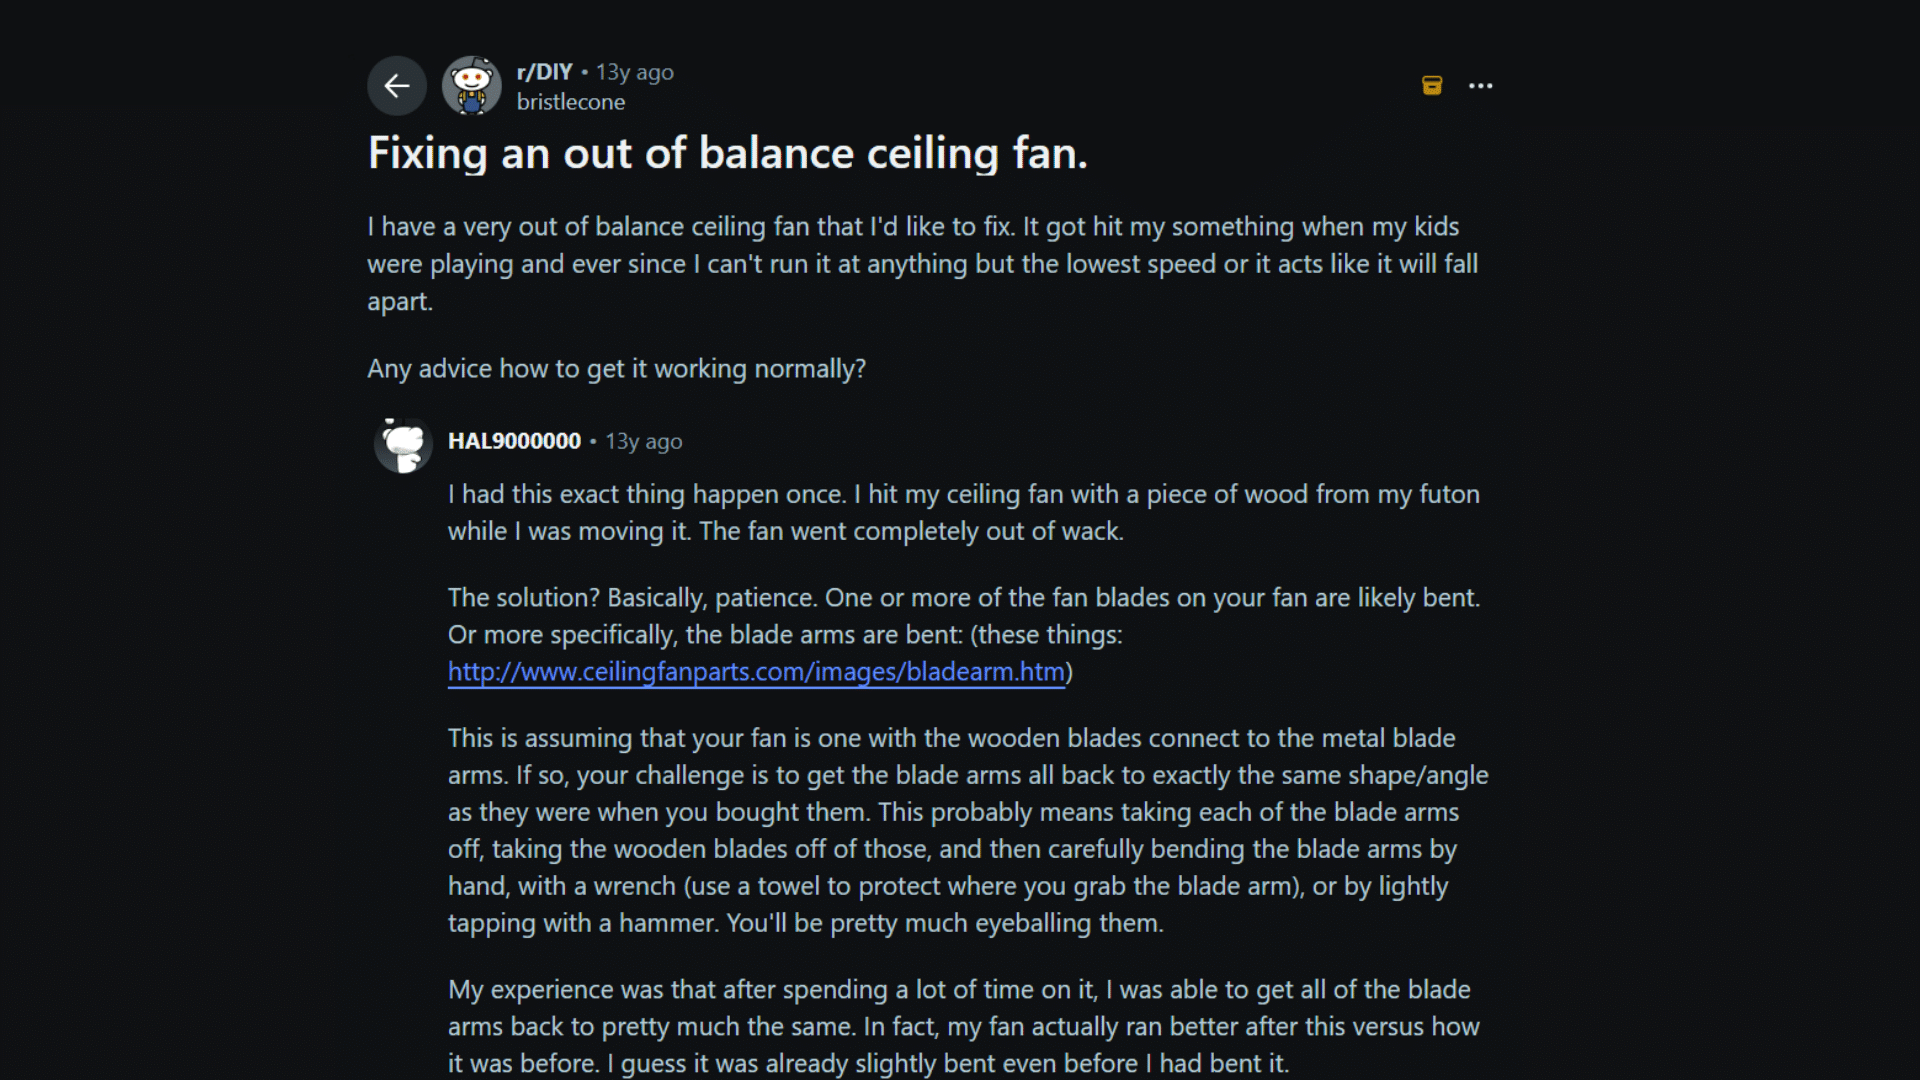
Reddit users shared a straightforward solution for fixing an unbalanced ceiling fan after it has been hit or bumped.
A common suggestion was to inspect the blade arms, as even a slight bend can cause noticeable wobbling and instability.
Many users recommended comparing the height and angle of each blade to identify any misalignment.
Some advised carefully bending the affected blade arms back into position using basic tools, while others suggested removing the blades first for a more accurate adjustment.
Several users noted that the process requires patience, as small corrections often make a significant difference.
Overall, most users agreed that restoring consistent blade alignment across all blades is one of the most effective ways to reduce wobbling and help a ceiling fan run smoothly again.
What to Do when Balancing Does Not Solve the Problem?
If wobbling continues after balancing the fan, another underlying issue may be affecting its performance.
| Possible Problem | What to Do |
| Loose Electrical Box | Inspect the ceiling box and tighten or replace it if it is not fan-rated. |
| Damaged Mounting Bracket | Check for wear or looseness and replace damaged hardware if needed. |
| Worn Motor Bearings | Listen for grinding noises and consider replacing the fan if the bearings are failing. |
| Bent Downrod | Inspect the downrod for bends and replace it if it is not straight. |
| Warped Fan Blades | Replace damaged blades that cannot be corrected through adjustment. |
| Faulty Blade Arms | Install new blade arms if existing ones are bent or damaged. |
| Internal Motor Issues | Contact a professional or replace the fan if the motor is causing vibrations. |
| Aging Ceiling Fan | Consider upgrading to a new fan if the unit is old and frequently develops problems. |
When to Call a Professional for Ceiling Fan Repairs?
If your ceiling fan continues to wobble after cleaning, tightening hardware, and balancing the blades, it may be time to call a professional.
Persistent wobbling often points to deeper mechanical, mounting, or electrical issues that require expert inspection.
While many ceiling fan balance problems can be fixed with simple DIY adjustments, some situations require more than basic maintenance.
A professional should inspect the fan if you notice excessive shaking, unusual grinding noises, a burning smell, damaged mounting hardware, or signs of motor failure.
Older fans with worn bearings or internal components may also require repair or replacement.
Additionally, if the ceiling electrical box is loose or not rated for a ceiling fan, professional installation is the safest option.
Getting expert help can prevent further damage, improve safety, and ensure your fan operates efficiently for years.
Signs Your Ceiling Fan Needs Balancing
An unbalanced ceiling fan often shows a few clear warning signs during normal operation.
| Sign | What It Means |
| Excessive Wobbling | The fan moves side to side while running instead of spinning smoothly. |
| Rattling Noises | Loose or misaligned parts may create unusual sounds during operation. |
| Shaking Light Fixture | The attached light kit vibrates or moves noticeably when the fan is on. |
| Uneven Blade Heights | One or more blades sit higher or lower than the others. |
| Increased Vibration | The fan feels unstable, especially at medium or high speeds. |
| Reduced Airflow | Poor balance can affect how efficiently the fan circulates air. |
| Visible Blade Damage | Bent, warped, or cracked blades can lead to balance problems. |
| Screws Loosening Frequently | Ongoing vibration may cause hardware to loosen over time. |
Can You Balance a Ceiling Fan without a Balancing Kit?
Yes, you can balance a ceiling fan without a balancing kit by using common household items to identify and correct blade imbalance.
The most popular method involves using tape and a small coin or similar lightweight object as a temporary balance weight.
Start by cleaning the fan blades and tightening all visible screws, as dirt and loose hardware often cause wobbling.
Next, tape a coin to the top of one blade about halfway between the blade holder and tip. Turn the fan on and observe whether the wobble improves.
Move the coin to another blade until you find the problematic one, then adjust its position until the fan runs smoothly.
After finding the ideal position, replace the temporary weight with a proper adhesive weight for a longer-lasting solution.
How to Prevent Ceiling Fan Wobble in the Future?
Regular maintenance and periodic inspections can help keep your ceiling fan balanced and operating smoothly over time.
- Clean Blades Regularly: Prevents uneven dust buildup that can affect blade balance.
- Tighten Screws Periodically: Keeps blades and mounting hardware secure during operation.
- Check Blade Alignment: Helps identify minor issues before they become noticeable wobble problems.
- Inspect Blade Arms: Detects bends or damage that may affect fan balance.
- Avoid Excessive Force: Prevents blades from becoming bent during cleaning or maintenance.
- Replace Damaged Parts Promptly: Stops worn components from causing vibration and instability.
- Inspect the Mounting System: Ensure the fan remains securely attached to the ceiling.
- Perform Seasonal Maintenance: Helps catch balance issues early and extends fan lifespan.
Conclusion
Balancing a ceiling fan is simple. Cleaning the blades, tightening screws, checking alignment, and using a balancing kit can help it run smoothly.
I hope this guide gave you a clear way to handle wobbling without guessing or wasting time on the wrong fix.
Still, every fan and room can be a little different. What works for one person may need a small adjustment for someone else.
That is why real user advice can be so helpful when solving common home problems.
Have you ever fixed a wobbling ceiling fan yourself? Share your experience, tips, or questions in the comments below so other readers can learn from your story.
Frequently Asked Questions
Is It Okay for a Ceiling Fan to Wobble Slightly?
Yes, a slight wobble is usually normal. However, excessive wobbling may indicate loose hardware, blade misalignment, or balance issues.
Can a Ceiling Fan Affect Sinuses?
Yes, ceiling fans can dry out nasal passages and circulate dust or allergens, which may worsen sinus irritation in some people.
Why Should One Not Sleep with a Fan on All Night?
Sleeping with a fan all night may cause dry eyes, dry nasal passages, muscle stiffness, or increased exposure to dust and allergens.
What Is the 3-3-3 Rule for Sleep?
The 3-3-3 sleep rule suggests avoiding food, stopping work, and avoiding screens for 3 hours before bed.