
Building a DIY pier and beam foundation is one of the smartest ways I’ve found to build a strong base without pouring a full slab.
This type of foundation works well for small homes, cabins, sheds, and additions. It lifts the structure off the ground, improves airflow, and makes repairs easier later.
If you want a foundation that’s solid but not overly complex, this is a great option.
In this guide, I will share how to build and install a pier and beam foundation using basic planning tools and common materials.
You’ll also learn about spacing, load support, soil checks, and common layout mistakes to avoid. You’ll learn when a DIY approach works and when professional input matters.
By the end, you’ll understand how to plan a safe and functional pier and beam foundation with confidence.
What Is a Pier and Beam Foundation?
A pier and beam foundation is a building support system that lifts a structure off the ground using vertical piers and horizontal beams.
The piers are placed into the soil and made from concrete, blocks, or treated posts. Beams sit on top of these piers and carry the weight of the building above.
This design creates open space under the structure, which allows air to flow and helps protect against moisture.
It also makes repairs easier because plumbing and wiring are accessible from below. I see pier and beam foundations used often for homes, cabins, and additions, especially on uneven land.
They work well in areas with soil movement since individual piers can be adjusted if needed.
Compared to concrete slabs, this type of foundation is simpler to build for DIY projects and offers flexibility without sacrificing strength when designed correctly.
Tools and Materials You’ll Need
Having everything ready before starting helps the work move faster and smoothly. These basics cover layout, leveling, and safe installation.
- Concrete tube forms (Sonotubes)
- Laser level or string line
- Tape measure and pencil
- Drywall T-square
- Jigsaw or reciprocating saw
- Concrete mixer
- 60-lb bags of concrete
- Rebar (steel or fiberglass)
- Reciprocating saw with carbide blade
- Shovel and wheelbarrow
- Simpson wet-set concrete brackets
- Water hose
- Fan for dust control
How to Design a DIY Pier and Beam Foundation?
Careful planning at the start helps prevent layout issues later. Taking time to set reference points makes every next step easier.
Step 1: Prepare the Site and Mark Tube Heights
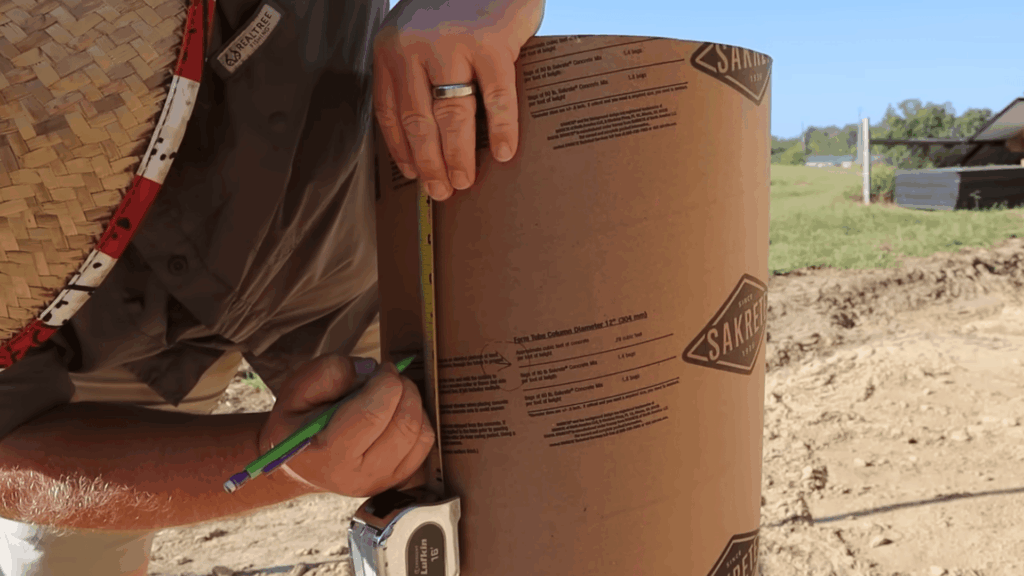
A laser level is used to mark the correct height on each concrete tube form. These marks show where the tubes must be cut so that every pier finishes level.
A tape measure is hooked on the top of each tube and measured down to the laser mark.
That same measurement is transferred around the entire tube.
This process ensures consistent pier height, which is critical for setting beams evenly and avoiding future leveling problems during framing and floor installation later in the build process overall.
Step 2: Draw Cut Lines Around Each Tube
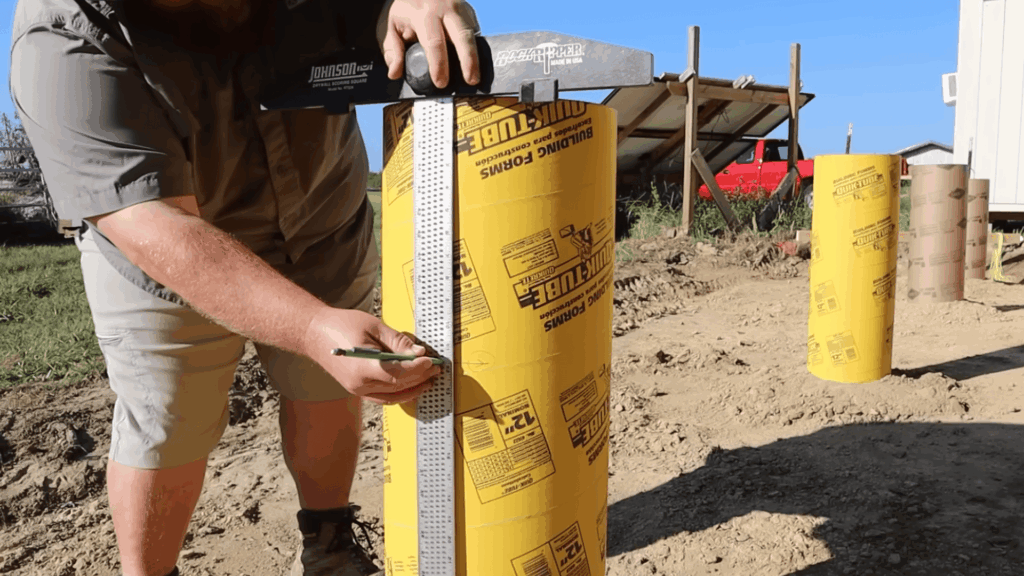
After measuring the correct height, cut lines are drawn all the way around each concrete tube.
A drywall T-square is used to keep the lines straight and even. The notches in the tool help guide the pencil smoothly around the tube.
For taller tubes where the tool cannot reach fully, dotted lines are drawn and connected.
Taking time to draw clean, accurate lines makes cutting easier and helps ensure the tops of all piers stay level and ready for concrete placement later.
Step 3: Cut the Concrete Tube Forms
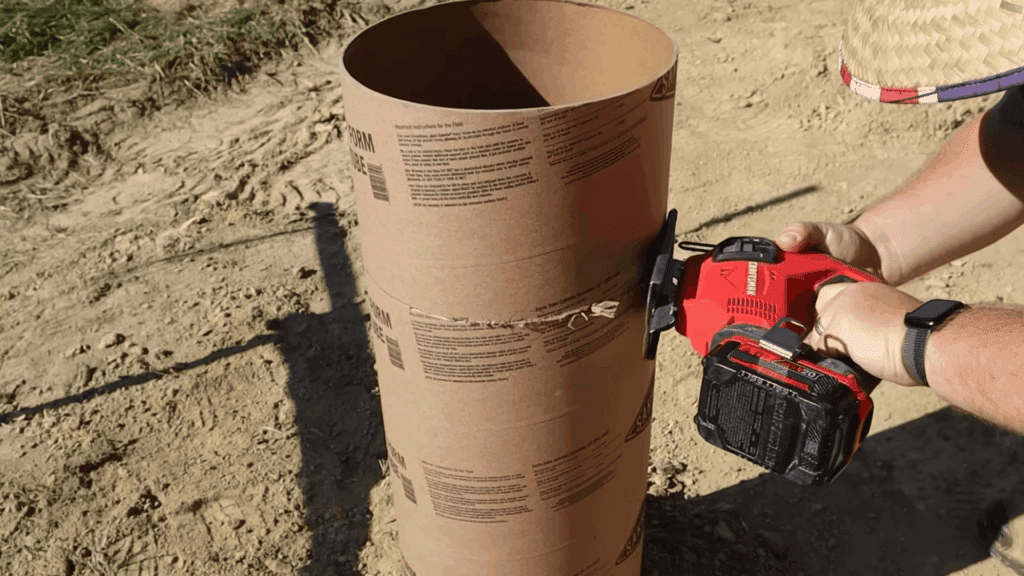
Once all tubes are marked, they are cut down to height using a jigsaw or reciprocating saw.
The saw follows the drawn line around the tube, removing the excess material cleanly.
Cutting slowly and steadily helps avoid uneven edges. After cutting, each tube form is checked to confirm it matches the correct height.
This step ensures the concrete will finish level across all piers, making beam installation smoother and reducing the need for adjustments during framing work later.
Step 4: Cut Rebar Before Mixing Concrete
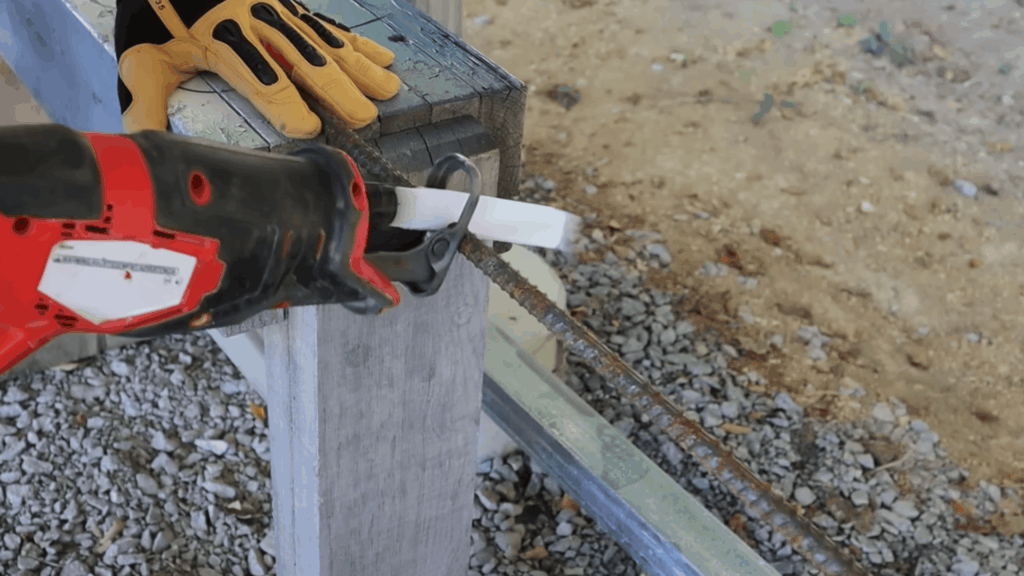
Before mixing any concrete, the rebar is measured and cut to the required lengths. Steel rebar or fiberglass rebar can be used, depending on preference.
A reciprocating saw with a carbide blade makes quick work of cutting each piece.
Preparing all rebar ahead of time keeps the concrete process moving without delays.
Each pier will receive two pieces of rebar to add strength and stability, helping the foundation support the structure safely over time.
Step 5: Set up the Concrete Mixing Area
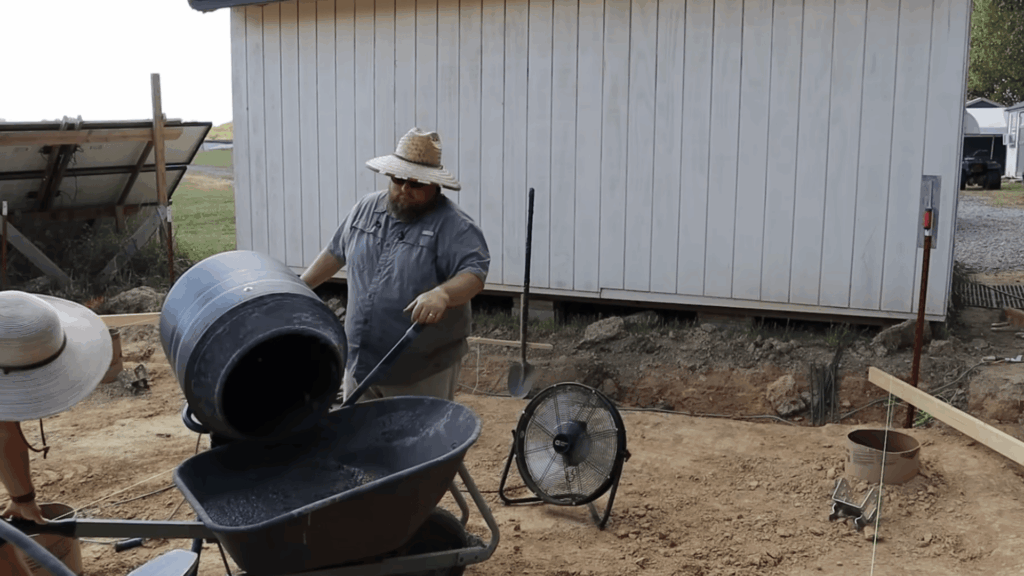
Before pouring concrete, all tools and materials are staged in one area to keep the process smooth.
Concrete bags are placed close to the mixer, with a water hose nearby for easy access. A wheelbarrow and shovel are set up for transporting the mix to each pier.
A fan is positioned to blow concrete dust away during mixing, helping protect lungs and keep the area cleaner.
Having everything ready ahead of time prevents rushing and keeps each pour consistent.
Step 6: Mix and Pour the Concrete
Concrete is mixed in a concrete mixer using about two to three 60-pound bags per batch.
Water is added slowly while mixing until the concrete reaches a smooth, workable consistency. Once mixed, the concrete is poured into a wheelbarrow and then shoveled into the tube forms.
Each pier is filled only halfway at this stage to prepare for rebar placement.
Mixing in small, controlled batches helps keep the consistency even and gives enough time to work before the concrete starts to set.
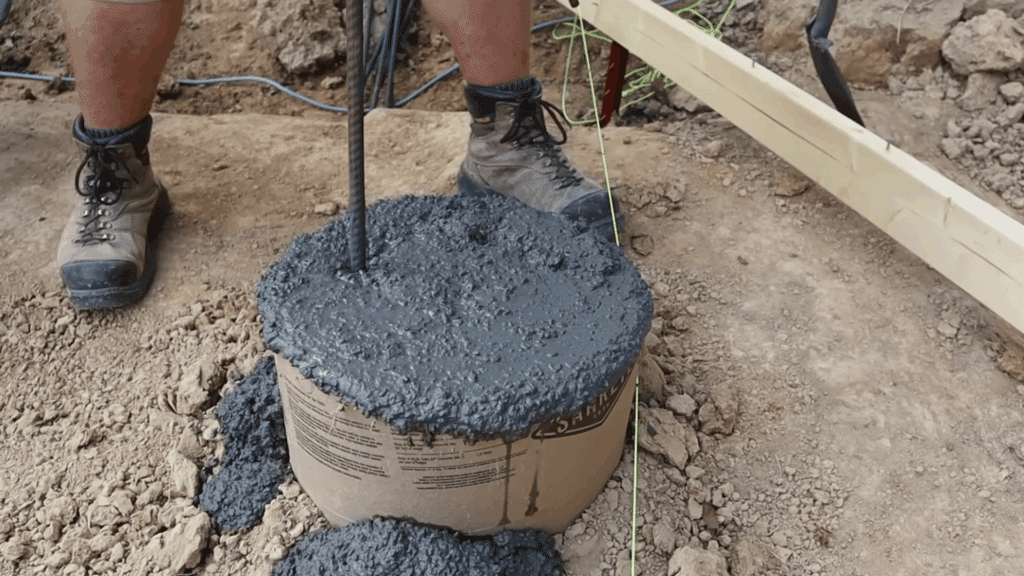
Step 7: Install Rebar and Remove Air Bubbles
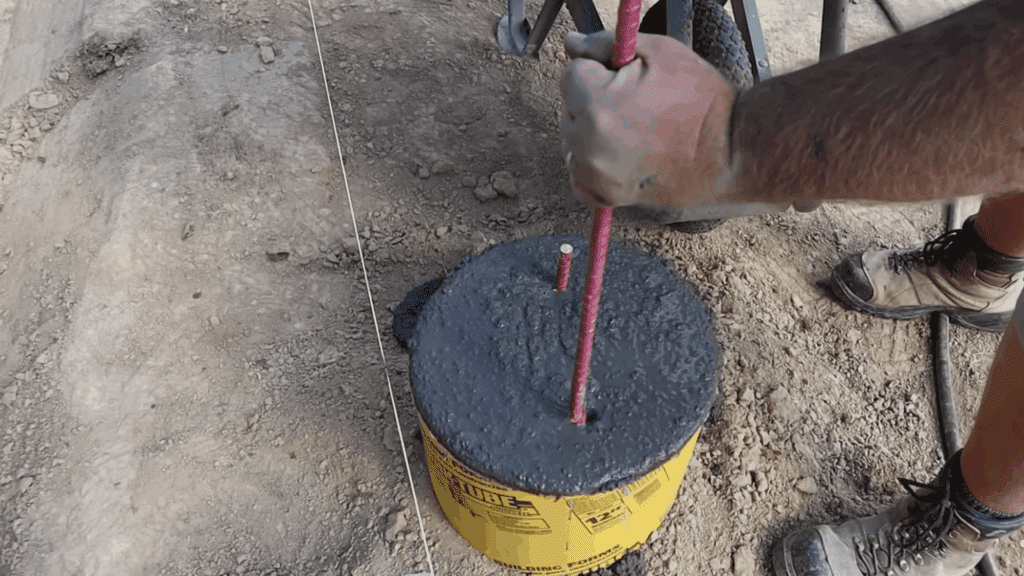
After the tube is filled about halfway, two pieces of rebar are placed into the wet concrete to strengthen the pier. Each piece is pushed down to make sure it sits securely and stays centered inside the tube.
A tool or saw blade is then used to poke through the concrete, helping trapped air bubbles rise to the surface.
Removing these bubbles helps avoid weak spots inside the pier.
Once the air is released, more concrete is added until the tube is completely full, locking the rebar firmly in place for long-term support.
Step 8: Float and Screed the Pier Tops
With the tube completely filled, the top of the concrete is leveled using a float to create a smooth surface. Screeding helps remove extra concrete and evens out the top so it sits flat.
As the concrete settles, some water may rise to the surface, which is normal during this stage.
The focus is to smooth the top without working it too much.
After leveling, the concrete is left alone for about 10 to 15 minutes so it can firm up enough to hold the beam brackets securely.
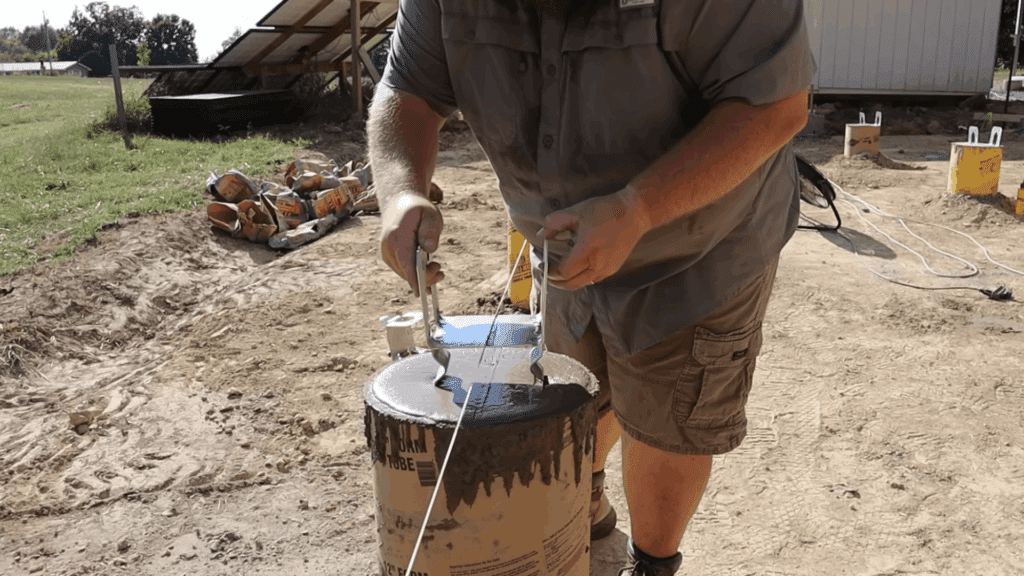
Step 9: Set Beam Brackets in Wet Concrete
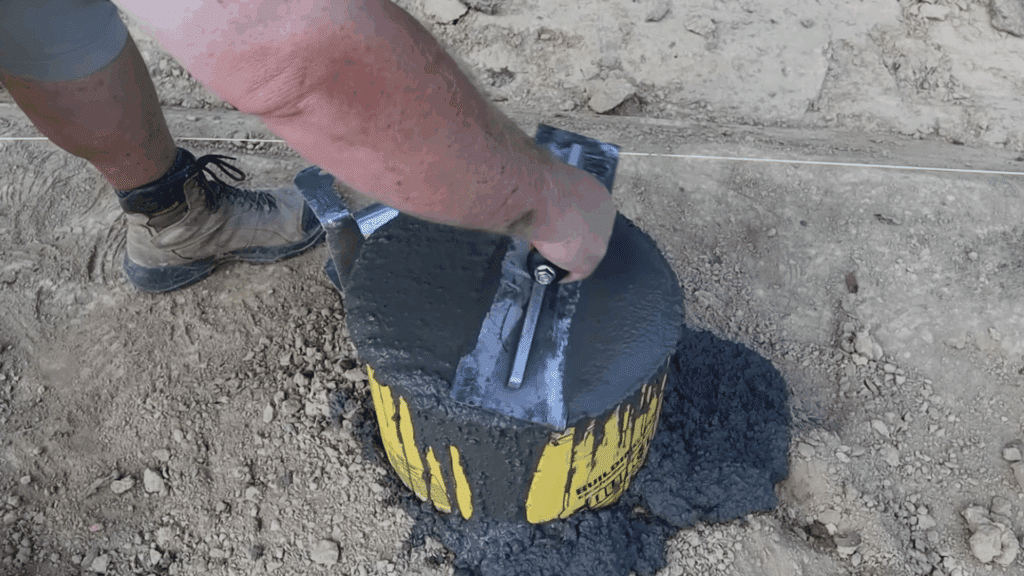
Beam brackets are installed while the concrete is still workable so they can be set accurately.
Each bracket is pre-marked at the center, making it easier to line up with the string line used for layout. The bracket is pressed down into the wet concrete and adjusted until it matches the layout perfectly.
The ridged base helps hold it firmly in place as the concrete begins to cure.
Once the bracket is aligned, it is left alone. This step finishes the foundation and gets it ready for beam installation.
This tutorial is based on a helpful video by Samcraft. You can check out the original video on their YouTube channel here or watch it below.
Signs Your Pier and Beam Design Needs Adjustment
Small changes in a structure can point to bigger foundation concerns. Watching for these signs early helps prevent costly repairs later.
- Uneven or sloping floors that feel soft or bounce when walked on
- Doors or windows that stick, drag, or no longer close properly
- Gaps forming between walls, floors, or ceiling joints
- Cracks appearing in drywall, flooring, or trim
- Beams pulling away from piers or sitting unevenly
- Visible settlingorshifting of individual piers
- Squeaking or creaking sounds that increase over time
Why Choose a Pier and Beam Foundation for DIY Projects?
A pier and beam foundation is a good choice for DIY projects because it is easier to plan and build than a full concrete slab.
You do not need heavy equipment, and most of the work can be done with basic tools.
This type of foundation is easier to adjust if something is slightly off during layout or leveling. It also works well on uneven ground, which is common in DIY builds. Another benefit is access.
Since the structure sits above the ground, you can reach plumbing and wiring without tearing into floors.
Repairs and changes are simpler later, which saves time and money.
Pier and beam foundations also handle soil movement better than slabs because individual piers can be corrected if needed.
For small homes, cabins, sheds, or additions, this foundation offers flexibility, strength, and a manageable learning curve for first-time builders.
Tips to Make Your Design Last Longer
Good planning and small habits can help prevent early wear and shifting. These steps support long-term stability with less maintenance over time.
- Use pressure-treated wood for all posts and beams
- Set piers below the frost line for better support
- Keep water draining away from the foundation
- Leave a clear space under the structure for airflow
- Add cross-bracing to reduce side movement
- Check piers and beams once a year for shifting
- Replace damaged brackets or fasteners right away
When to Call a Professional?
You should call a professional when the project goes beyond basic layout and leveling. If the structure is large, multi-story, or will carry heavy loads, an engineer can help calculate proper spacing and support.
I also recommend professional help if the soil is soft, wet, or shifts easily, since this can cause settling issues later.
If local building codes require stamped plans or inspections, a professional can save time and prevent mistakes.
You should also get help if floors start sloping, beams pull away from piers, or cracks appear after construction. These signs often point to deeper structural problems.
Older builds may also need expert input because worn materials can fail during adjustments.
Calling a professional at the right time can prevent costly repairs, protect the structure, and give peace of mind that everything is built safely and correctly.
Conclusion
A pier and beam foundation can feel like a big step, but with the right plan and a steady pace, it becomes a project you can truly feel proud of.
Taking the time to measure carefully, level each pier, and double-check your work pays off in the long run.
A solid foundation supports everything above it, from framing to finishes, and helps avoid problems later.
If you’re building something meant to last, the effort you put in at this stage matters more than almost any other step.
If you’re planning or already building, take your time and get each step right. If you’ve worked on a pier and beam foundation, share your experience in the comments.
Share your experience, tips, or challenges in the comments below.