
I’ve always loved how a concrete porch makes a home feel solid, welcoming, and stylish all at once.
It’s tough enough to handle weather, easy to clean, and fits with almost any home style, modern, farmhouse, or anything in between.
That’s why so many people choose concrete when building or redoing their porch.
In this guide, I’ll walk you through how to install a concrete porch step by step.
But I won’t stop there, I’ll also share creative design ideas, tips for painting a concrete porch, and ways to make your entryway not just strong, but also beautiful and full of personality.
If you’re a homeowner dreaming up your next weekend project, someone fixing up an old entryway, or just curious about how it all works, this guide is for you.
Why Choose a Concrete Porch?
Concrete porches are strong, stylish, and built to last. They’re a smart choice for homeowners who want durability with plenty of design options.
- Long-Lasting Durability: Concrete is known for its strength and can withstand years of foot traffic, weather changes, and daily use without wearing down.
- Low Maintenance: Requires minimal upkeep compared to wood or stone. Occasional cleaning and sealing are usually enough to keep it in good shape.
- Cost-Effective Choice: Concrete porches are budget-friendly both in terms of initial installation and long-term maintenance.
- Weather Resistance: Performs well in all climates, resists rain, heat, and snow without warping or rotting.
- Design Flexibility: Works with various home styles, including modern, rustic, farmhouse, and Mediterranean looks.
- Customization Options: It can be poured in different shapes, stamped with patterns, or stained in a variety of colors and textures to suit any design preference.
Materials Needed to Build a Concrete Porch Cap
If you’re tackling a small porch or adding a fresh overhang for stone veneer, this is everything you’ll need to get the job done from prep to finish:
1. Formwork & Setup
Before you pour, you’ll need to set up solid, level forms. These materials help shape your porch and keep everything in place with the right slope and support.
- 2×4 lumber (for standard forms and overhangs)
- 3¼” Tapcon screws (for securing forms to block)
- Drill or impact driver with a masonry bit
- Chalk line & level (for setting slope and height)
- Tape measure & pencil
- Shims (for slope adjustments if needed)
2. Surface & Area Protection
Protecting your home’s trim, siding, and doors is a must before pouring. These simple items help prevent stains, splashes, or concrete damage
- Visqueen plastic sheeting or painter’s plastic (for doors & trim)
- Painter’s or masking tape
- Utility knife (to cut and trim coverings)
3. Form Maintenance & Release
Clean, oiled forms are key to a smooth finish and easy removal. These tools help prep used forms and apply release agents properly.
- Putty knife or scraper (to clean reused forms)
- Wire brush
- Rags or towels
- Form oil (like Spec Form or any concrete release agent)
- Small brush, roller, or sprayer (for applying form oil)
- Optional: diesel fuel (as an emergency form of release)
4. Concrete Pouring & Reinforcement
Once the setup is done, it’s time to pour. These materials help you move, place, and strengthen the concrete for a long-lasting porch.
- 4000 PSI concrete mix (with air and microfiber reinforcement)
- Concrete vibrator (corded or battery-powered)
- Gloves, safety boots, and protective eyewear
- Wheelbarrow or chute (for handling the mix)
- Rebar or mesh (optional, for reinforcement if the slab is large)
- Extra concrete (order a little more than calculated)
5. Finishing Tools
After pouring, you’ll want to shape, smooth, and texture the surface. These tools help you get clean edges and a professional-looking finish.
- Screed board (10-ft aluminum screed or wood straightedge)
- Magnesium hand float
- Steel trowel (optional for edges)
- Edging tool
- Bull float (optional on larger slabs)
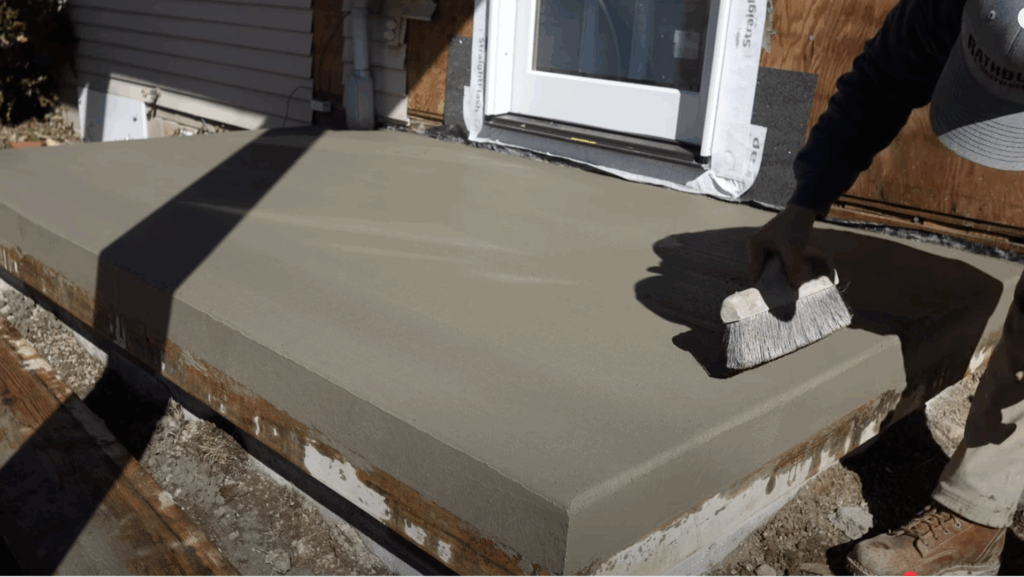
- Broom (for final texture finish)
- Mason’s trowel
- Hammer (for tapping air bubbles out of forms)
- Sponge or small hand float (for touch-ups)
- Knee boards (optional for access)
6. Form Removal & Curing
Once the concrete sets, the forms need to come off carefully. These items help you strip forms safely and support the slab as it cures.
- Drill/driver (to unscrew forms)
- Pry bar (for gentle removal if stuck)
- Extra screws (avoid reusing old ones)
- Curing blankets or plastic sheeting (if pouring in cold weather)
How to Pour a Concrete Porch?
Pouring a concrete porch seems like a big job, but it’s totally worth it with the right steps. This is a simple guide to help you build a strong, good-looking porch from start to finish.
Step 1: Clean & Prep Your Forms
Reuse forms from the last job were scraped clean to remove dried concrete “boogers.” Dirt or buildup can create gaps between the form and block, ruining your finish.
Clean forms help keep corners sharp and edges smooth. This step prevents imperfections from transferring to the new slab.
Use a wire brush or scraper to really get into corners and joints. Even a little leftover mud can cause chips or bulges. Make sure forms are dry before reuse.
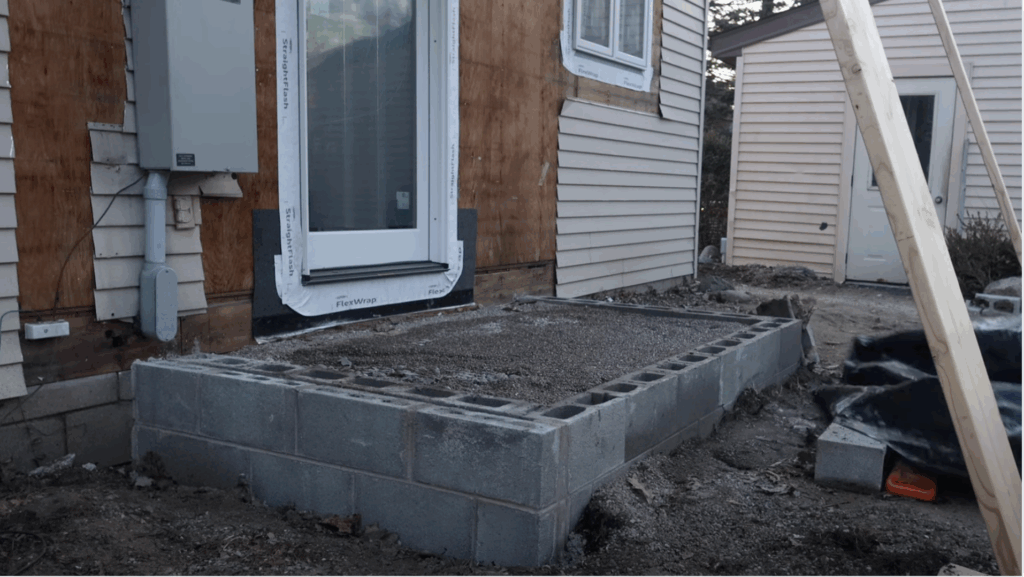
Step 2: Create Overhang for Stone Veneer
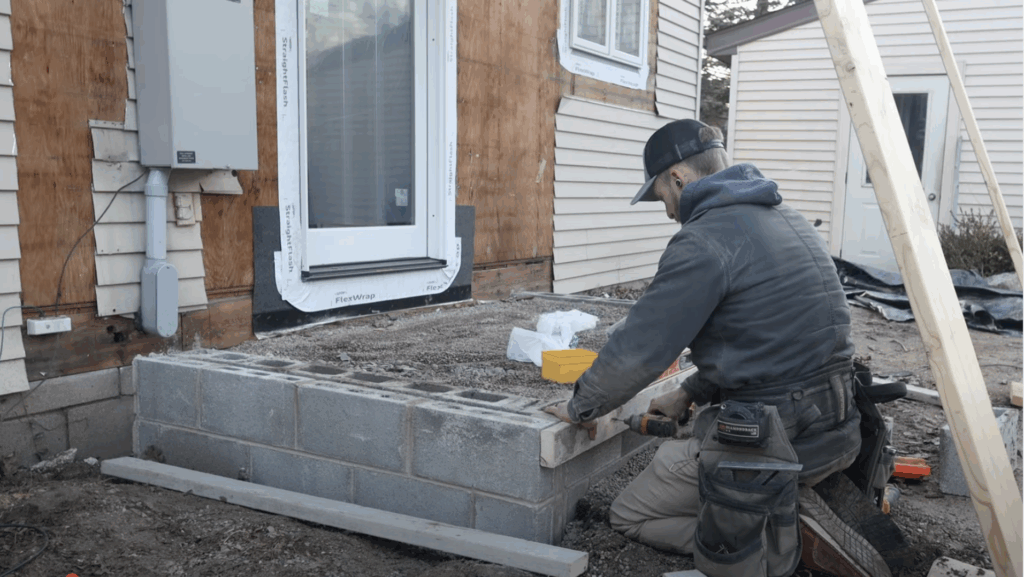
Use two 2x4s to build a 3-inch overhang if you’re adding stone later. No stone? One 2×4 is enough.
Screw the form to the block wall every 2–3 feet using Tapcon screws. Short slabs don’t need a ton of screws, just enough to hold tight.
The overhang ensures the stone will sit under the porch edge cleanly. Always double-check your spacing.
Step 3: Set Pitch & Level the Forms
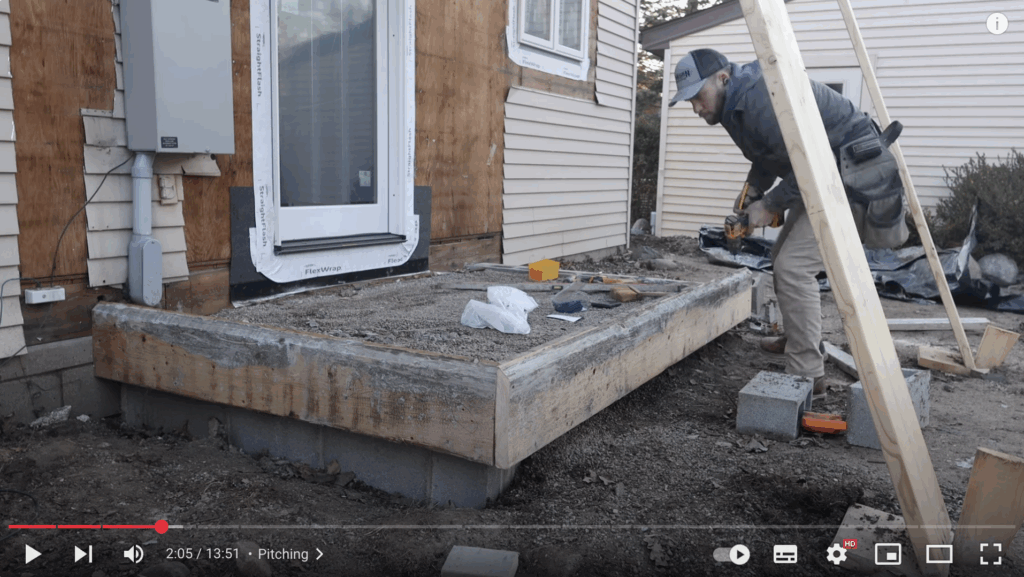
Add a slight slope of about ⅛ inch per foot for drainage. Bigger porches may need more slope (¼ inch per foot).
It’s easier to tilt the whole form than to slope the concrete surface. Use a chalk line on the house to keep the top edge perfectly level.
Double-check your pitch on both sides to make sure it’s even. A small mistake here can lead to water pooling later.
Step 4: Protect Trim, Doors & Rim Board
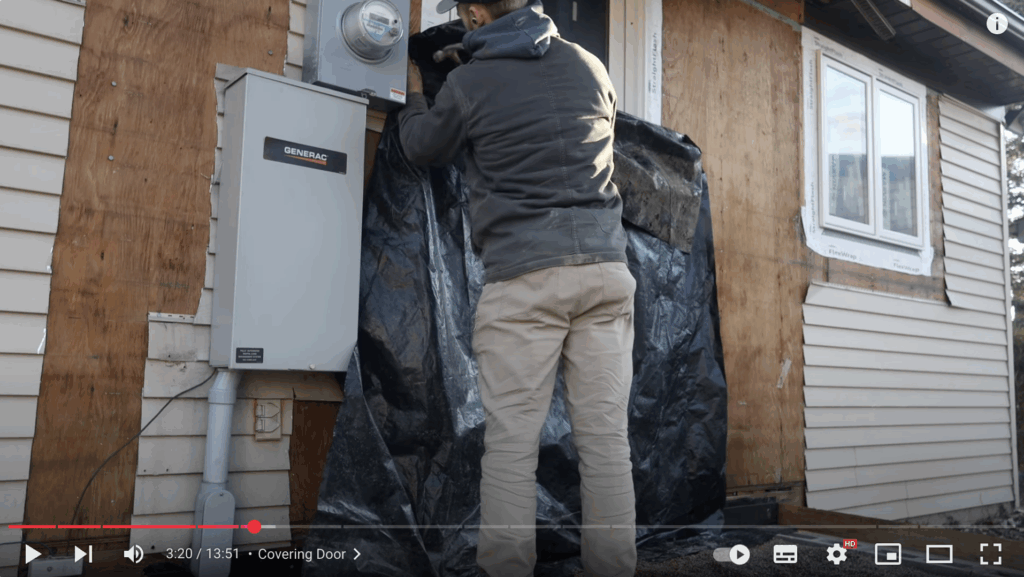
Cover the rim board and door with plastic to protect from splashes. New doors are expensive, better safe than sorry.
On big jobs, pros use power washers later, but for small jobs, cover things up. Trim the plastic so it doesn’t block your view while you work.
Add tape around edges so wind doesn’t blow the plastic into your pour. If the slab splashes onto trim, clean it immediately it sets fast.
Step 5: Apply Form Oil
Brush the form oil on all the forms so they release easily later. Spec Form (lemon-scented) works great, diesel works too in a pinch.
Oil helps the forms come off clean and keeps your slab looking crisp. Don’t skip this step; it makes cleanup much easier.
Apply it evenly; uneven oiling can leave marks or discoloration. Reapply if the oil dries before the pour begins, especially on hot days.
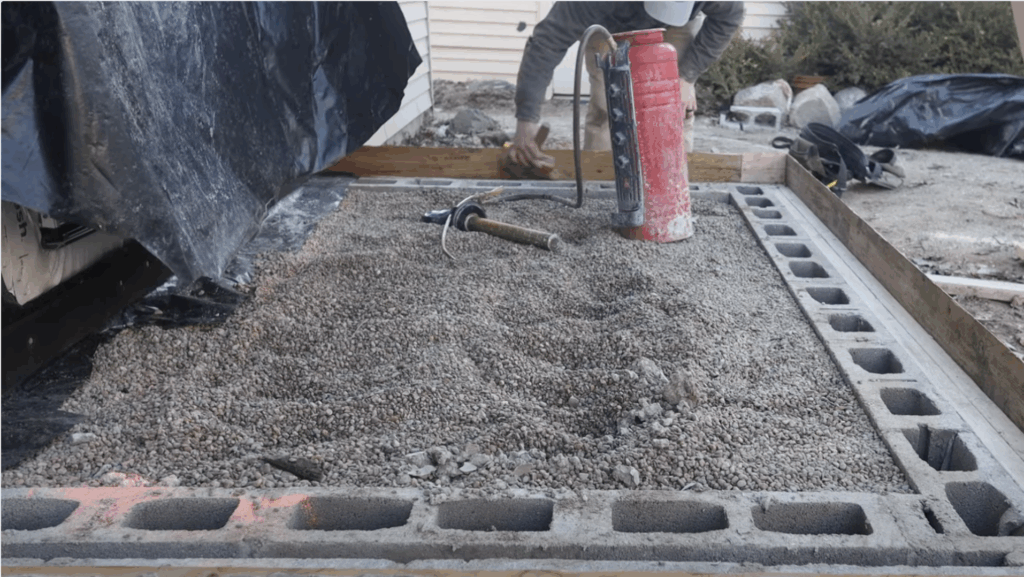
Step 6: Pour & Vibrate the Concrete
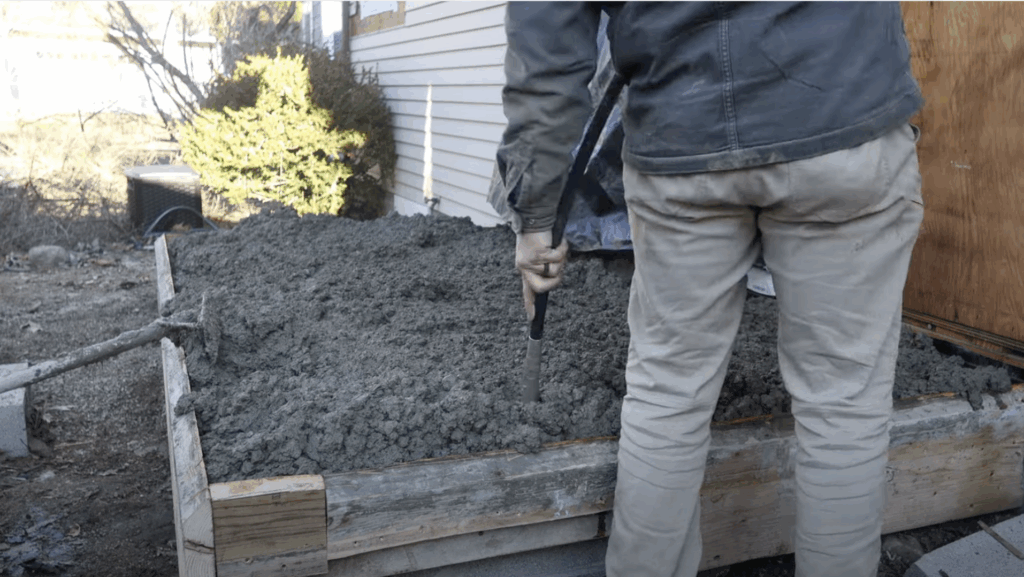
Use 4000 PSI concrete with air and fiber for outdoor strength. Pour it a little stiff if it’s cold out to avoid waiting forever.
Use a concrete vibrator to shake out air bubbles, especially at the edges. Always order a little extra concrete; you don’t want to run short mid-pour.
Keep an eye on the weather, wind, or sun can dry the mix too fast. Have your tools ready before the truck arrives.
Step 7: Screed & Hand Float
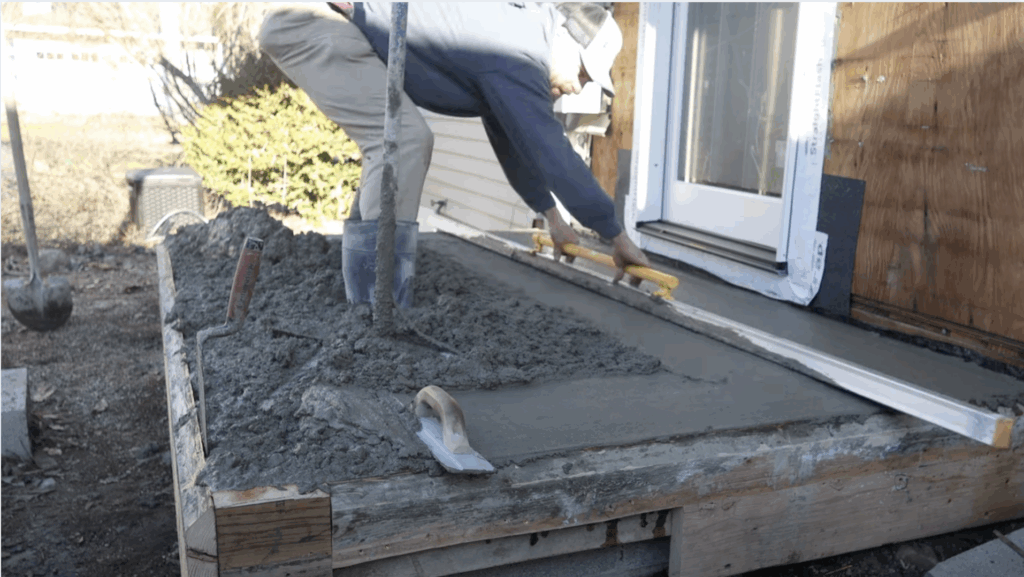
Start floating near the house and along the forms for a clean edge. Use a long screed board to flatten the slab evenly.
Screed one direction, then float the other way to keep it level. A tighter mix takes more work, but dries faster and looks better.
If you notice a dip, fix it right away; it’s hard to correct later. Use a float that fits your slab size so you don’t dig in too deep.
Step 8: Edge, Tap, and Finish the Surface
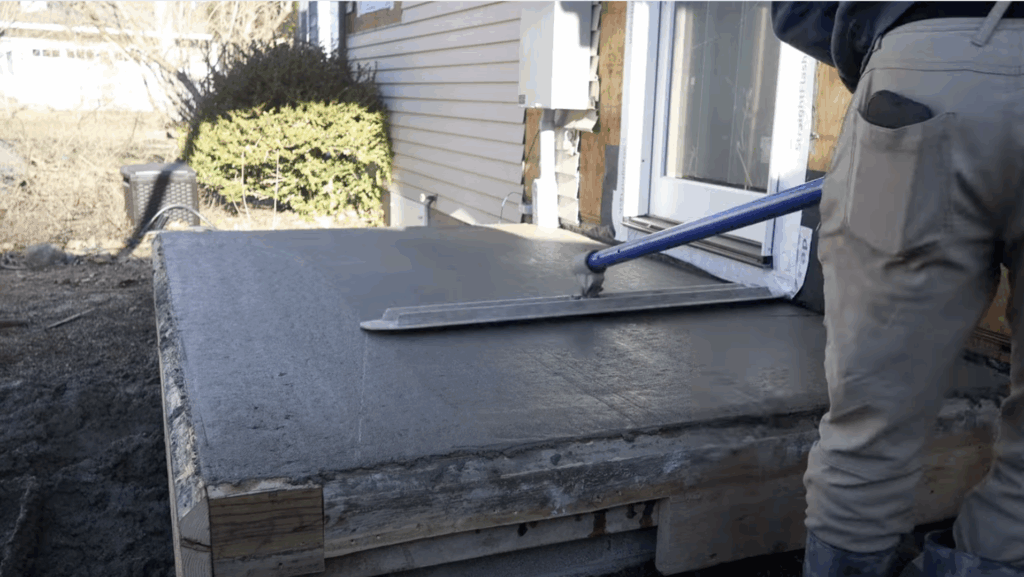
Tap the forms or vibrate along the sides to push out any air. Hand-float the edges so they don’t curl or dip.
Use an edger tool to smooth the border before brooming. Float out any tool marks to keep your finish nice and clean.
Avoid rushing this step; messy edges stand out the most. Check from different angles for dips or lines.
Step 9: Strip Forms Carefully

Take out all screws except the ends that hold it in place. Slide the form up and down gently to break suction before pulling it off.
If you yank too hard, it could tear the concrete face. Having a helper makes this part safer and easier.
Start with the easiest section to build confidence before tackling corners. Always check for leftover screws before lifting. Never pull straight out; slide to loosen first.
Step 10: Final Touches & Cure Time
Re-edge and re-broom to fix any marks or rough spots. If you see a dip, fill it with cream and stones from the mix.
Leave the forms on for 4–5 days to support the edge as it cures. Let the concrete fully harden before adding any stone or trim.
Don’t walk on it for at least 24–48 hours. For a painted concrete patio, wait a full month before painting.
Want to see this process in action? You can check out the full video here for a detailed look at the setup, forms, and pour.
Maintenance Tips for a Painted Concrete Patio
A concrete porch is tough, but it still needs a little care to stay looking great. These simple maintenance tips will help protect it from wear, cracks, and weather damage year after year.
- Sweep regularly: To remove dirt, leaves, and debris.
- Deep clean once a year: Use a pressure washer or mild soap and a stiff brush.
- Avoid harsh chemicals: This may damage decorative finishes.
- Reseal every 2–3 years: to protect against moisture, stains, and wear.
- Check if sealing is needed by sprinkling water: If it soaks in, it’s time to reseal.
- Ensure proper drainage: Prevent pooling water and erosion.
- Keep expansion joints clean: So the concrete can flex without cracking.
- Use plastic shovels: Use this in winter to avoid scratching the surface.
- Avoid salt-based de-icers: Opt for sand or non-salt alternatives.
- Don’t overload edges: With heavy planters or furniture, to avoid stress cracks.
Concrete Porch Design Ideas
If you’re building new or giving your old porch a facelift, these concrete porch ideas will help you create a space that’s both tough and beautiful.
1. Stamped Concrete with a Brick Border
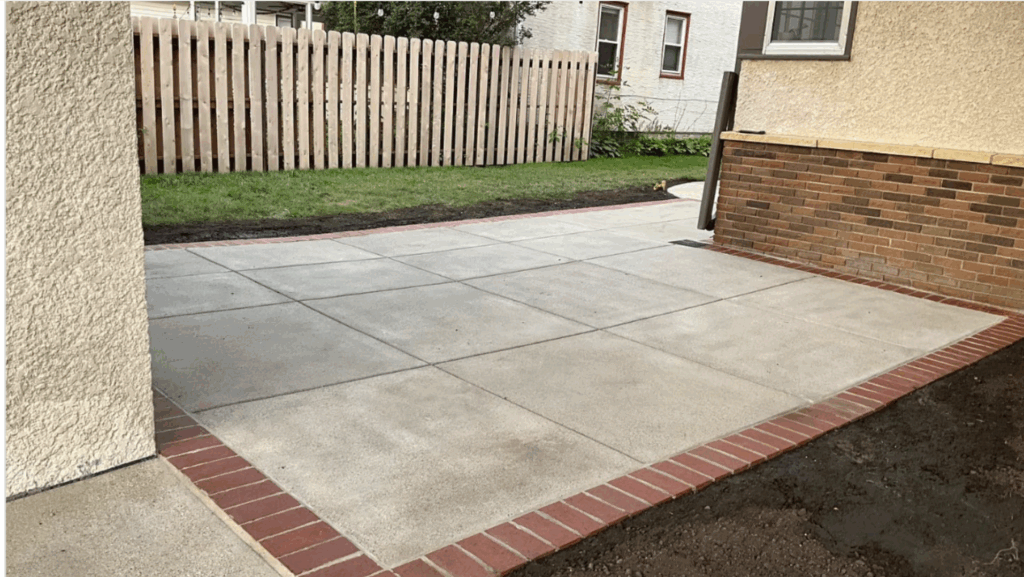
This design looks like real brick or stone but costs much less. The concrete is stamped to look like pavers, flagstone, or cobblestone.
A brick-style edge adds a nice frame around the porch. It’s a great option for classic or older-style homes. Choose warm colors like red or brown for the border.
The surface is slip-resistant and strong, so it holds up well over time. If you want a porch that looks fancy but is easy to take care of, this is a great choice.
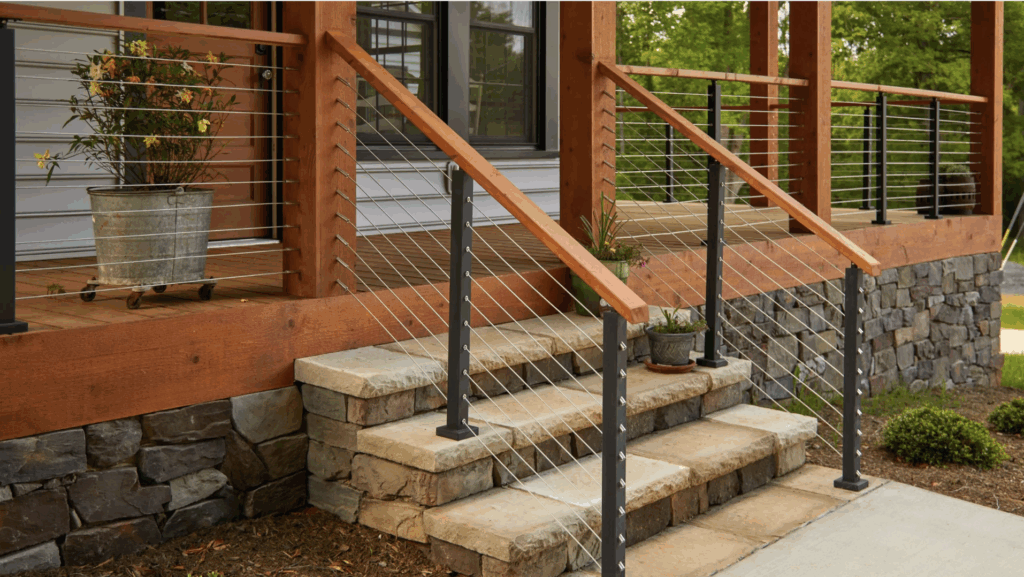
2. Smooth Concrete with Clean Lines
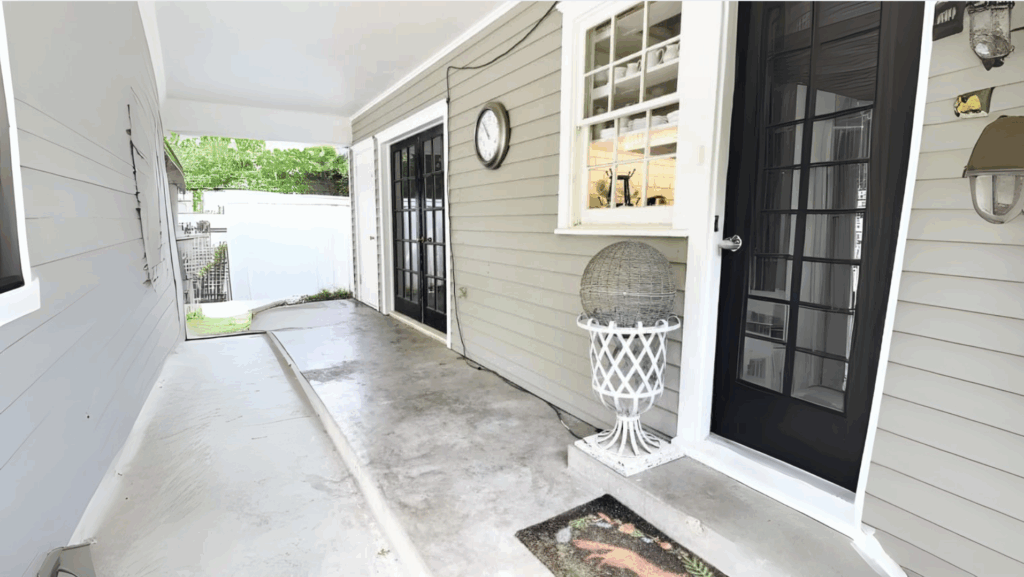
For a modern look, try a smooth concrete porch with sharp edges. Use simple colors like light gray, dark gray, or white.
This style works well with modern or mid-century homes. You can add light lines or grooves to make a pattern, or keep it completely flat.
Match it with metal railings or floating steps for a sleek design. It’s easy to clean, neat-looking, and perfect if you like a clean, simple style that feels fresh and updated.
3. Stained Concrete in Warm Colors
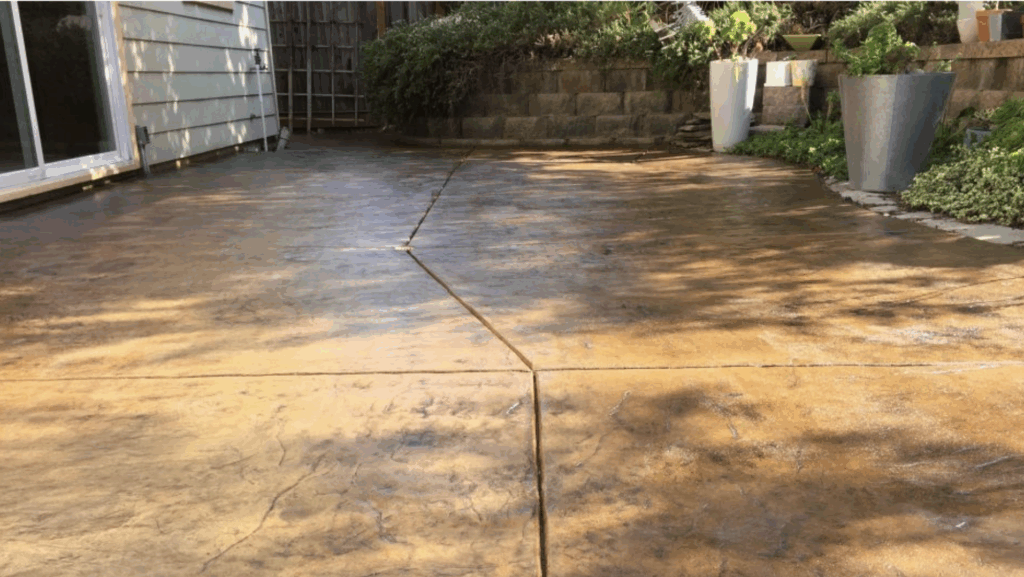
Stained concrete brings a warm, cozy feel to your porch. You can use stains to get colors like brown, rust, or gold that look like wood or stone.
The stain sinks into the concrete, so the color stays and won’t peel. It’s great for homes with a rustic, Mediterranean, or desert-style look.
Add a clear seal to make the color shine and protect the surface. This design is great if you want something unique and colorful that’s still easy to keep clean.
4. Exposed Aggregate Surface
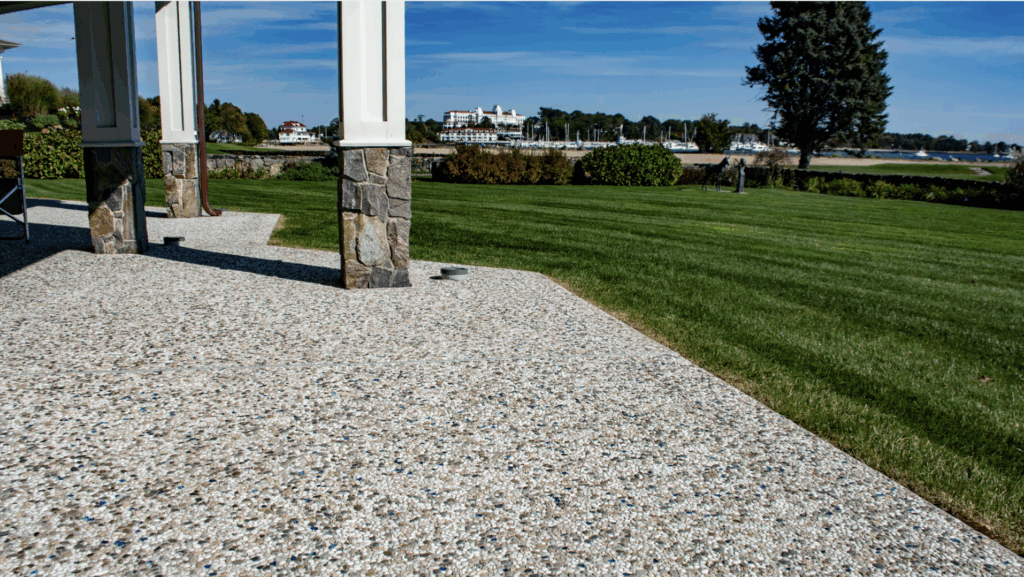
This type of porch shows off the stones and pebbles mixed into the concrete. It gives a rough, textured look that helps prevent slipping, perfect for rainy or coastal areas.
You can choose colorful stones to match your home’s style. It looks natural and feels strong underfoot.
This porch pairs well with wood, brick, or stucco houses. It’s a smart pick if you want something that’s tough, weather-friendly, and adds a bit of outdoor charm without needing a lot of upkeep.
5. Raised Porch with Built-In Planters
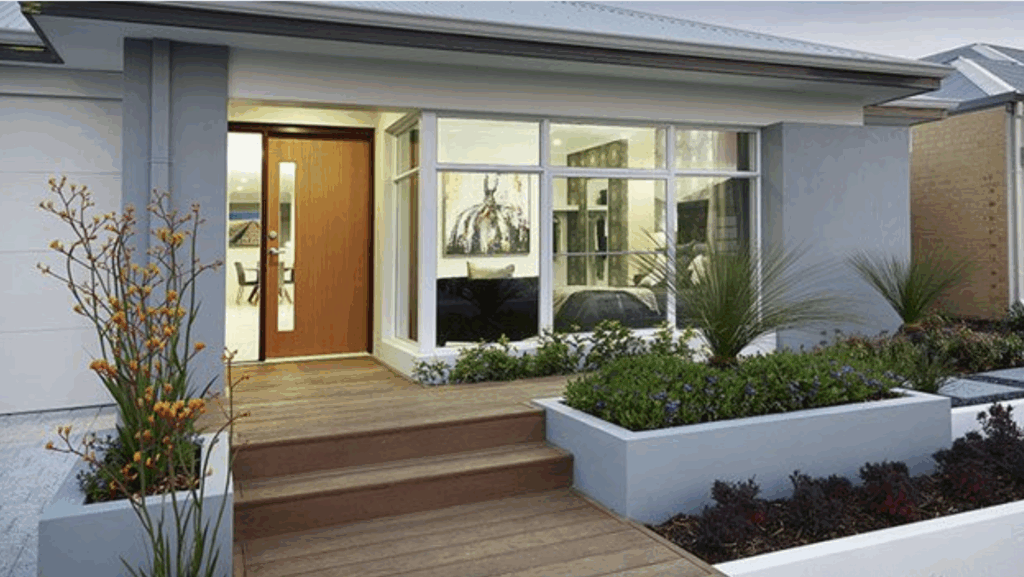
Build a raised concrete porch with planters built right in. These can be filled with flowers, herbs, or small plants and poured at the same time as the porch.
It’s a great way to add greenery and charm to small yards. This design works well for modern homes or townhouses where space is limited.
It also adds a fresh, friendly feel to your entryway. Concrete planters are strong and don’t need much care, making this a stylish and smart choice.
6. Wraparound Porch with Wooden Railing
A wraparound concrete porch goes around two or more sides of your house, giving you more space to sit and relax.
Add a wooden railing for a cozy, farmhouse look. You can paint or stain the railing to match your home. The concrete base is strong and flat, perfect for rocking chairs or potted plants.
This design works great for country homes or places with big yards. It gives your home a warm, welcoming feel and plenty of outdoor space to enjoy.
7. Concrete Porch with Scored Patterns
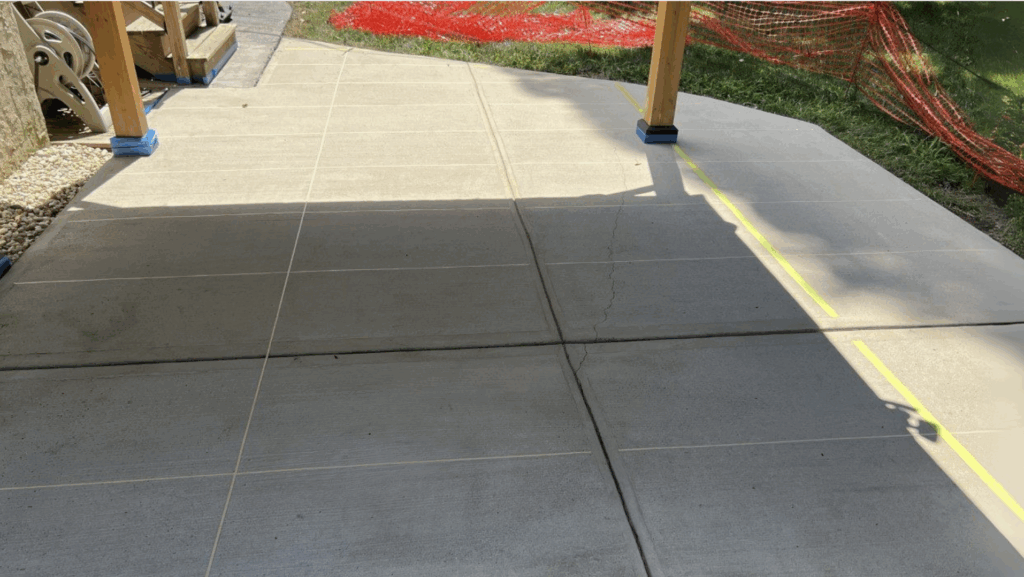
Instead of leaving the porch plain, you can add simple lines cut into the concrete this is called scoring.
These lines can make square, diamond, or grid shapes that look like tiles or big pavers. It’s an easy way to add detail without adding extra cost.
Scored concrete works well with all home styles and can be left plain or stained for more color. This design gives your porch a neat, custom look while still being clean and easy to care for.
Conclusion
Building my own concrete porch was one of the most satisfying home projects I’ve taken on.
It gave me a chance to create something strong, useful, and completely tailored to my home’s style.
If you’re starting from scratch or just giving your porch a fresh look, doing it yourself can save money and give you full control over the design.
I found that concrete is flexible, durable, and surprisingly fun to work with, especially when adding things like patterns, colors, or planters.
There’s plenty of room to be creative while still keeping things simple and functional.
Just be sure to take your time, follow each step carefully, and always think about safety along the way.
If you have questions or want to share your own porch project, I’d love to hear about it in the comments. Let’s help each other build spaces we’re proud of!