
If you’re short on space or need a smart sleeping setup, building your own bunk bed can be a great choice, and from my experience, projects like this can turn out better than expected.
This DIY bunk beds guide is designed for beginners who want something simple, sturdy, and budget-friendly.
You don’t need advanced skills or expensive tools; just a clear plan, basic materials, and a little patience.
Building your own bunk bed also gives you full control over the design. You can adjust the size, height, and style to match your room perfectly.
For kids, guests, or shared spaces, a DIY option can fit your needs better than store-bought beds
We also include simple tips to avoid mistakes and make the process smoother for first-timers.
In this guide, you’ll find easy plans and step-by-step instructions to help you build safely and confidently from start to finish.
What Are DIY Bunk Beds and Why Build One Yourself
DIY bunk beds are simple structures built at home that stack two beds to save space. They give you full control over the design, cost, and overall look while fitting your exact needs.
One of the biggest benefits is their space-saving design, which makes small rooms more functional by using vertical space.
They are also a cost-effective option, as building them yourself is often cheaper than buying ready-made furniture.
Another advantage is customization; you can adjust the height, width, and style to match your room perfectly.
Beyond practicality, there is also personal satisfaction in creating something useful with your own hands. This makes DIY bunk beds a smart and rewarding project for beginners.
Tools and Materials Needed for DIY Bunk Beds
Basic tools and sturdy materials ensure a smooth building process. Preparing everything in advance helps avoid delays during construction.
- Cutting Tools (Saw)
- Drill and Screws
- Measuring Tape and Level
- Strong Wood (Pine/Plywood)
- Finishing Supplies (Sandpaper/Paint)
Easy Steps to Build DIY Bunk Beds at Home
Following a clear order makes the process easier for beginners. Each step builds on the last to create a stable structure.
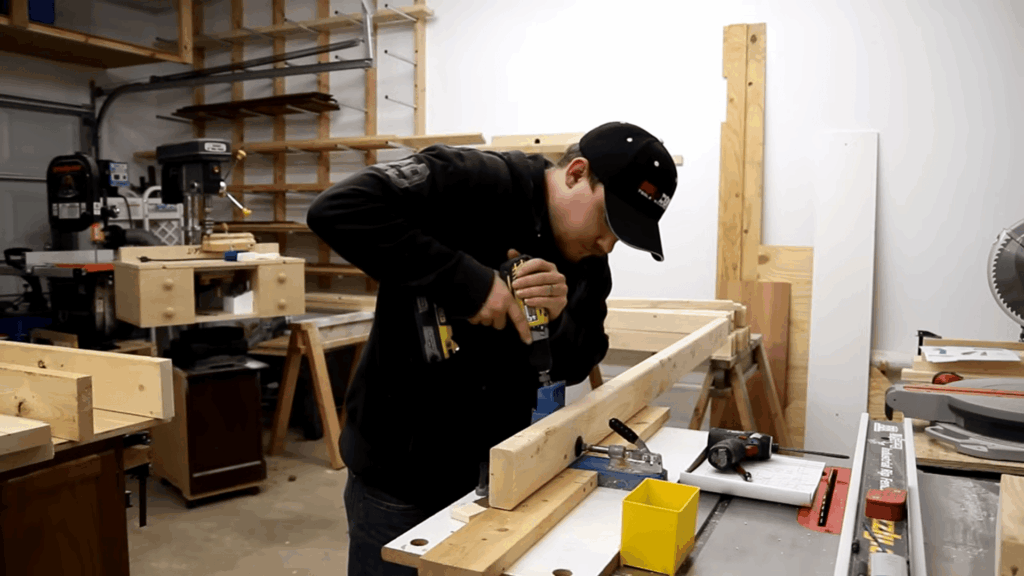
Step 1: Build the Bed Frames
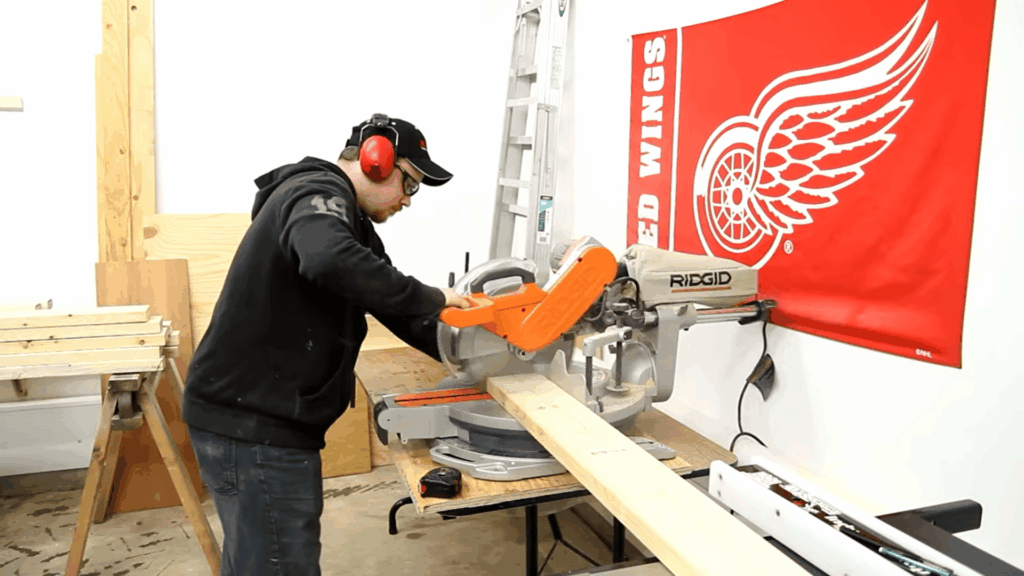
Start by cutting your 2×6 boards to the correct size for both the top and bottom bed frames.
Before putting everything together, run each board through a thickness planer to remove stamps while keeping the natural wood grain visible.
This helps achieve a clean, rustic look without heavy sanding. Use pocket hole joinery to connect the boards securely.
It keeps the structure strong and hides screws inside, giving your DIY bunk bed a smooth, neat, and professional finish.
Step 2: Add Mattress Support
Next, install support rails inside each bed frame using 2×2 strips to hold the mattress slats in place.
To save money, you can cut 2×2 pieces from standard 2×4 boards instead of buying them separately.
Attach the strips evenly along both inner sides of the frame, ensuring they are level and aligned.
Proper placement is important so the slats sit flat, helping provide even weight support and a stable base for the mattress.
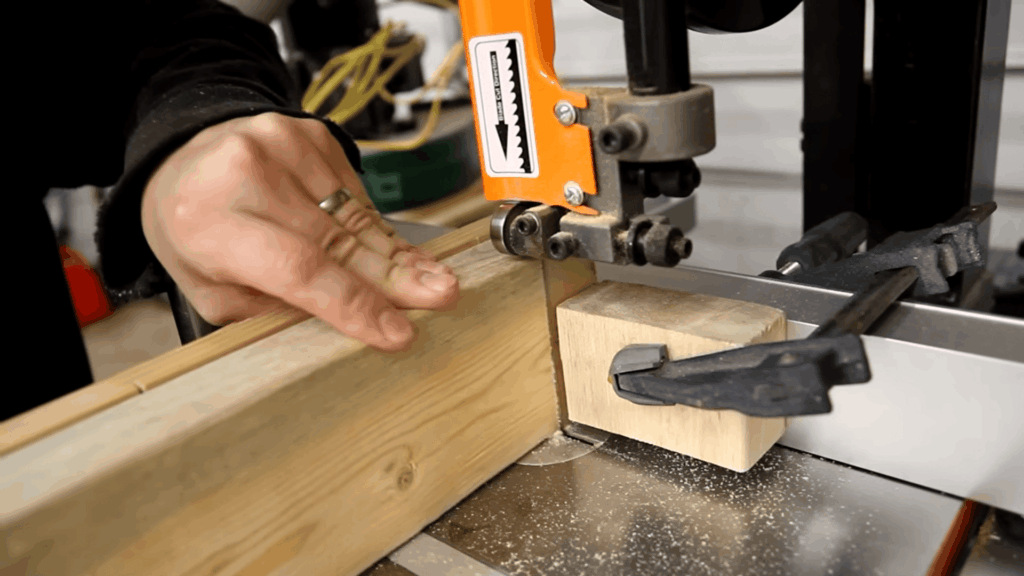
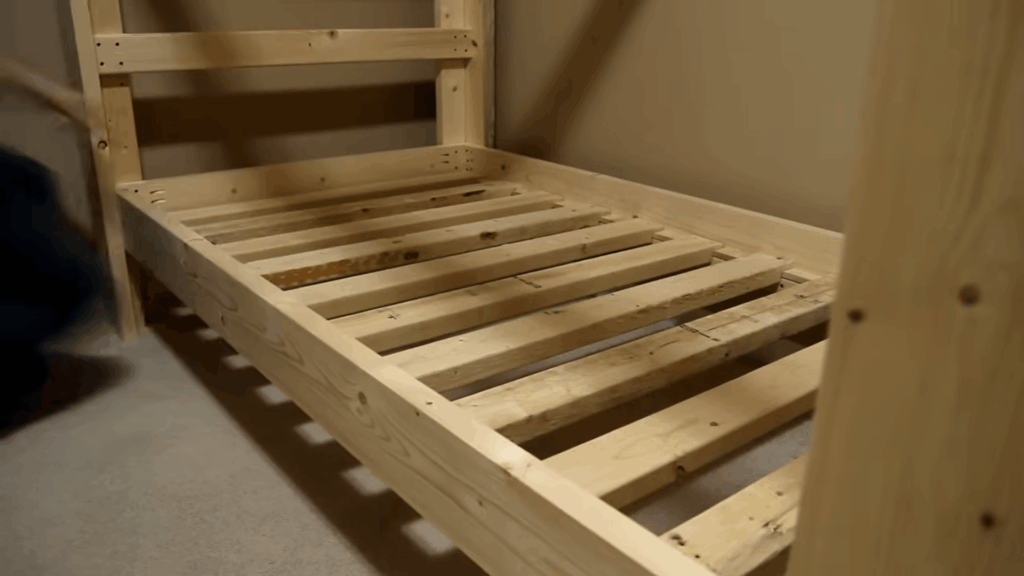
Step 3: Prepare Slats
Cut several slats from 2×4 boards to fit across the bed frame. Add rabbet cuts on both ends so they rest securely on the support rails.
If a table saw isn’t available, a circular saw with a simple jig can work just as well. Screw down only the center slat first, then use it as a guide to space the remaining slats evenly.
This helps keep the frame balanced, sturdy, and properly aligned for mattress support.
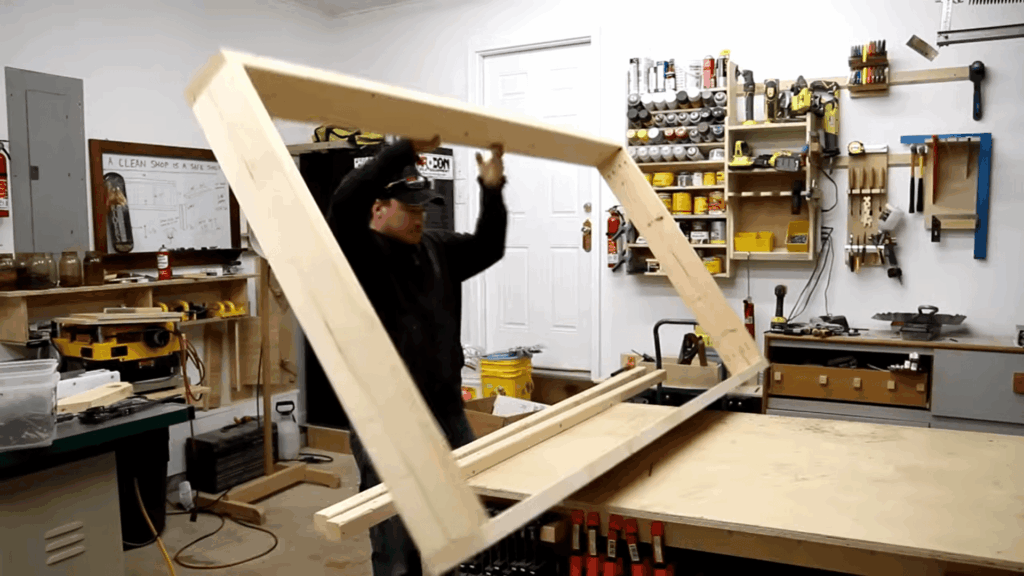
Step 4: Build Strong Legs
The legs are created by forming an L-shape using one 2×4 and one 2×6 board. Attach them securely with pocket holes to build a strong and stable support structure.
Make sure to position the screws on the inside faces so they remain hidden from view.
This small detail keeps the bunk bed looking neat and professional from the outside while still delivering the strength needed to safely support both the top and bottom bunks for daily use.
Step 5: Clean and Shape Wood
Check all wood pieces carefully, especially the ends, for rough edges, cracks, or defects before you begin assembly.
Use a block plane to smooth out uneven or damaged areas for a cleaner finish. Lightly round off any sharp edges to improve safety and comfort, which is especially important for children.
This step not only makes the bunk bed look more polished but also improves its feel when touched, all without the need for heavy sanding or extra effort later.
Step 6: Position Bed Frames on Legs
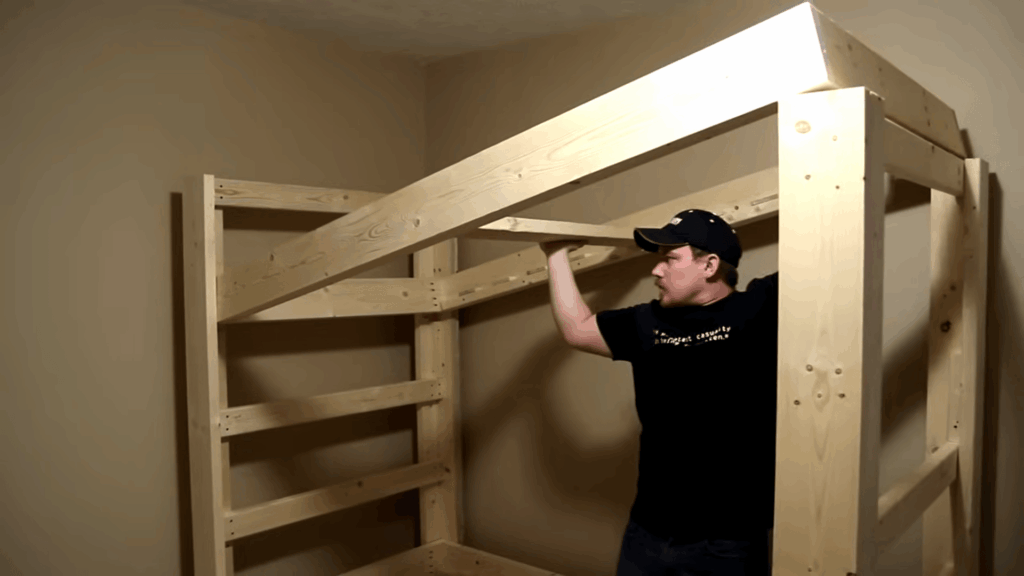
Now begin assembly by placing the bed frames onto the L-shaped legs. Use the small locating blocks installed earlier to align everything correctly and keep the frame from shifting.
These blocks act as guides and make positioning much easier. Carefully check that each frame sits level and flush against the legs on all sides.
Proper alignment at this stage is very important, as it ensures the bunk bed stays straight, stable, and secure during the final assembly process.
Step 7: Secure Inner Corners with Screws (6:10 – 6:30)
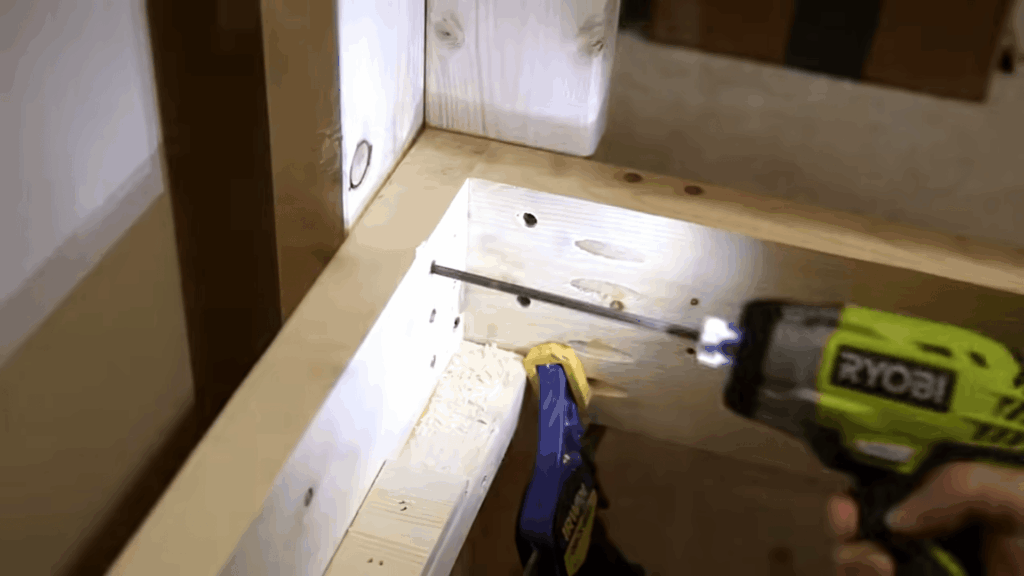
Attach the bed frames to the legs using screws driven from the inside corners. Each short side should receive two screws to hold the frame in place, while the longer side gets several screws for extra strength and support. This setup helps keep the structure solid and steady. By placing screws on the inside, you avoid visible hardware on the outside, giving the bunk bed a clean and neat appearance while maintaining strong, durable joints.
Step 8: Reinforce to Prevent Movement (6:30 – 6:50)
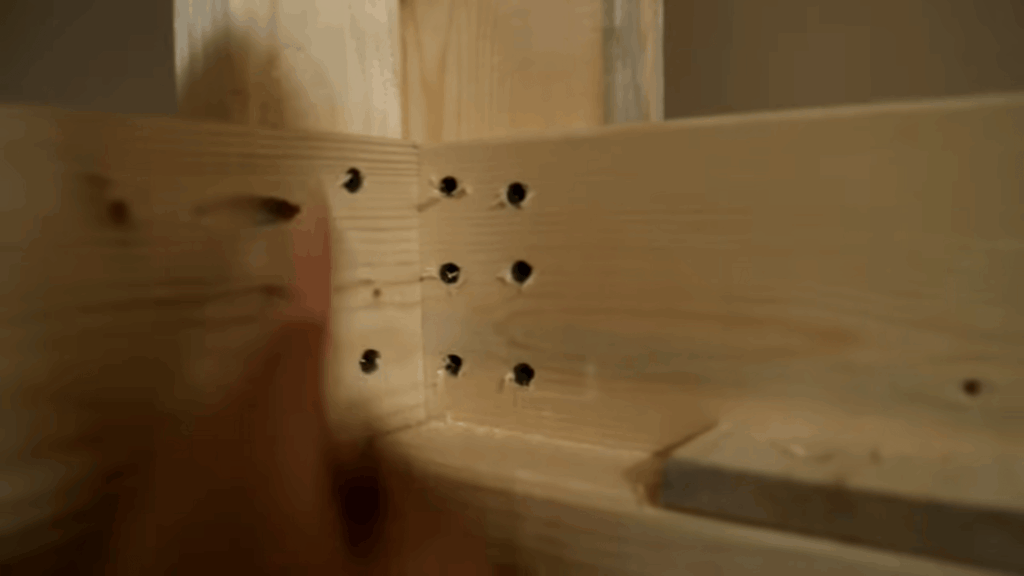
Attach the bed frames to the legs using screws driven from the inside corners.
Each short side should receive two screws to hold the frame in place, while the longer side gets several screws for extra strength and support.
This setup helps keep the structure solid and steady.
By installing screws on the inside, you avoid visible hardware on the outside, giving the bunk bed a clean, neat appearance while maintaining strong, durable joints.
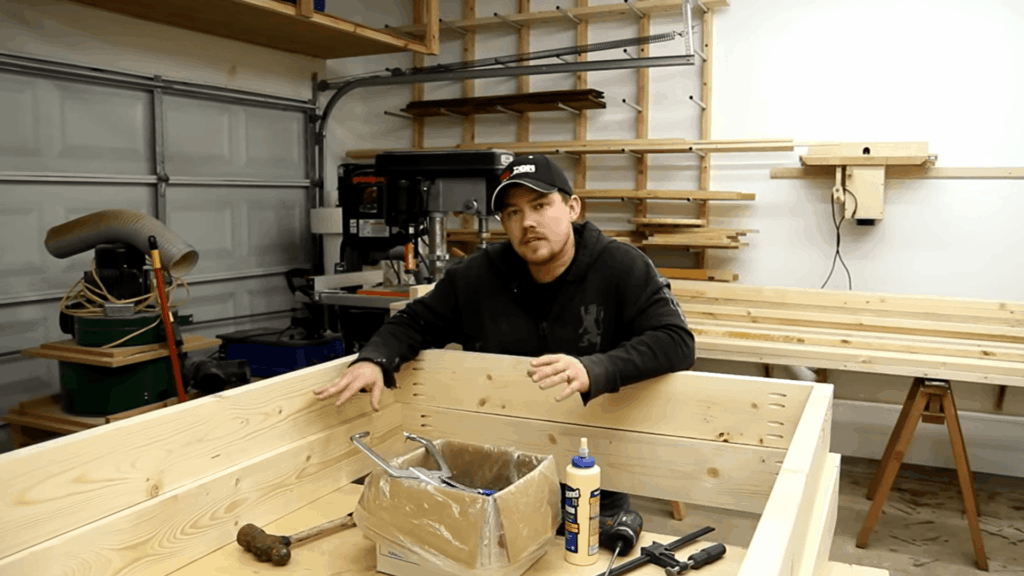
Step 9: Assemble the Structure
With everything secured, the bunk bed is now fully assembled and ready to use. The smart design keeps all screws hidden on the inside, giving the outside a clean and smooth look.
Both ends of the bed work as built-in ladders, making it easy to climb up from either side.
At this stage, you can use it as is or choose to add a finish later to protect the wood and give it a richer, more polished appearance.
This tutorial is based on a helpful video by Jay Bates. You can check out the original video on their YouTube channel here or watch it below.
Safety Tips Before You Start Building DIY Bunk Beds
Taking proper precautions reduces risks during building and use. A safe setup ensures long-term reliability of the bunk bed.
- Wear Safety Gear: Gloves and goggles protect you from cuts and dust.
- Check Tool Condition: Well-working tools prevent accidents and mistakes.
- Use High-Quality Wood: A strong material that resists breakage under weight.
- Plan Guardrails and Ladder: Prevents falls and improves safety for daily use.
- Double-Check Measurements: Reduces errors that could weaken the structure.
Maintenance Tips to Keep DIY Bunk Beds Strong and Safe
Regular care helps extend the life of your bunk bed. Small checks can prevent bigger problems over time.
- Tighten Loose Screws:
Regularly check and tighten all screws and bolts to keep the structure firm, stable, and safe for daily use. - Inspect for Damage:
Look closely for cracks, splits, or weak joints to catch problems early and prevent bigger issues later. - Clean the Surface:
Wipe down the bed often to remove dust, dirt, and buildup, keeping it clean and well-maintained. - Check Ladder Stability:
Make sure the ladder stays secure and sturdy to ensure safe and easy climbing every day. - Monitor Guardrails:
Check that guardrails remain strong and properly fixed to provide reliable protection for the top bunk user.
Final Thoughts
Building your own DIY bunk beds is more than just a home project; it’s a chance to create something useful, personal, and long-lasting.
You get to shape the design, control the cost, and build a piece that truly fits your space. Even if you’re new to DIY, taking it step by step makes the process feel manageable and rewarding.
When I worked on a similar DIY build, the best part was seeing it come together step by step.
As you finish your bunk bed, you’ll likely feel proud knowing you made it yourself. That feeling alone makes the effort worth it.
If you’ve already tried building one or are planning to start soon, I’d love to hear from you.
Share your experience, tips, or questions in the comments below. Your story might help someone else get started, too!
Frequently Asked Questions
How long does it take to build DIY bunk beds?
For beginners, building DIY bunk beds typically takes one to two days, depending on pace and skill level. Careful measuring and assembly help ensure a strong, mistake-free final result.
Can the size of DIY bunk beds be customized?
One major benefit of DIY bunk beds is customization. You can adjust height, width, and length to fit your room or mattress, helping create a bed that fits your space perfectly.
Are advanced tools required to build DIY bunk beds?
No, you don’t need advanced tools. Basic tools like a saw, drill, measuring tape, and level are enough for most DIY bunk bed projects.