
Cleaning windows can feel like a never-ending task, especially when streaks and grime keep coming back. Many cleaning products promise results but often leave marks or cost too much.
What if a simple solution could make this job easier and more affordable?
Vinegar is a natural cleaner that cuts through dirt, grease, and buildup without harsh chemicals.
It is easy to use and works well on both windows and glass doors. In this guide, you will learn a clear step-by-step method to clean windows using vinegar.
I will share the basic tools needed and simple tips to avoid streaks.
With the right approach, windows can look clean and clear without spending extra time or money.
Why Vinegar Is the Perfect Solution for Cleaning Windows?
Vinegar is one of those household items that can do so much more than just flavor your salad! It’s a powerhouse when it comes to cleaning, especially for windows.
The natural acidity in vinegar helps break down grease, dirt, and mineral deposits, leaving your windows clear, spotless, and streak-free.
It is effective, safe, cheap, and non-toxic, making it better than harsh cleaners.
It works equally well on both indoor and outdoor windows to remove dirt and grime. The best part?
You can create a simple window cleaning solution by mixing vinegar, water, and a small amount of dish soap. It’s quick, easy, and budget-friendly!
In the following steps, I’ll show you exactly how to use this natural cleaner to get your windows looking their best in no time.
How to Clean Windows with Vinegar for a Streak-Free Finish?
This simple method uses basic items to remove dirt and leave the glass clear. It works well on windows and doors without leaving streaks or strong chemical smells.
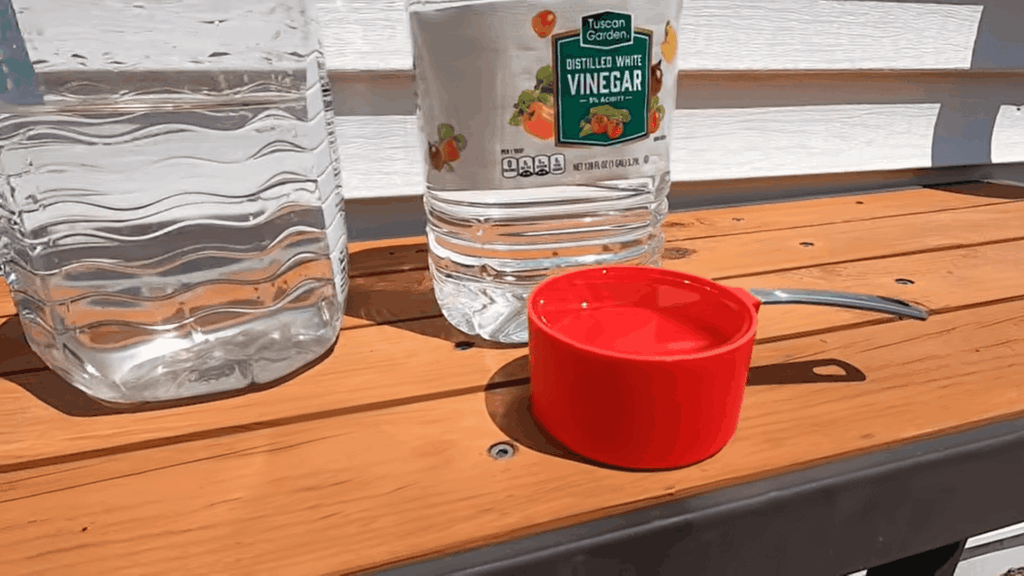
Tools and Materials Needed
Before you get started, make sure you have the following items ready:
- Vinegar (white vinegar is preferred for cleaning)
- Dish Soap (a small amount)
- Squeegee (a basic, affordable one will work great)
- Bucket (to mix the cleaning solution)
- Microfibre Cloth (for drying and wiping excess)
Step 1: Prepare Your Window Cleaning Solution
Start by making your cleaning solution. In a bucket or container, add half a teaspoon of dish soap.
Next, pour in half a gallon of water. Mix it thoroughly, ensuring that the soap is fully dissolved. Then, add one cup of vinegar. Stir the mixture and allow the suds to settle down.
You don’t want too many bubbles, as they can make the cleaning process more difficult.
This simple homemade solution is not only effective but also costs just a fraction of what store-bought cleaners do.
Step 2: Soak Your Squeegee
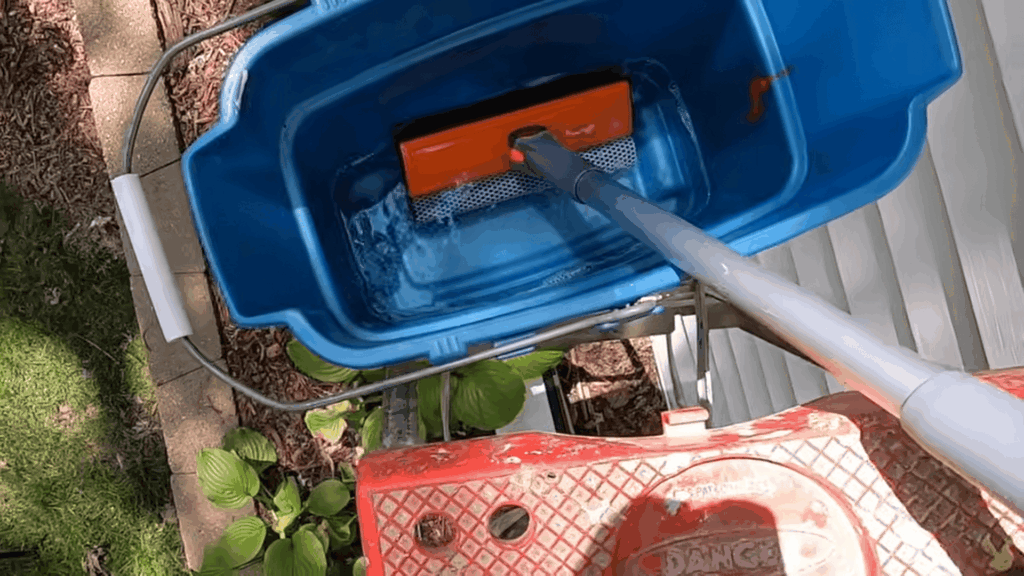
Once your cleaning solution is ready, it’s time to start cleaning. Take your squeegee and soak it thoroughly in the solution, ensuring it’s fully coated.
Shake off any excess liquid to avoid drips as you work, making the process smoother and more efficient.
A simple squeegee works perfectly for this job, and you can easily find one for as low as $18. Make sure you hold the squeegee firmly, giving you better control as you scrub the dirty window.
Step 3: Scrub the Window
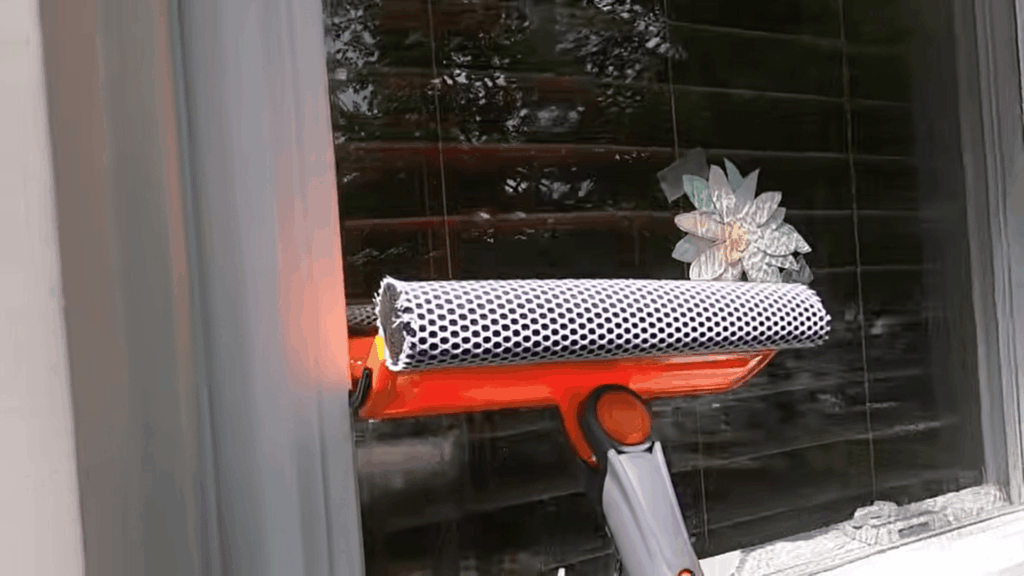
Start by choosing a dirty window and begin cleaning right away. Dip the squeegee in the vinegar solution and scrub the glass for a few seconds.
Focus more on areas with heavy dirt or buildup. The vinegar helps break down grease, bird droppings, and stuck debris with ease.
Use gentle circular motions to cover the entire surface evenly.
This method helps loosen dirt properly, making it easier to remove and leaving the glass clean and ready for the next step.
Step 4: Squeegee Off Excess Water
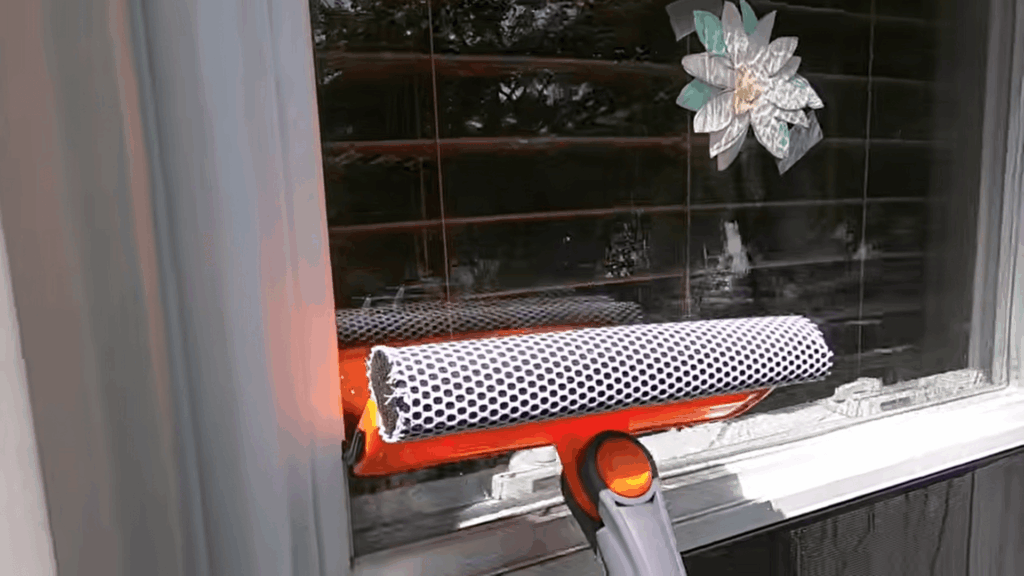
After scrubbing, remove the excess water and cleaning solution using a squeegee. Start at the top of the window and pull the squeegee down in one smooth, steady motion.
Make sure each stroke slightly overlaps the previous one to avoid lines.
Repeat this process across the entire surface until all liquid is cleared.
This method helps remove dirt and solution at the same time, leaving the glass clean, clear, and free from streaks without any extra wiping or polishing.
Step 5: Dry and Buff
After squeegeeing off the excess water, take a microfiber cloth or towel and gently dry any remaining liquid along the edges and corners of the window.
This will prevent water spots from forming and ensure a flawless finish.
Then, use the cloth to buff the window lightly, giving it an extra shine.
Thanks to vinegar’s natural cleaning properties, your window will have a crystal-clear, streak-free shine, leaving it looking as good as new and spotless.
This tutorial is based on a helpful video by Alley Picked. You can check out the original video on their YouTube channel here or watch it below.
Pro Hacks for Streak-Free Windows and Time-Saving Tips
Cleaning windows doesn’t have to be a long, tedious task. These pro hacks will not only help you achieve a streak-free shine but also save you time during the process. These are some tips to get the best results:
- Clean windows on a cloudy day: Direct sunlight can cause the cleaning solution to dry too quickly, leaving streaks behind. Overcast weather is perfect for streak-free windows.
- Use 2 spray bottles: One for the vinegar solution and one for clean water. This makes it easier to wipe off excess solution without adding more dirt.
- Microfiber cloth rotation: Use a fresh side of the cloth for each pass to avoid spreading dirt and streaks across the window.
- Squeegee strokes and direction: Use smooth, overlapping strokes from top to bottom. Make sure to wipe the squeegee after each pass to avoid drips.
- Use a microfiber cloth: This cloth absorbs water efficiently and doesn’t leave lint behind, ensuring a clean, streak-free finish.
- Work in sections: If you have large windows, clean one section at a time to ensure the solution doesn’t dry too fast, which can leave streaks.
Vinegar vs Store-Bought Window Cleaners
Both options clean windows well, but they differ in cost, safety, and ease of use. This comparison helps choose what works best for different needs.
| Feature | Vinegar Cleaner | Store-Bought Cleaners |
|---|---|---|
| Cost | Very low-cost and budget-friendly | Higher cost, varies by brand |
| Ingredients | Natural and simple (vinegar, water) | Chemical-based formulas |
| Safety | Non-toxic and safe for home use | May contain harsh chemicals |
| Effectiveness | Works well on grease, dirt, and light stains | Strong on tough stains and buildup |
| Smell | Mild, sharp smell that fades quickly | Fragranced, sometimes strong |
| Eco-Friendly | Environment-friendly option | Not always eco-friendly |
| Ease of Use | Needs mixing before use | Ready to use instantly |
| Surface Use | Best for basic glass cleaning | Can handle multiple surfaces |
Common Mistakes to Avoid While Cleaning Windows
These are some practical errors to avoid that could lead to streaks or slower cleaning:
- Cleaning in hot sun: Cleaning windows in direct sunlight can cause the solution to dry too quickly, leaving streaks behind.
- Too much soap: Overusing dish soap can create excess suds, making it harder to achieve a streak-free result.
- Hard water residue: Hard water spots can remain on windows if not cleaned properly, causing cloudy marks.
- Ignoring frames & tracks: Cleaning only the glass and neglecting the window frames and tracks can leave dirt behind, which can spread to the glass.
- Not shaking the squeegee: Failing to shake off excess liquid from the squeegee can cause unwanted drips and streaks.
- Not drying edges properly: Leaving excess water on the edges can cause water spots and streaks to form.
- Using the wrong cloth: Avoid using rough or non-absorbent materials that could scratch or leave streaks on your windows. Use microfiber for the best results.
Conclusion
Cleaning windows with vinegar is easy and low-cost. Mix vinegar, water, and a little dish soap to make a strong solution that leaves glass clean and streak-free.
Not only does vinegar save you money, but it also saves you time compared to using harsh chemical cleaners.
Plus, it’s a natural and eco-friendly option that’s safe for your home. Now that you know the easy steps and pro tips, it’s time to give it a try!
I hope these simple methods make your window cleaning routine easier and more efficient.
If you have any other tips or questions, feel free to share them in the comments below. Ready for streak-free windows? Try these tips today and let me know how it works for you!
Frequently Asked Questions
Can Vinegar Damage Window Tint or Coatings?
Vinegar is safe for most windows, but avoid using it on coated or tinted glass. Its acidity may cause damage over time. Always check the manufacturer’s guidelines first.
How Often Should Windows Be Cleaned with Vinegar?
Cleaning every 4–6 weeks keeps windows clear. In dusty or coastal areas, clean more often to avoid buildup.
Can Vinegar Remove Hard Water Stains from Windows?
Yes, vinegar is effective in removing hard water stains. Simply apply it directly to the stained area, let it sit for a few minutes, and then scrub with a cloth or sponge before wiping clean.