
Looking to give the kitchen a fresh look without spending a fortune? Shaker cabinet doors are timeless. Clean lines, simple design, and that classic look everyone loves.
But hiring someone to do the job? That can get expensive fast. And making Shaker cabinet doors at home is totally doable.
No fancy equipment needed. No years of woodworking experience required. Just some basic tools, a free weekend, and a willingness to get your hands dirty.
This blog breaks down the entire process into easy steps. Anyone can follow along and create professional-looking cabinet doors that’ll transform the kitchen. Ready to get started?
Are DIY Shaker Cabinet Doors Hard to Make?
Not at all. Shaker cabinet doors look fancy, but they’re actually one of the easiest door styles to build at home.
The design is straightforward: a flat center panel surrounded by four pieces of wood called rails and stiles. That’s it.
Sure, there’s some measuring and cutting involved. And yes, getting those corners to fit perfectly takes a bit of patience. But the basic technique? Simple enough for beginners.
Most people finish their first door in an afternoon. After that, the rest go even faster.
What Makes a Shaker Cabinet Door “Shaker Style”?
The Shaker style goes back to the 1700s when Shaker communities built furniture based on simplicity and function. No fancy carvings, no unnecessary decorations. Just clean, honest craftsmanship.
A true Shaker cabinet door has a five-piece construction. Four pieces form the frame: two vertical stiles on the sides and two horizontal rails on top and bottom. The fifth piece is a flat center panel that sits inside the frame.
What really defines the look? Those recessed panels and square edges. Everything sits flush and clean. No raised panels, no ornate details, no curves.
That minimalist approach is exactly why Shaker doors still look fresh today. They work with modern kitchens, farmhouse styles, and everything in between.
Tools and Materials You Need to Make Shaker Cabinet Doors
| Category | What you’ll need |
|---|---|
| Cutting & milling | Table saw, flat-top grind (FTG) blade (thin/kerf around 1/8”), miter gauge, tape measure, square, pencil/marker |
| Assembly | Wood glue, clamps (bar clamps or parallel clamps), a small brush, or scrap wood for spreading glue |
| Panel & lumber | 1x stock (for rails/stiles), 1/4” plywood panel (often actually ~3/16”), optional scrap piece for test fitting |
| Hinges & install | Concealed hinges (Euro/frameless or face-frame style as needed), hinge plates, 35mm Forstner bit, hinge jig (Kreg-style) or drill press fence setup, drill/driver, screws |
| Finishing (optional) | Sandpaper (multiple grits), router + round-over bit (optional), filler for plywood voids (optional), primer/paint or finish |
Stepwise Instructions on How to Make Shaker Cabinet Doors
Building Shaker doors becomes easier when broken down into clear steps. Here’s the complete process from start to finish.
Step 1: Pick the Door Style + Plan Your Dimensions and Cut List
Before cutting anything, decide you’re building a shaker (frame-and-panel) cabinet door instead of a slab door.
Shaker doors look simple, but accuracy matters because you’re making a frame that must fit together cleanly and capture a center panel.
Use SketchUp (or a quick drawing) to confirm your final door size, rail/stile widths, and most importantly, your joinery allowances. Rails can get cut too short if you forget the tenon length.
Create a cut list, then commit to your measurements so every part is repeatable and consistent.
Step 2: Break down Your Rails, Stiles, and Center Panel to Final Size
Start with straight 1x stock and rip it down into your rails (horizontal pieces) and stiles (vertical pieces).
Many people keep rails and stiles around 1 3/4”–2 1/4” wide, depending on the look and hinge clearance. Cut your center panel from plywood (commonly called “1/4 inch,” but it’s usually thinner in reality).
Cut everything slightly oversized if needed, then trim to the final size so your edges are square, and your frame assembles evenly.
After cutting, label each part (especially if your wood grain matters), so you don’t mix pieces later.
Step 3: Cut the Centered Groove on The Inside Edges of All Frame Parts
Set up your table saw to cut a groove along the inside edge of every rail and stile; this groove will hold the center panel. Use a flat-ground (FTG) blade so the groove bottom is clean (no ridges).
Don’t use a true 1/4” blade unless your plywood is truly 1/4”, because most “1/4” plywood is closer to 3/16”, which can cause a sloppy, rattly panel fit.
The centering trick is: make a pass, flip the board, and make another pass. Even if you’re slightly off, flipping guarantees the groove ends up centered.
Nudge the fence little by little until the groove matches your plywood panel thickness snugly.
Step 4: Cut the Tenons on The Ends of The Rails (Table Saw + Miter Gauge)
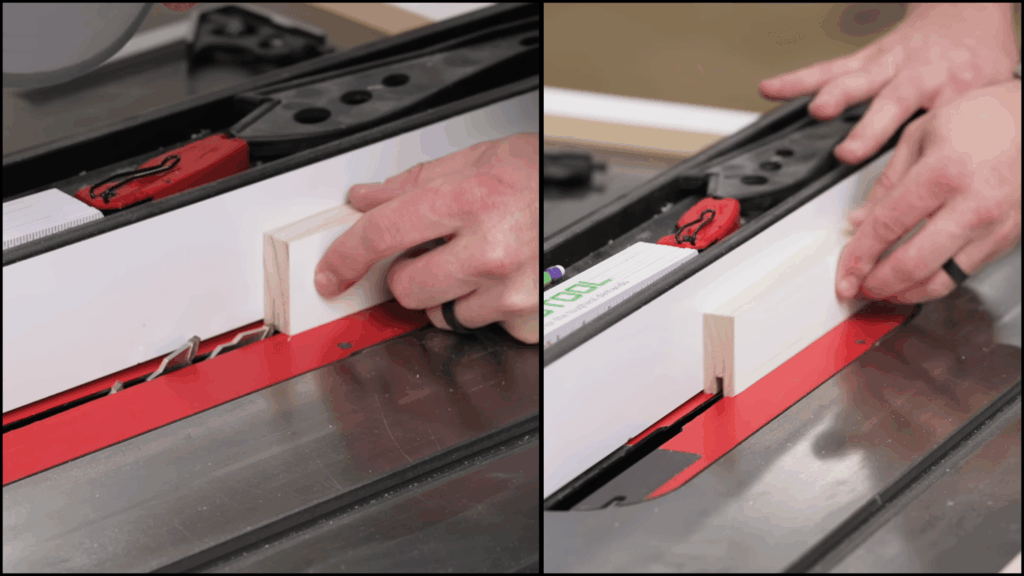
Now you’ll form the joinery that holds the door together: tenons on the ends of the rails.
The tenon length should match your groove depth (in the transcript example, tenons are about 3/8” long because the groove depth is about 3/8”).
Set blade height so the shoulder cut lines up flush with the groove area; start slightly low and sneak up on it. Use a miter gauge for these cuts; it keeps the rail controlled and helps reduce tear-out by supporting the back edge.
Cut a test tenon and dry-fit it into a stile groove. If it’s too thick, raise the blade slightly and recut until the fit is firm but not forced.
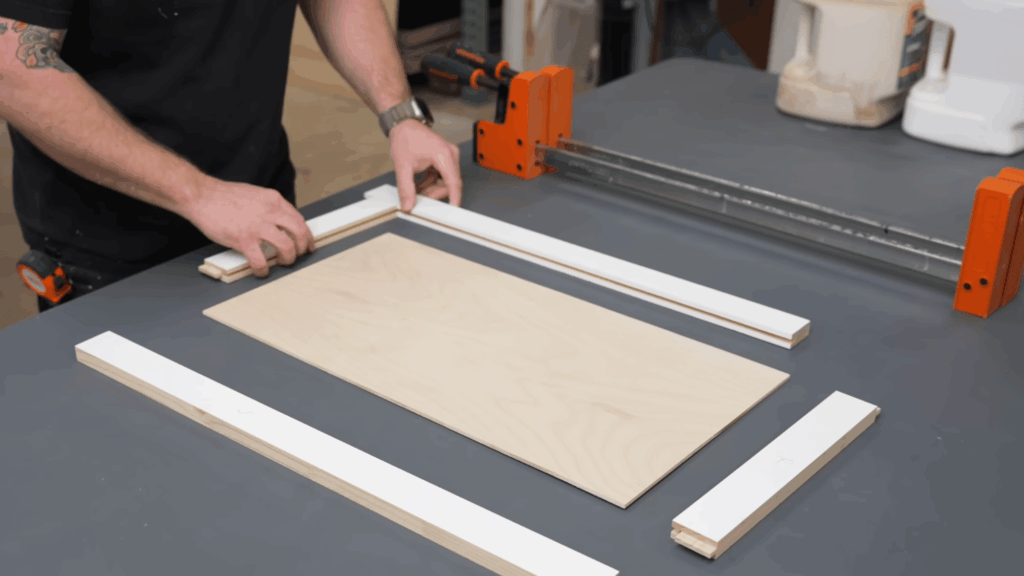
Step 5: Dry Fit, Verify Size + Square, Then Glue the Frame Correctly
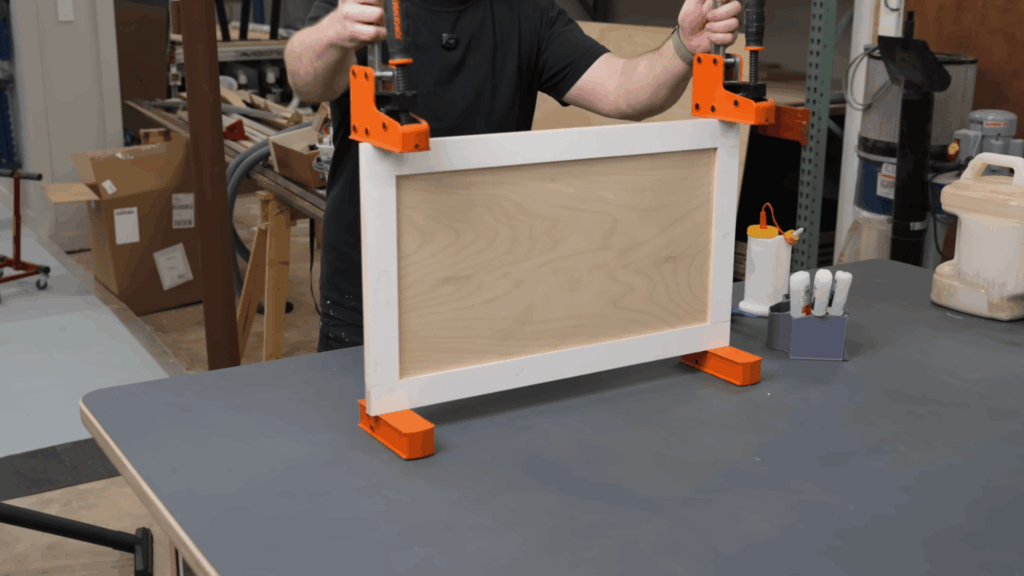
With grooves and tenons complete, do a full dry fit: rails into stiles, panel in the grooves, and check your door’s overall height/width against your plan.
Next, check squareness by comparing diagonal measurements corner-to-corner; equal diagonals mean you’re square. During glue-up, focus the glue where it matters: only on the tenons (that’s where the structure comes from).
The panel usually “floats” so it doesn’t split or cause issues later; you can add a tiny dab inside the groove in one or two spots only if you’re worried about rattling.
Clamp until the frame pulls tight and re-check diagonals before walking away.
Step 6: Size Your Cabinet Doors the Simple Way
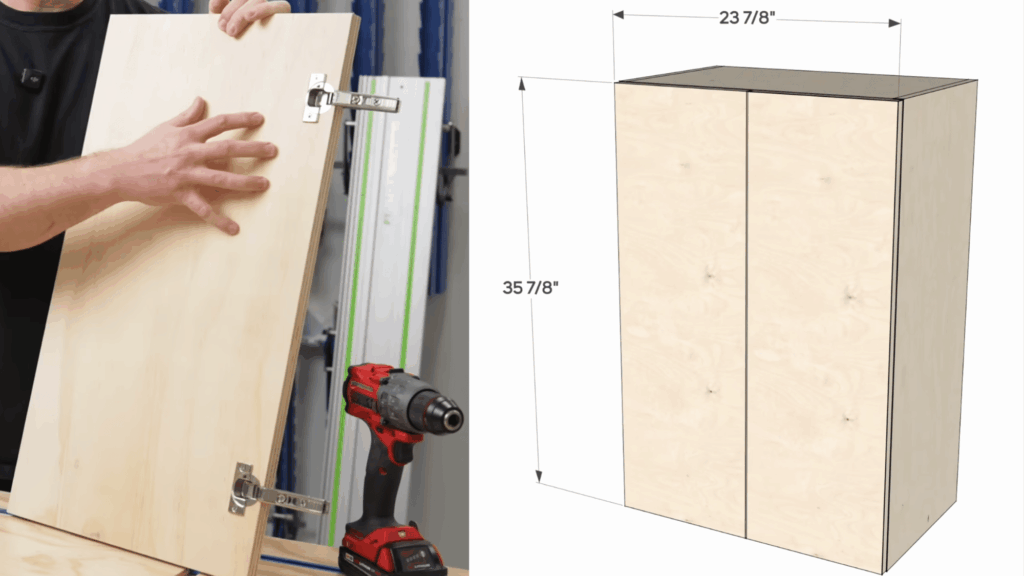
Sizing doors feels intimidating, but for frameless cabinets, it can be very straightforward. Take the exterior dimensions of the cabinet box and subtract a small gap allowance so installation and alignment are easier.
In the transcript’s approach, subtract about 1/16” from each edge (so 1/8” total in width and 1/8” total in height).
That creates a consistent reveal and gives you wiggle room while adjusting hinges. Aim for at least a 1/16” gap, though a 1/8” gap is often easier to make look even across multiple doors.
Apply a similar strategy to drawer fronts so they maintain consistent spacing above, below, and side-to-side.
Step 7: Drill and Install Concealed Hinges, Then Hang and Adjust the Doors
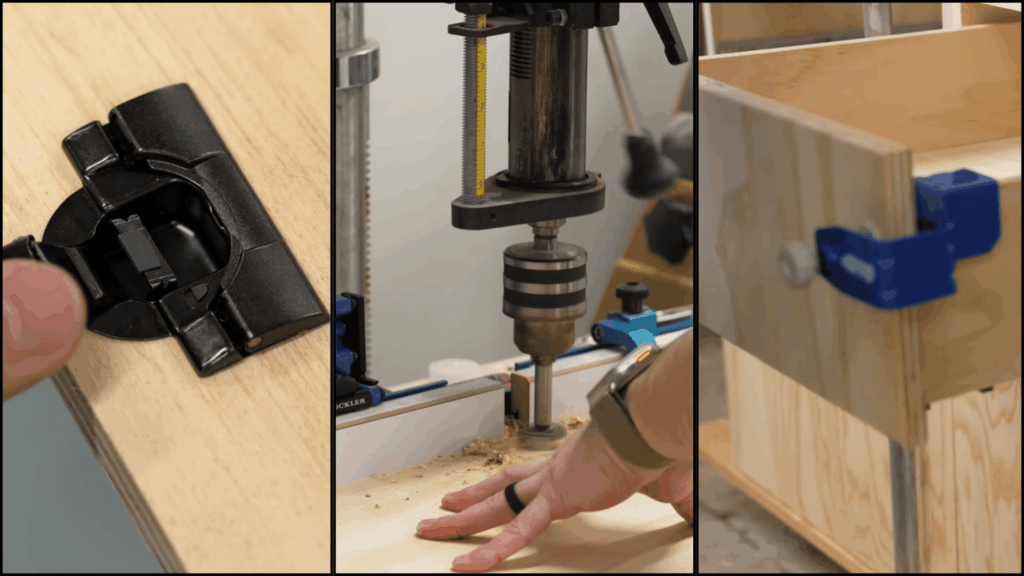
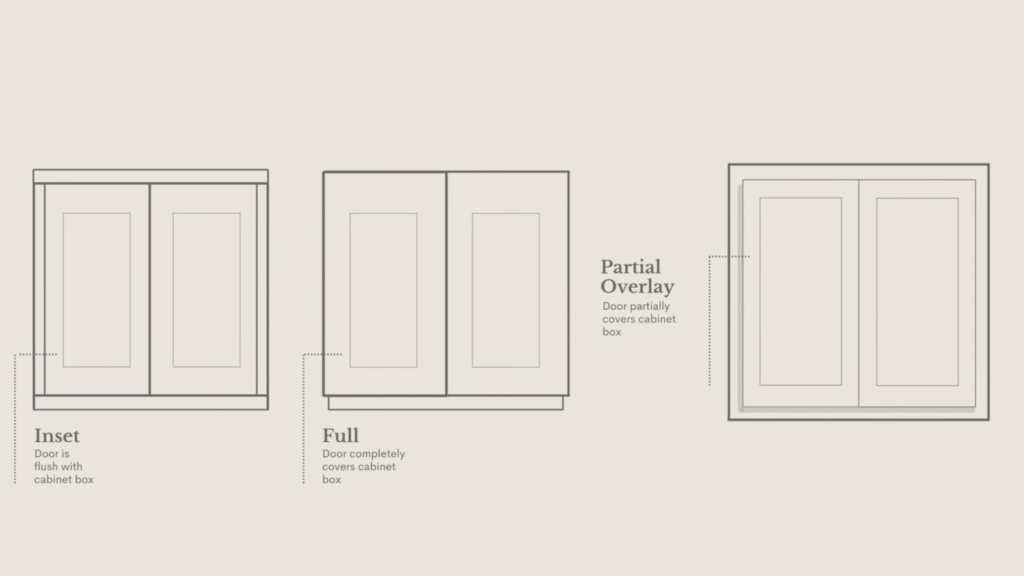
For a clean cabinet look and easy alignment, use concealed (Euro) hinges. Choose the correct type (overlay vs inset, frameless vs face-frame, and opening angle based on your cabinet layout).
Use a hinge jig (Kreg-style) or a drill-press fence setup with a 35mm Forstner bit to drill the hinge cups consistently.
A common placement is around 4 inches from the top and bottom of the door, but consistency matters more than the exact number.
Install hinge plates in the cabinet, clip the doors on, then fine-tune the fit using the hinge adjustments (up/down, in/out, side-to-side). Add small bumpers if needed to prevent paint sticking and reduce noise.
To know more detailed instructions on how to DIY shaker cabinet doors, watch the video given below:
How Much Do DIY Shaker Cabinet Doors Cost?
The total cost depends on the type of wood chosen and how many doors are being made.
Materials per door:
- Wood for rails and stiles: $8-$15
- Center panel (plywood or MDF): $3-$8
- Wood glue: $1-$2
- Sandpaper: $0.50-$1
- Finish or paint: $2-$5
Average cost per door: $15-$30
For comparison, pre-made Shaker cabinet doors run anywhere from $40 to $150 each, depending on size and quality. Custom-built doors from a carpenter? Even more expensive.
Making ten doors at home might cost around $200-$300 in materials. Buying those same doors could easily run $500-$1,000 or more.
The savings add up fast, especially for a full kitchen renovation.
Common Mistakes When Making DIY Shaker Cabinet Doors
Even simple projects have pitfalls. Avoiding these common errors will save time, materials, and a whole lot of frustration.
- Inaccurate measurements: Measuring once instead of twice leads to doors that don’t fit the cabinet openings properly.
- Skipping the wood conditioning step: Going straight to staining without prep causes blotchy, uneven finishes that look unprofessional.
- Using wet or warped wood: Starting with lumber that hasn’t properly dried results in doors that twist and gap over time.
- Rushing the glue-up process: Not clamping joints long enough or applying uneven pressure creates weak connections that eventually fail.
- Forgetting to account for panel expansion: Wood moves with humidity changes, so leaving no room for the center panel causes cracking and splitting.
Wrapping Up
Building Shaker cabinet doors at home isn’t just about saving money. It’s about taking control of a project and seeing it through from raw wood to finished product.
Sure, the first door might not be perfect. Maybe the joints aren’t completely flush, or the finish has a few brush marks. That’s fine. Each door gets better than the last.
By the end, there’s a kitchen full of custom cabinets that didn’t cost a fortune. Plus, there’s that satisfaction of knowing they were built by hand, not bought off a shelf.
Time to grab those tools and get building.