
A flower doesn’t need to wilt and fall apart to be done. With the right care, it can become part of something lasting.
Many people throw flowers away once they fade, but there’s a better way. Drying them at home keeps their charm and color going strong.
It’s not about doing something perfect; it’s about holding on to what matters. A single stem can remind someone of a wedding, a walk, or a quiet moment.
This guide shows how to dry flowers step by step, in ways that keep their shape and beauty ready for display, crafts, or just happy memories.
Why Dry Flowers at Home?
Drying flowers at home does more than just save petals. It helps people hold onto special memories in a lasting way.
A dried flower can remind someone of a loved one, a wedding day, or a favorite garden. It also gives new life to old blooms, turning them into decorations, gifts, or craft supplies.
Unlike store-bought items, dried flowers carry meaning. They are personal, handmade, and often one of a kind.
Drying flowers also lets people enjoy nature indoors, even when the season changes. It’s an easy hobby that brings joy, saves money, and makes something beautiful from what might have been thrown away.
Things to Know Before You Start
Before drying your flowers, it helps to know a few important things:
- Choose Fresh Flowers: Pick flowers before they are fully open. Flowers that are already wilting or dropping petals may not dry well.
- Dry Flowers Quickly: The faster you dry them, the more color and shape they keep.
- Handle Gently: Fresh flowers are soft and easy to damage. Be gentle when moving or hanging them.
- Remove Extra Leaves: Take off leaves from the bottom of the stem. This helps the drying process go faster and keeps things clean.
Best Flowers for Drying

Some flowers dry better than others. Flowers with strong stems and firm petals usually keep their shape and color longer. The ones below are great for beginners and work well with most drying methods like air drying, pressing, or using silica gel.
| Flower Name | Why It’s Good for Drying | Best Drying Method |
|---|---|---|
| Roses | Keep shape well and are easy to hang dry | Air drying, silica gel |
| Lavender | Keeps scent and color; strong stems | Air drying |
| Baby’s Breath | Tiny flowers that dry fast and hold shape | Air drying |
| Hydrangeas | Large, full heads that dry slowly and beautifully | Air drying, water drying |
| Statice | Paper-like texture holds color well | Air drying |
| Strawflower | Petals feel dry even when fresh | Air drying, silica gel |
| Marigolds | Keep the bold color when dried with care | Silica gel, microwave drying |
| Daisies | Simple shape dries flat or full | Pressing, silica gel |
| Zinnias | Bright colors and strong petals | Silica gel, air drying |
| Globe Amaranth | Round shape and vibrant color last long | Air drying |
| Eucalyptus | Fragrant leaves that keep their scent and shape | Air drying |
How to Dry Flowers: Simple Methods
There are several ways to dry flowers at home. Each one works well for different types of flowers and uses:
1. Air Drying (Hang Drying)
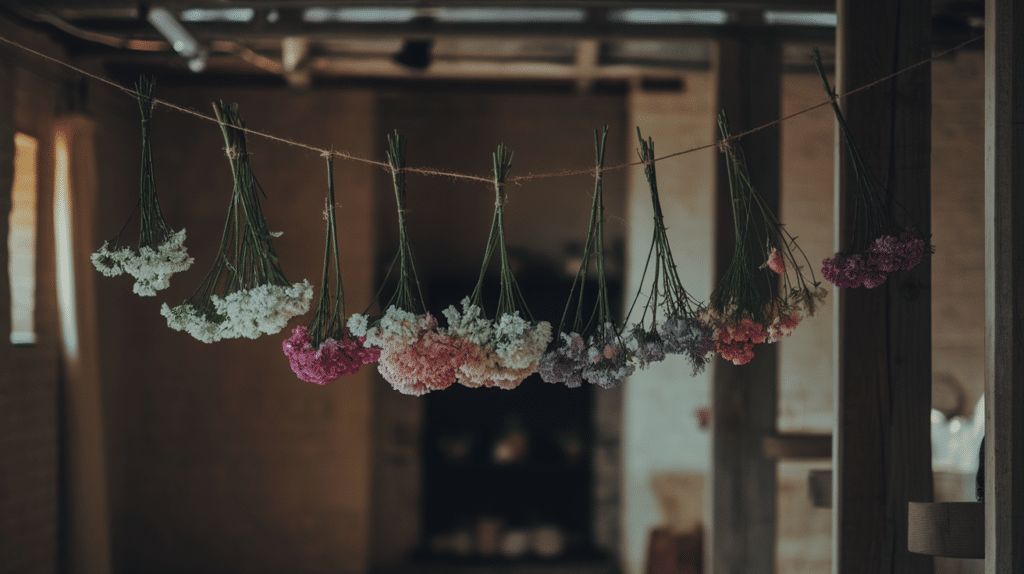
This is one of the easiest and most common ways.
Steps:
- Pick flowers when they are fresh but not fully open.
- Remove extra leaves from the stems.
- Tie 3–6 stems together with a string or a rubber band.
- Hang them upside down in a dry, dark, and airy place.
- Leave them for 2–3 weeks.
- Once dry, spray with a little hairspray to help them keep their shape.
Best For: Roses, lavender, baby’s breath, statice, and other sturdy flowers.
Pros:
- No tools needed
- Good for many flowers
- Keeps natural shape
Cons:
- Takes time
- Color may fade if not kept in a dark place
2. Using Silica Gel
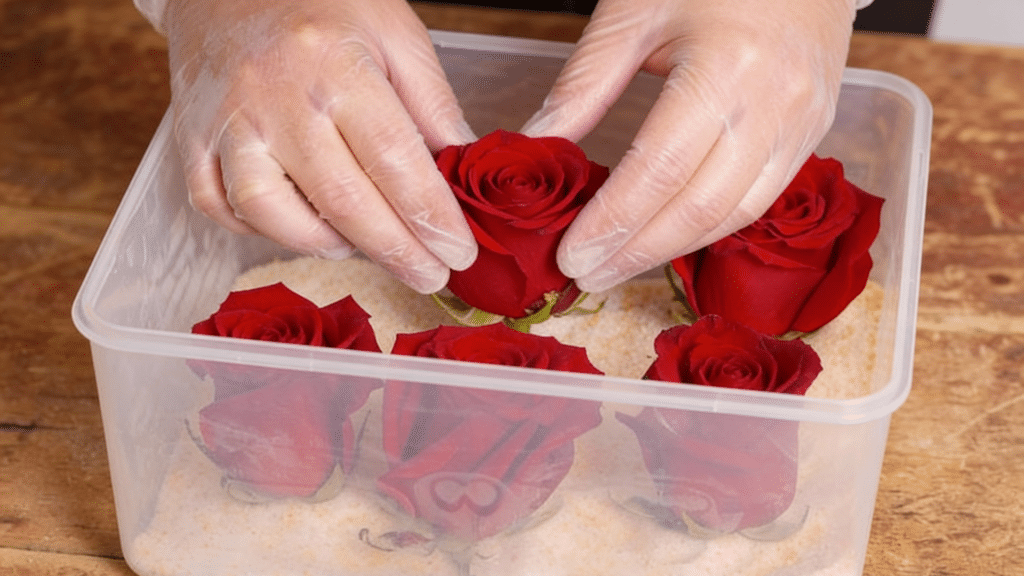
Silica gel helps flowers dry faster and keeps more color.
Steps:
- Get a box or container with a lid.
- Pour a layer of silica gel at the bottom.
- Place flowers on top with petals facing up.
- Slowly pour silica gel around and over each flower until they are fully covered.
- Close the container.
- Leave it for 3–7 days, depending on the flower size.
- Gently take the flowers out and shake off the extra gel.
Best For: Roses, zinnias, daisies, marigolds, pansies, and large blooms.
Pros:
- Keeps bright colors
- Works fast
- Keeps its flower shape well
Cons:
- Silica gel can be costly
- Must handle flowers carefully
3. Pressing Flowers
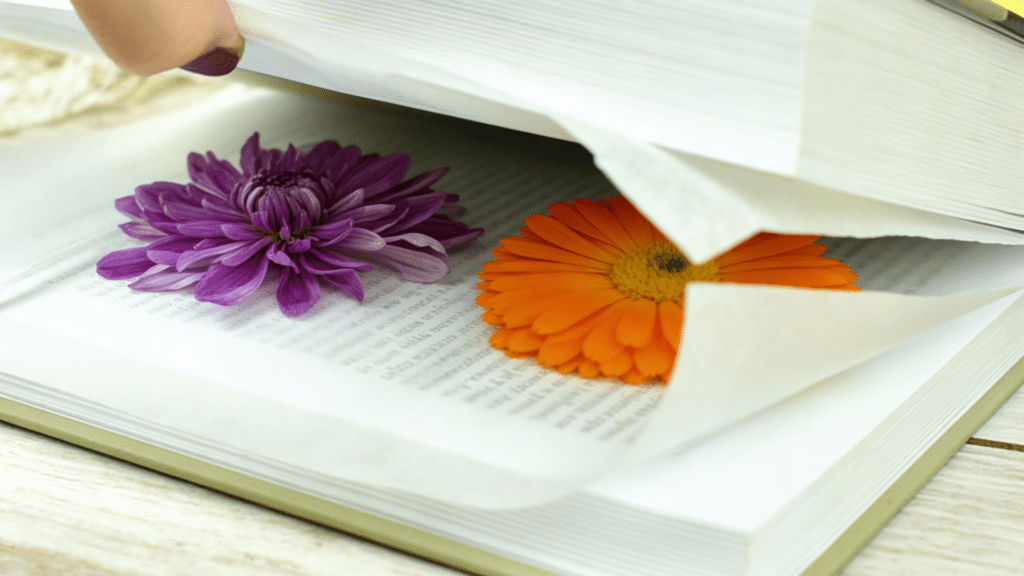
This method flattens flowers for art or scrapbooking.
Steps:
- Place the flower between two pieces of parchment or blotting paper.
- Put it inside a book and weigh it down with more books.
- Leave it for 7–10 days.
- Carefully take it out when it’s dry and flat.
Best For: Small flowers, pansies, violets, daisies, and ferns.
Pros:
- Great for paper crafts
- Easy to do
- No tools needed
Cons:
- Flowers lose their 3D shape
- Not good for thick flowers
4. Microwave Flower Drying
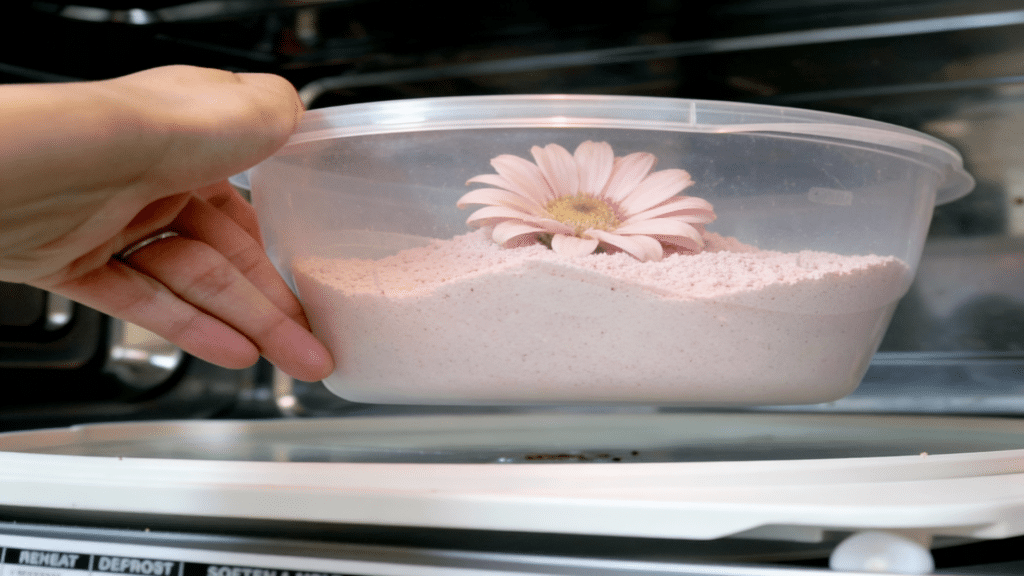
Microwave drying is fast and works best with silica gel.
Steps:
- Put a flower in a microwave-safe container.
- Cover it with silica gel.
- Place a cup of water in the microwave (to avoid burning).
- Microwave for 30 seconds to 1 minute.
- Check and repeat in small bursts if needed.
- Let it cool for 24 hours before removing the flower.
Best For: Roses, daisies, and medium-sized flowers.
Pros:
- Very fast
- Keeps color well
Cons:
- Easy to burn flowers if not careful
- Needs practice
5. Oven Drying

This is another quick method, but not as gentle.
Steps:
- Set your oven to the lowest heat (around 150°F or 65°C).
- Place flowers on a baking sheet lined with parchment.
- Leave the door slightly open.
- Bake for 1–2 hours, checking often.
- Let them cool before handling.
Best For: Thicker flowers that don’t press well.
Pros:
- Fast
- No extra tools needed
Cons:
- Heat can change color
- Flowers may become brittle
How Long Do Dried Flowers Last?
Dried flowers can last from 6 months to 2 years. Some last even longer if stored well. Color may fade over time, but the shape usually stays. Using the correct method helps keep both.
If you’re not using the flowers right away, store them in:
- Cardboard boxes (not plastic, which traps moisture)
- Dry closets or drawers
- Old books for pressed flowers
Keep them away from water, heat, and bugs.
Creative Uses for Dried Flowers
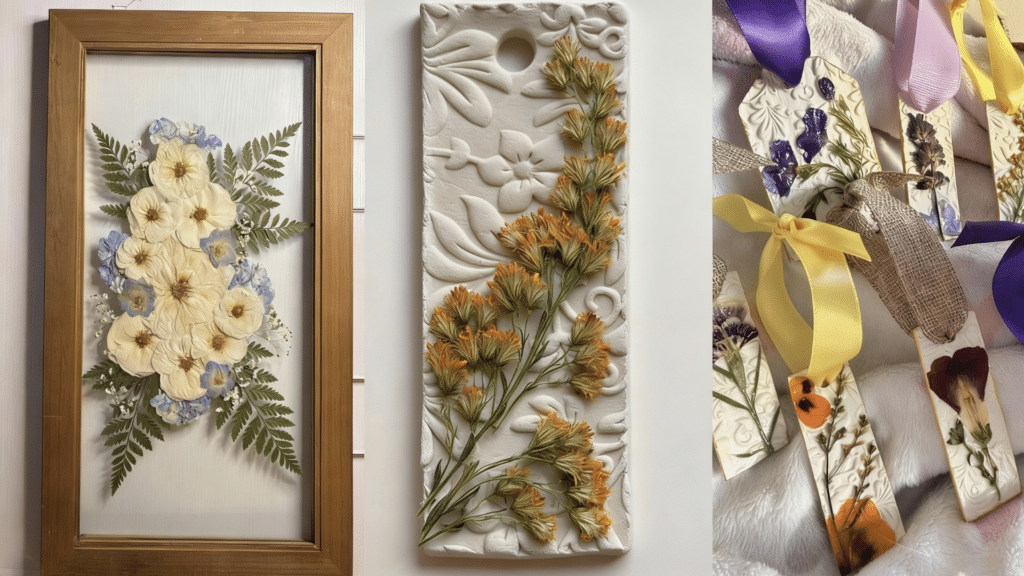
Once your flowers are dry, you can use them in many fun and beautiful ways. Dried flowers are great for gifts, home decor, and craft projects. Here are some easy ideas:
| Use | Description |
|---|---|
| Framed Art | Arrange dried flowers in a frame for wall decor |
| Bookmarks | Press flowers between paper and laminate or glue to make pretty bookmarks |
| Gift Wrapping | Add dried flowers to wrapped presents for a special, handmade touch |
| Candles | Place dried petals around clear candle jars for a natural look |
| Cards & Letters | Glue small flowers to greeting cards or letters for a personal feel |
| Glass Jar Displays | Fill jars with dried flowers for simple home or shelf decor |
| Wreaths | Use a wire or foam base and glue dried flowers into a circular wreath shape |
| Resin Crafts | Seal dried flowers in resin to make keychains, coasters, or jewelry |
| Flower Crowns | Combine flowers with wire or ribbon to make a crown or headband |
| Potpourri | Mix dried petals with herbs and oils to make a scented bowl for any room |
Tips to Keep Dried Flowers Looking Good
Dried flowers can last a long time if they are cared for the right way. Follow these tips to help them stay beautiful:
- Keep them out of direct sunlight: Sunlight can fade the color over time.
- Avoid humid places: Moisture can cause mold or make flowers soft again.
- Dust gently: Use a soft brush or a hairdryer on cool, low speed.
- Use hairspray or sealant spray: This helps flowers hold their shape and keeps them from shedding.
- Handle with care: Dried flowers are delicate and can break easily.
- Display in a cool, dry place: Avoid spots near heat vents or steamy rooms like bathrooms.
Wrapping Up
A dried flower can do more than just sit in a vase. It can hold a memory, add charm to a room, or become part of something handmade.
Drying flowers isn’t hard, but doing it well takes a little care. Each method has its own steps, and choosing the right one helps keep the color and shape.
With a bit of patience, the results can last for months or even years. Don’t toss those blooms too soon.
Try saving them instead. Pick a flower, follow the steps, and see how easy it is to make something that lasts. Start your first flower-drying project today!