
Installing drywall may seem like a big job at first, but it becomes much easier when you break it down into simple steps.
If you’re finishing a basement, remodeling a room, or taking on your first DIY project, knowing how to hang drywall correctly can save you time, money, and frustration.
I’ve worked through the basics myself, and one thing I’ve learned is that careful preparation makes all the difference.
With the right tools, accurate measurements, and a clear plan, you can achieve solid, professional-looking results.
This guide shows you how to hang drywall, from preparing the room and cutting panels to securing them, creating outlet openings, and avoiding common mistakes.
What Is Drywall and Why Is It Used?
Drywall is a building material made from a gypsum core sandwiched between two sheets of heavy paper.
It is used to create smooth interior walls and ceilings in homes, offices, and other buildings. Drywall is popular because it is affordable, easy to install, and provides a clean surface that can be painted or finished in many ways.
Drywall is faster and easier to install than traditional plaster, making it the standard choice in modern construction.
It is available in several types, including moisture-resistant, mold-resistant, and fire-resistant options for specific areas of a building.
In addition, drywall helps improve a room’s appearance while covering framing, wiring, and insulation.
When installed correctly, it creates strong, durable walls that can last for decades with minimal maintenance.
Tools and Materials Needed to Hang Drywall
Before you begin, make sure you have the necessary tools and materials on hand to complete the installation safely and efficiently.
- Drywall sheets (panels)
- Drywall screws
- Metal corner bead
- Utility knife
- Screw gun or drill
- Drywall router
- Spiral saw
- Tin snips
- Step ladder
- Safety glasses
- Work gloves
- Drywall lift (optional, for large panels)
- Wall studs and framing
How to Prepare the Room Before Hanging Drywall?
Preparing the room before hanging drywall means making sure the framing, measurements, and work area are ready for installation.
A well-prepared room helps drywall panels fit properly and reduces mistakes during the project.
Start by inspecting the wall studs and ceiling joists to ensure they are straight, secure, and evenly spaced. Mark the locations of studs and joists so they are easy to find when driving screws.
Next, check for electrical wiring, plumbing lines, ductwork, and electrical boxes that may affect panel placement.
Remove any obstacles that could interfere with installation and clean the work area to create a safe workspace.
It is also a good idea to measure walls and ceilings carefully and plan the panel layout in advance. Taking these steps helps create smoother installations and better-looking finished walls.
How to Hang Drywall By Yourself?
Handling drywall alone requires careful planning and support tools to keep panels stable while ensuring accurate placement and fastening.
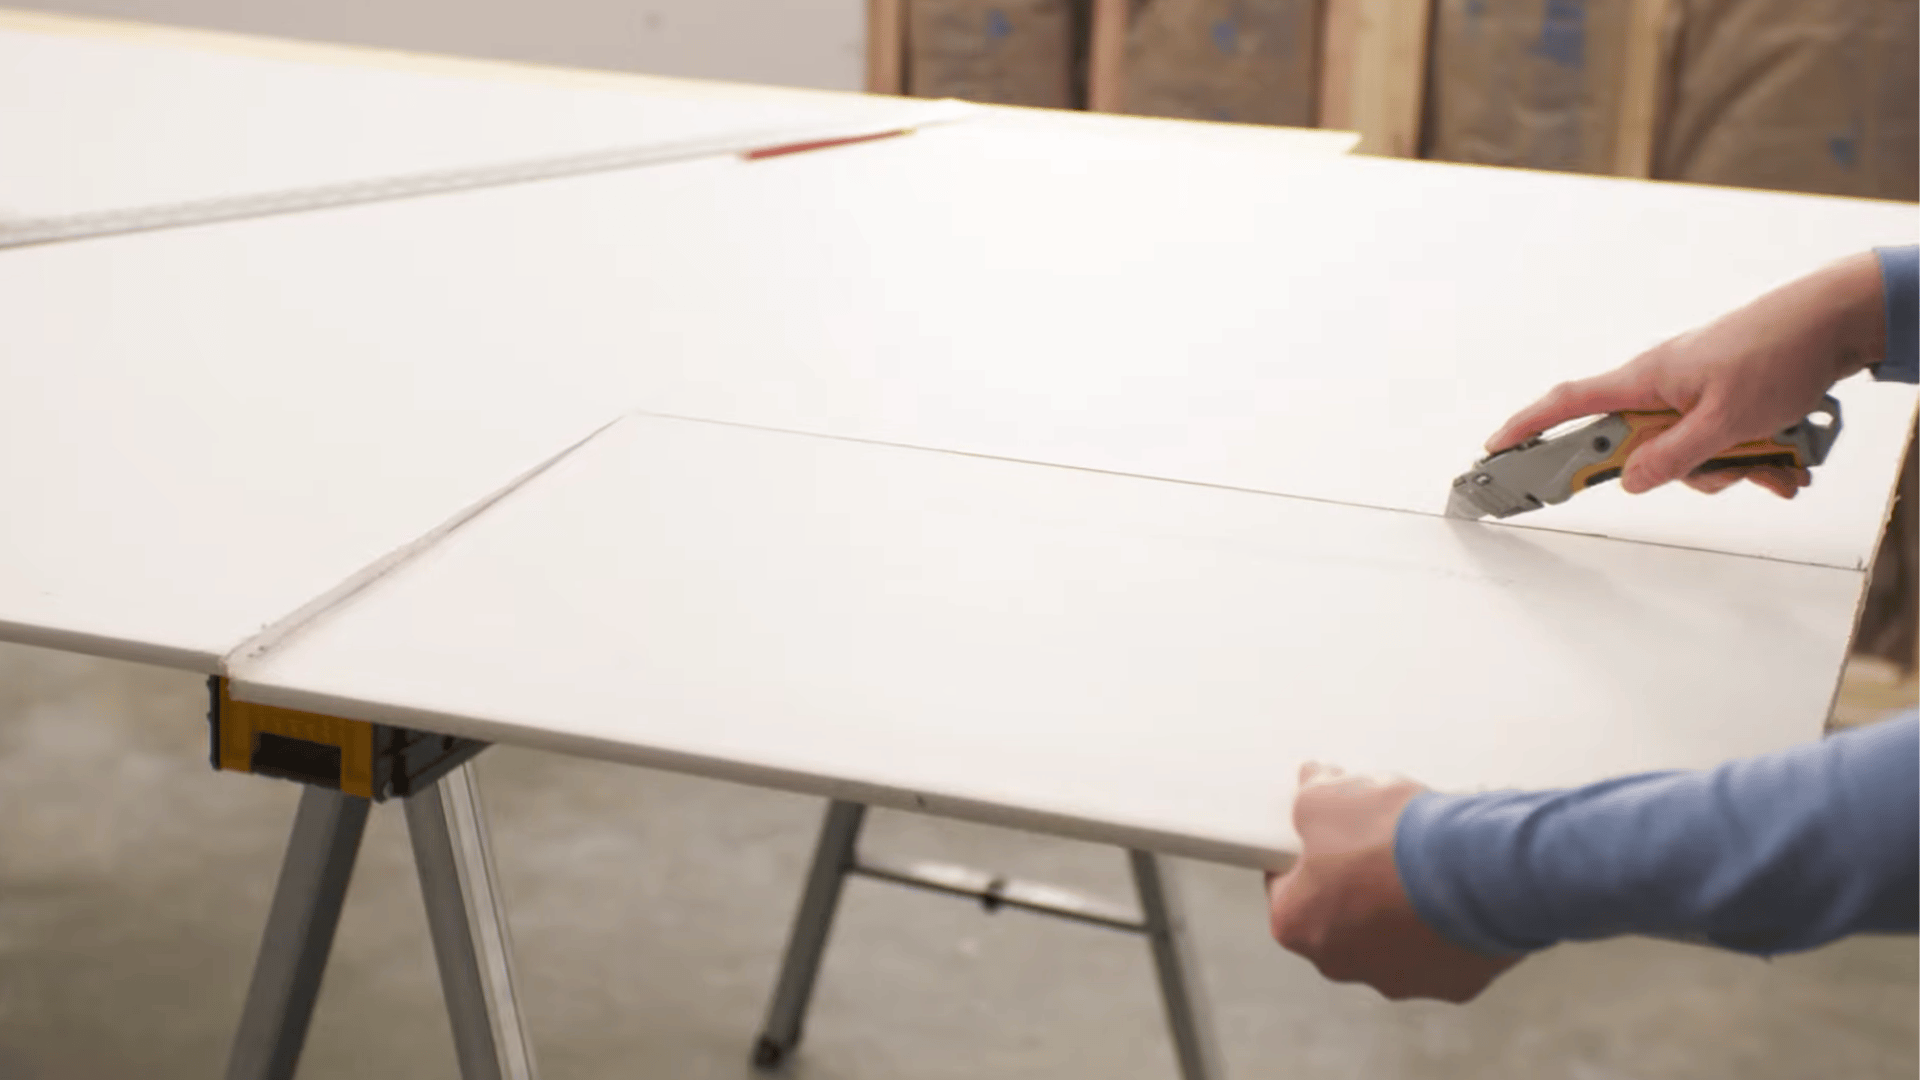
Step 1: Measure the Walls and Cut the Drywall
Begin by measuring the length of each wall carefully to determine the correct drywall size. Once you have your measurements, cut each drywall sheet about 1/4 inch shorter than the wall width.
Leaving this small gap makes it easier to lift, position, and align the panels during installation.
It also helps prevent fit issues caused by slight variations in wall dimensions, allowing for a smoother, more accurate installation process.
Step 2: Hang Drywall Horizontally

Whenever possible, install drywall sheets horizontally rather than vertically.
This approach creates fewer seams across the wall, which makes taping, mudding, and finishing much easier.
Start by hanging the top row of panels first, then work your way down. As you continue, avoid aligning seams directly above or below one another on adjacent sheets.
Staggering the seams helps strengthen the wall and reduces the likelihood of cracks developing in the finished surface over time.
Step 3: Position the Panel and Install the First Screws
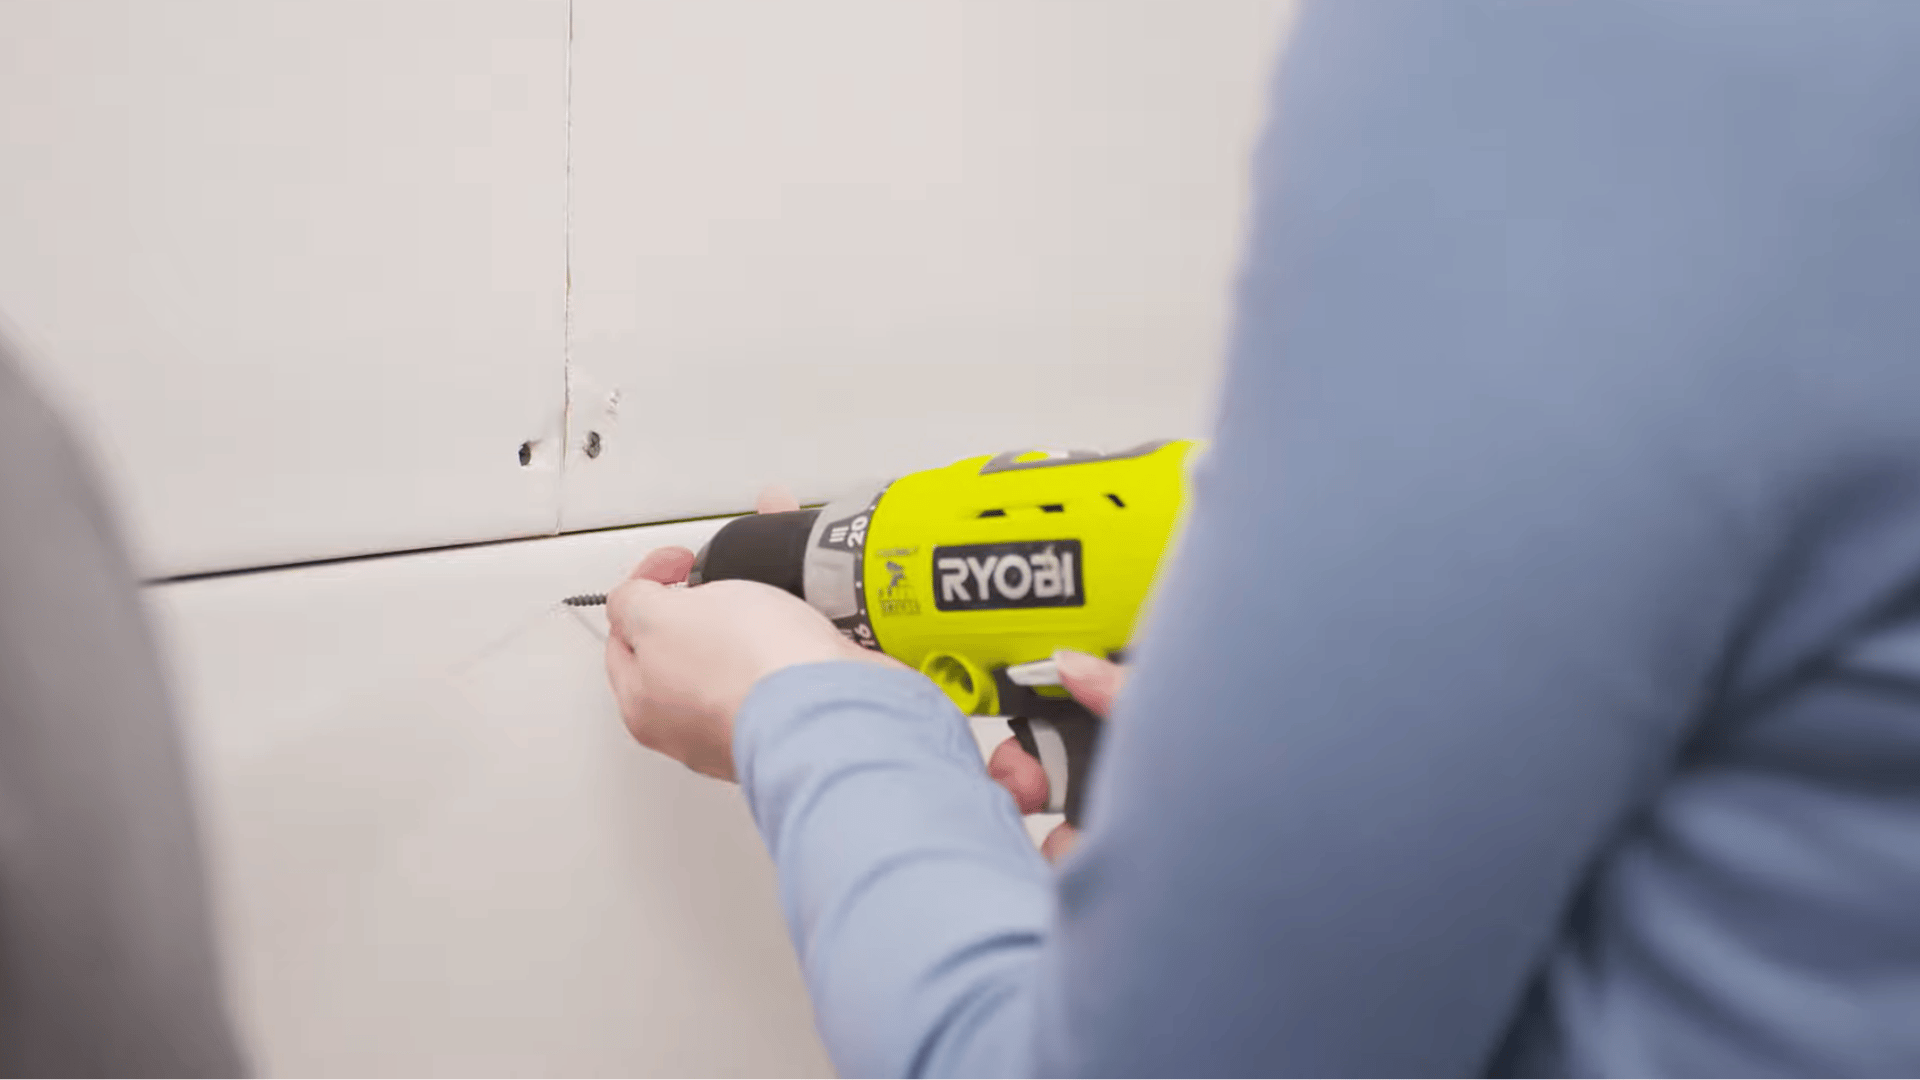
Carefully lift the drywall panel into position and hold it firmly against the wall framing.
Once the sheet is properly aligned, begin securing it by driving drywall screws into the center area of the panel at a comfortable working height.
Starting in the middle helps keep the sheet stable and prevents shifting during installation.
After the panel is anchored, you can continue adding screws throughout the sheet to ensure a secure, even attachment.
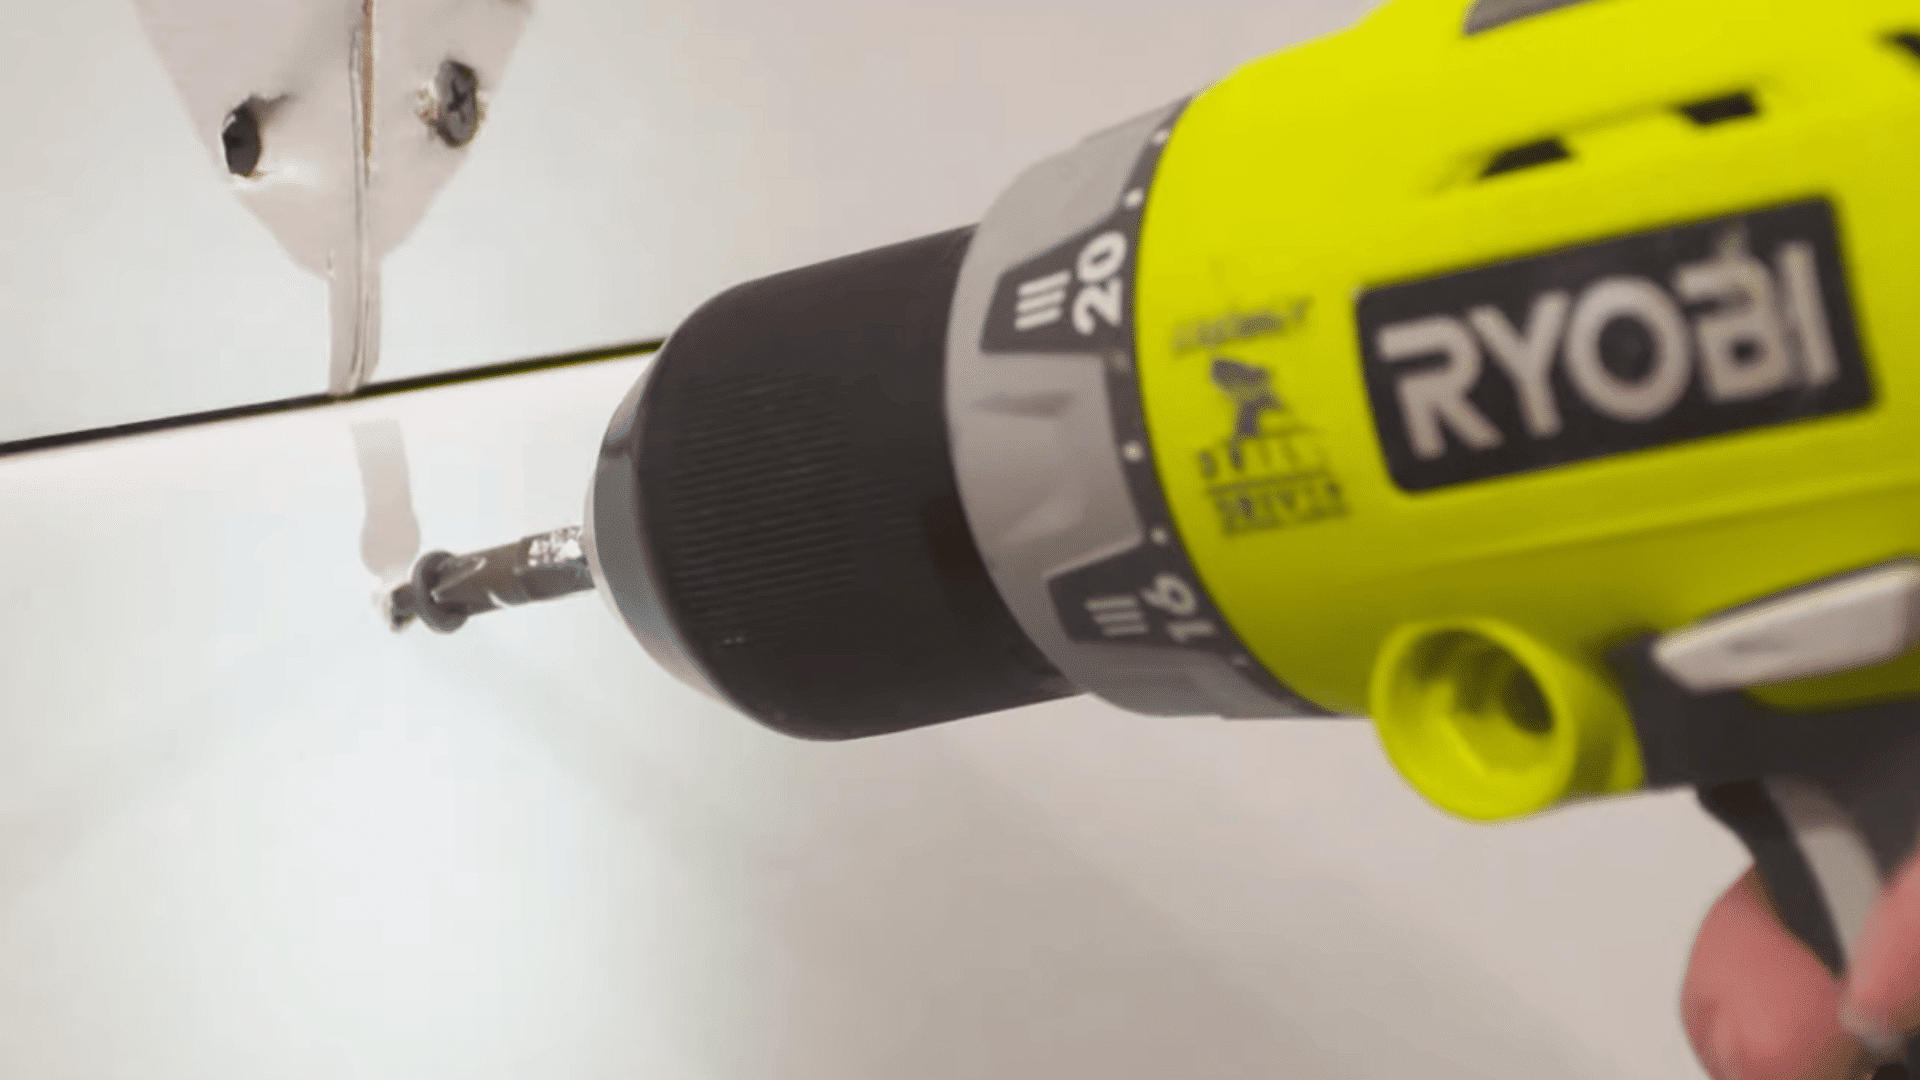
Step 4: Secure the Remaining Screws
Once the first screws are in place, continue securing the drywall by working from the center of the panel toward the outer edges.
This method helps keep the sheet flat against the framing and reduces the chance of warping or gaps.
Space the screws approximately 16 inches apart and ensure each one is driven into a wall stud for a strong hold.
Proper screw placement improves stability and creates a solid foundation for the finishing stages of the project.
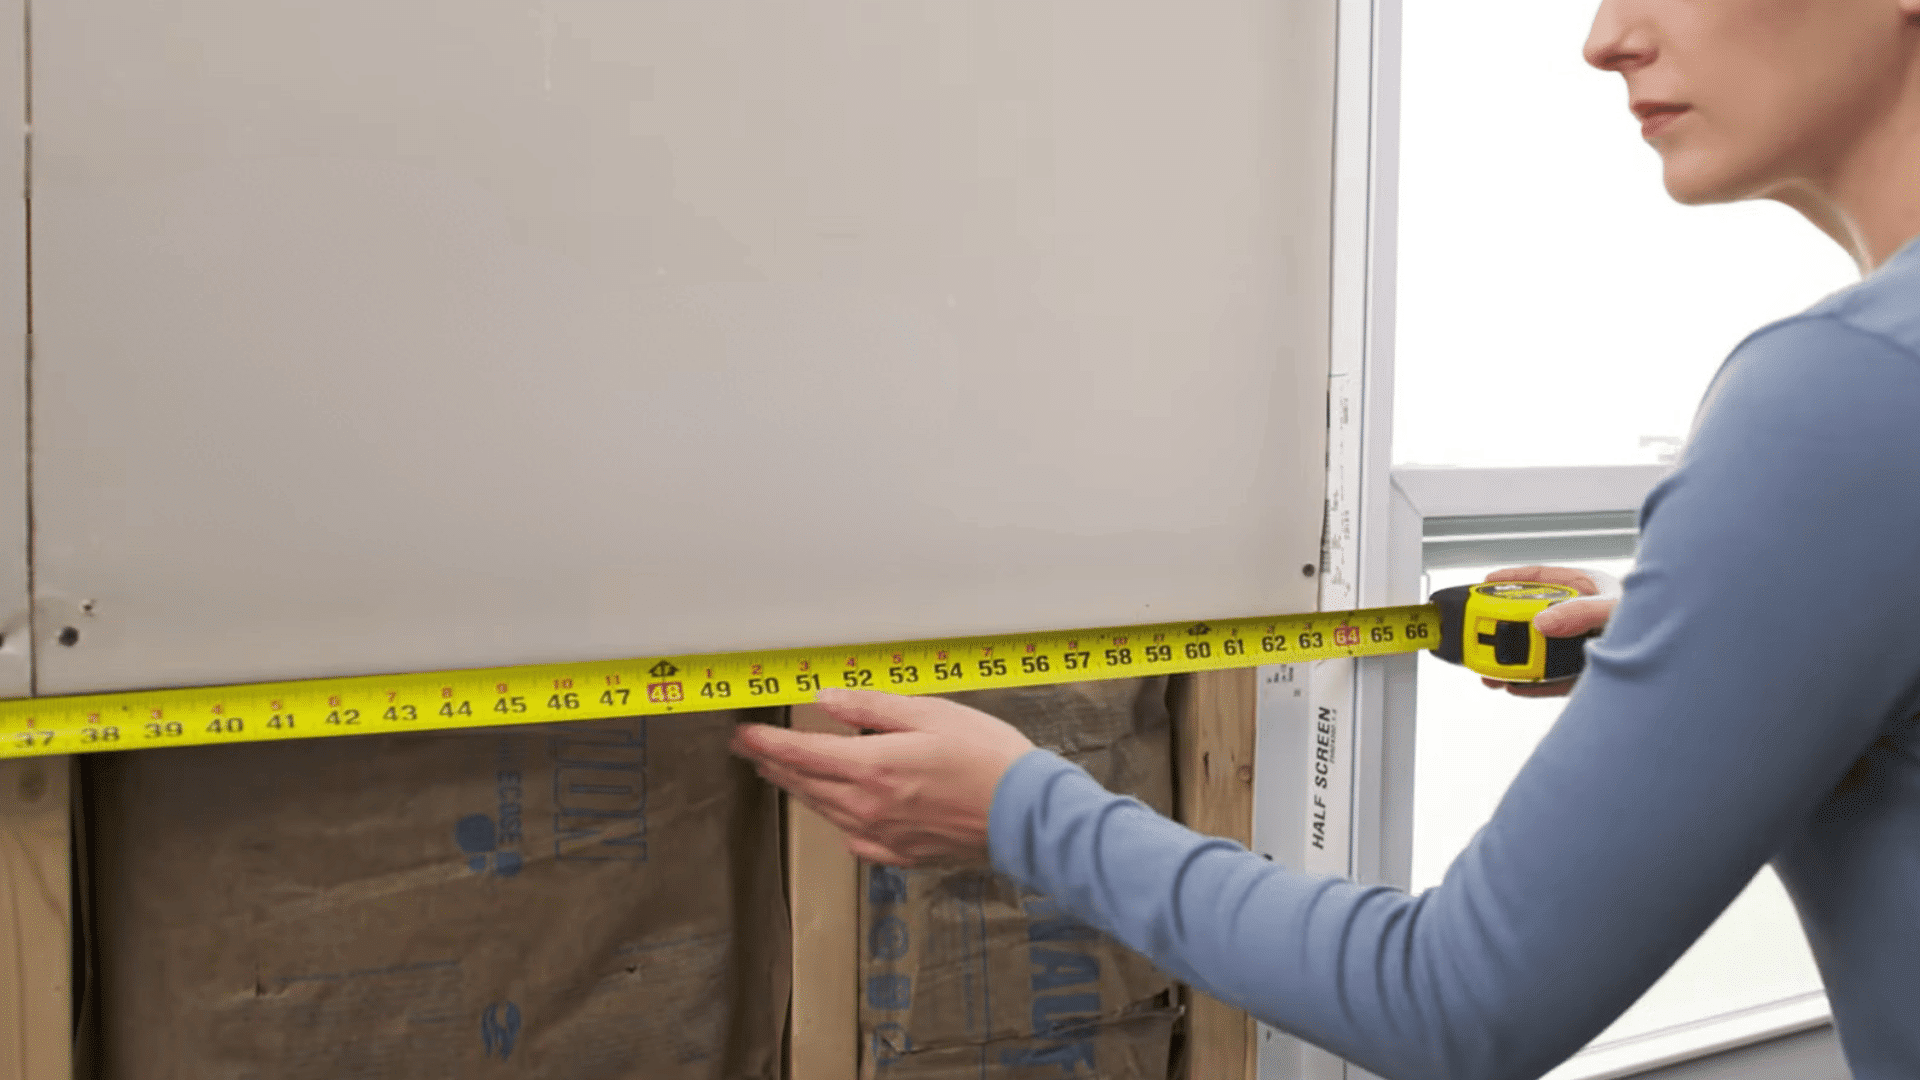
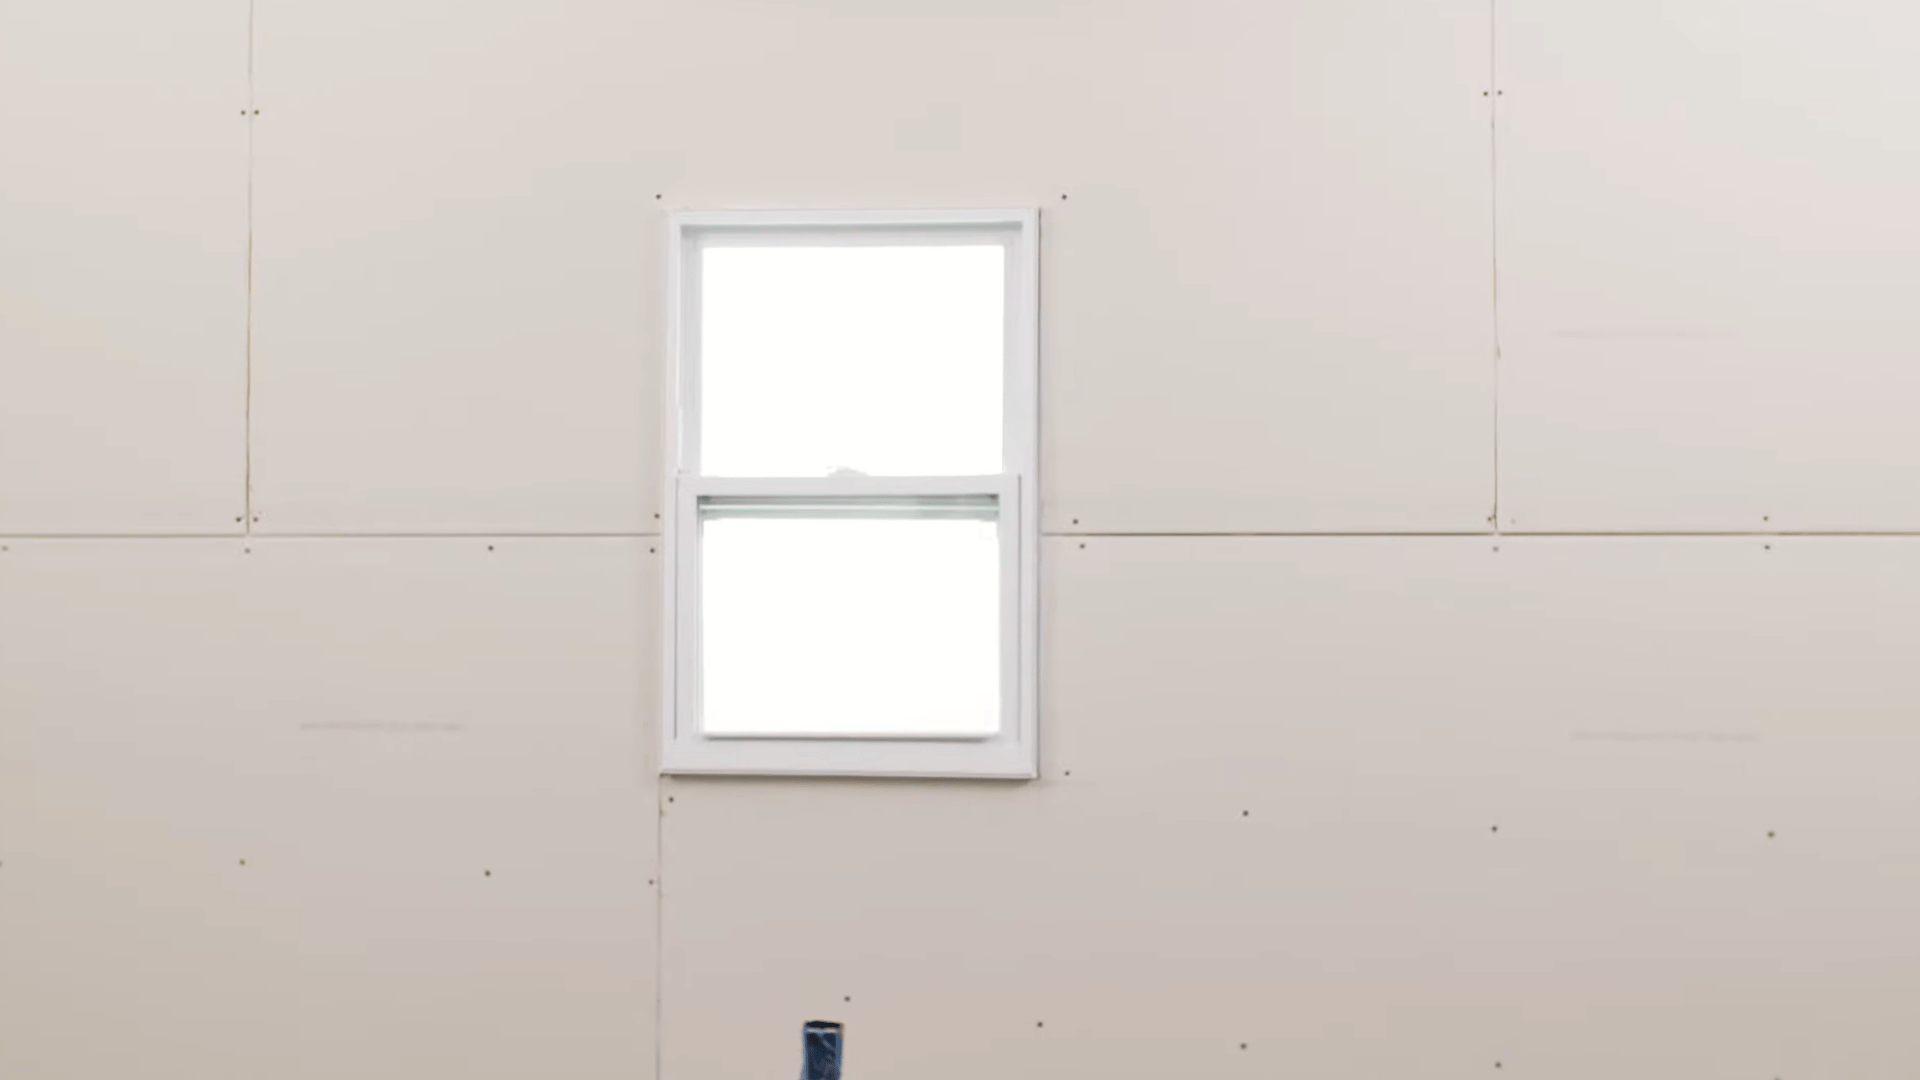
Step 5: Cut Drywall Around Windows
Before hanging drywall around a window, take careful measurements of the opening to ensure a precise fit.
For lower panels, mark where the drywall aligns with the bottom edge and both sides of the window.
For upper panels, measure the distance from the ceiling to the top of the window opening and transfer those measurements to the drywall sheet.
Accurate measuring and cutting help reduce gaps, minimize waste, and create a cleaner, more professional-looking installation around the window frame.
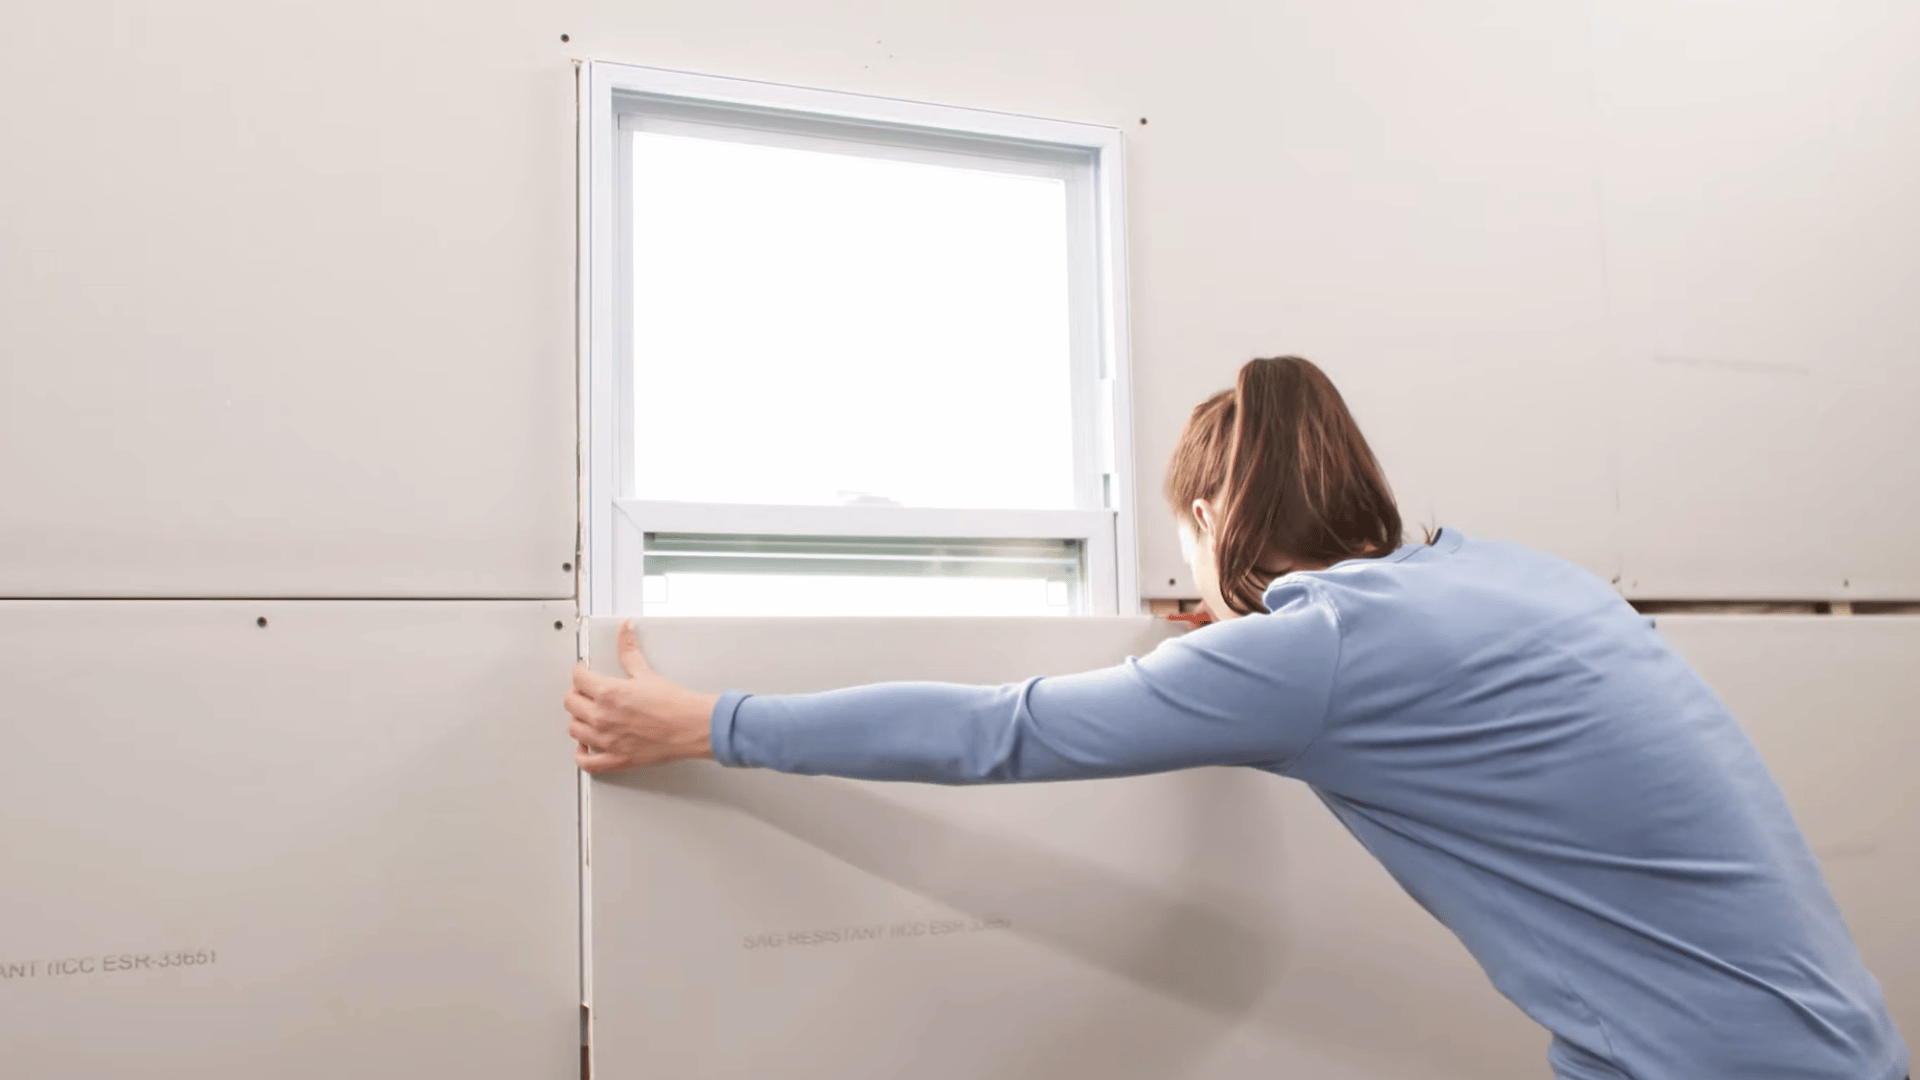
Step 6: Use a Drywall Router for Uninstalled Windows
If the window has not yet been installed, you can simplify the process by first covering the entire opening with a sheet of drywall.
Secure the panel to the wall framing with drywall screws, ensuring it is firmly attached.
Once the sheet is in place, use a drywall router to cut out the window opening by following the edges of the frame.
This method can be faster and often results in cleaner, more accurate cuts than measuring and cutting the opening beforehand.
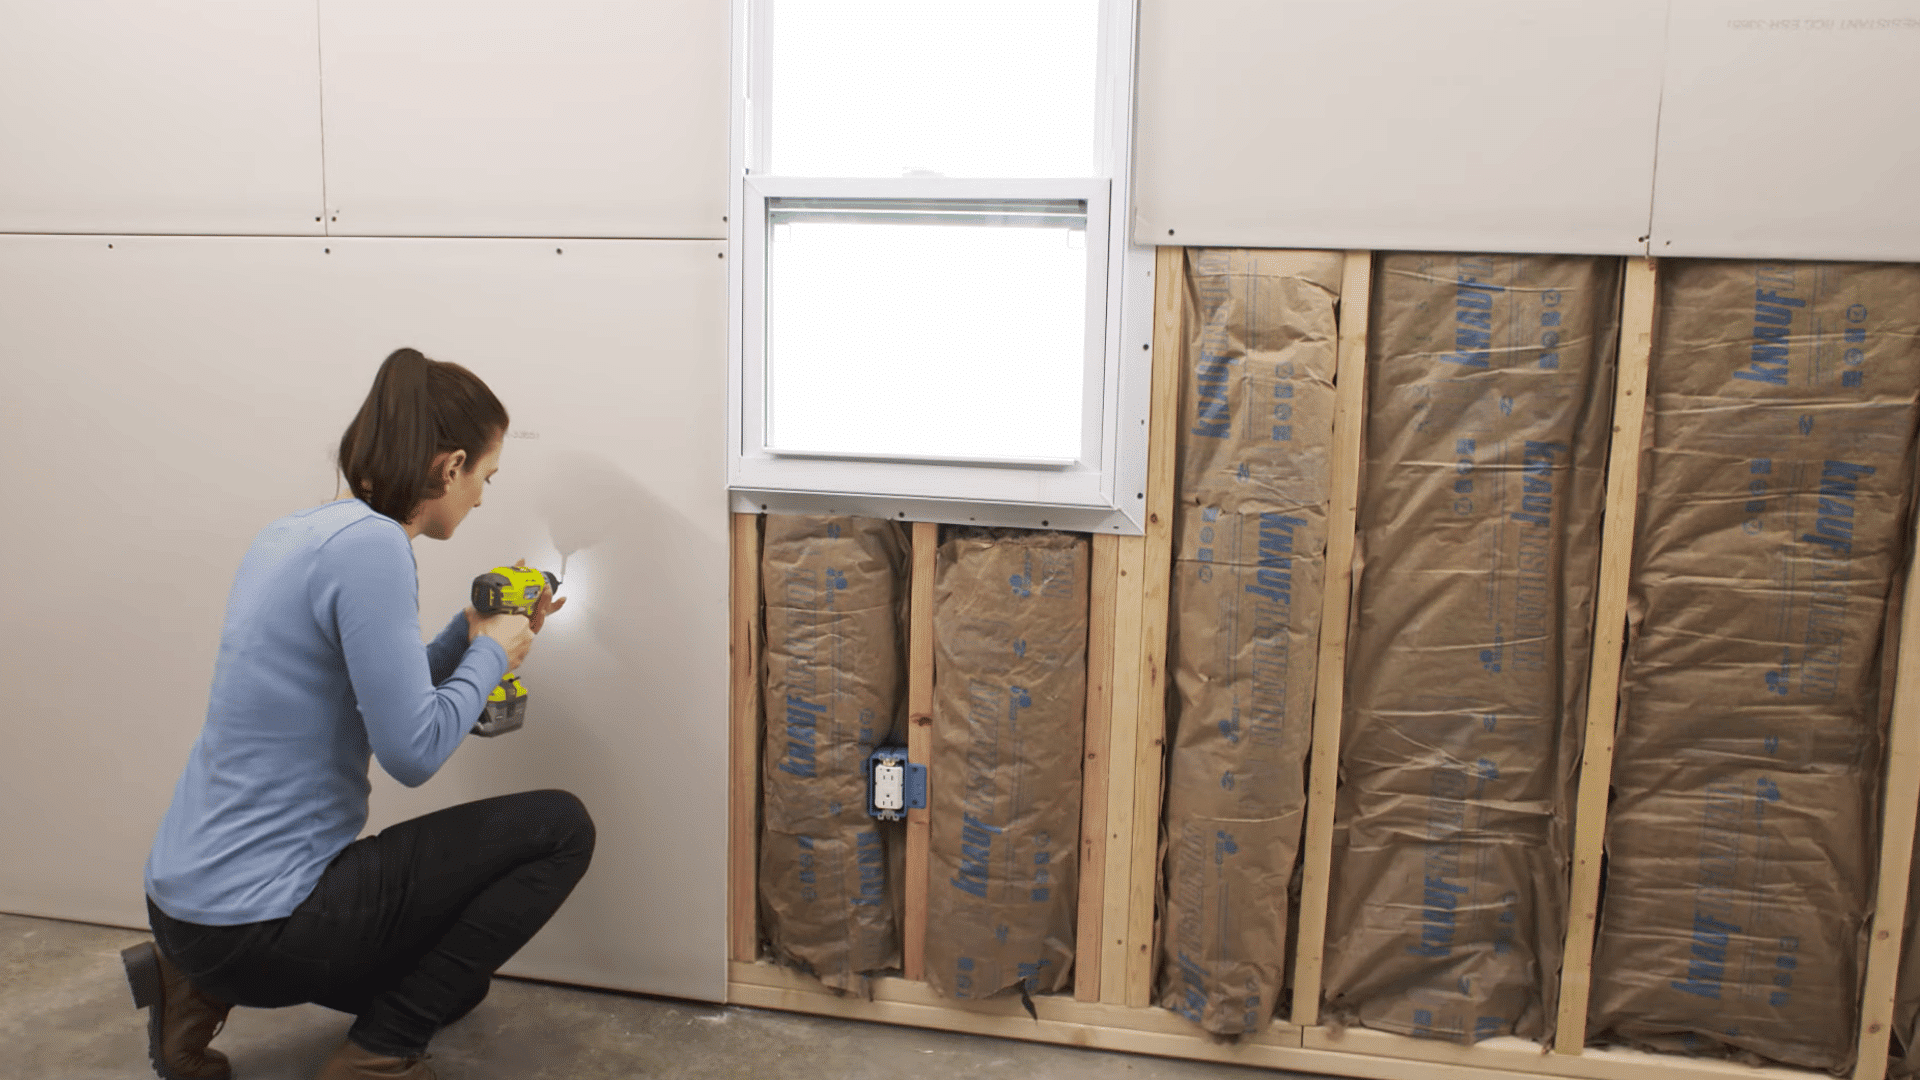
Step 7: Create Openings for Outlets and Fixtures
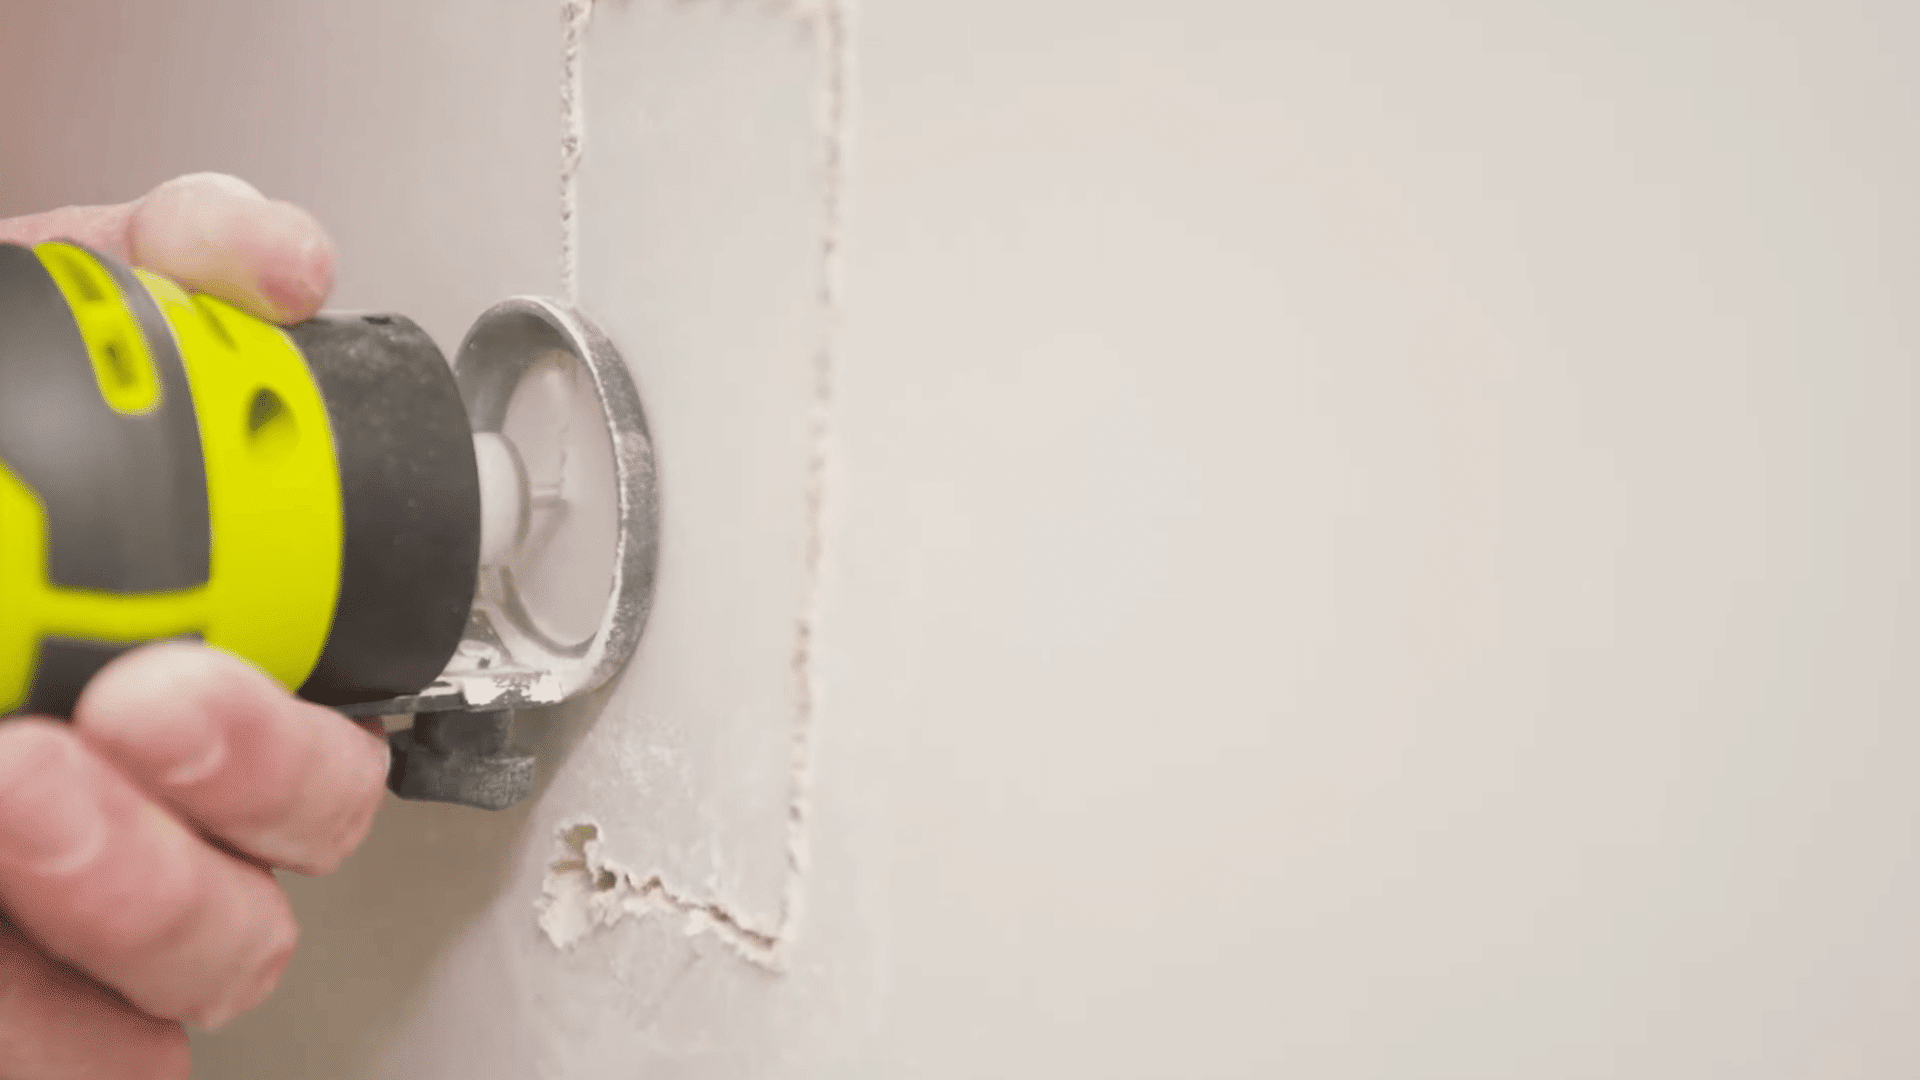
Before hanging the drywall, carefully measure the location of all outlet boxes, switches, and other wall fixtures.
Transfer these measurements onto the drywall sheet and mark them clearly.
After that, install the drywall panel over the covered box and secure it with just enough screws to hold it in place.
Finally, use a spiral saw to cut around the edges of the box or fixture. This approach helps create accurate openings and reduces the risk of measurement errors.
Step 8: Install Metal Corner Beads
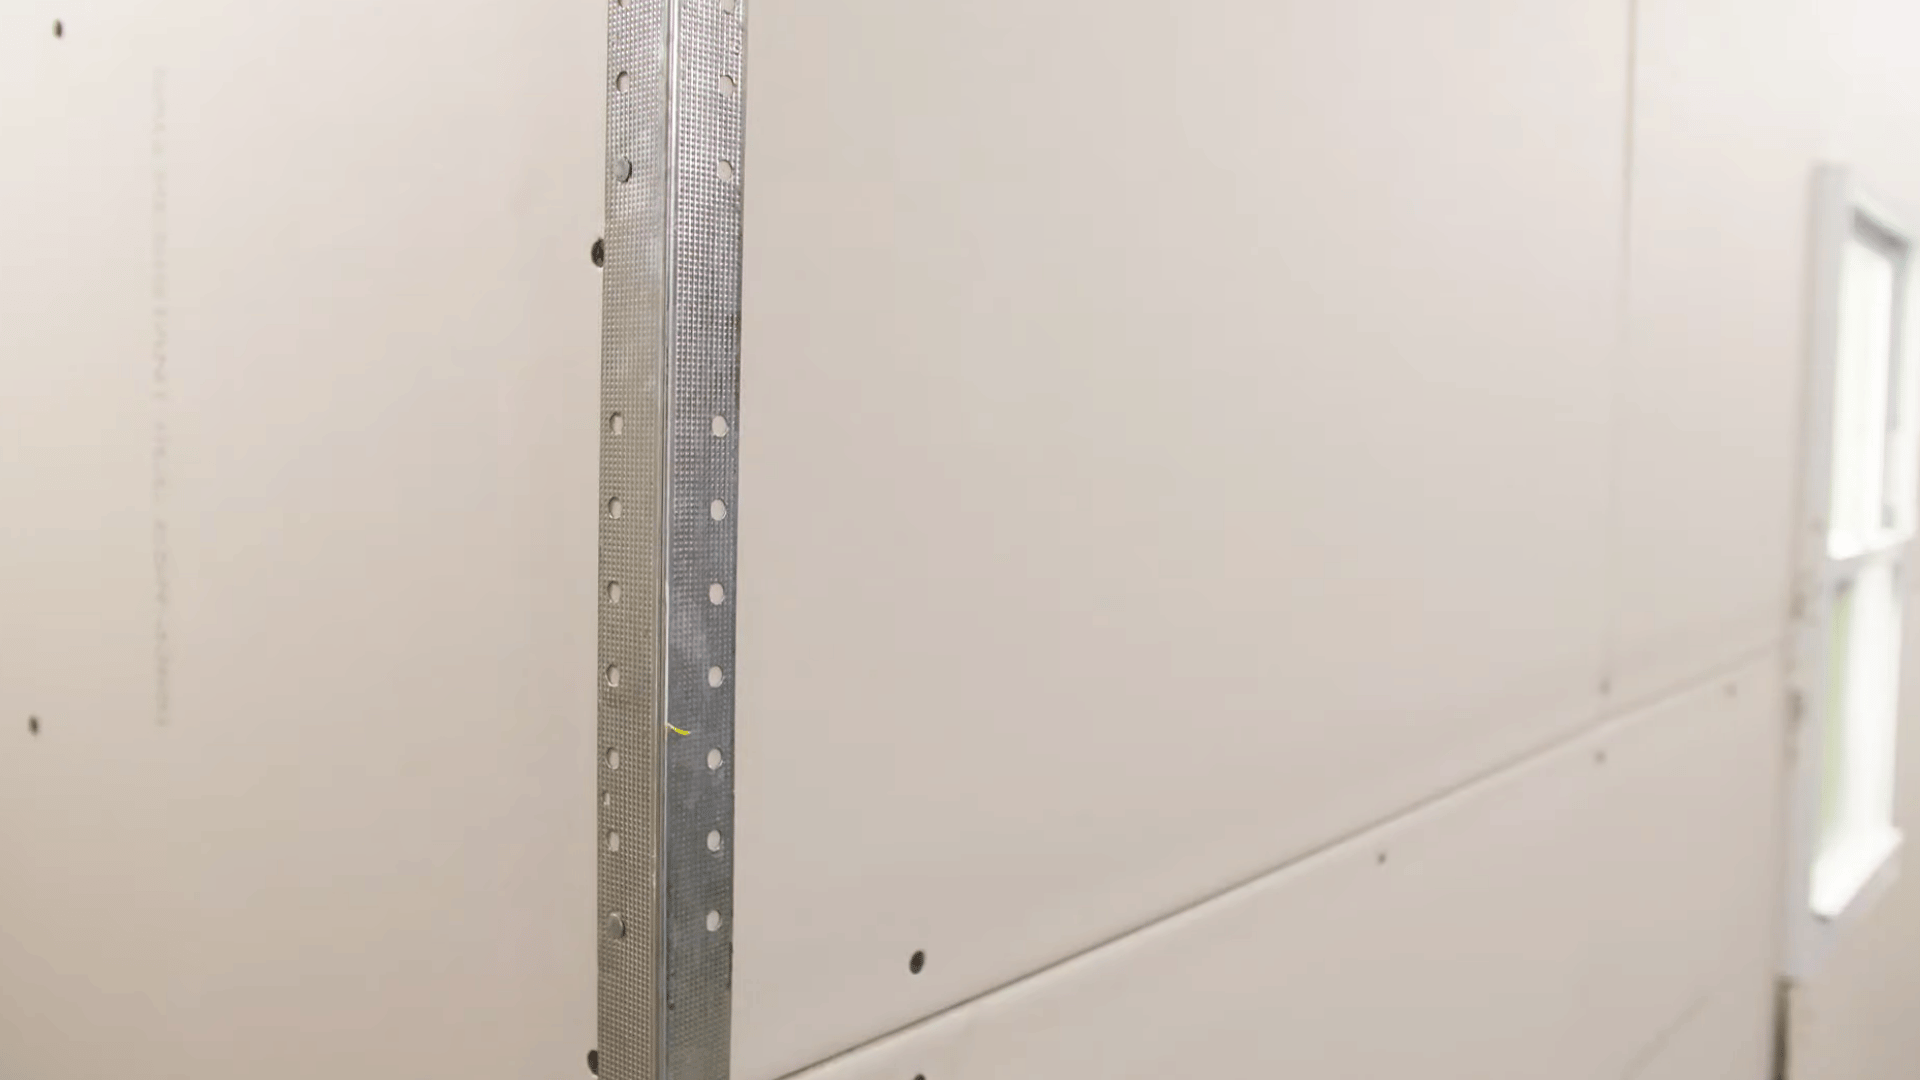
To protect outside corners from damage and create clean, straight edges, install a metal corner bead after the drywall is in place.
Use tin snips to cut the bead so it is about 1/2 inch shorter than the corner height. Position it tightly against the corner and check that it sits evenly from top to bottom.
Then secure it by driving nails every 9 inches along both sides. Properly installed corner bead helps create stronger corners and makes finishing work much easier.
Step 9: Install the Final Drywall Sheet
Cut the final drywall sheet so it is about 1/4 inch shorter than the remaining opening. This small gap makes it easier to maneuver the panel into place without damaging the edges.
Carefully fit the sheet between the corner and the last installed panel, making sure it aligns properly with the surrounding drywall.
Once the panel is positioned correctly, secure it to the wall studs using drywall screws.
Proper fitting and fastening help create a stable surface and reduce problems during the finishing stage.
Step 10: Create a V-Groove for Easier Finishing
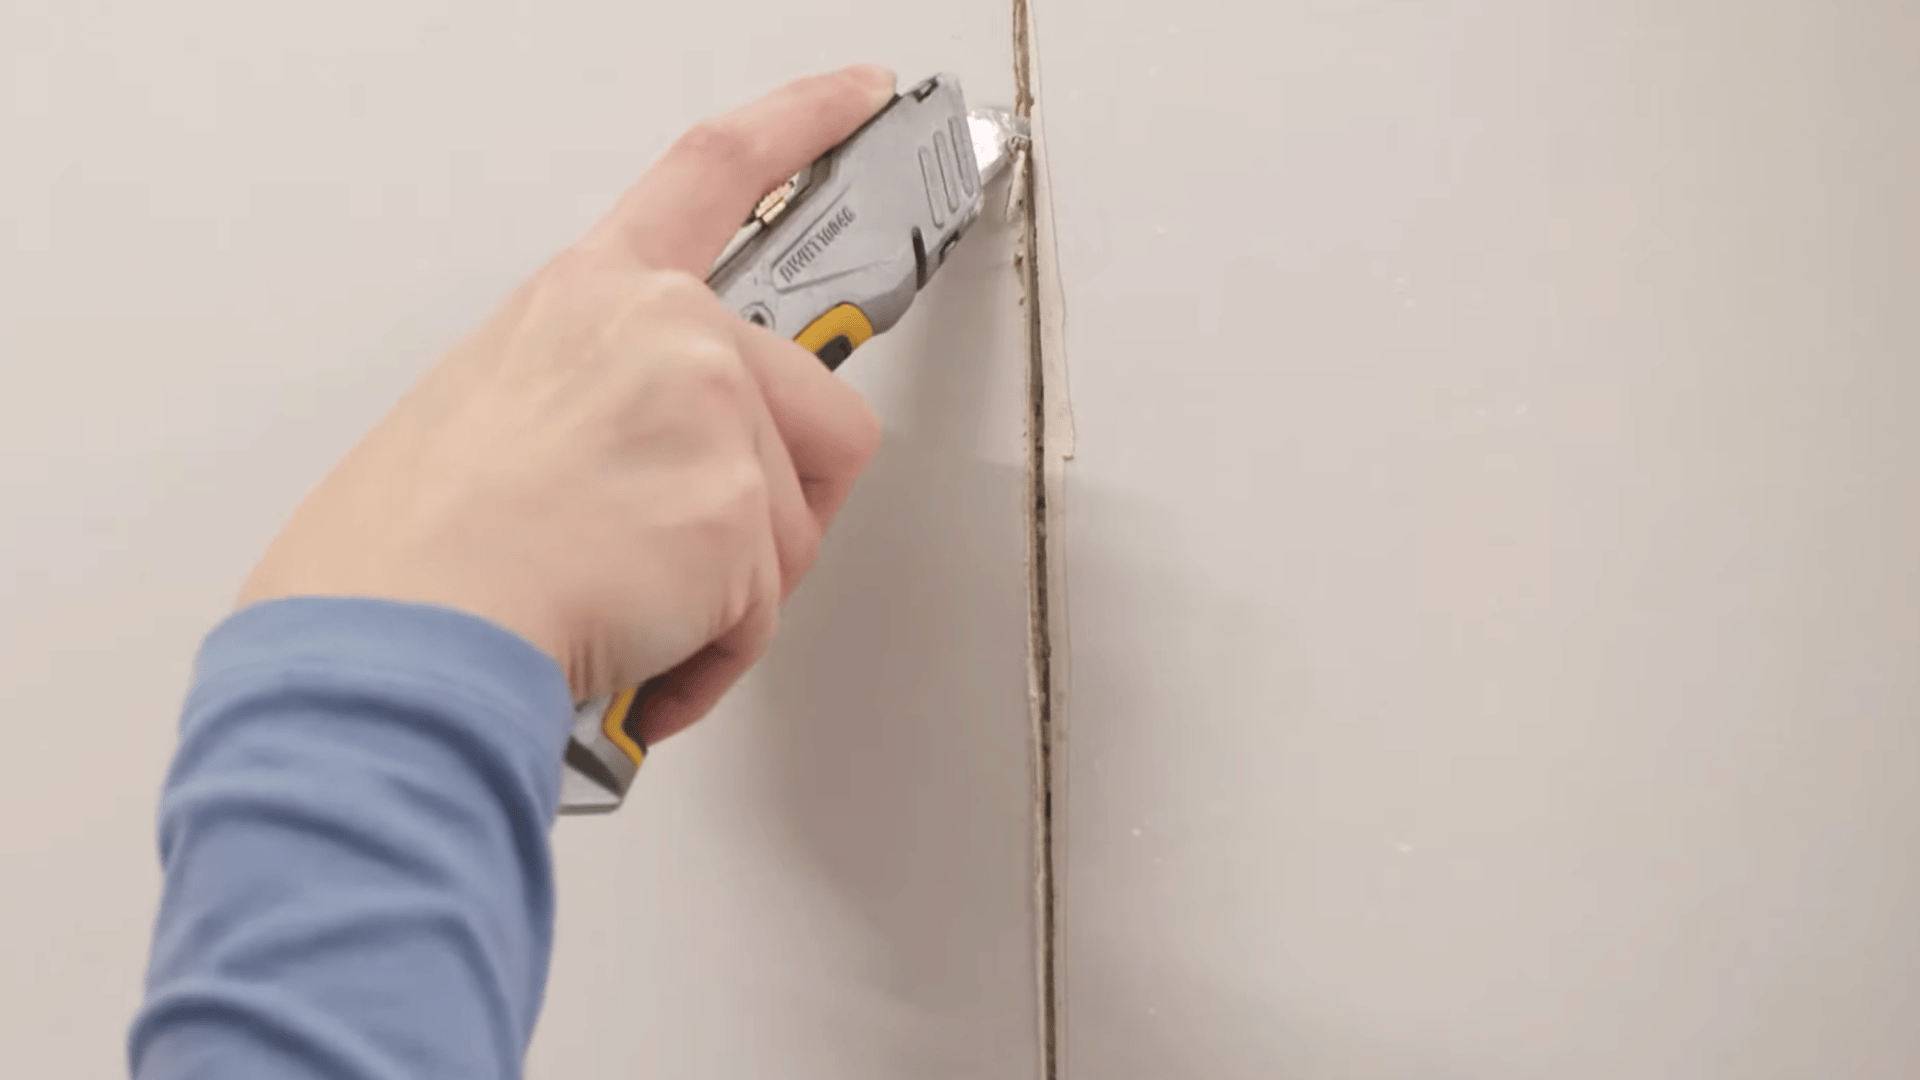
Use a utility knife to cut a small V-groove along the short, non-tapered edges where two drywall panels meet.
Creating this shallow groove provides extra space for joint compound and tape, making the seam easier to conceal during the finishing process.
Take care to remove only a small amount of material and keep the cut consistent along the joint.
This simple step can help create a smoother surface and improve the appearance of the finished wall once taping, mudding, and sanding are complete.
Step 11: Prepare for Taping and Finishing
Once all the drywall panels have been installed and secured, the project moves into the finishing stage.
Begin by applying drywall tape over every joint and seam to help prevent cracks from forming later. Next, cover the tape and screw heads with joint compound, spreading it evenly across the surface.
After the compound dries, sand the area smooth and apply additional coats as needed.
Proper taping and finishing help hide seams, create a uniform appearance, and prepare the walls for primer, paint, or other decorative finishes.
This tutorial is based on a helpful video from The Home Depot. You can check out the original video on their YouTube channel here or watch it below.
Common Types of Drywall for Different Rooms
Different rooms have different moisture, safety, and durability needs, so choosing the right type of drywall is important for long-lasting results.
| Type of Drywall | Best Used In | Key Benefit |
| Standard Drywall (White Board) | Living rooms, bedrooms, hallways | Affordable and suitable for most interior spaces |
| Moisture-Resistant Drywall (Green Board) | Bathrooms, laundry rooms, kitchens | Helps resist moisture and humidity |
| Mold-Resistant Drywall | Basements, bathrooms, damp areas | Reduces the risk of mold growth |
| Fire-Resistant Drywall (Type X) | Garages, utility rooms, shared walls | Provides added fire protection |
| Soundproof Drywall | Home offices, bedrooms, media rooms | Helps reduce noise transfer between rooms |
| Impact-Resistant Drywall | Children’s rooms, high-traffic areas | More resistant to dents and damage |
How to Calculate the Amount of Drywall You Need?
To calculate the amount of drywall you need, measure the total square footage of the walls and ceilings, then divide by the square footage of a drywall sheet.
Add extra material for waste and cutouts. Start by measuring the height and width of each wall, then multiply those numbers to find the square footage.
Repeat this process for every wall and ceiling surface you plan to cover. Add all the measurements together to get the total area.
Next, divide the total square footage by the size of the drywall sheets you plan to use. For example, a standard 4×8 sheet covers 32 square feet.
Most professionals recommend purchasing an additional 10% to 15% of drywall to account for mistakes, waste, and cuts around windows, doors, and electrical fixtures.
Quick Drywall Installation Tips
A few simple techniques can make drywall installation easier and help improve the quality of the finished project.
- Install Panels Horizontally: Hanging drywall horizontally creates fewer seams, reducing taping work and helping produce a stronger, smoother finished wall.
- Start With the Top Row: Installing upper panels first provides better support for lower sheets and helps keep joints aligned properly.
- Work From the Center Outward: Driving screws from the center toward the edges keeps panels flat and reduces gaps or bowing.
- Keep Screws Properly Spaced: Placing screws at the recommended intervals helps secure the drywall firmly and prevents movement after installation.
- Stagger Drywall Seams: Avoid aligning seams on adjacent panels to improve wall strength and reduce the likelihood of cracks.
- Measure Openings Carefully: Accurate measurements around windows, outlets, and fixtures help create cleaner cuts and minimize material waste.
- Leave a Small Installation Gap: A slight gap around panels makes positioning easier and accommodates minor framing irregularities during installation.
- Use a Helper for Large Sheets: Having another person assist with lifting and positioning panels improves safety and installation accuracy.
What to Do After Hanging Drywall?
After hanging drywall, the next steps are taping the joints, applying joint compound, sanding the surface, and preparing the walls for primer and paint.
These finishing tasks help create a smooth, seamless appearance. Start by applying drywall tape over all seams and joints to reinforce them and reduce the risk of cracks.
Next, spread a thin layer of joint compound over the tape and screw heads, feathering the edges for a smooth transition.
Allow the compound to dry completely before sanding it lightly. Most projects require multiple coats of compound, with sanding between coats, to achieve a flat surface.
Once the walls feel smooth and the joints are no longer visible, remove any dust and apply a drywall primer.
This prepares the surface for paint and helps ensure an even, professional-looking finish.
How to Hang Drywall on Ceilings?
Hanging drywall on ceilings requires careful handling because the panels must be secured overhead. Following the correct installation process helps create a strong, stable surface and reduces the risk of cracks or sagging.
- Ceiling Installation: Use a drywall lift to safely support panels during installation and minimize the chance of damage.
- Panel Orientation: Install drywall sheets perpendicular to the ceiling joists for greater strength and support.
- Screw Placement: Fasten screws every 12 inches along each joist to keep the panels securely attached.
- Seam Layout: Work from one end of the room to the other while staggering seams between adjacent panels.
- Installation Order: Hang ceiling drywall before wall drywall so the wall panels can support the ceiling edges.
Drywall Hanging Mistakes to Avoid
Understanding common drywall mistakes can help improve installation quality and reduce problems during finishing.
| Mistake | Why It Is a Problem |
| Overdriving Screws | Driving screws too deep tears the drywall paper, reducing holding strength and increasing the likelihood of panels loosening. |
| Aligning Seams | Placing seams directly in line creates weak spots that increase the chances of visible cracks developing later. |
| Incorrect Measurements | Inaccurate measurements lead to poorly fitting panels, extra cutting, wasted material, and unnecessary installation delays. |
| Using Too Few Screws | Insufficient screws can allow drywall sheets to shift, sag, or pull away from framing over time. |
| Forgetting Outlet Locations | Missing outlet measurements result in incorrect cutouts, which require additional repairs and significantly slow installation progress. |
| Damaging Panel Edges | Broken or chipped edges make taping difficult and can leave noticeable imperfections after finishing work. |
Conclusion
Learning how to hang drywall may seem challenging at first, but it becomes much more manageable when you take the process one step at a time.
From measuring and cutting panels to finishing the surface, every step affects the final result.
In my experience, patience, careful planning, and attention to detail are key to creating smooth, professional-looking walls. Even if this is your first drywall project, do not feel pressured to get everything perfect right away.
Each project helps build skills and confidence. With the right tools and techniques, you can create a strong foundation for a successful renovation.
Have you ever hung drywall before? Share your experience, tips, or questions in the comments below.
Frequently Asked Questions
Should Drywall Be Nailed or Screwed?
Drywall screws are generally preferred because they provide a stronger hold, reduce nail pops, and help keep panels securely attached over time.
Why Do Drywallers Start at the Top?
Drywallers install the top panels first because they support the lower panels and help create tighter joints near the ceiling.
Why Leave a Gap at the Bottom of Drywall?
A small gap prevents moisture from the floor from being absorbed and allows for slight building movement without damaging the drywall.
Do You Stagger Drywall Seams on Walls?
Yes. Staggering drywall seams strengthens the wall, improves stability, and reduces the chance of visible cracks forming later.