
Let’s talk about a simple home upgrade that can totally change a room without breaking the bank: beadboard wainscoting.
I first fell in love with this look when visiting my grandma’s farmhouse, where wooden panels added instant warmth and character to her kitchen walls.
Imagine adding texture and classic style to your space for just a few dollars per square foot. This isn’t some complicated renovation – it’s a weekend project that can make any room feel cozy and inviting.
No matter if you’re living in a modern apartment or a vintage home, beadboard wainscoting works magic. In this guide, I’ll walk you through:
- Exact materials you’ll need
- Step-by-step installation process
- Budget-friendly tips
- Ways to cut costs without compromising style
Ready to upgrade your walls? Let’s get started!
What You’ll Need Before You Begin
Before you start, gather the following:
- 4×8 sheets of beadboard (roughly $21 per sheet at Home Depot/Lowe’s)
- Measuring tape
- Pencil & level
- Table saw or circular/skill saw with a guide
- Jigsaw (for detailed cuts around obstacles)
- Brad nailer with compressor (or finish nails and hammer)
- Caulk and caulking gun (preferably paintable silicone)
- Wood filler or putty
- Sandpaper (medium/fine grit)
- Molding or chair rail for top trim
- Paint and brushes or roller
How to Install Beadboard Wainscoting?
Beadboard wainscoting can completely turn a plain bathroom into a warm, inviting space, without spending a fortune.If you’re a beginner or just looking to refresh your space, these steps will help you get it done like a pro.
Step 1: Choose Your Beadboard and Plan the Layout
Start by deciding how high you want the wainscoting to go. Opt for a 4-foot height, which is visually balanced for a standard bathroom and aligns well with vanities.
Next, consider your baseboard. If it’s already installed and in good shape, you can leave it on the wall and install the beadboard above it. This saves time and eliminates the need to reinstall trim later.
Step 2: Understand Panel Alignment and Start Measuring
Beadboard sheets have edge patterns designed to interlock; one side ends in a groove (bead), and the other starts with a flat edge.
It’s important to align each panel so the bead lines continue seamlessly across the wall. Start with the bead edge facing out on your first panel, then flip the next piece accordingly to match up the pattern.
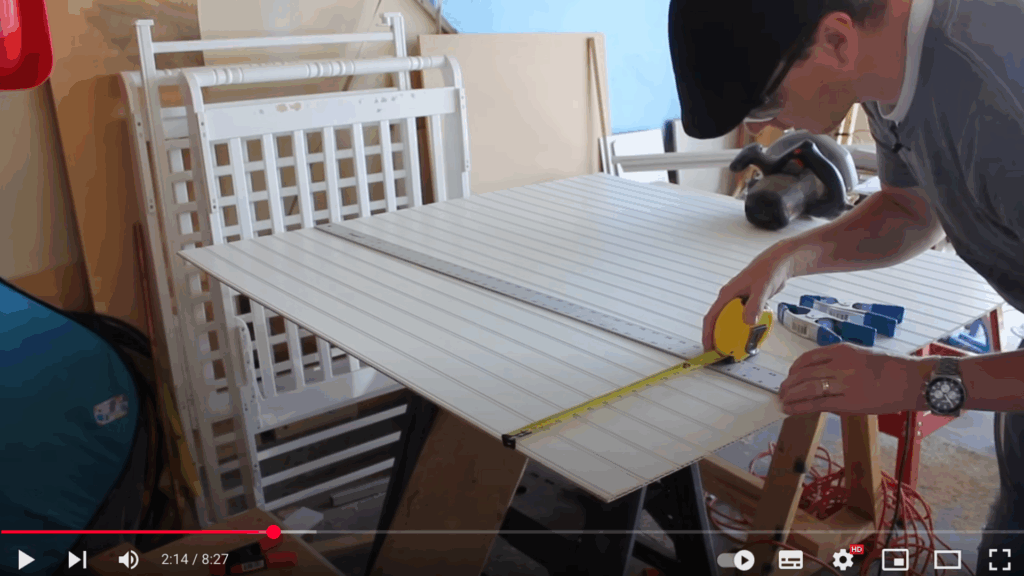
Measure each wall segment precisely and write your dimensions down. Double-check everything before you start cutting.
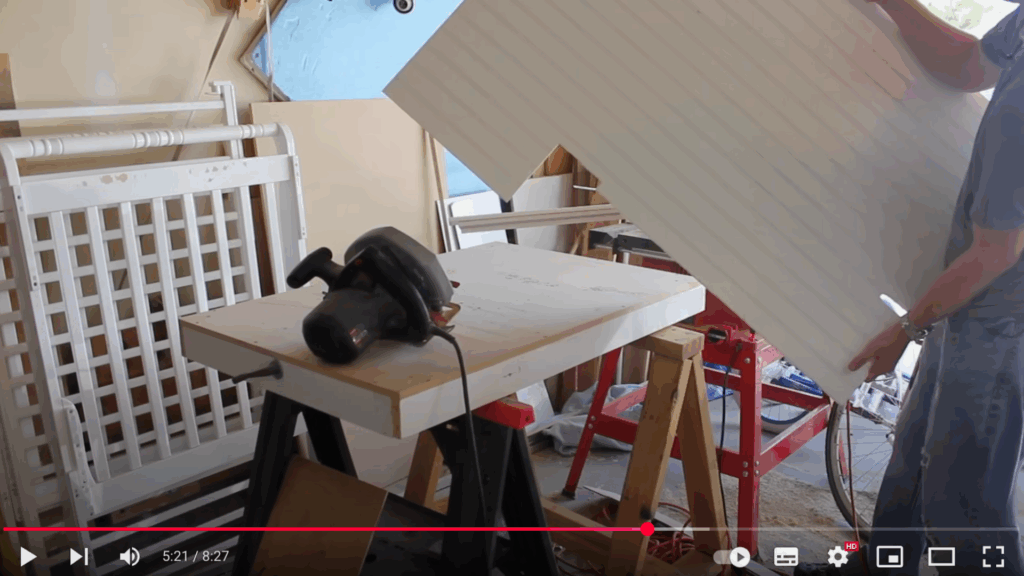
Step 3: Cut Your Panels with a Skill Saw
Use a skill saw and a guide to ensure perfectly straight cuts. First, determine the distance from the edge of the saw’s guide to the blade.
For example, if it’s 1-3/16″, add this measurement to the target cut (8-1/4″) to calculate where the guide should be positioned (9-7/16″).
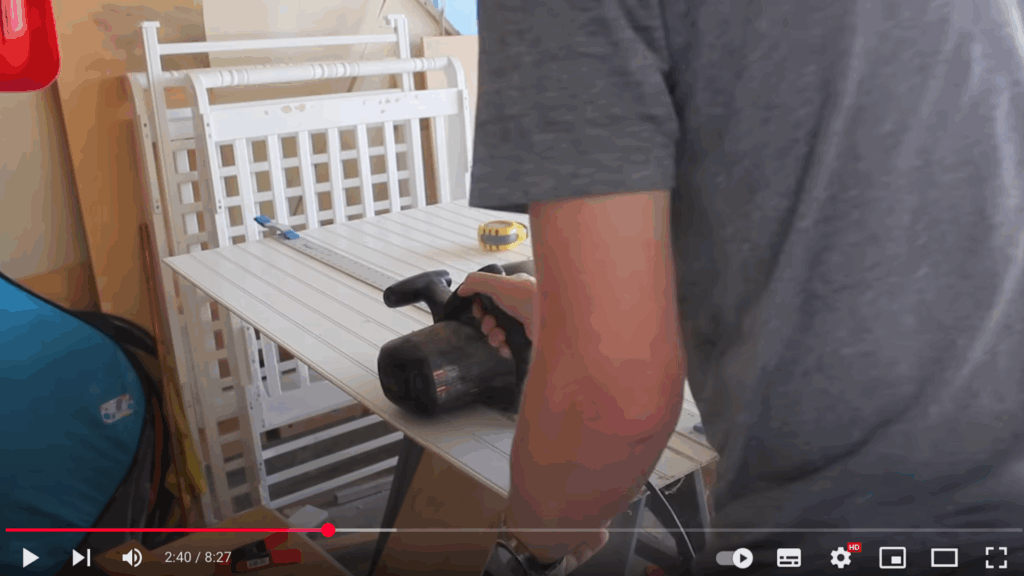
Important tip: Always cut beadboard face down. The blade enters from the bottom, which results in a cleaner cut on the decorative side. If you forget, you may end up with chipping or a rough edge that needs sanding.
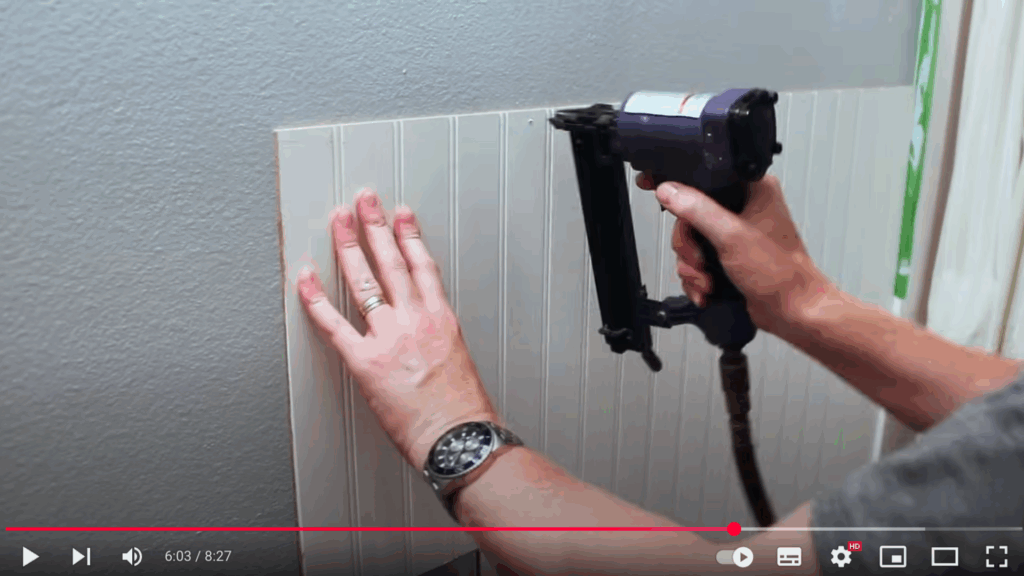
Step 4: Begin Installing the Beadboard
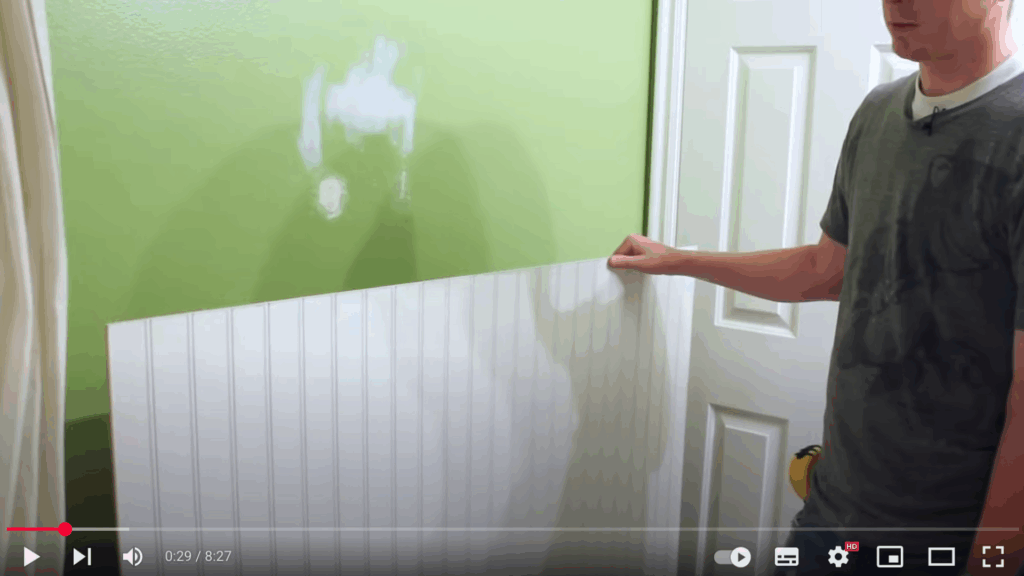
Once your panels are cut, it’s time to install. Start at one end of the wall and make sure the first panel is level and flush against both the baseboard and the wall.
Use a brad nailer to tack the panel in place, starting at the bottom and working your way up. If you don’t have a nailer, use finish nails and a hammer; it’s slower, but effective.
Nails should be placed strategically, first along the bottom, if you plan to install baseboard over it, along the top, where they’ll be hidden by trim and additional nails in the middle or corners, if necessary (to reduce warping).
If the nails are visible, plan to fill them with wood putty before painting.
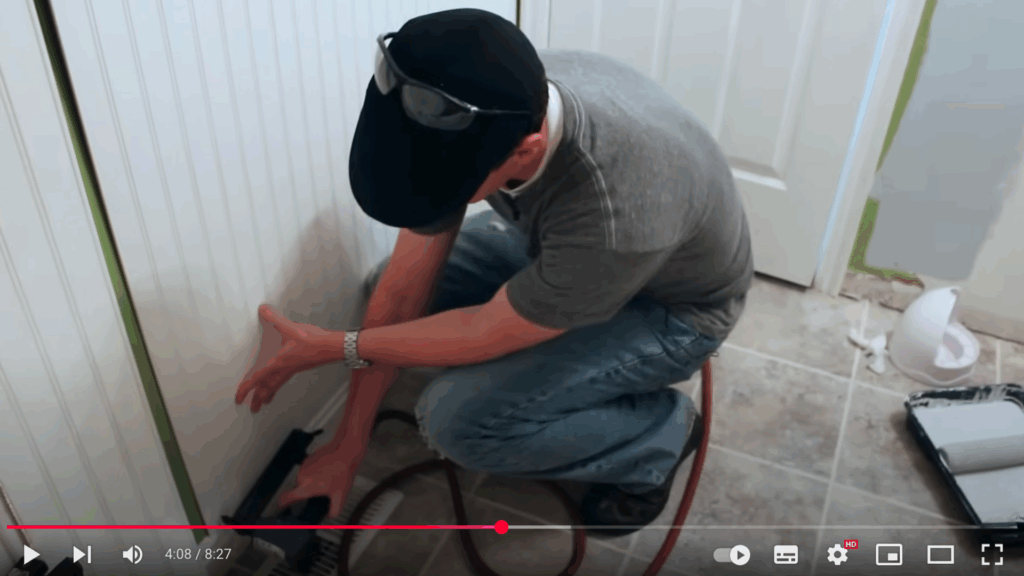
Step 5: Make Custom Cuts Around Obstacles
Bathrooms usually have pipes, vanities, and countertops that beadboard must be cut around. For this, use a jigsaw.
Measure carefully, then cut out notches or holes in your panels to accommodate fixtures like plumbing lines under sinks, countertops, and vanities, and electrical outlets (if needed).
Dry-fit each panel before installing to check for a snug fit. A small trim ring or molding can help cover minor imperfections around pipes.
Step 6: Continue Panel Installation
Work your way around the room, installing each panel. Make sure to match up the edges cleanly and maintain level alignment across the top of the panels.
If you need to remove a panel to adjust the fit, don’t worry, brad nails are forgiving, and the panels usually come off cleanly. Just re-tack them once you’re satisfied with the layout.
Step 7: Install the Top Trim or Chair Rail
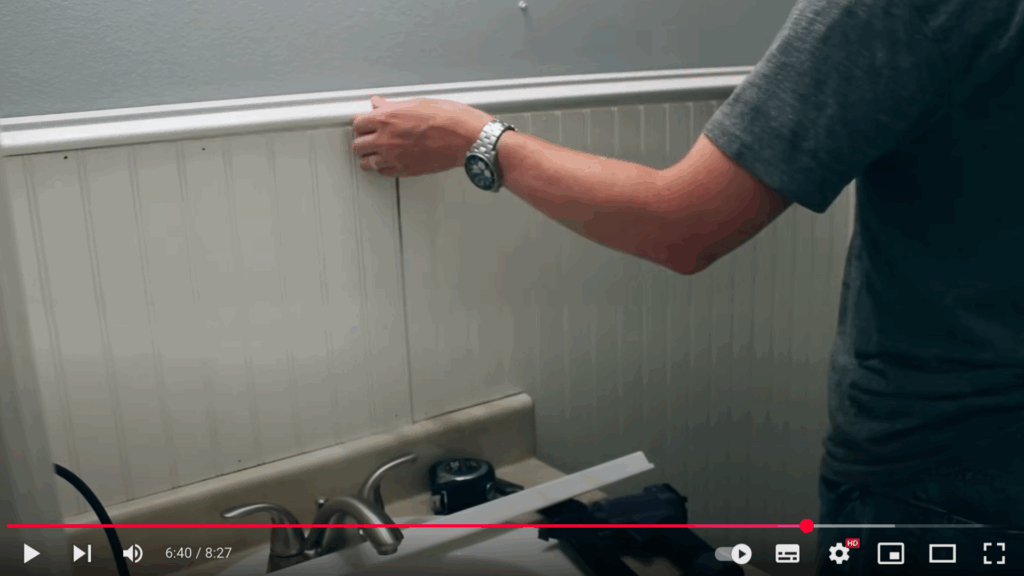
For the finishing touch, install molding along the top of the beadboard. You don’t need a full chair rail, you can choose a compact molding profile with a thick base that fits snugly on top.
The trim hides the top edge of the panels and gives the wainscoting a polished, framed appearance. Nail it in place, again focusing on corners and ends to ensure it stays secure.
Step 8: Caulk, Fill, and Paint
Once everything is nailed in, use silicone caulk to seal along the top of the trim, then at the inside corners and around any panel seams or joints where water might seep in. Then use wood filler to patch nail holes and any visible seams.
Sand everything smooth once it’s dry. Finally, apply your paint, usually a semi-gloss or satin finish works best in bathrooms due to moisture exposure.
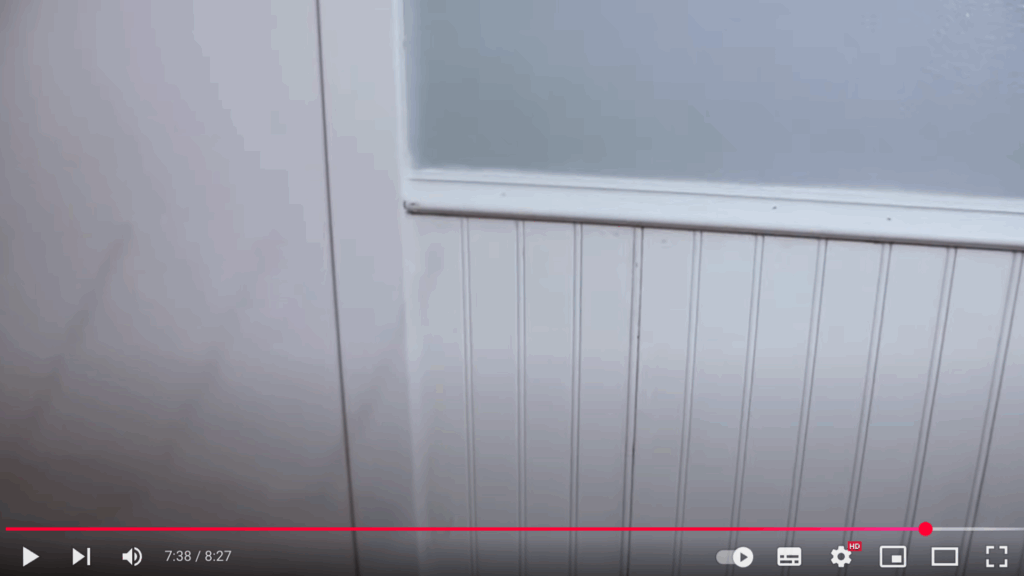
Apply two coats for even coverage, and let everything dry fully before reinstalling fixtures or touching the walls. With all panels and trim in place, caulk applied, and paint finished, your bathroom will have a clean, updated look.
This project requires some patience, but the results are well worth it, especially on a budget.
This step-by-step guide is inspired by an excellent video from LRN2DIY. Huge thanks to the creator for sharing such a clear and informative tutorial. You can view the original video on their YouTube channel or watch it right below.
Money-Saving Tips for a Budget Beadboard Installation
Change your space without emptying your wallet. Find insider tricks to install beautiful beadboard wainscoting while keeping your budget intact.
- Opt for MDF Beadboard: Medium-density fiberboard (MDF) beadboard is often more affordable than wood, and it still gives you the classic look you want.
- Shop Sales and Discounts: Look for sales, clearance items, or discounts at home improvement stores, or check out online marketplaces for deals.
- Repurpose Old Beadboard: If you’re remodeling, consider salvaging old beadboard from other areas of the home to cut down on material costs.
- Avoid Custom Designs: Stick to standard sizes and simple designs to keep costs lower. Custom-cut pieces can be pricey.
- Install in Small Sections: Rather than doing your entire home, consider installing beadboard in smaller areas like a single accent wall or bathroom to save money
Bonus Tip: Track your spending. A simple spreadsheet can help you stay on budget and feel like a total money-saving champion.
Conclusion
Beadboard wainscoting isn’t just a home upgrade – it’s a weekend adventure that can totally change how a room feels. Remember, perfection isn’t the goal. Your first try might have a few quirks, and that’s totally okay!
Each panel you install brings your space closer to something special. No professional skills? No problem. With basic tools and a bit of courage, you can create walls that tell a story.
My first project wasn’t flawless, but it was mine – and that’s what matters. Want to show off your work? Drop a photo in the comments. Stuck on a step? Ask away! We’re all learning together.
Your walls are waiting to be changed, one panel at a time. DIY isn’t about perfection. It’s about trying, learning, and making your space uniquely yours.
Ready to start?