
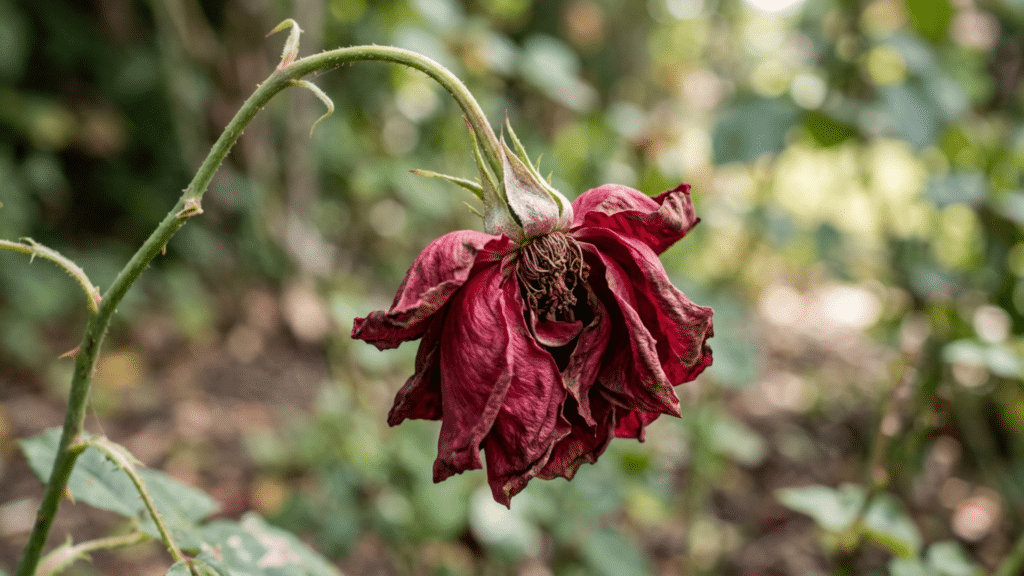
Fresh flowers can brighten a room, lift a mood, and make a space feel alive. But when petals start to droop and stems bend, it can feel frustrating and disappointing.
Many people assume fading flowers are beyond saving. In many cases, that is not true. Flowers often show clear signs when they are stressed, thirsty, or lacking proper care.
With the right approach, they can recover and look healthy again. This guide explains how to revive dying flowers back to life using simple, clear steps.
The focus is on practical methods that are easy to follow and apply at home, without special tools or training.
What Happens When Flowers Start to Wilt
When flowers start to wilt, the change is caused by a loss of water pressure inside their cells.
Healthy flowers stay upright because their cells are filled with water, which gives them firmness and structure. As soon as water flow slows, internal pressure weakens, and stems begin to droop.
In cut flowers, wilting often occurs when stems become clogged with bacteria or air, preventing proper hydration. In potted plants, the issue usually starts at the roots, either from dry soil or from excess moisture that limits oxygen availability.
Heat, direct sunlight, and sudden temperature changes can also speed up moisture loss, causing petals and leaves to collapse more quickly than expected.
Identify Why Your Flowers are Dying
Before attempting to revive any plant, it is important to identify the exact cause of decline. The table below outlines common symptoms, likely causes, and what those signs typically indicate. This will help you apply the correct recovery method rather than guess.
| Visible Symptom | Likely Cause | What It Means |
|---|---|---|
| Drooping stems but green leaves | Dehydration | The plant is not receiving enough water to maintain internal pressure. Cells lose firmness, and stems bend. |
| Dry, pulling-away soil | Underwatering | The roots are not absorbing enough moisture, and the soil has become too dry to support the plant. |
| Yellowing leaves with soft texture | Overwatering | Roots may be suffocating due to excess moisture, which reduces oxygen supply and weakens nutrient uptake. |
| Mushy, dark stems near the soil line | Root rot | Prolonged overwatering has caused root decay, limiting the plant’s ability to transport water. |
| Cloudy vase water (cut flowers) | Bacterial buildup | Bacteria are clogging the stem’s vascular system, blocking water absorption. |
| Slimy or brown stem ends | Stem blockage | The cut ends are contaminated or sealed, preventing proper hydration. |
| Crispy, brown leaf edges | Heat or sun stress | Excessive evaporation is causing moisture loss faster than the plant can replace it. |
| Sudden wilting after repotting | Transplant shock | Roots are stressed from disturbance and need time to reestablish in the new soil. |
How to Revive Dying Flowers: Step-by-Step
Before you begin, gather the right tools so you can complete each step without interruption.
Tools and Materials Required
| Tool / Material | Purpose |
|---|---|
| Clean bucket or large container | For bottom watering or full submersion |
| Pencil or chopstick | To aerate compacted soil |
| Pot with drainage holes | Allows excess water to escape |
| Filtered or distilled water | Prevents salt and mineral buildup |
| Cotton swabs | Removing pests like mealybugs |
| Rubbing alcohol | Disinfecting and pest removal |
| Artificial grow light (optional) | Supplementing low natural light |
| Diluted liquid fertilizer (optional) | Correcting nutrient deficiencies |
Step 1: Research Your Plant’s Specific Needs

Before adjusting care, confirm what your plant actually requires. Different plants have very different soil, light, and watering preferences.
Some prefer drying out completely between waterings, while others need consistently moist soil. Look up your plant’s ideal conditions for sunlight exposure, watering frequency, and soil type.
Many revival attempts fail because owners apply generic advice instead of plant-specific care.
Once you understand what your plant naturally thrives in, you can compare those conditions to your current setup and correct any mismatch.
Step 2: Test and Correct Soil Moisture Properly
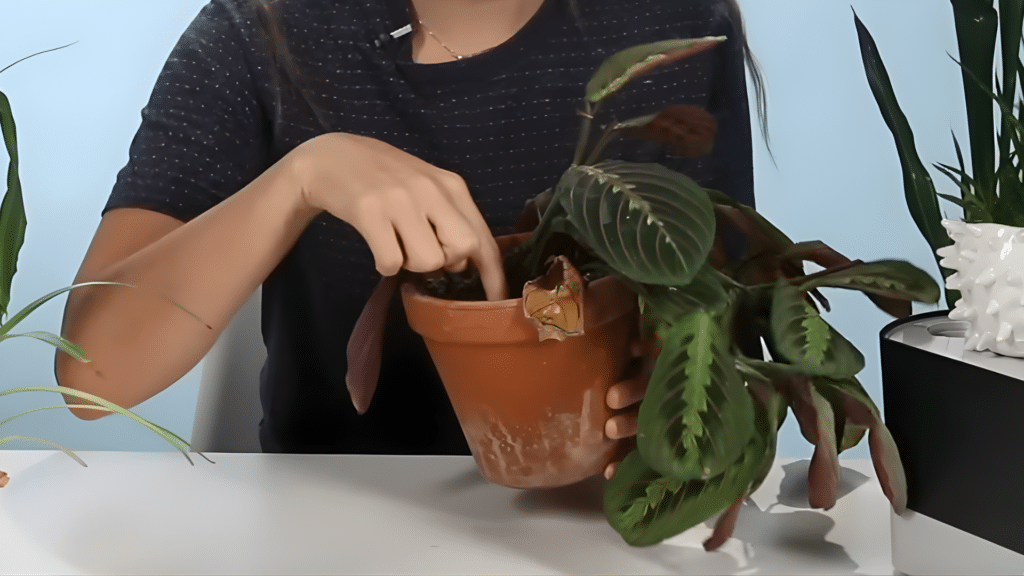
Insert your index finger one to two inches into the soil to check moisture below the surface. If the soil feels hard, compacted, and dry, it may be repelling water instead of absorbing it.
In that case, submerge the entire pot in a bucket filled with water and allow it to soak from the bottom.
Once the soil absorbs moisture, use a pencil or chopstick to poke small holes throughout the soil. This improves aeration and allows water to reach deeper roots.
If the soil feels extremely wet, heavy, and has a strong odor, stop watering immediately. Overwatering prevents oxygen from reaching the roots and can lead to decay. Allow the soil to dry before watering again.
Step 3: Ensure Proper Drainage and Healthy Roots
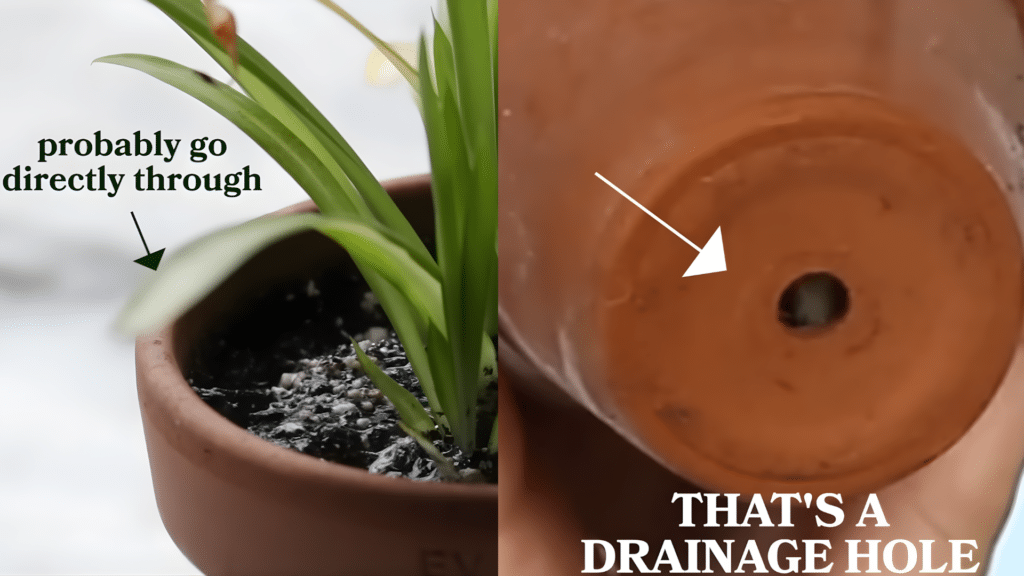
Check the bottom of the pot for drainage holes. Without drainage, excess water becomes trapped and suffocates the root system.
When watering properly, you should see water flow out of the bottom. This confirms full saturation while preventing waterlogging.
If the plant continues to decline, inspect the roots carefully. Healthy roots appear firm and fibrous with white tips. Rotten roots are brown, mushy, and may smell unpleasant.
If rot is present, allow the plant to dry out and avoid additional watering until recovery begins. Drainage is often the difference between revival and permanent damage.
Step 4: Adjust Light, Water Quality, Fertilizer, and Pests
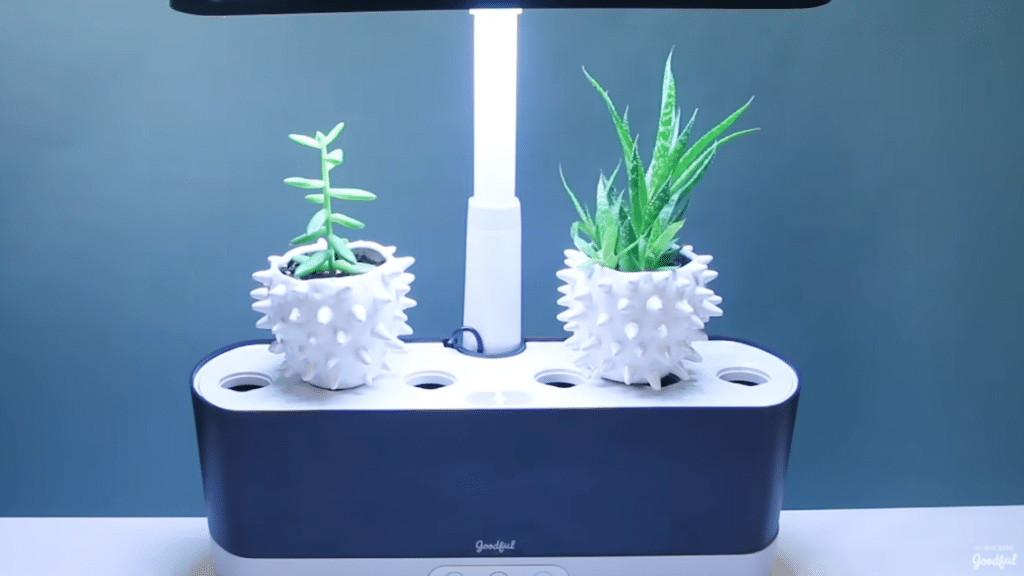
Once watering issues are corrected, evaluate environmental stress. If your plant is not receiving enough natural light, consider using a grow light to create stable conditions. Insufficient light weakens growth and slows recovery.
If your tap water contains high mineral content, switch to filtered water to prevent salt buildup.
If salt has accumulated, flush the soil by running water through it three to four times, allowing full drainage each time. Be cautious with fertilizer, as overuse can cause chemical burns. Always dilute fertilizer properly.
Finally, check for pests such as mealybugs or aphids. Light infestations can be removed using a cotton swab dipped in rubbing alcohol.
Removing pests quickly prevents further stress and supports long-term recovery.
For a more detailed guide, watch this YouTube tutorial by @Goodful:
Emergency Revival Methods for Severely Wilted Flowers
When standard watering and trimming do not improve your plant’s condition, more intensive recovery techniques may be necessary. The methods below are designed for severely stressed flowers that require immediate intervention.
| Revival Method | When to Use It | How to Do It Properly | Why It Works |
|---|---|---|---|
| Deep Water Submersion | For extremely wilted cut flowers | Fill a sink or bucket with lukewarm water. Submerge the stems fully and, if needed, the blooms for 30–60 minutes. Recut stems before placing them back in a clean vase. | Allows rapid rehydration through both stem tissue and petals, restoring internal water pressure. |
| Bottom Watering (Potted Plants) | For severely dry, compacted soil | Place the pot in a tray or bucket of water and allow it to absorb moisture from the bottom for 20–30 minutes. Remove and allow full drainage. | Encourages deep root hydration and prevents water from running off hardened soil. |
| Soil Aeration | For compacted or poorly draining soil | Use a pencil or chopstick to gently create small holes throughout the soil after watering. | Improves oxygen flow to roots and helps water distribute evenly. |
| Root Inspection & Reset | For suspected root rot | Remove the plant from its pot, trim brown or mushy roots, and repot in fresh, well-draining soil. | Removes decaying tissue and gives healthy roots space to recover. |
| Grow Light Support | For plants suffering from poor lighting | Place under a full-spectrum grow light for several hours daily, adjusting distance based on plant type. | Provides stable light energy to support recovery and new growth. |
When Flowers Cannot Be Saved
Unfortunately, some flowers cannot recover. Signs of irreversible damage include:
- Fully brown, brittle stems
- Extensive root rot
- Collapsed stem structure
- Complete leaf drop
At this stage, removing the plant prevents the spread of disease to nearby plants.
Common Mistakes That Prevent Flower Recovery
Even with good intentions, certain mistakes can delay or completely prevent recovery. Avoid the following:
- Watering again without checking soil moisture first
- Leaving plants in pots without drainage holes
- Using dull scissors that crush stems instead of cutting cleanly
- Over-fertilizing stressed plants
- Moving the plant repeatedly between different environments
- Placing recovering flowers in harsh direct sunlight
- Ignoring salt buildup from tap water
- Treating pests too late or overlooking early signs
- Making multiple changes at once instead of adjusting gradually
Consistency and controlled adjustments are more effective than aggressive intervention.
Special Care Tips for Popular Flower Types
Different flowers respond differently to stress. The table below highlights key recovery tips for a few of the most common household and cut flower varieties.
| Flower Type | Common Issue | Special Revival Tip | Care Reminder |
|---|---|---|---|
| Roses | Drooping blooms after cutting | Recut stems under water and place in lukewarm water immediately | Remove guard petals and change vase water every two days |
| Tulips | Bent or leaning stems | Wrap tightly in paper and stand upright in water for several hours | Keep in a cool room away from direct sunlight |
| Hydrangeas | Rapid dehydration | Dip freshly cut stems in warm water before placing in cool water | Maintain consistent moisture; do not let the soil dry completely |
| Orchids | Root rot from overwatering | Trim damaged roots and repot in well-draining orchid bark | Water sparingly and ensure strong drainage |
The Bottom Line
Reviving flowers is rarely about luck. It is about paying attention at the right time. A drooping stem or fading leaf is often a signal, not the end.
When care is adjusted thoughtfully, many plants respond with surprising resilience. The process may take a few hours for cut flowers or several days for potted plants, but improvement is often visible when conditions stabilize.
What matters most is consistency after recovery. Keep observing, keep adjusting, and avoid rushing changes.
Strong plant care habits develop through practice. If this guide helped, save it for future reference and share it with someone who needs to rescue their flowers.