
When I first heard about a Tadelakt shower, I was curious but a little nervous to try it myself. A waterproof lime plaster finish sounded fancy and tricky, but it turned out to be one of my favorite DIY projects.
In this guide, I’ll walk you through exactly how I applied Tadelakt plaster in my own shower, using simple tools and a bit of patience.
This is what you’ll learn:
- How to mix and apply Tadelakt plaster
- The best tools and materials for beginners
- My tips for sealing and polishing it right
If you’ve ever wanted a shower that looks handmade and feels smooth like stone, you’re in the right place. I’ll show you how to get that look step by step, without overcomplicating the process.
What Is a Tadelakt Shower?
A Tadelakt shower is a smooth, waterproof surface made from lime plaster. I like it because it gives the walls a clean, stone-like finish without using tiles or grout.
The plaster is made by mixing lime, marble dust, and pigments, then applying it in thin layers.
Once it’s dry, I rub it with a stone and seal it with olive oil to make it water-resistant and shiny. What I love most is how durable and natural it feels.
If you’re tired of grout lines or mold, this might be the upgrade you need. A Tadelakt shower works well in wet areas like bathrooms because it’s sealed completely, leaving no gaps for water to sneak in.
It takes patience to apply, but the result is a smooth, easy-to-clean surface that lasts for years.
Tools and Materials Needed for a Tadelakt Shower Plaster
Creating a tadelakt shower requires the right materials and tools to ensure a smooth, waterproof finish. Below is a simple breakdown:
| Category | Items Needed | Purpose |
|---|---|---|
| Plaster materials | Lime plaster, natural pigments | Forms the main tadelakt surface and gives color |
| Substrate requirements | Cement board or waterproofed walls | Provides a strong, stable base for the plaster |
| Tools for application | Trowel, spatula, sponge, polishing stone | Used to apply, smooth, and burnish the plaster |
| Sealing materials | Olive soap or wax | Polished onto the surface to waterproof and protect |
Using these tools and materials the right way helps you build a strong, long-lasting Tadelakt shower. With proper care, it will stay smooth, waterproof, and look great for years.
Step-By-Step Guide to Applying Tadelakt in Showers
Applying tadelakt in showers requires careful steps to achieve a smooth, waterproof finish. Each stage, from mixing to burnishing, must be done properly to ensure durability and beauty.
Step 1: Prepare the Substrate and Apply the Waterproof Membrane
Begin with cement backer board that’s taped, floated, and firmly secured. The surface must be flat, solid, and clean, as any flaws will show through the plaster.
Use a taping knife to remove bumps, fill gaps with patching compound, and wipe away dust.
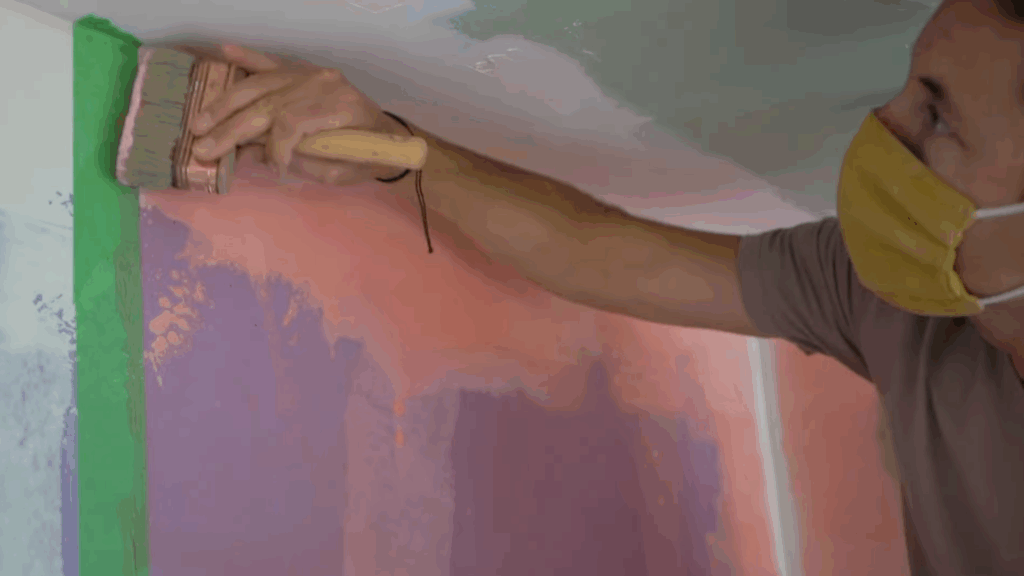
Once smooth, apply a waterproof membrane like Elastoshield using a nap roller for walls and a masonry brush for corners. Apply two even coats, letting each dry fully.
This step ensures a stable, moisture-resistant base for a strong, lasting Tadelakt shower.
Step 2: Scratch Coat (Key Coat) with Versabond
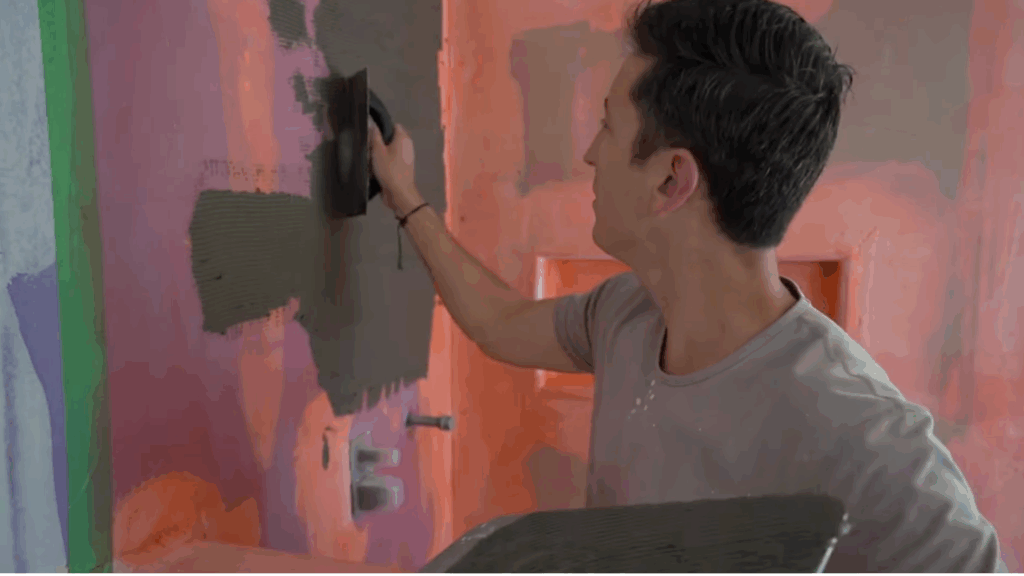
Once the membrane is fully cured, apply a scratch coat using Versabond mixed to a firm, peanut butter-like texture.
Spread it evenly in small sections, then use a V-notch trowel to create grooves across the surface. These ridges give the next layer a strong grip and prevent it from peeling or separating over time.
Let the coat dry completely before adding more plaster.
A well-made scratch coat creates a stable base and helps ensure the final Tadelakt surface stays secure.
Step 3: Apply the Base Coats
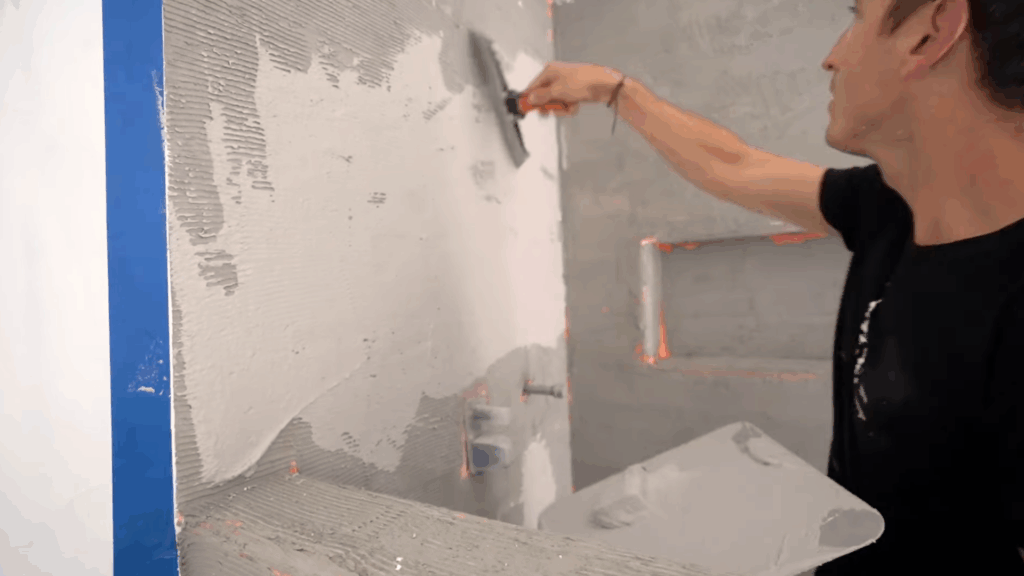
Apply the base coat about ⅛ inch thick over the scratch coat using a trowel.
Press it firmly for good adhesion, then smooth it out with a wet sponge float to remove trowel marks. Once dry, scrape away any high spots with a taping knife.
Add a second base coat the same way for an even, level surface. These layers provide strength and prepare the wall for the final plaster application.
Smooth, consistent base coats help your Tadelakt shower look professional and last longer.
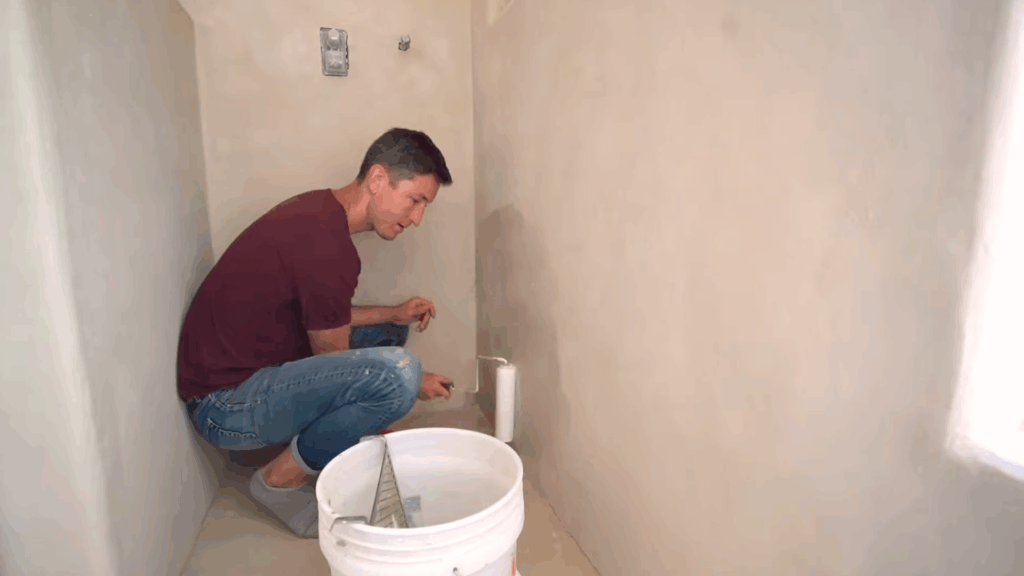
Step 4: Mix and Apply the Tadelakt Plaster Coats
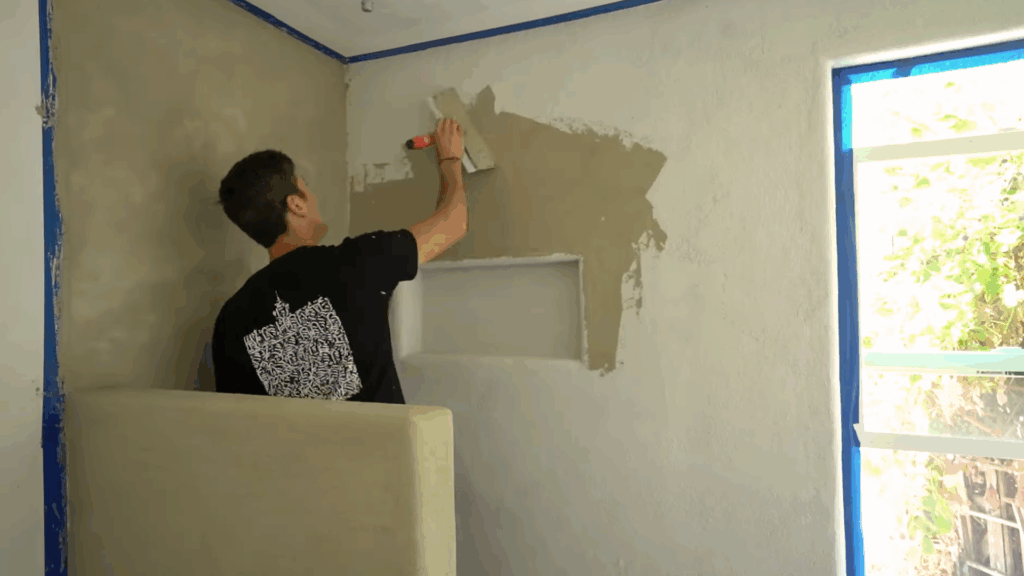
Mix pigments and water first for even color, then add plaster powder in thirds to a 5-gallon batch with about 8 liters of water, stirring until creamy.
Apply the first coat with a steel trowel, spreading it evenly and slightly beyond the grain height.
Overlap strokes to avoid harsh lines. Once dry, apply the second coat and third coat using the same technique to refine texture and deepen color.
After the final coat dries, gently smooth and burnish the surface with a steel trowel and damp sponge to reveal a soft, natural sheen.
Avoid over-polishing to keep the subtle, handcrafted texture that gives Tadelakt its stone-like look.
Step 5: Soap, Waterproofin,g and Burnishing
To waterproof the surface, mix lime soap at a ratio of six parts water to one part soap. Apply it evenly with a roller, then use a steel trowel to press and burnish it into the plaster.
Use a masonry brush for corners and apply when the plaster is firm but absorbent; too wet or dry, and it won’t bond.
The reaction between the lime and soap creates a natural, waterproof barrier that protects the plaster.
Finish with two coats of lime soap and a thin layer of wax for protection and sheen. Let it cure fully for a smooth, durable Tadelakt finish.
This tutorial was inspired by a great video from the Mt. Washington Weekend Project.
Thanks to the creator for such a clear, detailed guide. You can watch the original video on their YouTube channel or view it below.
Helpful Tadelakt Shower Tips for Beginners
Starting your first Tadelakt shower project can feel challenging, but a few simple tips can make the process smoother. These steps will help you avoid common mistakes and get a clean, durable finish.
- Start small: Practice on a sample board before working on your shower walls.
- Prep the surface well: Make sure the base is clean, strong, and waterproof before applying plaster.
- Mix carefully: Follow the lime and pigment ratio closely to get the right texture.
- Work in thin layers: Apply the plaster evenly to avoid cracks and uneven spots.
- Don’t rush drying: Let each layer dry fully before moving to the next.
- Polish gently: Use a smooth stone or trowel for a soft, even shine.
- Seal regularly: Reapply olive soap or wax to keep it waterproof.
Benefits of a Tadelakt Shower
A Tadelakt shower offers more than just a nice look; it’s practical too. The plaster creates a smooth, waterproof surface that keeps out moisture and mold, so cleaning is easy.
I like that it has no grout lines, which means less scrubbing and fewer spots for dirt to hide.
Because it’s made with natural lime and pigments, it’s also eco-friendly and safe for your home. The finish feels soft and warm to the touch, unlike cold tiles.
Another benefit is durability; with proper sealing and care, it can last for years without cracking or fading.
You can even choose different colors and textures to match your style.
Overall, a Tadelakt shower gives you a clean, low-maintenance space that looks natural and feels handmade, a great mix of beauty and function.
Is Tadelakt Suitable for Showers and Wet Rooms?
Tadelakt is a plaster that works well in showers, but there are a few key things to know first.
When properly polished with soap, tadelakt becomes water-resistant, helping to prevent water from soaking into walls, which makes it suitable for wet areas.
However, it must be sealed correctly and maintained regularly to stay strong and waterproof.
Compared to other finishes, tadelakt has unique advantages and differences. Unlike tiles, it has no grout lines, making it easier to clean.
And compared to microcement or Venetian plaster, it feels softer and more natural, giving a warm, spa-like appearance, although it requires more care to maintain its moisture resistance.
With proper sealing, tadelakt can be both beautiful and practical for wet rooms.
How to Maintain a Tadelakt Shower?
Keeping your Tadelakt shower in good shape doesn’t take much effort, but a few simple habits will help it last longer and stay smooth. Regular care keeps the surface waterproof and looking fresh.
- Clean gently: Wipe the surface with a soft cloth or sponge and mild soap. Avoid harsh cleaners.
- Reapply olive soap: Rub on a thin layer of olive soap every few weeks to keep it sealed and shiny.
- Dry after use: Use a towel to remove water drops and prevent buildup.
- Avoid scrubbing tools: Don’t use abrasive pads or brushes; they can scratch the surface.
- Repair small cracks fast: Fill any chips or cracks quickly to prevent water damage.
- Keep it sealed: Reseal the plaster every year or two to maintain its waterproof layer.
Tadelakt Shower Cost Breakdown
Creating a tadelakt shower can vary in cost depending on whether you do it yourself or hire a professional. Below is a clear breakdown to help you plan:
| Category | Details | Estimated Cost |
|---|---|---|
| DIY vs Professional | Doing it yourself saves labor but requires skill; professionals ensure a perfect finish | DIY: $200–$500, Professional: $1,000–$3,000+ |
| Materials Pricing | Lime plaster, pigments, tools, olive soap/wax | $100–$300 for a small shower |
| Time and Labor | DIY can take several days to weeks; professionals work faster | DIY: 3–7 days, Professional: 1–3 days |
Considering both materials and labor helps you decide the best approach. Proper planning ensures your tadelakt shower looks great and lasts for years.
Common Mistakes to Avoid
When working with tadelakt, even minor mistakes can significantly impact its appearance and longevity. Avoiding common errors helps keep your shower smooth, waterproof, and beautiful.
- Poor surface preparation: Failing to fix cracks or uneven walls can cause the plaster to peel or crack later. Always start with a strong, smooth base.
- Over-sanding or over-watering: Excessive sanding or watering can damage the plaster, making it weak or uneven. Work gently and carefully.
- Inadequate sealing: Skipping or underapplying the olive soap or wax seal will allow water to seep in, reducing durability.
- Applying too thick or too thin: Thick coats can crack, and thin coats may not cover properly.
By avoiding these mistakes, your tadelakt shower will stay beautiful and functional for years.
Alternatives to Tadelakt Plaster in Bathrooms
Tadelakt is a beautiful choice, but it’s not the only option for bathroom walls and showers. Other finishes can still give a smooth, stylish, and water-resistant surface, depending on your needs and budget.
- Microcement: This thin coating is strong, waterproof, and suitable for use over various surfaces. It dries quickly and needs less skill than tadelakt, making it easier for DIY projects.
- Venetian plaster: Known for its polished, marble-like look, this finish adds elegance. It’s smoother and glossier, but may require additional sealing in wet areas.
- Lime plaster variations: Other lime-based plasters offer a natural look and good breathability. Some are easier to apply but may not be as water-resistant without sealing.
Conclusion
Finishing my Tadelakt shower was one of those projects that taught me a lot. It wasn’t fast or perfect, but seeing the smooth surface come together made it worth every bit of effort.
The best part? I built it myself, and it’s holding up beautifully.
If you’re planning to try Tadelakt, start small, take your time, and don’t rush the drying or sealing. Those details make a big difference in how long it lasts.
Keep your tools clean and follow each layer carefully for a shower that’s solid and easy to maintain.
With the right mix of patience and care, your Tadelakt shower can last for years and still look fresh. It’s a project that gives back every time you step inside.