
Thinking about renovating your whole house? You’re not alone.
Many homeowners undertake complete renovations to create their dream space without moving, or to enhance their home’s value while addressing existing issues.
Here’s the truth: a whole house renovation is one of the most significant projects you’ll ever take on.
But with the right plan, it’s possible. I’ve helped dozens of families through this, and you can do it too. In this guide, you’ll learn how to plan your project from beginning to end.
This advice comes from my personal experience with renovation, so it’s tested, not just theory. Let’s get started and turn your home into something amazing.
Setting a Budget for Whole House Renovation
Your budget is the foundation of your entire renovation, and if it’s not built solidly, the whole project can quickly go off track.
Always include a 20% cushion for unexpected issues. Surprises like water damage, outdated wiring, or last-minute design changes are common and can derail your plan if you’re not ready.
| Budget Category | Recommended % of Total Budget | Details |
|---|---|---|
| Structural Work | 25% – 30% | Foundation, walls, framing, roof, and major layout changes |
| Kitchen and Bathrooms | 20% – 25% | Cabinets, counters, appliances, plumbing, and tile work |
| Flooring & Painting | 10% – 15% | Hardwood, tile, vinyl, and interior paint |
| Fixtures & Finishes | 10% – 15% | Lighting, doors, trim, hardware |
| Exterior Work | 5% – 10% | Siding, windows, landscaping, roofing |
| Contingency Fund | At least 20% | Emergency and surprise costs |
Once your categories are set, obtain multiple quotes for significant items, such as structural work and kitchens. Don’t just go with the lowest bid; check for experience, references, and licenses.
As your project progresses, track every cost using a simple spreadsheet or budgeting app. This helps you catch problems early and keeps your renovation on budget.
Whole House Renovation Process
Now comes the main event. The key to success is following the correct order. Each step builds on the previous one. Skip ahead, and you’ll create problems later.
1. Demolition and Structural Work
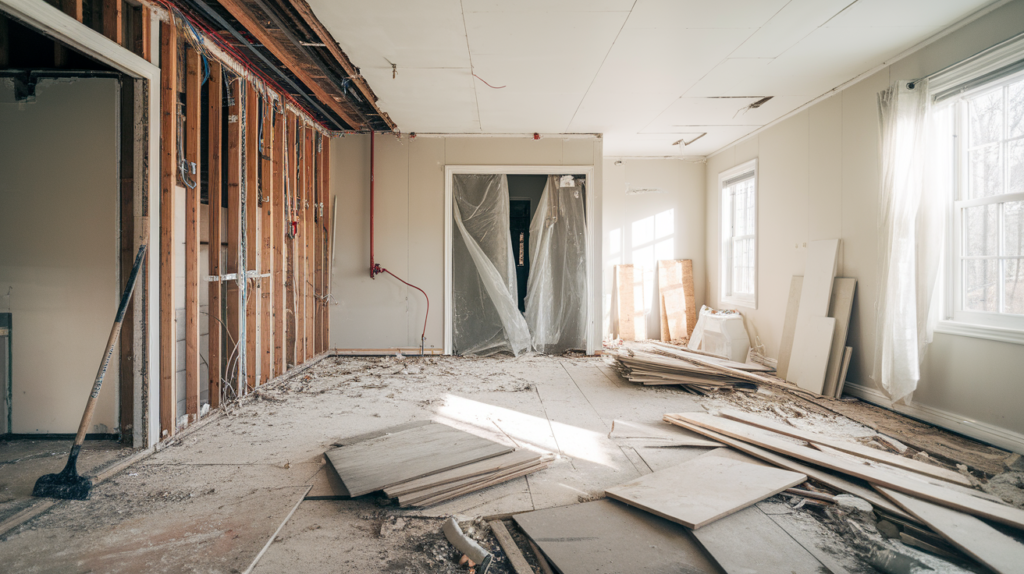
Demolition kicks off your renovation, but don’t rush it.
- Safety First: Always shut off utilities in the work zone to ensure safety.
- Hazardous Materials: Check for lead paint or asbestos and hire professionals for removal.
- Remove Non-Structural Items: Start by removing cabinets and trim, and save reusable materials to reduce costs and waste.
- Structural Work: For tasks like moving walls or fixing foundations, always hire professionals.
- Documentation: Take photos of wires and pipes to save time and money later in the remodel
2. Plumbing, Electrical, and HVAC Upgrades
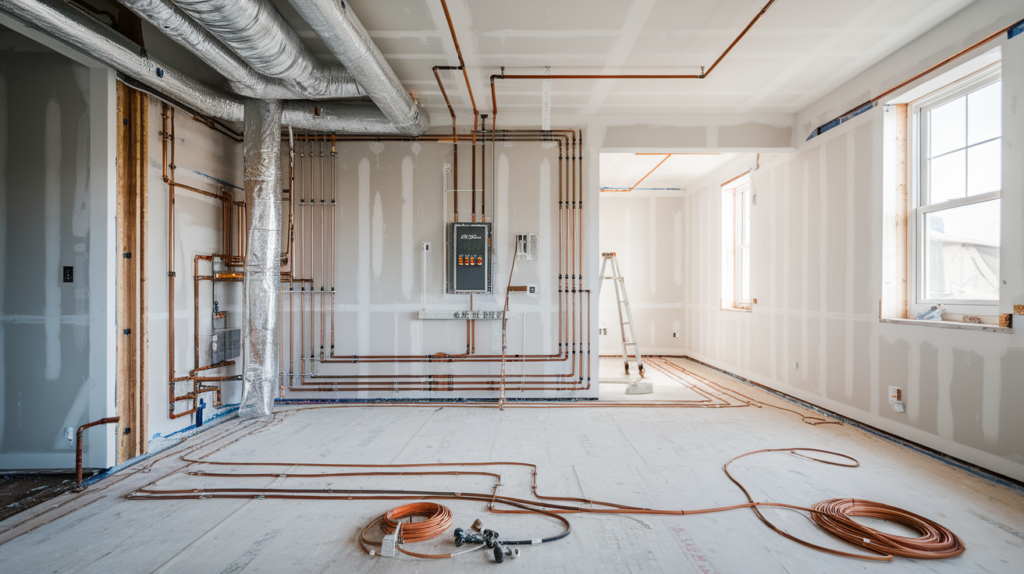
Tackle plumbing, electrical, and HVAC systems before walls go up.
Plan for electrical needs; modern homes use more power and require additional outlets.
For plumbing, expect surprises such as old or damaged pipes that require complete replacement.
HVAC systems should be sized to match the new layout. Bigger isn’t always better; right-sizing improves efficiency and comfort.
Upgrading these systems now saves future headaches and keeps your home running smoothly for years to come.
3. Insulation and Drywall
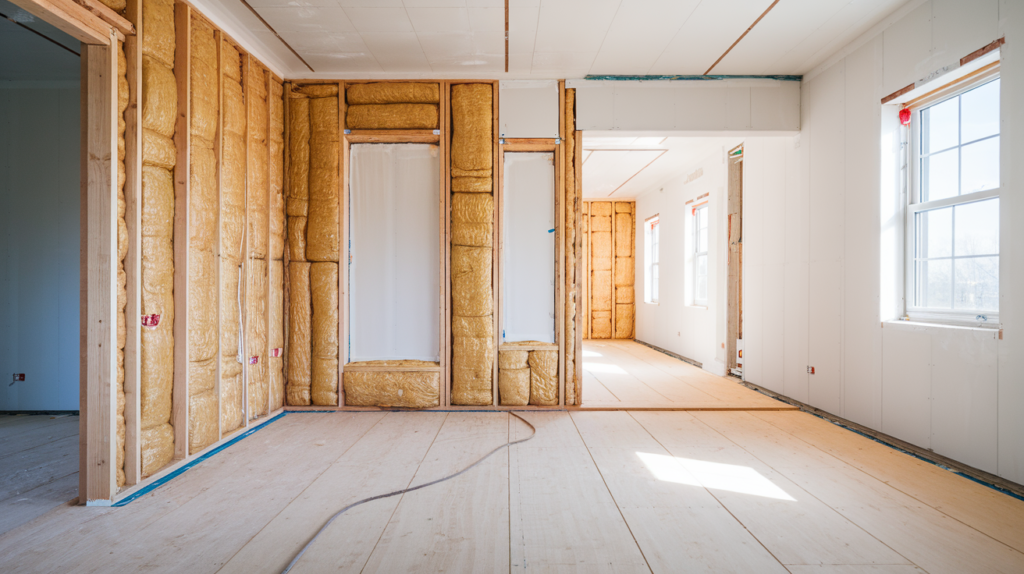
Installing insulation before drywall is essential, as it’s your last chance to access the walls. Sound insulation saves money by keeping your home more energy-efficient.
Check your area’s code for proper R-values and don’t skimp here. Skilled workers should do drywall.
It may seem simple, but poor drywall work is difficult to conceal later. Don’t forget to prime before painting.
Primer helps paint stick better and gives a smoother finish. Taking your time with this step makes a big difference in the look and feel of your home.
4. Flooring Installation
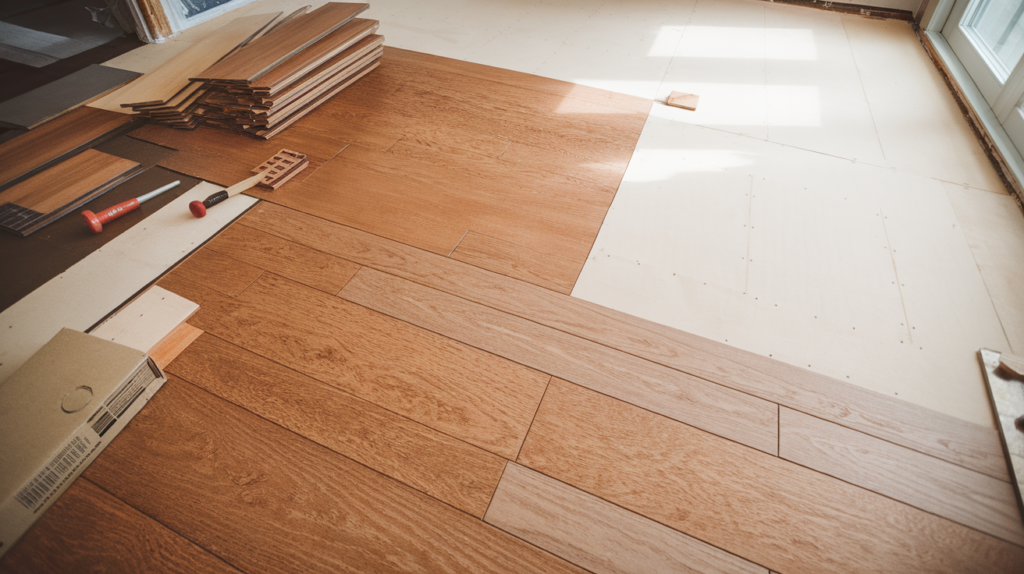
Install flooring after most of the heavy work is completed, but before the baseboards and trim are installed. This protects your floors and allows for clean finishing.
Choose materials based on your lifestyle; hardwood is stylish but needs care, tile is strong but cold, and luxury vinyl offers durability with a softer feel.
| Material | Pros | Cons |
|---|---|---|
| Hardwood | Stylish, classic look | Needs regular care and maintenance |
| Tile | Strong, durable, water-resistant | Can be cold and hard underfoot |
| Luxury Vinyl | Durable, soft underfoot, water-resistant | May not have the same aesthetic appeal as wood or tile |
Prepare your subfloor first to avoid squeaks or uneven spots. Let flooring materials adjust to your home’s environment for a few days before installation.
This step helps prevent future problems, such as warping or buckling.
5. Painting and Finishes
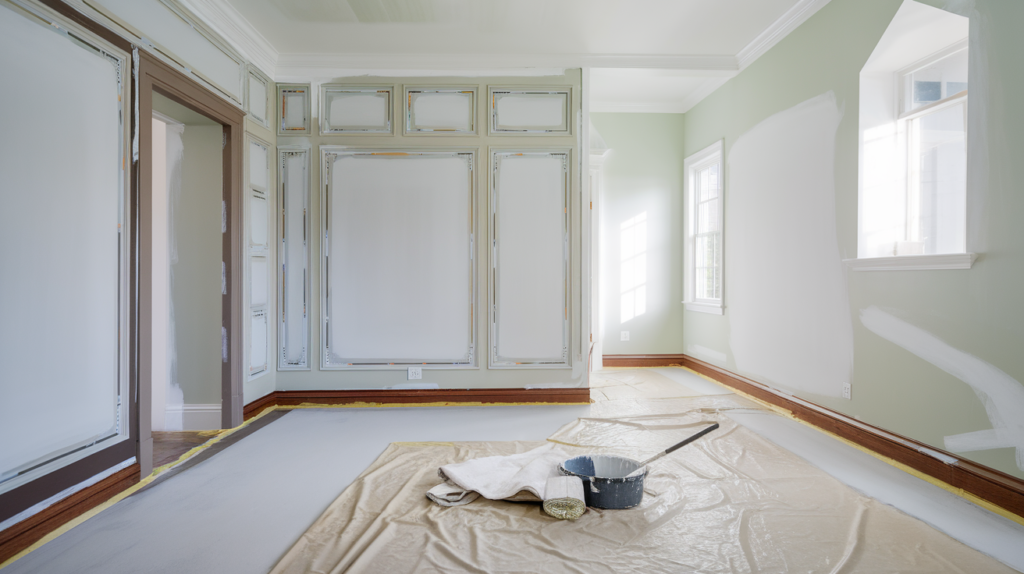
Painting instantly changes the look of your home, so take your time. Clean the walls thoroughly, fill any holes, and smooth out rough patches before starting.
| Paint Finish | Best For | Recommended Paint | Pros | Notes |
|---|---|---|---|---|
| Satin or Semi-Gloss | High-traffic areas (kitchens, bathrooms) | Acrylic Latex or Enamel Paint | Durable, moisture-resistant, easy to clean | Ideal for areas exposed to moisture and wear |
| Flat or Eggshell | Living areas (bedrooms, living rooms) | Matte or Eggshell Latex Paint | Soft, subtle finish, hides imperfections | Best for areas with less wear or moisture exposure |
A well-done paint job makes your whole space feel fresh and complete.
6. Kitchen and Bathroom Remodels
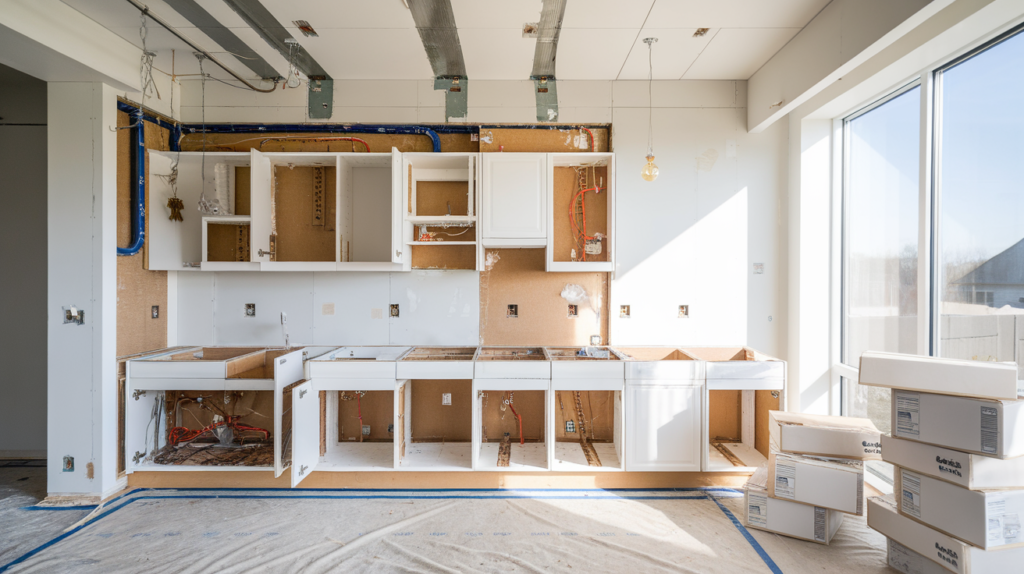
Kitchens and bathrooms are the most complicated and essential rooms in your remodel. Design them for how you live.
Beautiful but poorly planned spaces quickly become frustrating. Plumbing and electrical work in these rooms begins early, but final installations are completed later. Plan to keep things moving.
Order cabinets, sinks, and fixtures early to ensure timely delivery. Special orders can take weeks or even months. A delay here affects your entire schedule.
These rooms are the most expensive and take the longest, so careful planning pays off in terms of comfort and style.
7. Lighting and Fixtures
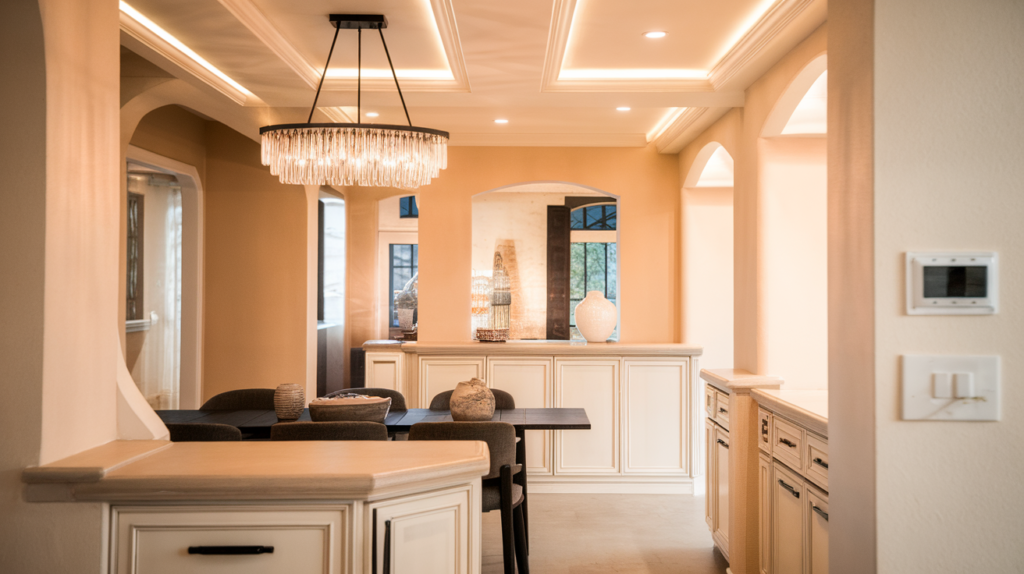
Lighting plays a massive role in how your home looks and feels.
- Mix Lighting Types: Use a combination of ambient, task, and accent lighting for depth and flexibility.
- LED Bulbs: Though more expensive upfront, LED bulbs last longer and cost less to operate.
- Warm Tones: Use warm-toned bulbs in living areas for a softer, cozier feel.
- Dimmer Switches: Upgrade to dimmers to save energy and adjust lighting to match your mood—ensure LEDs are compatible.
- Complementary Fixtures: Choose lighting fixtures that complement each other in style, even if they don’t match exactly
8. Exterior Renovation

The outside of your home matters just as much as the inside. It’s the first thing people see and your first line of defense against the weather.
Address structural issues, such as roof leaks, cracks, or damaged siding, before focusing on design.
A power wash can make a massive difference by cleaning away years of dirt. Do this before painting or sealing outdoor surfaces.
Save landscaping for last. Heavy equipment and foot traffic will damage grass, flowerbeds, or shrubs during construction.
Common Challenges and How to Avoid Them
The following are the common problems you need to keep in mind to avoid them:
- Budget Overruns: Add a 20% buffer to your budget. Get written quotes and track spending daily to avoid surprises.
- Timeline Delays: Build extra time into your schedule. Order materials early and prepare for weather or permit setbacks.
- Permit Problems: Research local rules early. Never begin work until all necessary permits have been fully approved.
- Contractor Issues: Check references and licenses. Get everything in writing and pay only for completed work.
- Living in Construction Stress: Set up temporary spaces for daily needs. Plan short breaks during messy phases if possible.
Tips for Renovation Design and Style
The following are the renovation tips you need to know for styling and designing your home:
- Choose timeless design elements for significant investments
- Use trendy colors and accessories on easy-to-change items
- Create a flow between rooms based on how you live
- Don’t remove walls to follow trends
- Maximize natural light with windows, light colors, and mirrors
- Plan built-in storage to reduce clutter
- Mix textures and materials for added visual interest
Conclusion
Whole-house renovations are significant commitments that can test your patience, budget, and even your relationships.
However, when done correctly, the results can truly improve your life and enhance your enjoyment of your home.
The most important thing is proper planning. Don’t rush into demolition without a complete plan, a clear budget, and a realistic timeline.
Hire professionals for anything outside your skill level; it’s worth the investment.
Always remember why you started. If you’re building your dream home or enhancing your home’s value, keeping your goal in mind helps you stay focused on achieving it.
What worries you most about renovating? Drop your thoughts in the comments. I’d love to help!