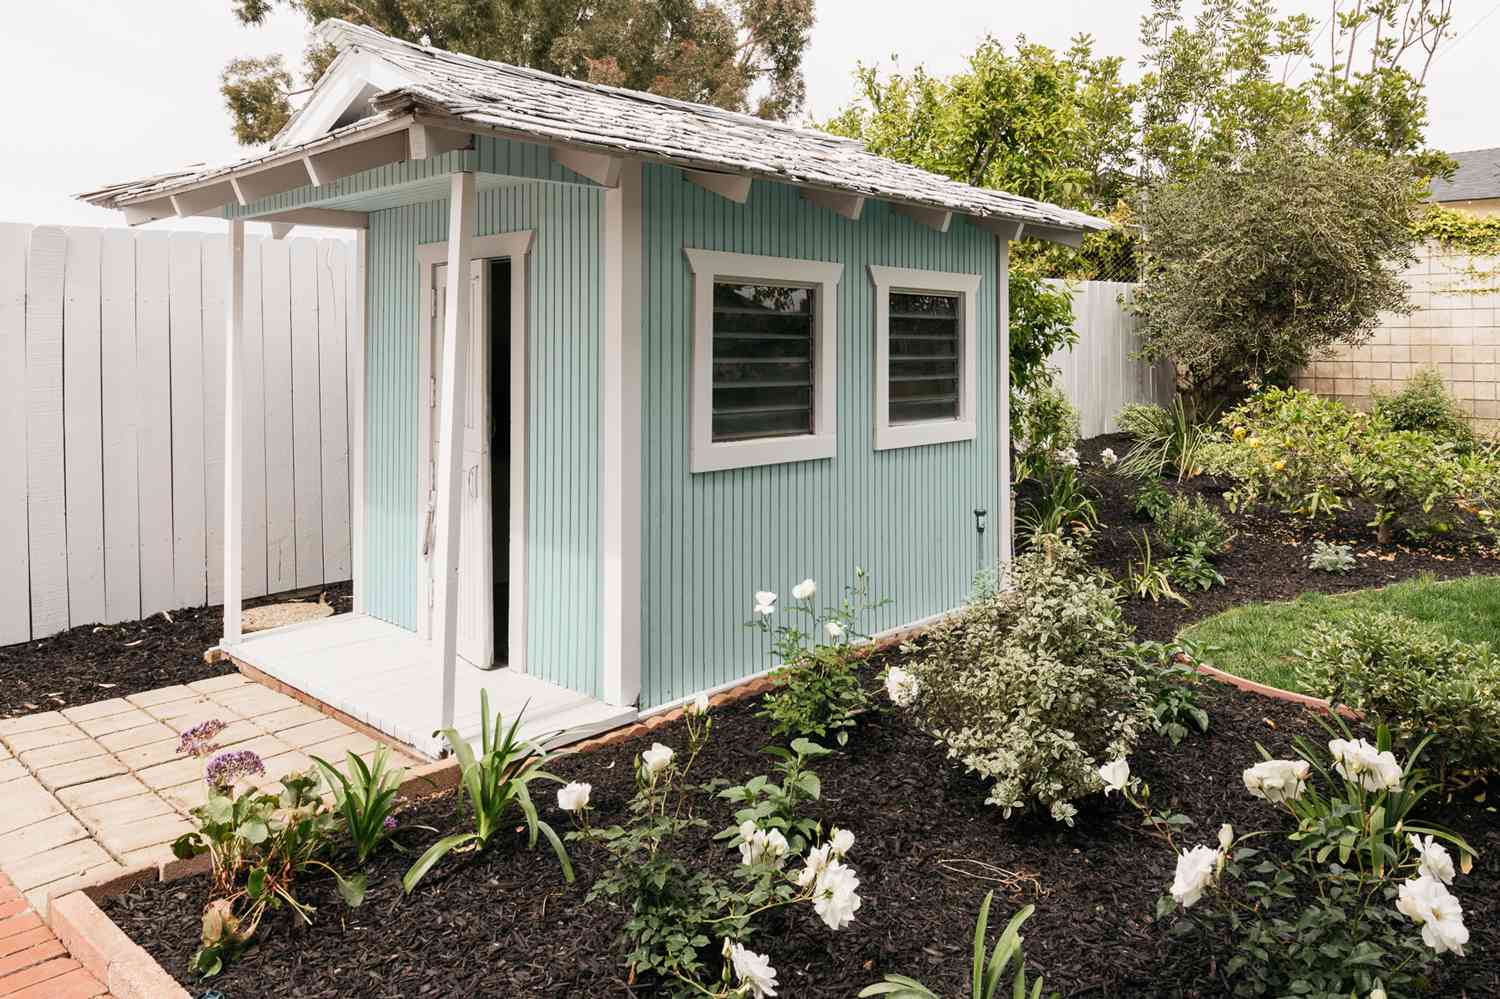
A lean-to-roof shed is a very productive piece of construction to have in your home’s backyard. But is it something you can DIY? Let’s find out! A shed in your backyard can be used to store all kinds of essentials, gardening tools and supplies, etc. A lean-to-shed will be one of the best options to consider for the same. And it is definitely possible to DIY such a structure on your property.
The overall cost of tools, properties, and mechanics required to build a lean-to-roof shed is comparatively cheaper than the cost of building a concrete structure./p>
In this article, we will explore everything there is to know about building a lean-to-roof shed yourself like a professional!
Building a Lean-to-Roof Shed
The two factors that make a lean-to-roof shed popular are simplicity and durability. As long as a shed is easy to construct, looks simple, and stays durable, what more is required? There are some tools and construction properties you will have to get ready for before moving to the shed building.
Always remember that proper planning makes a positive difference to the output. Below is the list of items you must have in order to build a simple yet perfect lean-to shed.
We have added product links along with the items required for you to check them out if purchasing is required.
Materials Required:
Step 1: Building the Foundation
The very basic step to start with while building a lean-to-roof shed will be to lay a solid foundation and create the side walls. Depending on your indivisible requirements, the location and position of the shed may differ. It is not always necessary to build the shed against a wall.
A wall might create a strong support for the shed, but even without a wall, you can build a stand-alone shed by erecting the shed walls on a strong base.
A paver or concrete foundation can act as a strong base for the shed.
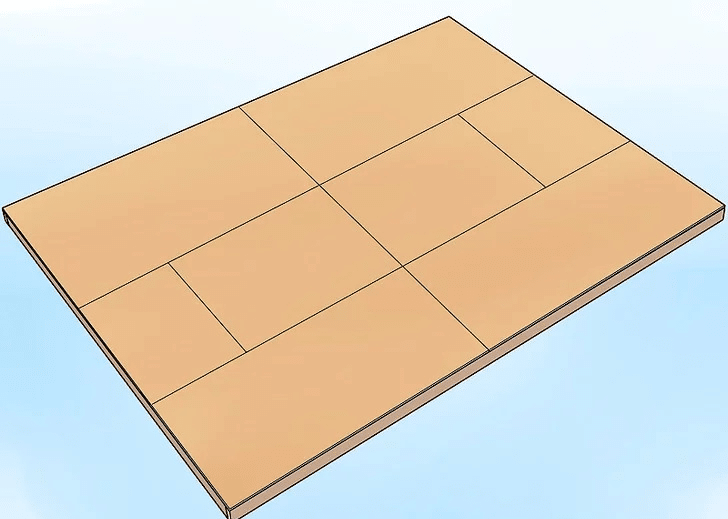
Here in this example, we are building out a cabin floor from scratch. You can make joists using the 2×4 lumber. Joists are cross beams used to connect a wooden frame. Determining the size of the frame should be easy as it is the same as the size of the cabin you want. You can use 2-1/2″ nails to create a frame using plywood.
Creating holes in the frame using a drill will make the insertion of nails easy while creating the frame. The joists should be measured and cut exactly fit inside the frame. Once the joists are ready, use 3-1/2″ galvanized screws to fix them between the frame. Make sure to leave a 14-inch gap between each joist. Once all the joists are attached inside the frame, a strong basement is ready for your cabin.
Now you can cut a 4×4-treated lumbar using the circular saw to create additional beams. Make four additional beams and attach them to this frame. Place these frames between the front and back panels of the frame. With the help of metal connectors, you can attach these beams to the joists to make a solid foundation.
Once this setup is ready, you can cover the surface of the frame with a plywood sheet. 1/5-inch screws can be used to nail the sheet properly to cover the structure. Now, a strong floor is ready for your shed.
Step 2: Creating the Frames
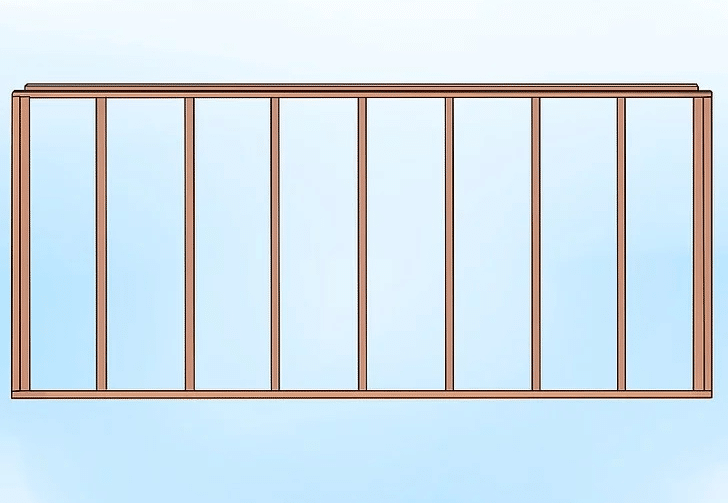
While framing the side walls for the shed, determining the wall height won’t be a hurdle. The back and sides of the lean-to-roof shed will all be at the same height. Only the front side of the shed will have a higher wall frame compared to the other three sides. This site will help the roof surface of the shed appear in a leaning position. This difference in height can be brought in later by adding a small, additional wall. A set of 2×4 lumber can be used to prepare the frames.
Use two 2x4s for each side of the frame. One 2×4 will be enough for the top and bottom parts of the frame. Make sure to get each side’s measurement correctly before nailing so that the frame won’t look uneven.
Cut the 2×4 lumbar bars to a height of 81 inches using a circular saw. Take these bars and attach them to the frame. This can be done with the help of joists that are fixed at a distance of 22 inches from each other on the frame. You can use the drill and make holes in the frame to attach the beams using 2-1/2″ screws.
While creating the front portion of the shed, leave a gap of around 53 inches. This space will let you quickly fix a door. Attach two beams to either edge of this opening so it’ll be sturdy enough to drill nails while attaching the door.
Step 3: Attaching the Walls
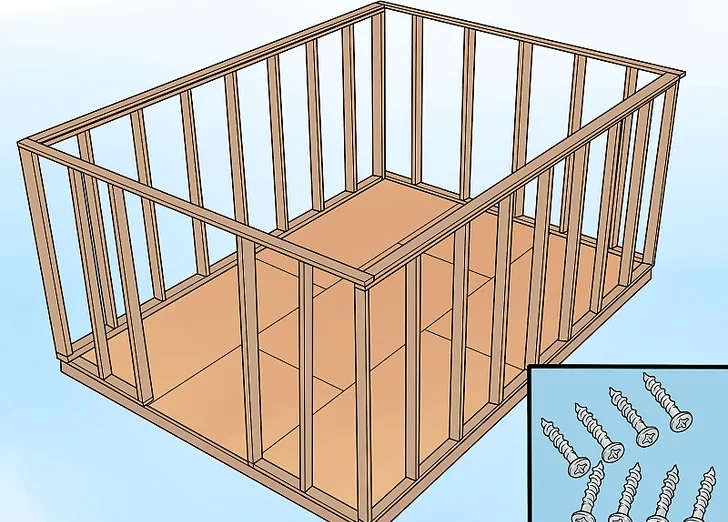
Once these frames are ready, you can place them on the foundation using the nails. While drilling the screws into the bottom foundation, make sure to place them at least 8 inches apart. Lift all the sides of the cabin up and fix them strongly using the 2-12″ screws. In order to properly place the frames, you can use a level and carpenter’s tape.
This way, you can make sure the angles are perfect, and no part of the cabin wall is unevenly placed. The best way to do this step of building a lean-to-roof shed will be first to place the side walls, then move on to the front and back sides of the sheds.
Step 4: Enclosing the Shed
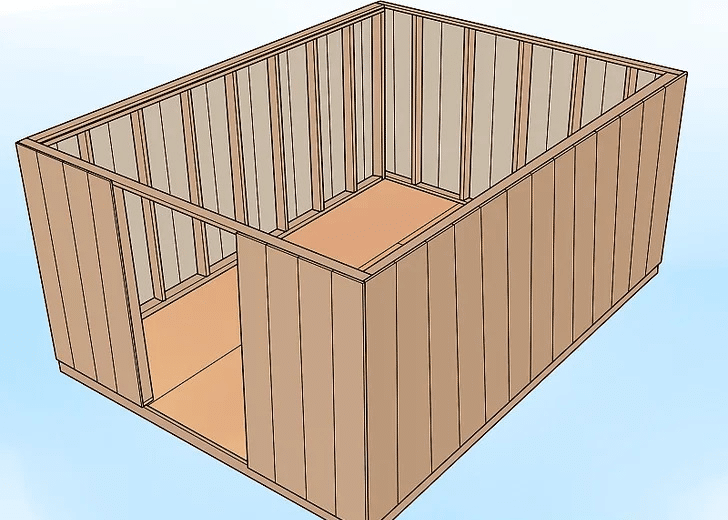
Now that all the sides of the sheds are enclosed using the walls, it is time to enclose them using siding completely. Measure the gaps between the frames of the walls to start with. Make sure to get the exact measurement here. Referring to these measurements, you can cut the sidings using a circular saw. Once all the siding is cut, drill holes in the frames to place 2-inch nails. It is suggested to place the nails at least 12 inches apart from each other and drill them directly into the joists. Fix the spacing and enclose the walls of the shed completely.
The sheds required for this can be bought from hardware stores. If you have a specific color in mind for the shed, you can choose the sides accordingly.
Step 5: Building the Additional Wall
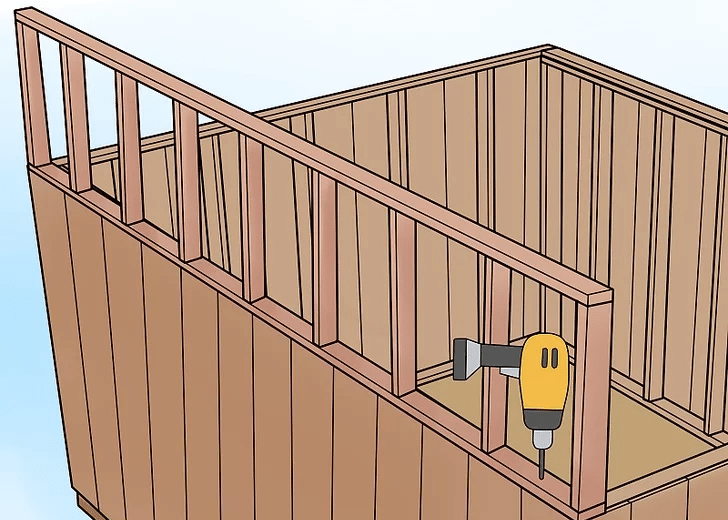
As we are building a lean-to-roof shed, one side of the shed should be higher than the rest of the sides. To make this structure possible, an additional wall is required to be fixed to the cabin that is built. Let us first start making a frame for this small, additional wall. This add-on wall should at least have a measurement of 192 inches in width and 32 inches in height. Again, this measurement is solely dependent on the cabin you have built. Just make sure that the height of this wall is very low.
Using the 2×4 lumber, you can create a frame for this wall like before. Place the joists between the frames keeping a distance of 22 inches. You can use the 3-1/2″ screws to drill and attach the joists tightly. Once the joists are fixed, you can now take the entire frame and attach it to one of the sides of the cabin. You can use the 2-1/2″ screws to attach this frame to the cabin and keep it sturdy.
Step 6: Covering the Roof
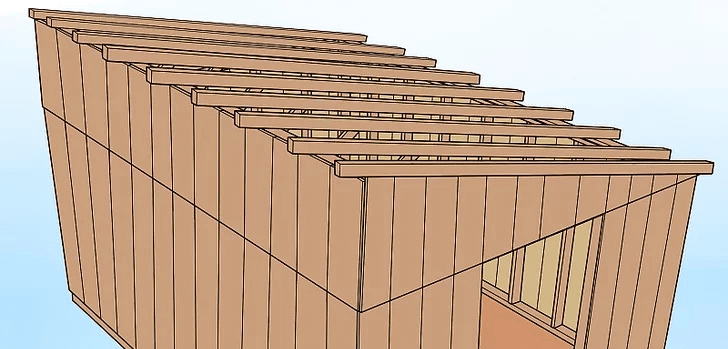
Using the 2×4 lumber, create rafters using the circular saw. Ensure that the rafters are long enough to cover the shed’s roof. It is recommended to cut the rafters to a length of at least 168 inches. Uniformity must be maintained while cutting the rafters and adding notches on either side of each rafter.
Once the rafters are cut, you can now place them on the shed to cover the roof. Make sure to leave at least a 24-inch gap between each rafter. Let the rafters connect the higher wall of the shed to the lower wall, making a slope that extends further from the lower end wall. Now you can use the rafter tiles to connect each rafter to the wall.
This can be done using 2–3 inches of nails and drilling on the joists of the additional wall and the rafters. Connecting the rafters this way will make the roof portion of the shed more sturdy.
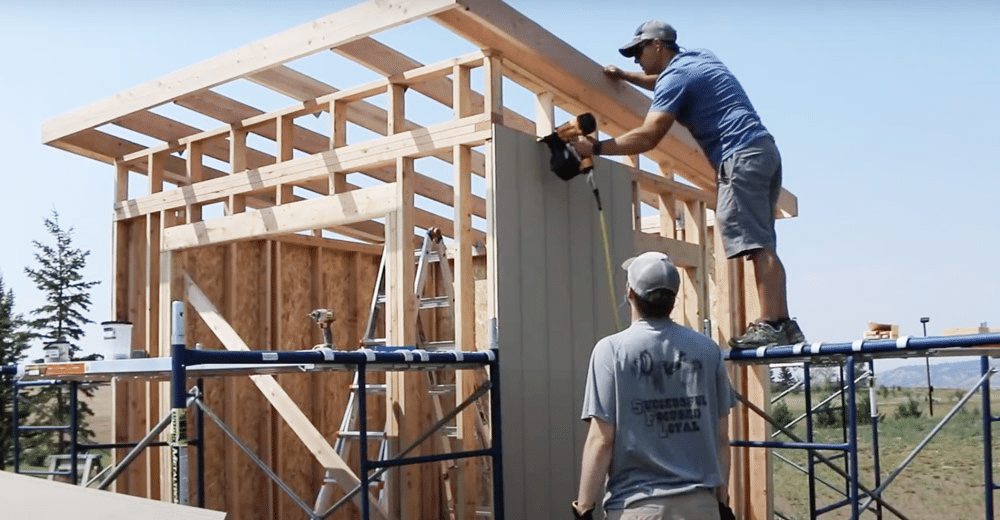
To make the roof of the shed stronger, it is recommended to attach more beams to the front and back of the shed. Cut the 2×4 lumber using the saw and insert it in the gap below the roof at the front and back of the shed. A gap of 20.5 inches should be maintained between each supporting beam. The supporting beams should be cut according to the gap between the roof and the walls, in decreasing order of height.
Once the roof supports are installed, you can finally cover all the gaps on the roof and the sides of the shed. For this, you can take the sidings and cut them exactly to fit the gaps using the circular saw.
Using 2-inch nails, you can cover the additional wall, roof, and front and back portions of the shed neatly.
Step 7: The Final Touch
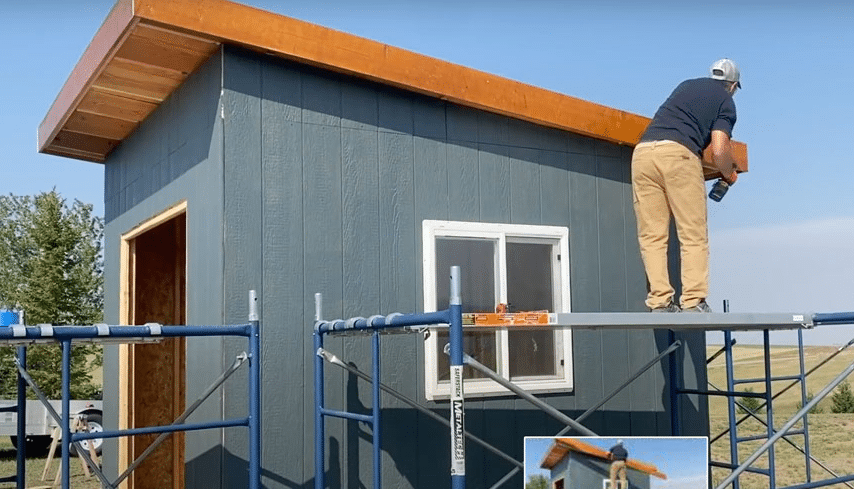
Once the whole shed is completely covered, you can use the plywood to add an extra layer of covering on the roof. Cut the plywood sheet as required using the saw and attach it to the roof using 2-inch nails. Drill the nails straight into the rafters for better results. After completing the roofing, it is now time to give a desirable look to your lean-to-roof shed.
Apply stain or paint to your shed’s roof. Using stain will bring out the natural shade of the wood, whereas painting will give the wood a custom color. Make sure to apply two or three coats of paint to make the roof exhibit a solid shade of color in a uniform manner. Leave the shed for 48 hours after painting, and voila! You have successfully built a lean-to-roof shed.
Final Word
Spending a lump sum to buy a shed for your backyard is not advisable, as you can create an equally productive and good-looking lean-to-roof shed on your own. Most people find the design of the roof part too difficult. After reading this article, you might have understood that this is not the case.
All you have to have is a great plan, to begin with, and you can DIY a lean-to-roof shed easily. Figure out the size of the shed you require and make a plan beforehand to get a fair idea of how the measurements and cuttings will go. Sticking to such a plan will reduce material waste too.
We hope the guide to DIYing a lean-to-roof shed was helpful in learning how to build one!

