
Walls take up the most space in a room, yet they’re often left bare. A few small touches can change that.
DIY wall decor brings life, color, and character into any space using things you already have. No need for expensive art or store-bought frames.
These ideas are all about making your walls feel like part of your home, not just the background. It’s less about being perfect and more about having fun.
From soft textures to bold shapes, there’s a lot you can try. This list gathers easy, creative ways to decorate your walls with your own two hands.
Where to Start with DIY Wall Projects?
If you’re new to DIY wall decor, begin with small, low-risk projects like framed prints or washi tape designs. These are easy to change or remove if needed.
Start with one wall or corner rather than decorating the entire room at once. Choose ideas that match your space, tools, and time.
Focus on one color theme or material to keep things simple. Before putting anything up, test layouts on the floor or use painter’s tape to visualize placement.
Most importantly, enjoy the process. DIY is about creating something that feels right for you, not aiming for perfection.
DIY Wall Decor Ideas for Any Room
No matter the size or style of your space, these DIY wall decor ideas work well in bedrooms, living rooms, kitchens, or even hallways. Each one is simple to make and adds a personal touch that helps turn a house into a home.
1. Abstract Painted Canvas Art
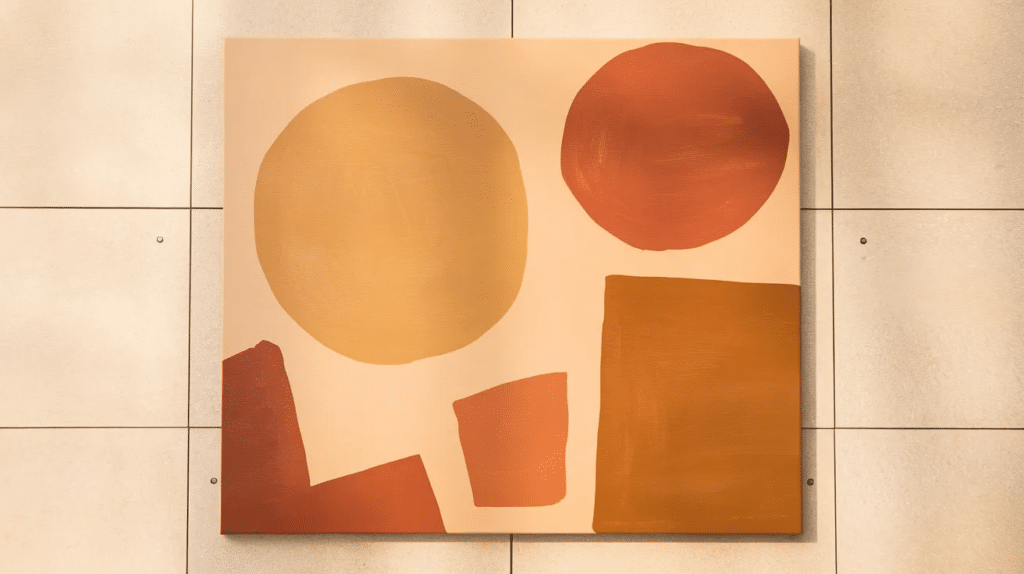
Create a bold statement with abstract canvas art that reflects your personality. Use simple shapes, lines, or color blocks to add modern flair to your wall.
Best For: Living rooms, bedrooms, hallways, modern, boho, or minimalist homes.
Materials Needed: Blank canvas, painter’s tape, acrylic paints, brushes, ruler, pencil.
How to Achieve This:
- Lightly sketch your design with a pencil, using simple geometric or freeform shapes.
- Apply painter’s tape to section off areas for clean lines.
- Fill each section with your chosen colors and let them dry completely.
- Remove tape and touch up edges if needed before hanging.
2. Rustic Floating Shelves
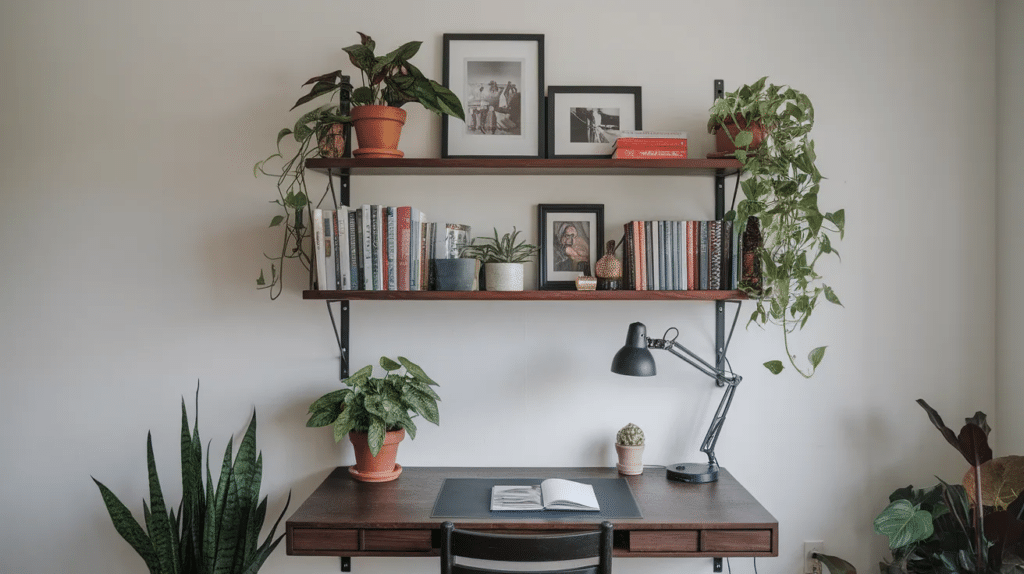
Create depth and dimension with rustic floating shelves that beautifully showcase decorative items, plants, and books.
Best For: Living rooms, bedrooms, or home offices, works well with farmhouse to modern minimalist styles.
Materials Needed: Wooden boards, L-brackets, screws, level, drill, wood stain or paint.
How to Achieve This:
- Cut wood boards to the desired lengths precisely.
- Stain or paint the boards and allow them to dry fully.
- Locate the wall studs and securely attach L-brackets using a level for accuracy.
- Mount the shelves and style them with books, framed art, or small plants.
3. Washi Tape Wall Patterns
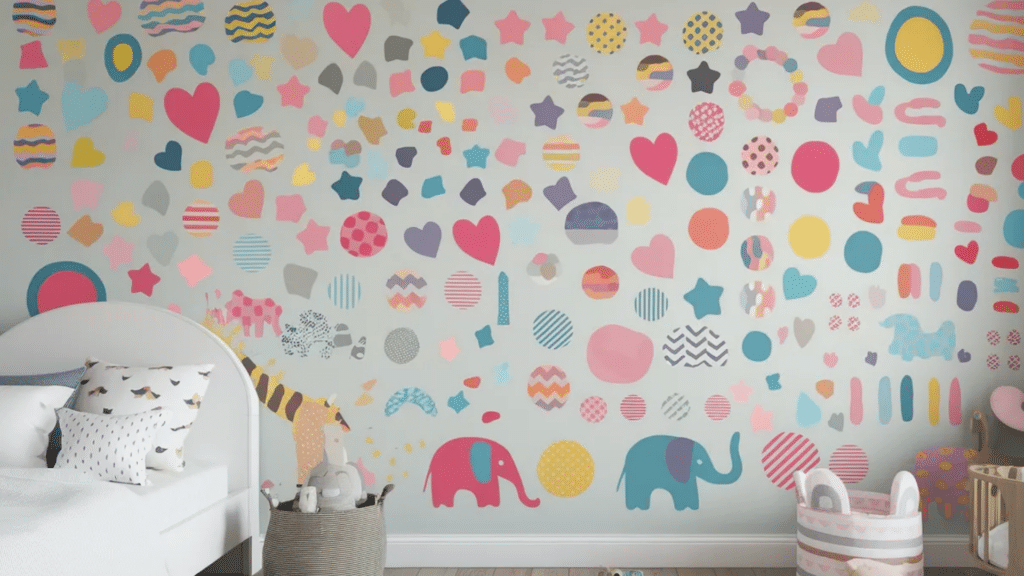
Design custom patterns or faux wallpaper using colorful washi tape. It’s renter-friendly, fun, and super easy to change.
Best For: Kids’ rooms, dorms, craft corners, perfect for renters or temporary style.
Materials Needed: Washi tape (various colors and patterns), ruler, pencil.
How to Achieve This:
- Lightly mark your desired pattern with a pencil using a ruler for clean lines.
- Apply washi tape directly over the marks in shapes like stripes, grids, or chevrons.
- Press down firmly on the edges for a smooth finish.
- Change up the pattern anytime without damaging the walls.
4. DIY Macrame Wall Hanging
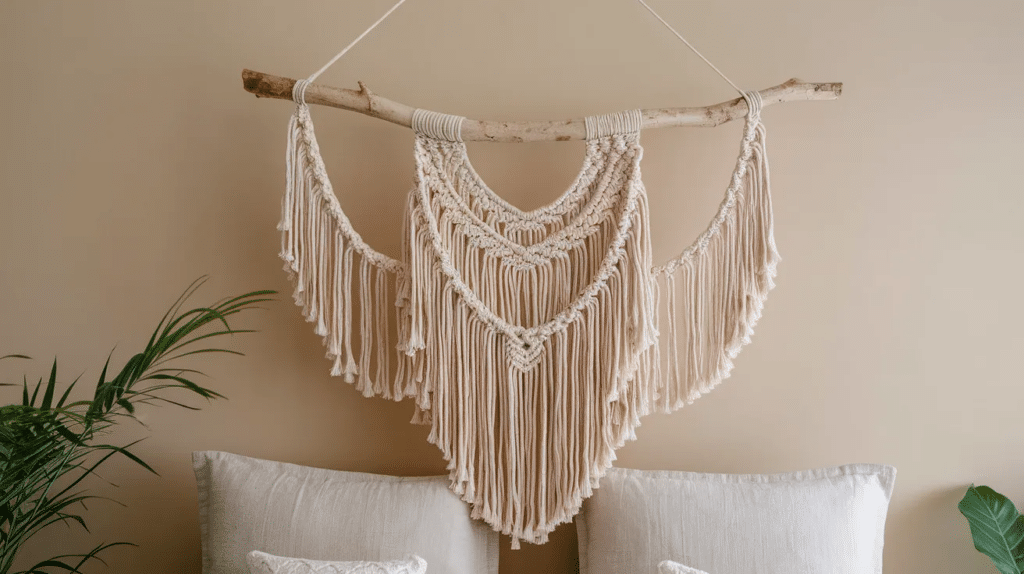
Add soft texture and a handmade touch with macrame. Even basic knots can create beautiful boho wall art that feels warm and inviting.
Best For: Bedrooms, living rooms, or reading nooks, best for boho, eclectic, or cozy spaces.
Materials Needed: Cotton macrame cord, wooden dowel or stick, scissors, measuring tape.
How to Achieve This:
- Cut cords to your desired lengths, allowing extra for knots and fringe.
- Tie each cord to the dowel using a lark’s head knot.
- Follow a beginner-friendly macrame pattern using square or spiral knots.
- Trim the ends evenly, then hang your finished piece with string or nails.
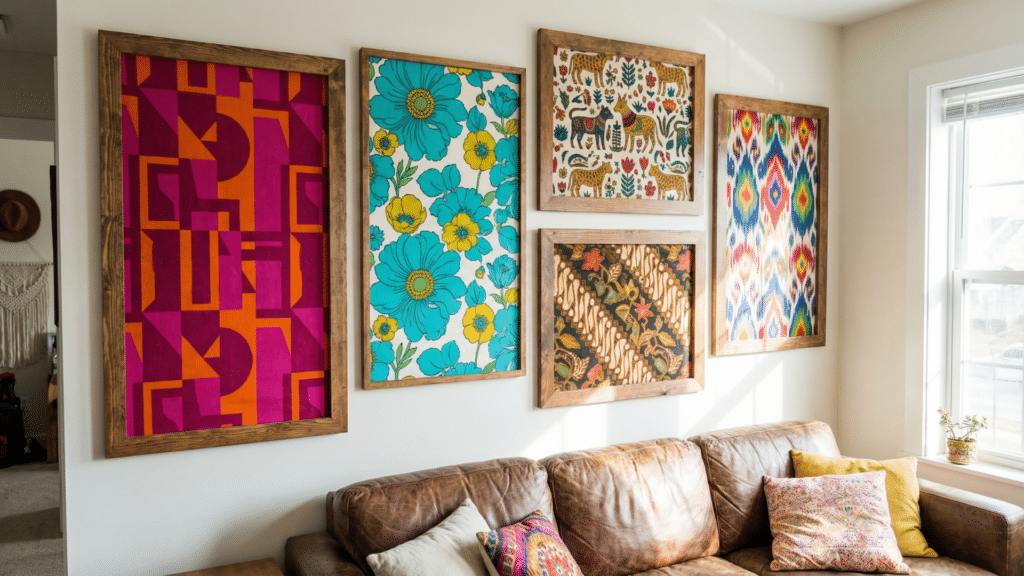
5. Framed Wallpaper or Gift Wrap Prints

Transform leftover wallpaper or beautiful gift wrap into affordable, eye-catching wall art by framing it like gallery pieces.
Best For: Dining rooms, hallways, or bedrooms, fits modern, eclectic, or vintage themes.
Materials Needed: Wallpaper/gift wrap, picture frames, scissors, tape, or glue.
How to Achieve This:
- Cut wallpaper or gift wrap to the size of each frame using scissors.
- Smooth the paper into the frame backing with tape or glue to prevent wrinkles.
- Arrange the frames in a straight row or grid on the wall.
- Mix different patterns or stick to one theme for a cohesive look.
6. DIY Photo Collage Wall
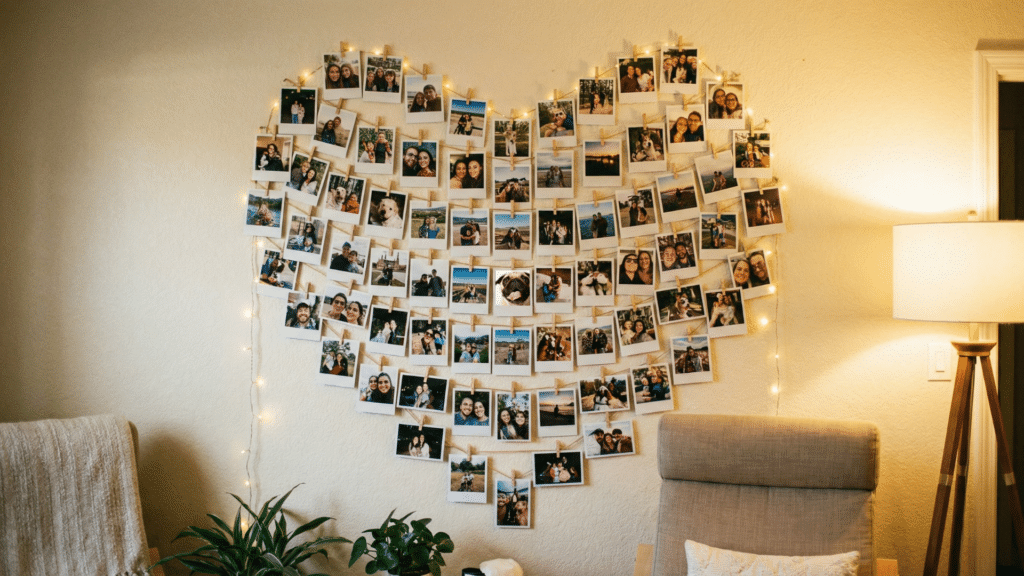
Show off memories by creating a stylish photo collage wall using prints, clips, or frames. It adds a personal touch and makes your space feel more like home.
Best For: Hallways, bedrooms, staircases, perfect for family homes or creative spaces.
Materials Needed: Printed photos, adhesive strips or clips, measuring tape, level, and optional frames.
How to Achieve This:
- Choose 9–12 photos with similar tones or themes for a cohesive look.
- Lay them out on the floor first to plan the arrangement.
- Use adhesive strips or command hooks to attach them to the wall evenly spaced.
- Optional: frame the prints or hang them from clips and string for added charm.
7. Paper Flower Wall Art
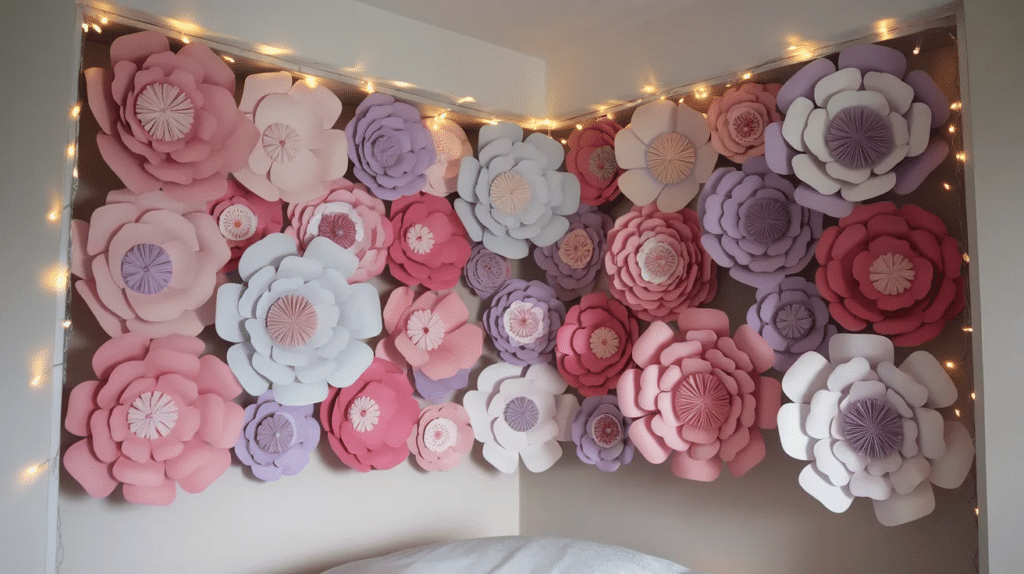
Add soft color and texture to your walls with oversized paper flowers. These 3D blooms are great for feature walls and look stunning in groups.
Best For: Bedrooms, nurseries, event backdrops, ideal for soft, feminine, or playful spaces.
Materials Needed: Colored cardstock, glue, scissors, pencil, flower templates (optional), and wall-safe adhesive.
How to Achieve This:
- Cut out petals and leaves from cardstock using stencils or by hand.
- Layer and glue petals to form each flower, curling edges for depth.
- Add a center piece using rolled paper or a contrasting color.
- Arrange the flowers and stick them to the wall in a cluster or border.
8. Chalkboard Wall or Framed Board
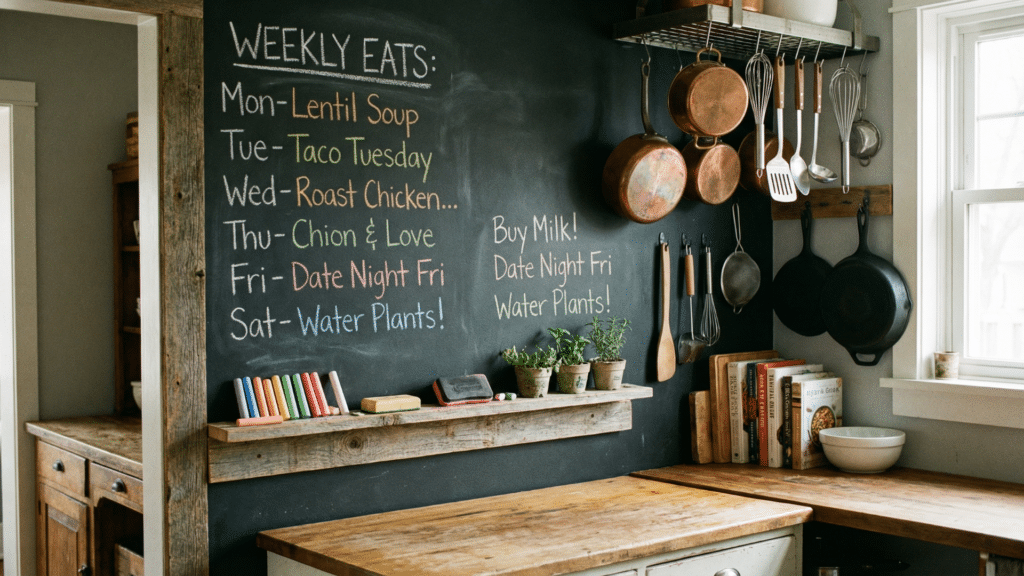
Create a fun and useful space with chalkboard paint. It’s perfect for writing notes, doodles, or rotating quotes that keep things fresh.
Best For: Kitchens, playrooms, offices, great for interactive or practical use.
Materials Needed: Chalkboard paint, paintbrush or roller, painter’s tape, optional wood board or frame, chalk.
How to Achieve This:
- Choose a wall section or paint a large board with chalkboard paint.
- Use painter’s tape for clean edges if painting directly on the wall.
- Let the paint cure for 24 hours before writing on it.
- Hang the board or start writing directly if it’s wall-mounted.
9. Hanging Plant Wall
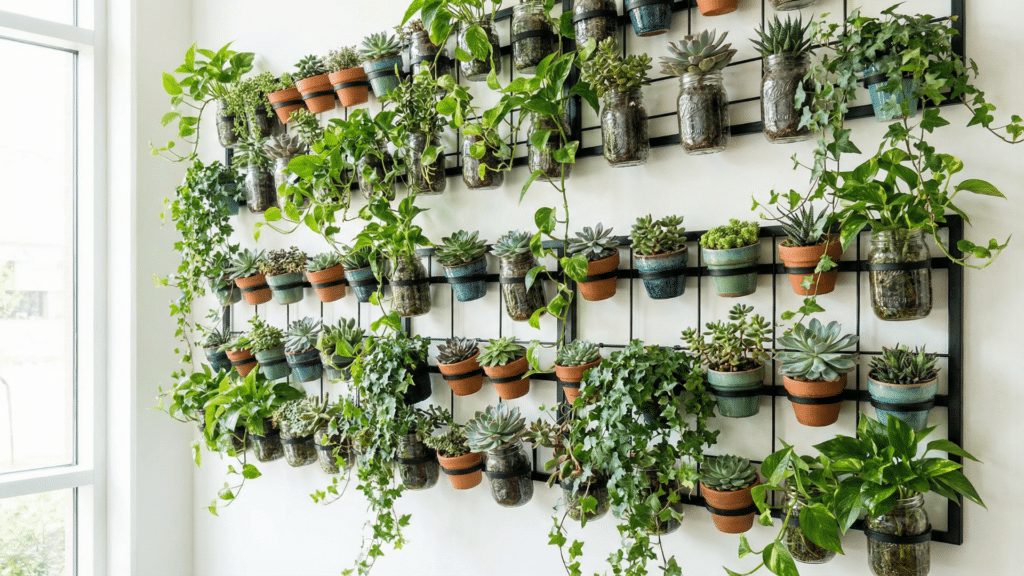
Bring life and greenery to your space by creating a wall-mounted plant display. Great for small spaces and indoor gardening lovers.
Best For: Living rooms, kitchens, bathrooms, ideal for earthy, nature-inspired interiors.
Materials Needed: Wall planters or mason jars, brackets or hooks, screws, drill, and small indoor plants.
How to Achieve This:
- Choose low-maintenance plants like pothos or succulents.
- Mount brackets or hangers securely to wall studs.
- Attach planters or jars and fill them with soil and plants.
- Water lightly and make sure they get enough indirect sunlight.
10. Clipboard Art Display
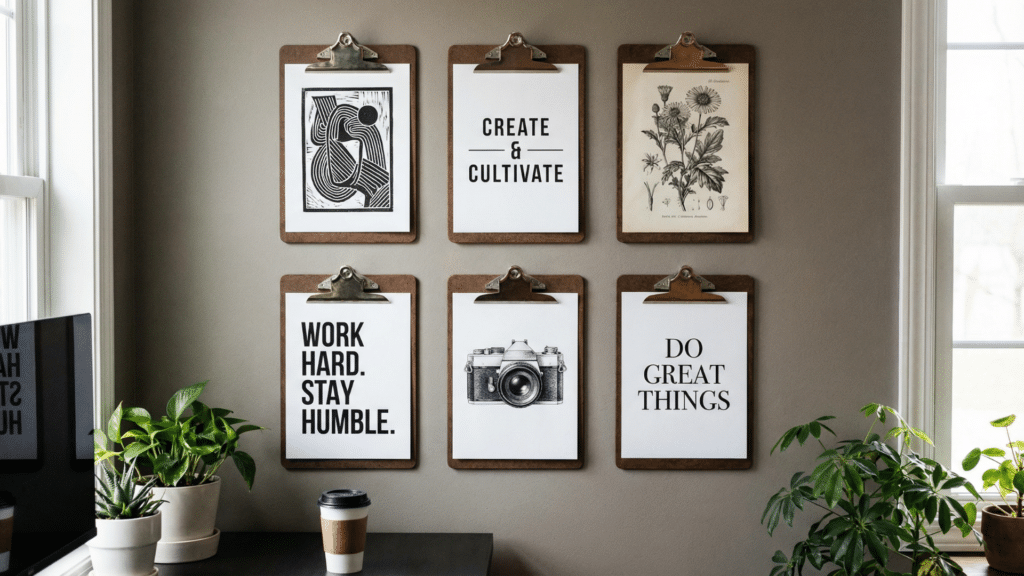
Easily swap art, prints, or kids’ drawings with a clipboard wall. It’s simple, flexible, and makes your walls feel active and fun.
Best For: Offices, kids’ rooms, hallways, great for anyone who likes to change decor often.
Materials Needed: Clipboards, nails or hooks, hammer, printed quotes or art.
How to Achieve This:
- Arrange 3–6 clipboards on the wall in a neat line or grid.
- Attach them using nails or adhesive wall hooks.
- Clip in your favorite art, photos, or even calendars.
- Switch out the contents whenever you want a fresh look.
11. Mirror Gallery Wall

Add light and space to any room with a gallery wall of mirrors. Different shapes and frames create a stylish and bright display.
Best For: Small rooms, hallways, and living rooms, ideal for modern, vintage, or glam styles.
Materials Needed: Assorted mirrors, wall hooks or adhesive strips, a level, and optional spray paint for frames.
How to Achieve This:
- Gather mirrors of different shapes and sizes. Thrift stores are great for unique finds.
- Spray paint frames to match or mix tones for a collected look.
- Plan the layout on the floor, then transfer it to the wall using a level.
- Hang mirrors evenly or in a creative pattern to reflect light beautifully.
12. DIY String Light Photo Display
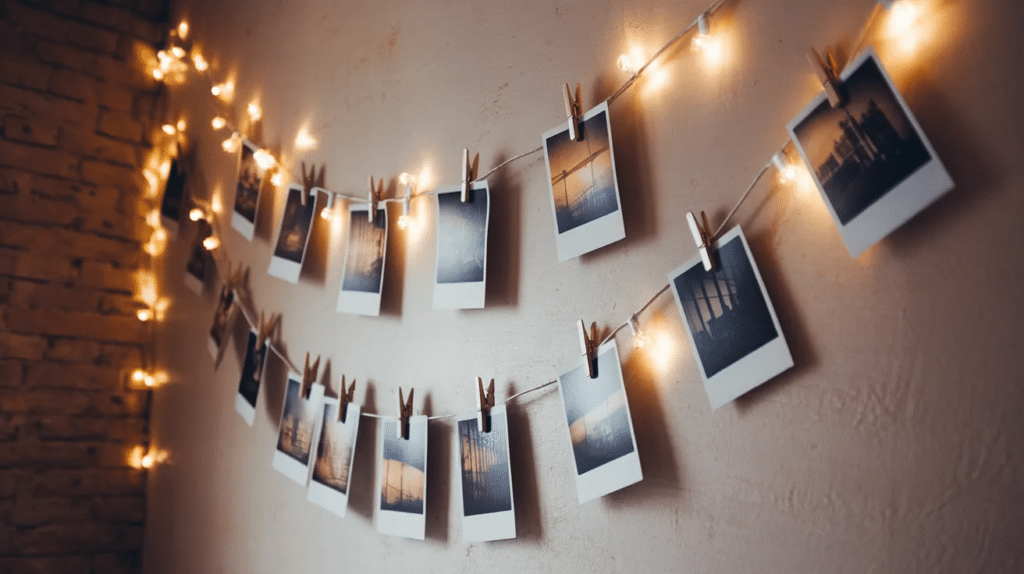
Create a cozy and charming wall display using string lights and clipped photos. It adds both warmth and personality to any room.
Best For: Bedrooms, dorms, creative corners, works well in casual, cozy settings.
Materials Needed: String lights, mini clothespins, printed photos, adhesive wall hooks, or nails.
How to Achieve This:
- Hang string lights in zig-zag rows across your wall using small hooks or nails.
- Print square or mini-sized photos.
- Clip the photos onto the light strands using mini clothespins.
- Plug in the lights for a soft, glowing atmosphere that shows off your memories.
13. Painted Wood Quote Sign
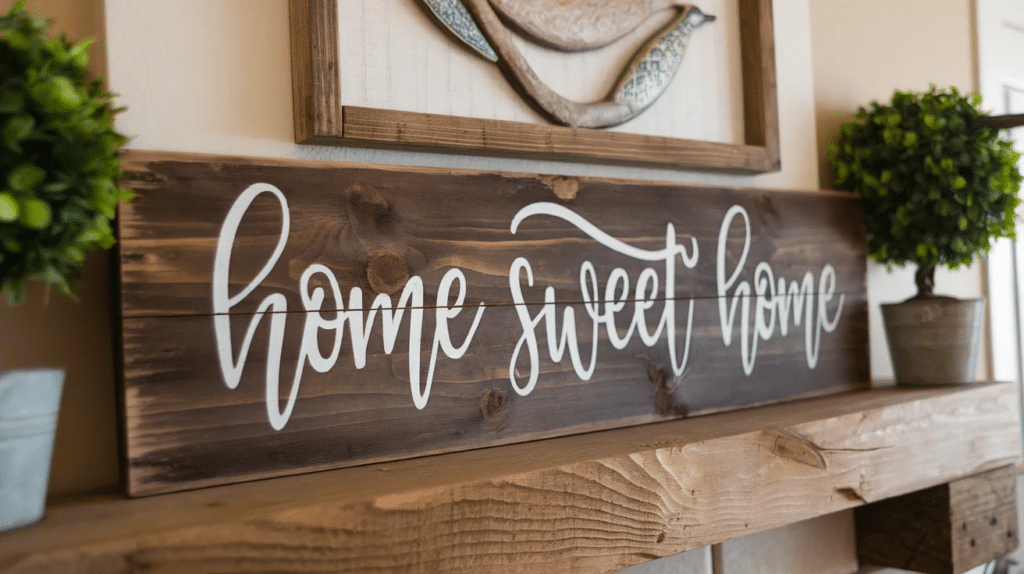
Make a rustic wood sign with your favorite quote or word. It adds a handmade, heartfelt touch to your wall.
Best For: Living rooms, kitchens, entryways, fits farmhouse, rustic, or casual styles.
Materials Needed: Wood plank, paint, stencil or vinyl letters, sandpaper, nails, or sawtooth hanger.
How to Achieve This:
- Lightly sand and paint or stain the wood plank.
- Use a stencil or vinyl letters to add your chosen phrase.
- Paint over the letters, let dry, and remove the stencil.
- Distress the edges if desired, then hang with nails or wall mounts.
14. Shadow Box Display Frame
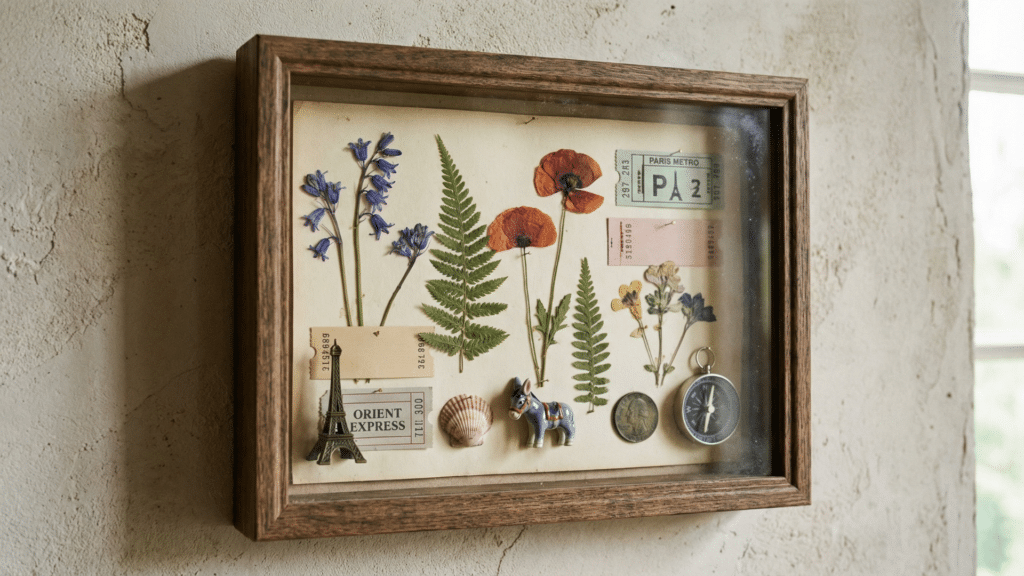
Display keepsakes, souvenirs, or small items in a shadow box frame. It gives depth to your wall while telling a story.
Best For: Entryways, offices, or personal spaces, great for travel or memory-themed walls.
Materials Needed: Shadow box frame, small objects (souvenirs, dried flowers, tickets), glue dots or pins.
How to Achieve This:
- Arrange your keepsakes inside the shadow box before attaching anything.
- Once happy with the layout, secure each item with glue dots or pins.
- Close the frame and hang it using a hook or picture hanger.
- Create a themed wall by grouping multiple shadow boxes together.
15. Basket Wall Display
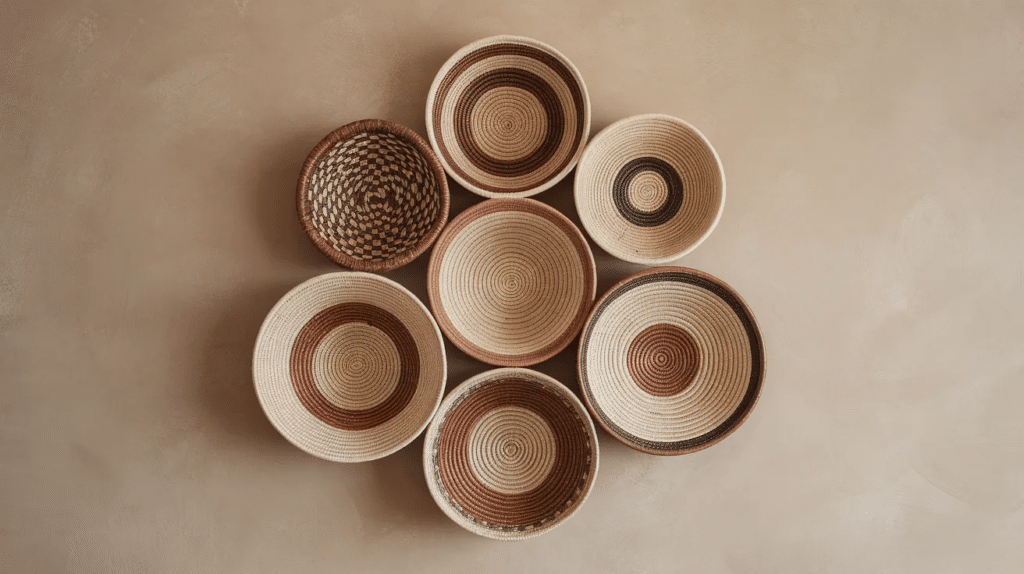
Use woven baskets to create a warm, textured wall display. Mix shapes and sizes for a casual yet stylish focal point.
Best For: Dining rooms, living rooms, stairwells, perfect for boho, neutral, or rustic themes.
Materials Needed: Flat woven baskets, command hooks or nails, a level, and optional paint.
How to Achieve This:
- Arrange baskets on the floor to test the layout before hanging.
- Mix round, oval, and square baskets for visual variety.
- Optional: paint part of the baskets to match your color palette.
- Hang using nails or adhesive hooks, starting with the center and working outward.
16. Hanging Photo Ladder
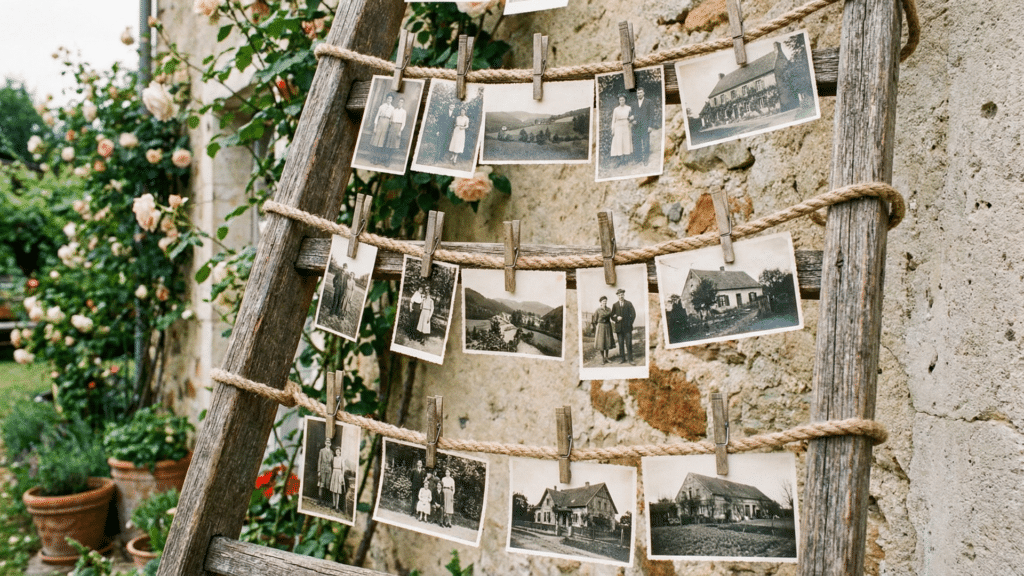
Turn a wooden ladder into a beautiful vertical photo display. It brings a rustic charm and showcases personal memories in a unique way.
Best For: Bedrooms, staircases, or cozy corners, ideal for farmhouse, vintage, or eclectic styles.
Materials Needed: Old ladder or wood rods, twine or string, mini clothespins, printed photos, hooks or nails.
How to Achieve This:
- Clean and sand the ladder if needed, or leave it worn for a rustic look.
- Tie the string horizontally across each rung to form hanging rows.
- Use clothespins to clip printed photos or small prints to the strings.
- Lean the ladder against the wall or hang it securely with anchors.
17. Framed Fabric or Textile Art
Add texture and color by framing pieces of fabric, scarves, or old clothing with patterns you love. It gives any room a soft, creative vibe.
Best For: Bedrooms, hallways, or reading nooks, great for vintage, eclectic, or cultural themes.
Materials Needed: Fabric scraps, scissors, frames, tape or glue, optional iron.
How to Achieve This:
- Cut fabric to fit your frames, ironing out wrinkles if needed.
- Tape or glue the fabric to the frame backing to keep it smooth.
- Place it in the frame and seal it closed.
- Hang the framed textiles in a grid or scattered layout for impact.
18. Painted Wall Arch or Shape
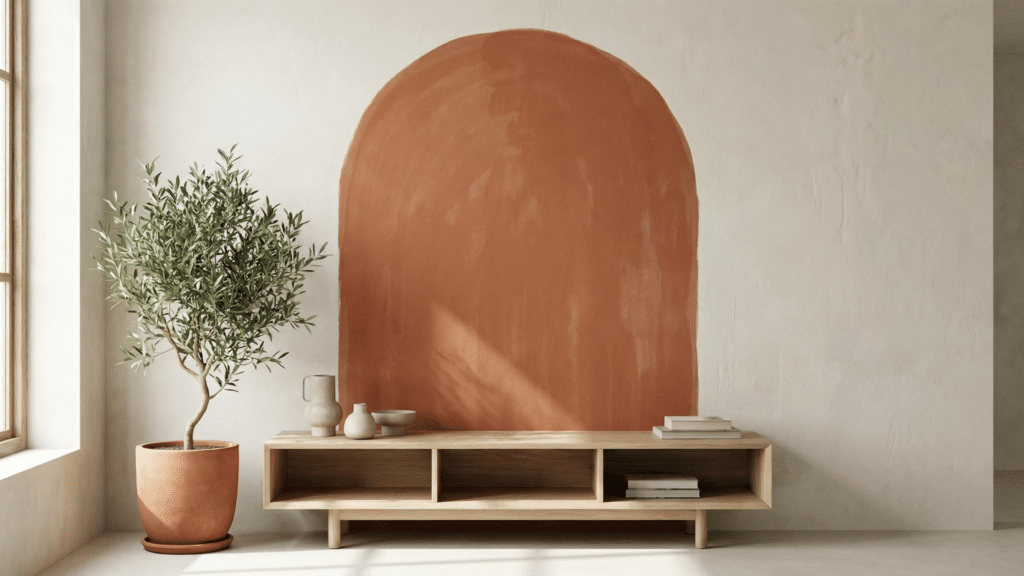
Use paint to create a soft arch, circle, or geometric design directly on your wall. It adds visual interest without needing extra decor.
Best For: Behind beds, reading chairs, and desks, ideal for modern, minimalist, or boho spaces.
Materials Needed: Paint, painter’s tape, pencil, string, measuring tape, paintbrush or roller.
How to Achieve This:
- Mark your shape using a pencil and measuring tape (tie a string to a pencil for a perfect arch).
- Tape off the edges for clean lines.
- Paint inside the shape using a roller or brush and let it dry completely.
- Remove tape and touch up any uneven edges.
19. T-Shirt Wall Art
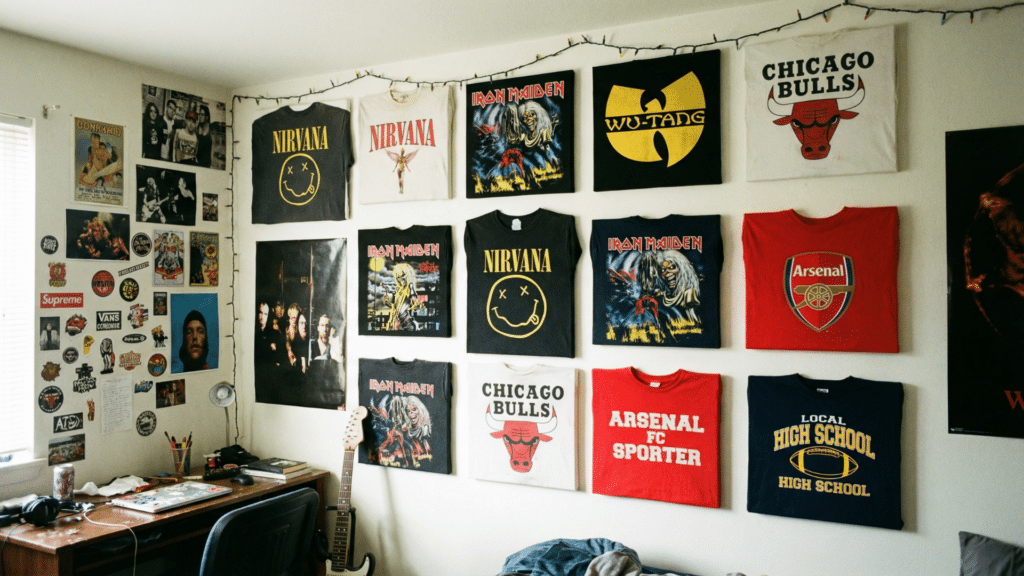
Repurpose old graphic tees or shirts with meaningful designs into cool, framed art pieces. It’s a great way to save memories and decorate at the same time.
Best For: Teen rooms, game rooms, man caves, ideal for casual or nostalgic themes.
Materials Needed: T-shirt, scissors, canvas or frame, staple gun or glue.
How to Achieve This:
- Cut the shirt front slightly larger than your canvas or backing.
- Stretch the fabric over the canvas and staple it tightly on the back.
- Trim excess fabric and hang the piece on the wall.
- Repeat with other shirts for a full T-shirt gallery wall.
20. Seasonal Wall Switch-Out Frame
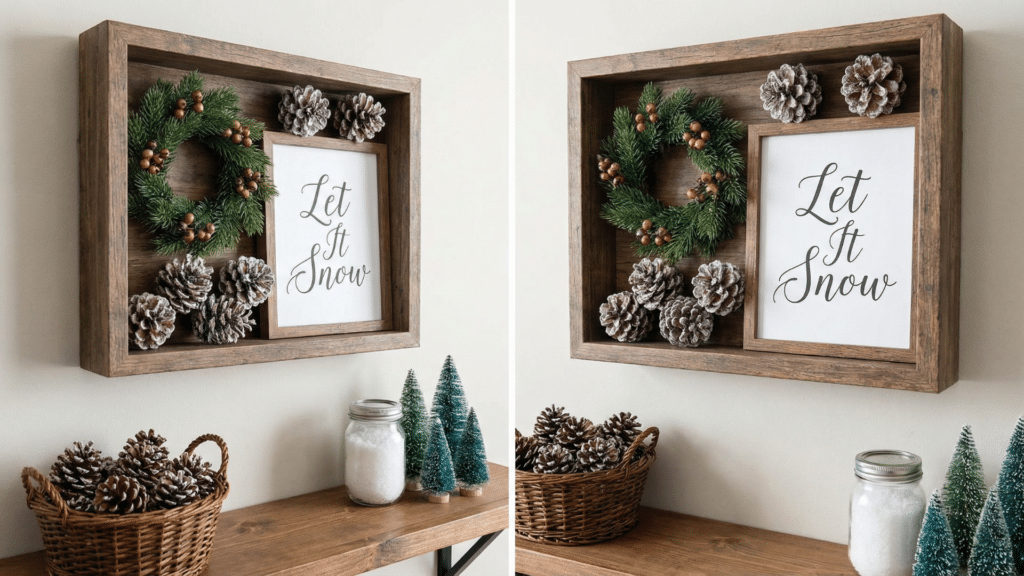
Create one wall frame or shelf that you change with the seasons. Use printables, small wreaths, or themed items to refresh your space year-round.
Best For: Entryways, kitchens, or above mantels, fits all styles depending on decor choices.
Materials Needed: Frame or shadow box, seasonal decor items (small wreaths, printables), and hooks or clips.
How to Achieve This:
- Hang a large frame or box with a neutral background.
- Attach small items with clips, string, or tape, like spring flowers, fall leaves, or holiday signs.
- Change items every few months to match the season or holiday.
- Store off-season pieces in a box for easy swaps.
21. Pegboard Art and Storage Wall
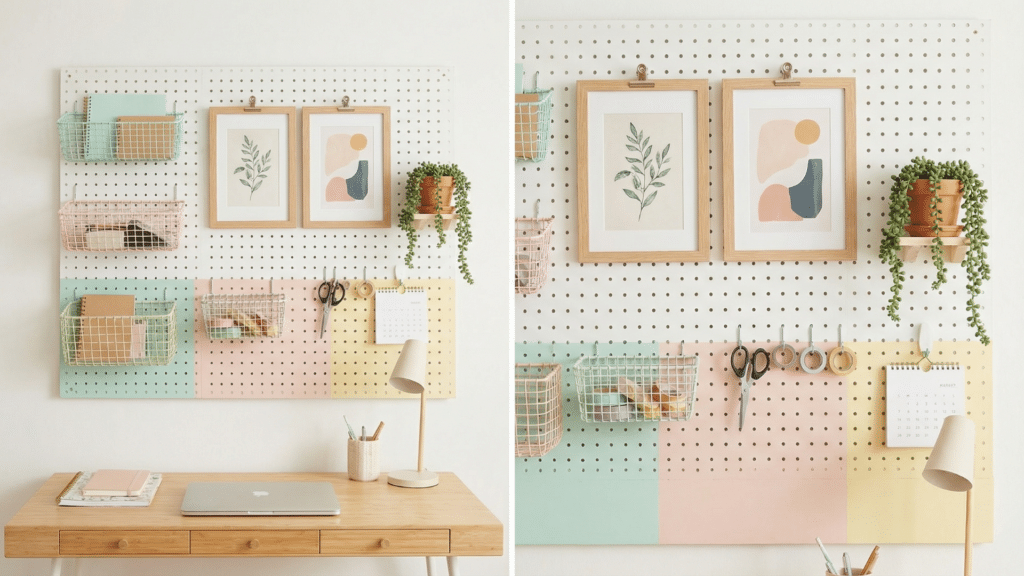
Design a custom pegboard that holds tools, plants, art, or decor. It’s both practical and creative, giving your wall purpose and style.
Best For: Craft rooms, offices, kitchens, works well with modern or industrial looks.
Materials Needed: Pegboard sheet, paint, screws, drill, pegs, baskets, or hooks.
How to Achieve This:
- Paint the pegboard if desired and let it dry fully.
- Mount it to wall studs using screws for strong support.
- Insert hooks, baskets, or shelves into peg holes.
- Decorate with supplies, small art, tools, or plants to combine function and beauty.
Final Tips Before You Start
Before jumping into your DIY wall decor project, it helps to plan a few things ahead. These quick tips can save time and make your project go smoothly from start to finish.
- Measure your space before cutting or hanging anything.
- Lay out your design on the floor first to see how it looks.
- Stick to a color palette to keep everything looking balanced.
- Use wall-safe adhesives if you’re renting or want to avoid damage.
- Start with one project instead of many to avoid feeling overwhelmed.
- Choose ideas based on the time and tools you already have.
Wrapping Up
Every wall has the chance to say something. It can show your style, tell a story, or simply make your space feel more complete.
DIY wall decor lets you do that in a personal, hands-on way. These ideas are just a starting point; there’s no single “right” way to decorate.
Mix shapes, colors, and textures that feel right to you. Take time to enjoy the process, not just the result. Let your walls grow and change with you.
Looking for more ways to decorate your space? Browse our latest DIY and home design ideas for fresh inspiration.