
Building a garden path on a tight budget is easier than it seems. With basic tools and affordable materials, it’s possible to create a clear, useful walkway through any yard or garden.
These types of projects help organize outdoor space and make it easier to move around, even after rain or watering.
Many low-cost path ideas can be built in a day or over a weekend. They don’t require advanced skills or expensive supplies.
This blog post lists practical, budget-friendly DIY garden path ideas. Each one is designed to save money while still getting the job done.
What to Know Before Building a DIY Garden Path
A strong garden path needs more than just good looks. It should be safe, simple to build, and fit your space and budget. Before you start, take a few minutes to plan your layout, choose the right materials, and consider how the path will be used.
- Pick a safe, simple design: Choose a path that is easy to walk on and not slippery, even when wet.
- Plan the size and shape: Measure your space. Use a garden hose or rope to outline your path.
- Set a clear budget: Know how much you want to spend. Stick to low-cost materials like mulch, gravel, or reused bricks.
- Check your tools: Most DIY garden path ideas only need a shovel, rake, mallet, and level. Make sure you have the basics.
- Think about the weather: Choose materials that hold up in your local climate, especially in rain, snow, or direct sun.
- Know how often it will be used: For high-traffic areas, choose stronger materials such as pavers or crushed stone. For light use, mulch or wood rounds work fine.
- Look for what you already have: Reuse leftover wood, bricks, concrete, or gravel from past projects to save money.
Planning helps you avoid waste, save money, and pick a path that works well in your yard. A little prep makes the project go faster and gives better results.
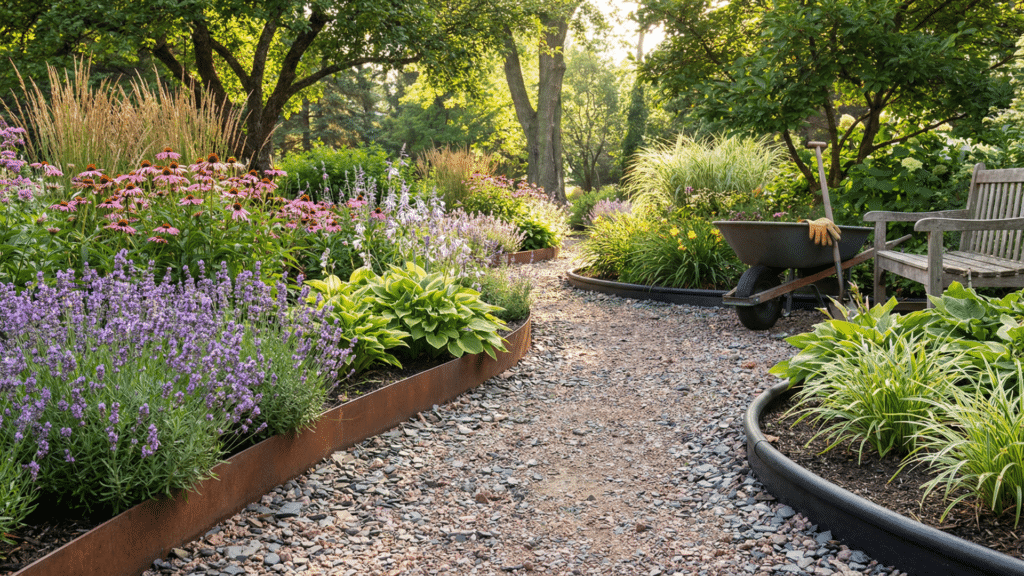
Simple and Cheap Garden Path Ideas
You don’t need a big budget to build a great-looking path in your yard. The ideas below are easy to follow, use low-cost or free materials, and can be done with basic tools.
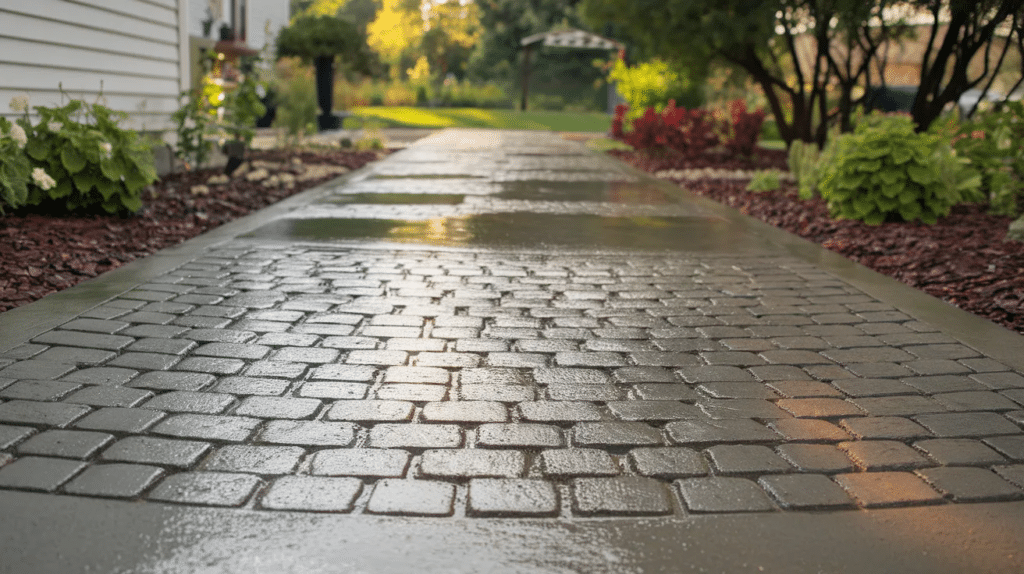
1. Gravel Path with Edging
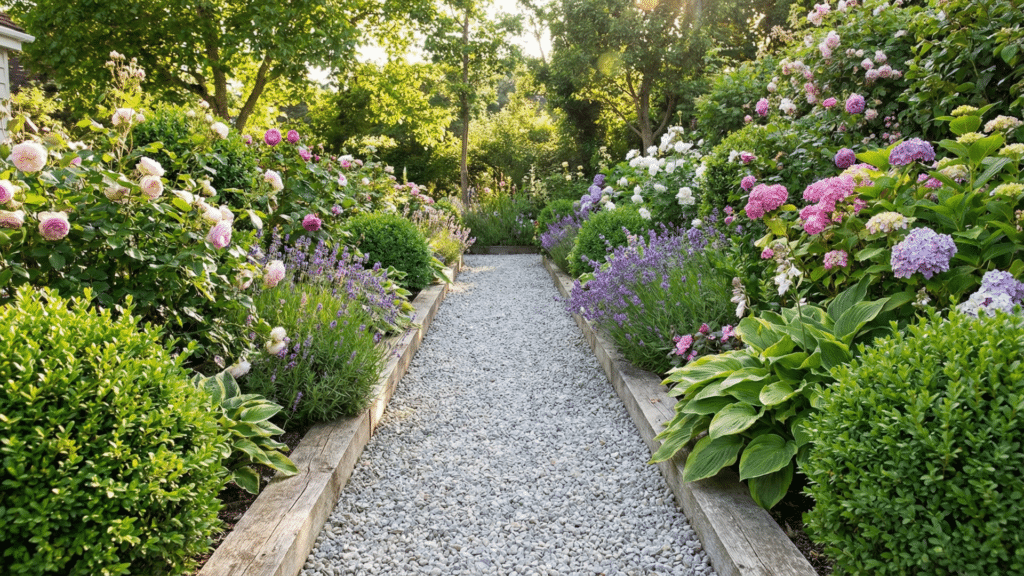
Gravel paths are simple, quick to build, and low-cost. They work well in most climates and can be shaped to fit any space.
Materials Needed:
- Gravel (pea gravel or crushed rock)
- Landscape fabric
- Wooden, plastic, or stone edging
- Shovel
- Rake
Steps:
- Mark the path using stakes and string.
- Dig the path about 2–3 inches deep.
- Lay down landscape fabric to stop weeds.
- Place edging along both sides of the path.
- Pour gravel on top and spread it evenly with a rake.
- Walk on the path or tamp it down to settle the gravel.
Extra Tips:
- Use crushed stone for more grip underfoot.
- Choose a gravel color that matches your garden.
Why it Works: Gravel is cheap, drains water well, and creates a tidy walking space. The edging keeps it from spreading out over time.
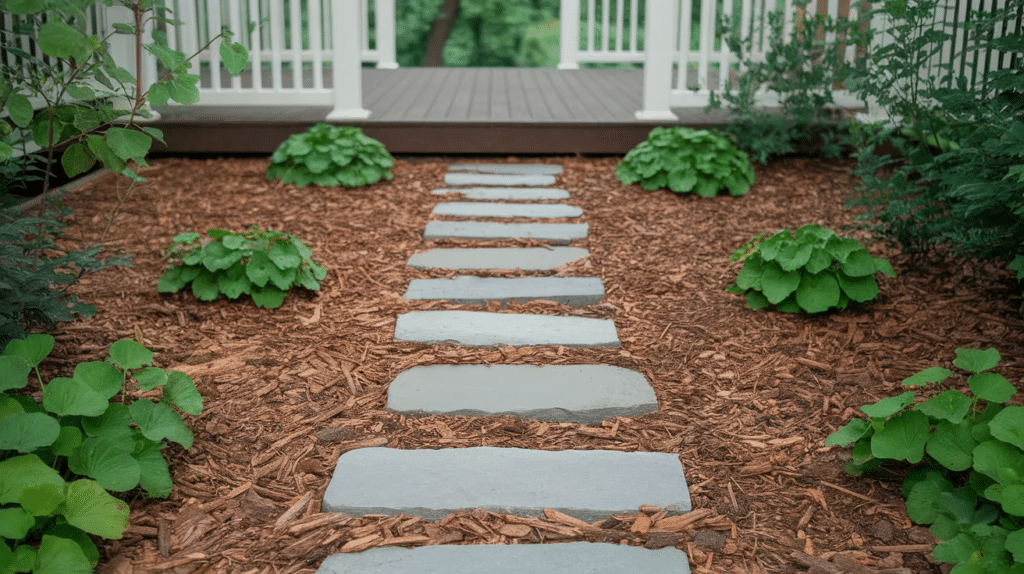
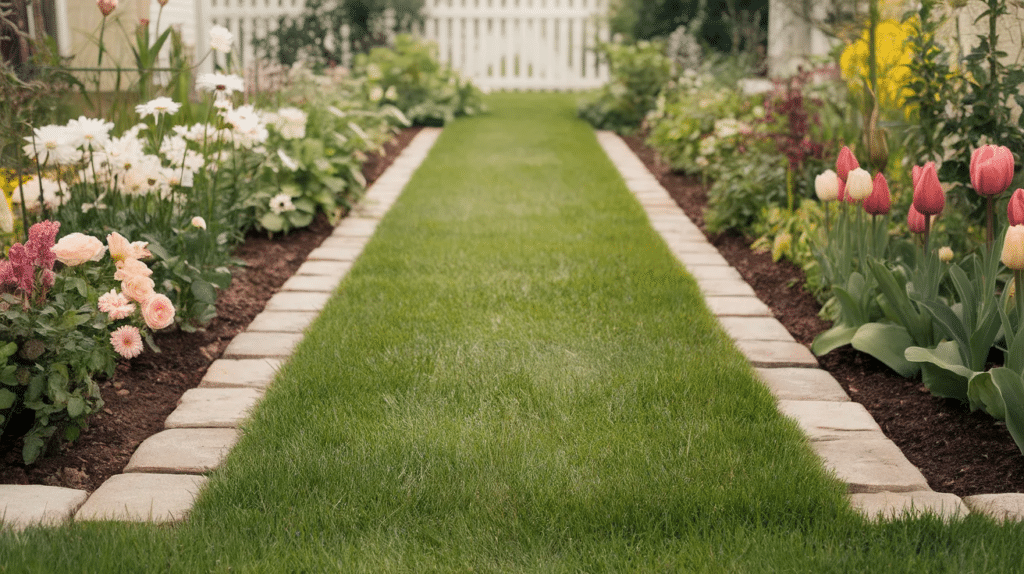
2. Stepping Stones in Grass
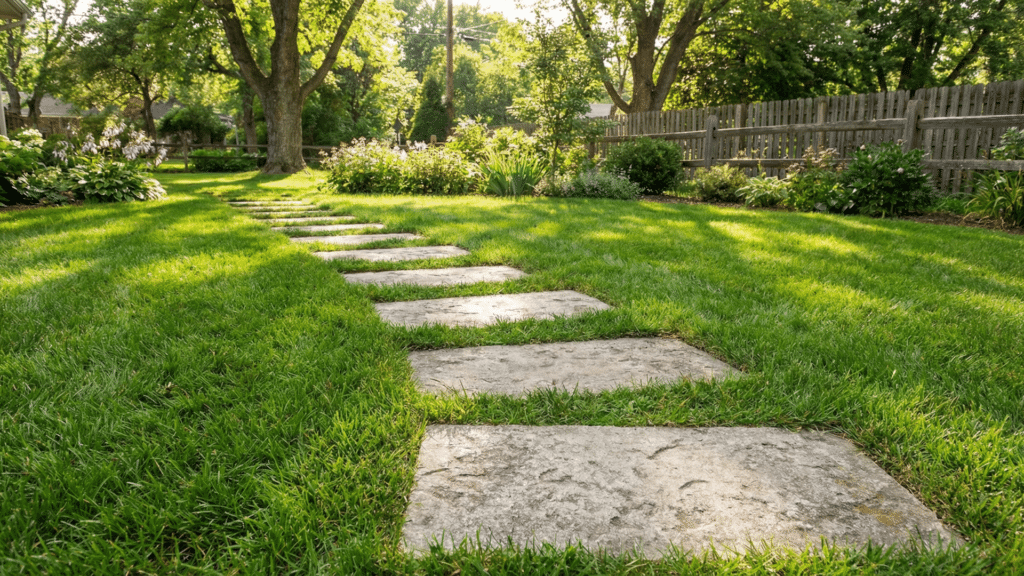
This path uses simple stone steps placed across a lawn. It’s perfect for casual walkways and doesn’t need a full dig-out.
Materials Needed:
- Concrete or natural stone pavers
- Shovel
- Sand (optional)
Steps:
- Lay out the stones where you want them on the grass.
- Step on each one to test the spacing and comfort.
- Trace around each stone with a shovel.
- Remove the grass and dig about 2 inches deep.
- Place each stone in the hole.
- Make sure the top of each stone is level with the grass.
Extra Tips:
- Add a bit of sand under each stone to help level them.
- Choose round or square stones depending on your style.
Why It Works: This DIY garden path idea uses fewer materials and keeps a green look. It’s low-cost, fast to install, and blends with your yard.
3. Mulch Garden Path
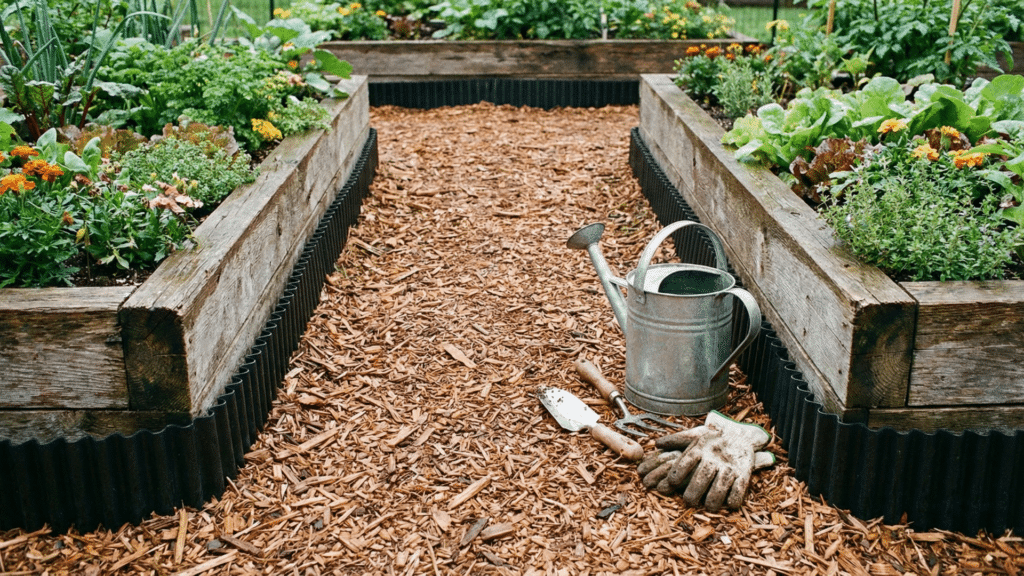
Mulch paths are soft, natural-looking, and super easy to build. They work great for veggie gardens or backyard areas.
Materials Needed:
- Mulch or bark chips
- Landscape fabric
- Stakes and string
- Shovel or hoe
- Rake
Steps:
- Mark the path with stakes and string.
- Remove grass or weeds along the line.
- Roll out landscape fabric to block weeds.
- Spread mulch 2–3 inches deep on top.
- Rake the surface to level it out.
Extra Tips:
- Refresh the mulch once a year to keep it neat.
- Use edging to stop the mulch from spreading.
Why it Works: It’s one of the cheapest DIY garden path ideas. Mulch keeps weeds down and soil moist while giving your garden a clean path.
4. Brick Path with Sand Base
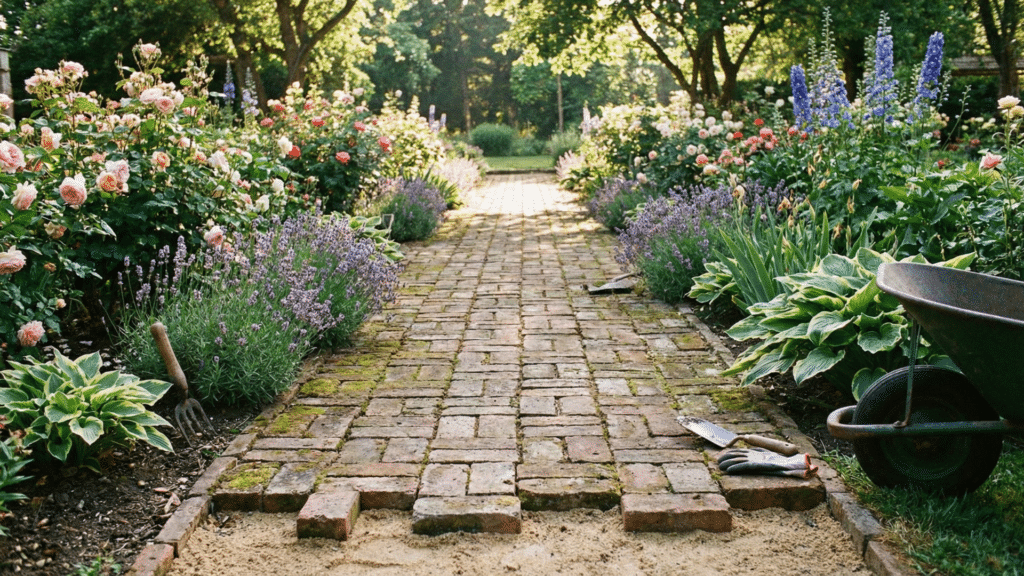
This path uses old bricks to create a strong, lasting walkway. Many people can find bricks for free or cheaply through local listings.
Materials Needed:
- Bricks
- Shovel
- Sand
- Rubber mallet
- Level
Steps:
- Mark and dig the path about 4 inches deep.
- Add a 2-inch layer of sand and level it.
- Lay bricks in a pattern, straight, basket weave, or herringbone.
- Tap bricks into place with a mallet.
- Fill gaps between bricks with sand and sweep it in.
Extra Tips:
- Use a level to keep the surface even.
- Water the sand to help it settle in the gaps.
Why It Works: Brick paths are long-lasting and look great. Using leftover or secondhand bricks keeps the cost down.
5. Wood Slice or Log Round Path
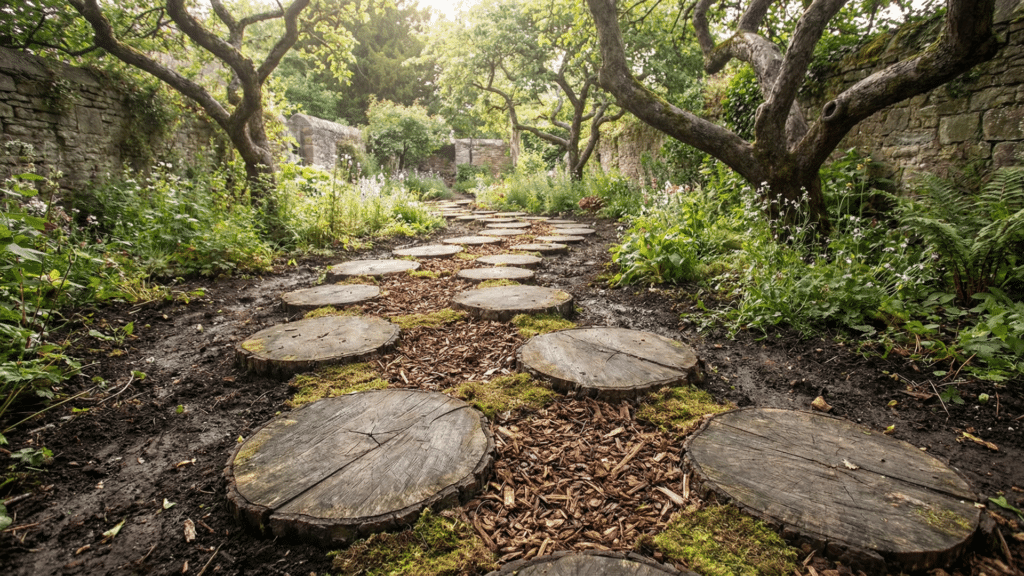
This path uses tree slices laid in the soil to create a rustic feel. It’s best for shady areas where the wood won’t dry too fast.
Materials Needed:
- Log slices (2–3 inches thick)
- Saw
- Shovel
- Sand or mulch (optional for filling gaps)
Steps:
- Cut logs into even, round slices.
- Mark the path and dig shallow holes for each slice.
- Place slices flat and level on the ground.
- Fill gaps with mulch or sand.
- Step on each one to check for stability.
Extra Tips:
- Seal the wood to protect it from rot.
- Use cedar or hardwood if possible; they last longer.
Why it Works: This DIY garden path idea is low-cost, especially if you already have wood on hand. It adds a creative, natural look to your space.
6. Crushed Stone Garden Path
Crushed stone paths are sturdy, simple to build, and great for areas that get a lot of foot traffic. The stones lock together and stay in place better than loose gravel.
Materials Needed:
- Crushed stone (not rounded gravel)
- Landscape fabric
- Edging (optional)
- Shovel
- Rake
- Tamper (manual or rented)
Steps:
- Mark and dig the path about 3–4 inches deep.
- Lay landscape fabric to block weeds.
- Pour a 2–3 inch layer of crushed stone.
- Spread and level the surface with a rake.
- Compact the stone using a tamper or by walking over it.
- Add edging if you want cleaner borders.
Extra Tips:
- Use smaller crushed stone (like ¼ inch) for a smoother walk.
- Add more stone later if it starts to settle.
Why it Works: This path is solid, drains well, and won’t shift around like loose gravel. It’s a great choice for a long-lasting, low-cost walkway.
7. DIY Pallet Wood Path
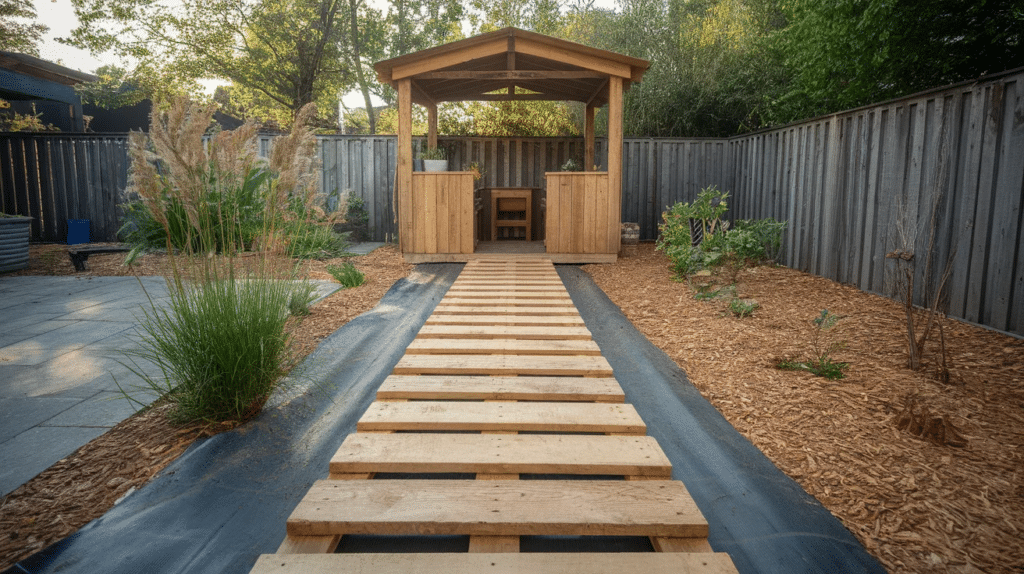
This rustic-style path reuses pallet wood and turns it into a simple walkway. It’s perfect for narrow garden beds or side yards.
Materials Needed:
- Wooden pallets
- Crowbar or hammer
- Nails or wood screws
- Saw
- Drill or screwdriver
- Weed barrier or gravel (optional)
Steps:
- Take apart pallets using a crowbar or hammer.
- Cut boards to even sizes if needed.
- Mark the path and lay down a weed barrier or gravel.
- Place boards across the width of the path, side by side.
- Secure boards with nails or screws (optional if you want a floating path).
- Check the boards are level and steady.
Extra Tips:
- Sand the boards to remove splinters.
- Seal the wood to prevent rotting.
Why it Works: Pallet wood is often free. This DIY garden path idea is ideal for tight budgets and adds a rustic touch using basic tools.
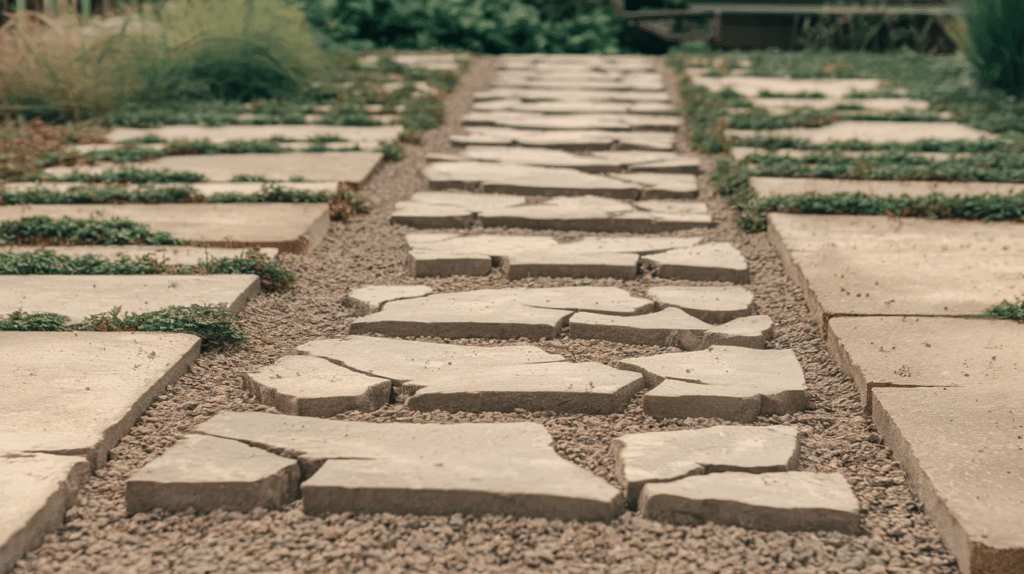
8. Flagstone and Gravel Mix Path
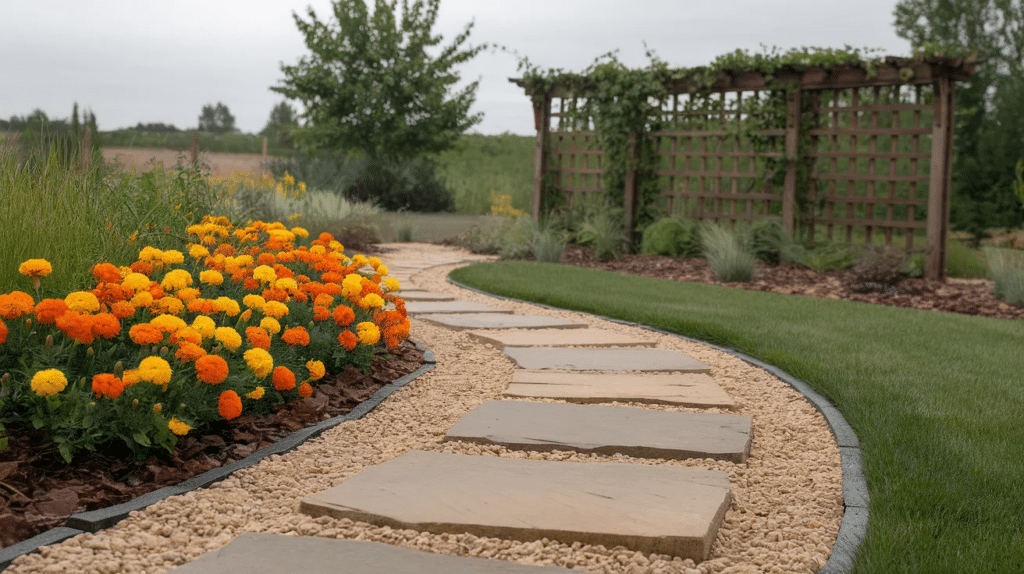
This combo path uses fewer large stones and fills the gaps with gravel. It’s a great way to stretch materials while keeping a strong, attractive look.
Materials Needed:
- Flagstones
- Gravel or pea gravel
- Landscape fabric
- Shovel
- Rake
- Tamper
Steps:
- Mark and dig out the path.
- Lay landscape fabric to stop weeds.
- Position flagstones in a walking pattern.
- Fill the rest of the space with gravel.
- Rake and tamp everything to lock it in place.
Extra Tips:
- Choose irregular-shaped flagstones for a natural look.
- Space stones evenly for easy walking.
Why it Works: This path uses less stone, lowering the cost, while still giving a clean, durable surface. It’s a perfect balance of price and appearance.
9. DIY Concrete Mold Path
With reusable molds and a bag of concrete mix, you can create patterned paths that look like bricks or stones, without the high price.
Materials Needed:
- Concrete mold (plastic, reusable)
- Concrete mix
- Water
- Bucket or wheelbarrow
- Trowel
- Release spray or cooking oil (to prevent sticking)
Steps:
- Mix concrete according to package directions.
- Spray the mold with release agent.
- Place the mold on the ground or over leveled soil.
- Pour concrete into the mold and smooth with a trowel.
- Let it sit, then remove the mold and repeat the process.
- Once dry, you can paint or seal the surface if desired.
Extra Tips:
- Work in sections to keep things simple.
- You can buy molds online in different shapes.
Why it Works: This gives you a cobblestone-style look at a fraction of the price. You only need one mold to create many pavers.
10. Brick Edging with Grass Path
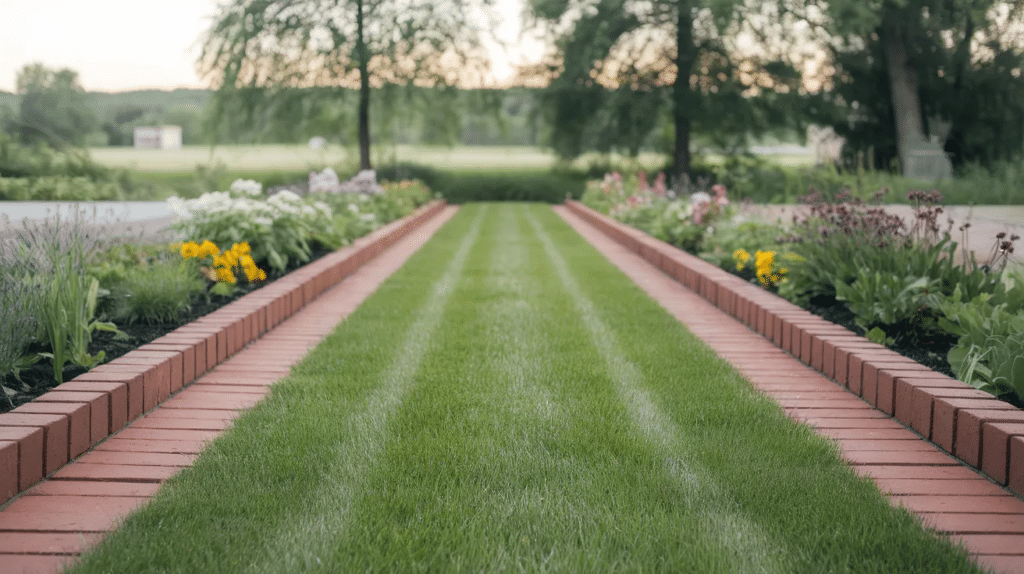
Instead of filling the entire walkway, this idea keeps the center grass and uses bricks as a tidy border.
Materials Needed:
- Bricks or pavers
- Shovel
- Level
- Rubber mallet
- Garden hose or string (to mark the shape)
Steps:
- Mark the edges of your path using a hose or string.
- Dig shallow trenches along both sides.
- Lay bricks in the trench and level them.
- Tap gently into place with a mallet.
- Keep the grass in the center trimmed low.
Extra Tips:
- Mow carefully to keep the grass tidy.
- Use a brick color that contrasts or blends with your yard.
Why it Works: You save money by only using bricks on the edges. It gives a clean look while keeping most of the natural lawn intact.
11. Recycled Concrete (Urbanite) Path
Recycled concrete, also called urbanite, is broken pieces of old sidewalks or driveways. Instead of throwing it away, use it to build a rugged garden path.
Materials Needed:
- Broken concrete pieces
- Shovel
- Gravel or sand (optional)
- Wheelbarrow (to move concrete)
Steps:
- Collect concrete from demolition sites or local giveaways.
- Dig a path wide enough for the concrete slabs.
- Place pieces like puzzle pieces, leaving small gaps between them.
- Level each slab and tamp it down with your foot or a mallet.
- Fill gaps with sand, gravel, or soil.
Extra Tips:
- Use smaller pieces for curves.
- Mix with brick or gravel if you don’t have enough concrete.
Why it Works: It’s nearly free, strong, and eco-friendly. You can create a custom pattern without spending on new materials.
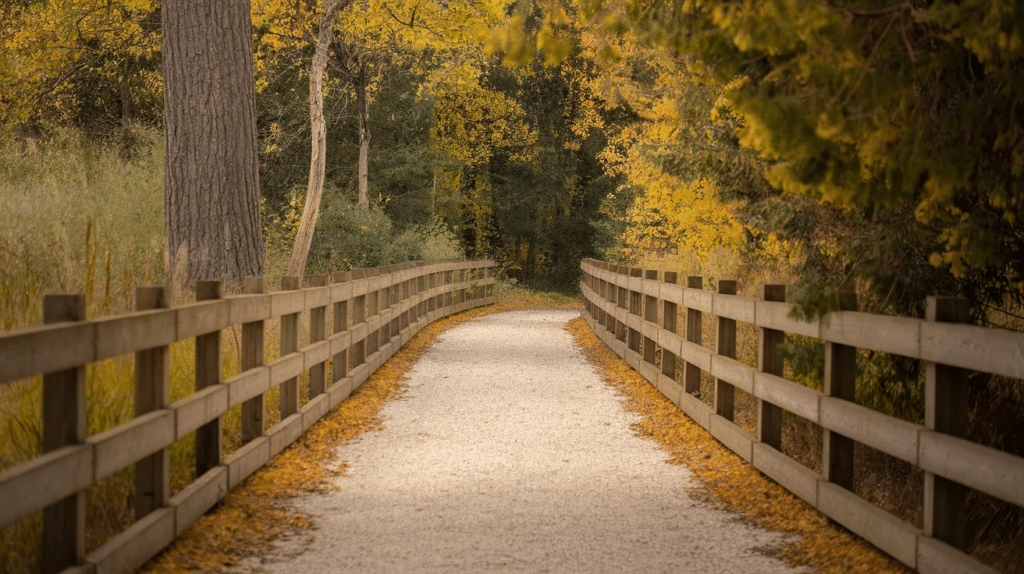
12. DIY Boardwalk with Wood Planks
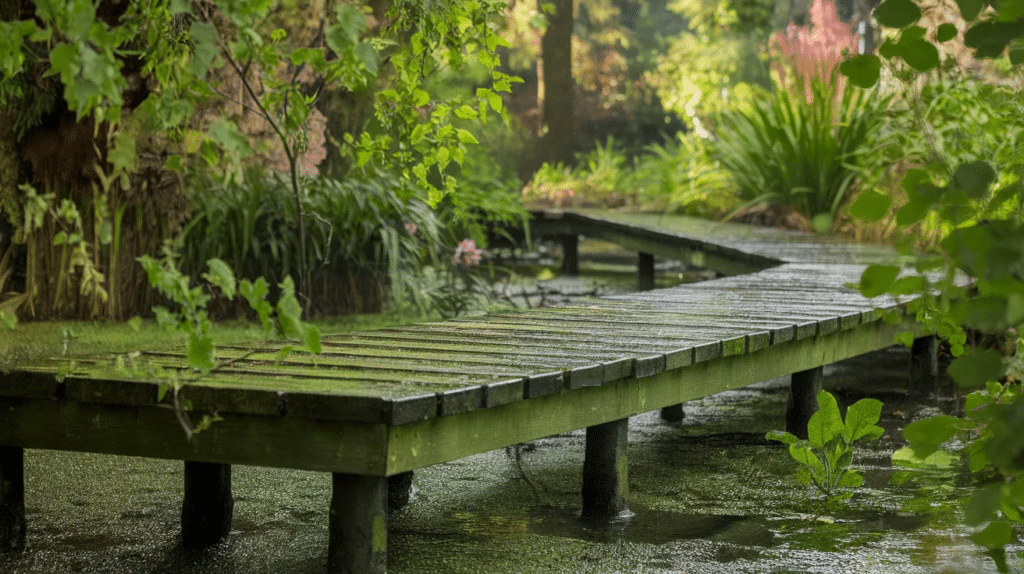
A wooden boardwalk path is great for areas with poor drainage or muddy soil. It stays raised above ground and keeps your shoes clean.
Materials Needed:
- 2×4 or 2×6 treated wood planks
- Wood screws
- Drill or screwdriver
- Landscape fabric (optional)
- Gravel or concrete blocks for support
Steps:
- Measure and mark the path area.
- Place concrete blocks or thick gravel pads at even intervals.
- Lay planks across the supports.
- Drill and secure the boards together.
- Check for wobbling and adjust if needed.
Extra Tips:
- Leave small gaps between planks to allow water to drain.
- Use wood rated for outdoor use (pressure-treated or cedar).
Why it Works: It creates a clean, dry walkway. This is one of the best DIY garden path ideas for soggy areas or spots with uneven ground.
13. Stone and Mulch Mix Path
This idea combines stepping stones with mulch to save money and create a soft, natural feel. It’s easy to change or expand later.
Materials Needed:
- Flat stones or pavers
- Mulch or bark
- Landscape fabric
- Shovel
Steps:
- Mark the path and lay down landscape fabric.
- Place large flat stones evenly apart.
- Press stones down into the soil or fabric base.
- Fill the remaining space with mulch and spread it evenly.
Extra Tips:
- Choose large stones to reduce the number you need.
- Use dark mulch to contrast with light-colored stones.
Why It Works: It uses fewer expensive materials and blends into garden beds easily. The mulch makes it soft and weed-resistant.
14. Shell Path (Good for Coastal Areas)

Crushed shell paths are common in coastal regions where shells are cheap or free. The shells break down over time but stay firm underfoot.
Materials Needed:
- Crushed shells
- Landscape fabric
- Shovel
- Rake
Steps:
- Mark and dig the path 2–3 inches deep.
- Lay down landscape fabric.
- Pour crushed shells over the fabric.
- Rake to spread evenly and level the path.
Extra Tips:
- If shells are damp, allow them to dry before walking on them.
- Refill every couple of years as they break down.
Why it Works: In coastal areas, this is a low-cost and unique DIY garden path idea. The white shells brighten up the yard and drain water easily.
15. Straight Gravel Path with Wood Edging
This path is simple and straight, with gravel for the walkway and wood along the sides to hold it in place. It’s a great option for side yards or narrow spaces.
Materials Needed:
- Gravel
- Wooden boards or landscape timbers
- Nails or screws
- Stakes (for support)
- Shovel
- Rake
Steps:
- Mark a straight line for your path.
- Dig out the path about 3 inches deep.
- Install wooden edging on both sides and secure with stakes.
- Lay landscape fabric (optional).
- Pour gravel and spread it evenly with a rake.
Extra Tips:
- Use a level to check the edging before pouring gravel.
- Paint or stain the wood for longer life.
Why it Works: It’s fast, low-cost, and looks neat. The wood edging keeps the gravel from spreading out into your yard.
16. DIY Concrete Slab Squares
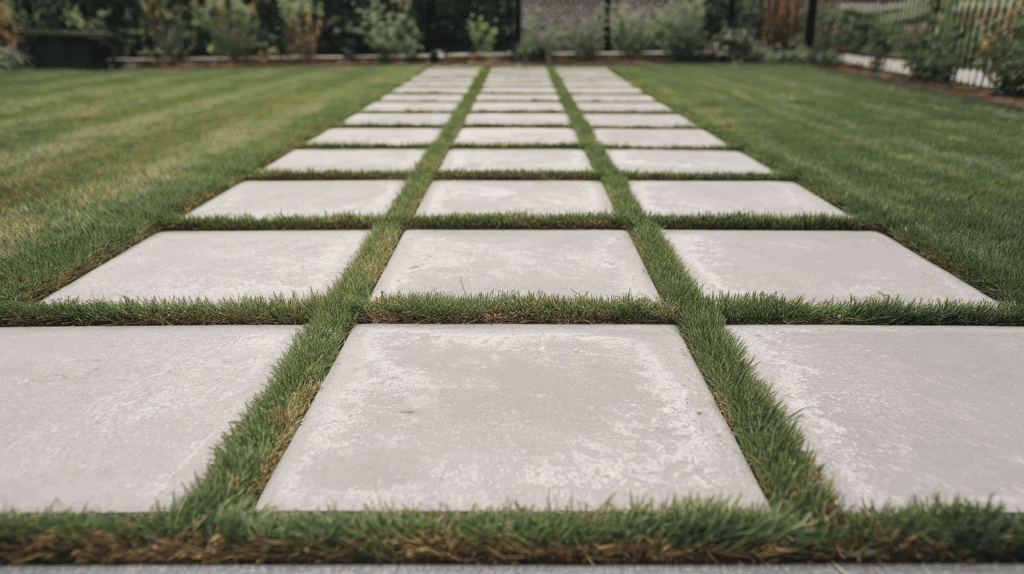
If you want a modern look on a small budget, you can make square concrete pavers yourself using simple molds or containers.
Materials Needed:
- Concrete mix
- Square molds (wood frames, baking pans, or plastic containers)
- Trowel
- Water
- Cooking spray or mold release
Steps:
- Mix concrete in a bucket or wheelbarrow.
- Spray the molds with cooking oil to stop sticking.
- Pour the concrete into the molds and smooth with a trowel.
- Let the slabs set for 24–48 hours until dry.
- Remove slabs from the molds.
- Dig and place them along your path, leveling each one as you go.
Extra Tips:
- Add pebbles or small stones to the top for texture.
- Make several slabs in batches over a weekend.
Why it Works: It’s much cheaper than buying large pavers. You can customize the size and finish while saving money.
17. Landscape Timber Steps on Slopes
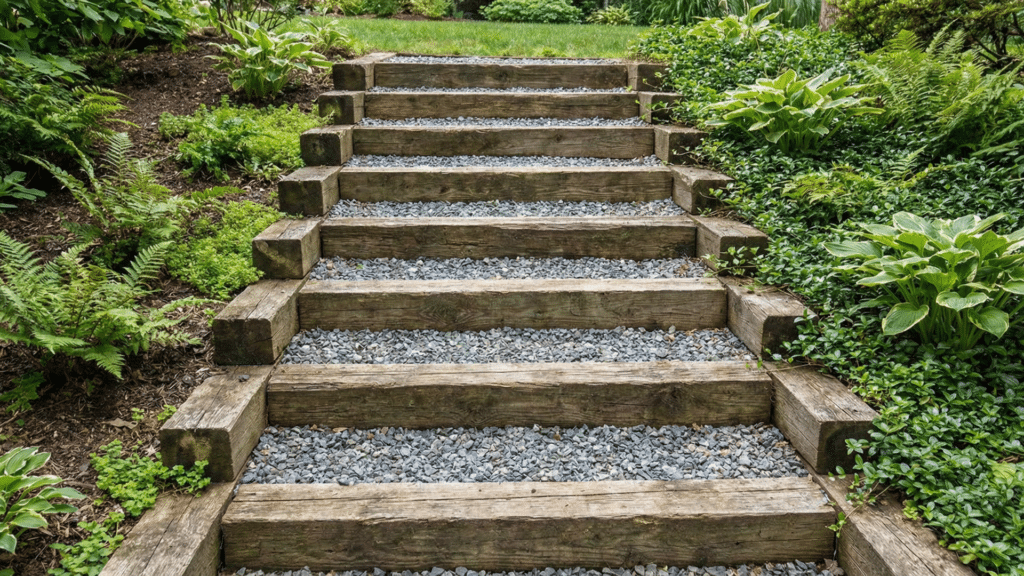
If your yard has a slope, use landscape timbers to build simple steps instead of a flat path. It’s functional and cost-effective.
Materials Needed:
- Landscape timbers
- Rebar or metal stakes
- Drill
- Gravel
- Shovel
Steps:
- Measure and mark where each step will go.
- Cut landscape timbers to fit the width of the path.
- Place each timber where a step is needed.
- Drive rebar through the timber to hold it in place.
- Fill the step area behind each timber with gravel or soil.
Extra Tips:
- Use two timbers stacked if you want taller steps.
- Keep the slope gentle and even for safety.
Why it Works: It’s a cheap and sturdy way to create steps on a hill or slope. Landscape timbers are durable and easy to install.
18. Grass Path with Stone Borders
Instead of covering the entire area, let the grass remain in the center and add stone or brick edging along each side to shape the walkway.
Materials Needed:
- Bricks, pavers, or flat stones
- Shovel
- Rubber mallet
- Level
Steps:
- Mow the area where you want the path.
- Mark both edges using a string or a hose.
- Dig shallow trenches along both edges.
- Lay bricks or stones into the trenches.
- Tap each one with a mallet to keep them even.
- Maintain the grass by trimming often.
Extra Tips:
- Works best for light foot traffic.
- Use contrasting brick color for visual appeal.
Why it Works: You use fewer materials by keeping the grass, but still create a neat and defined path. It’s budget-friendly and easy to build.
19. Painted Stepping Stones
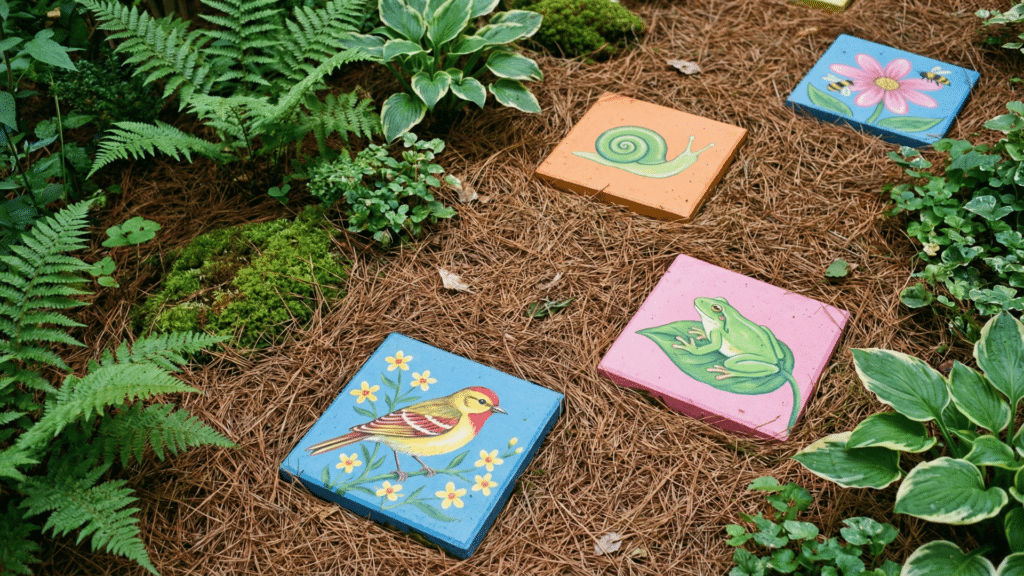
Add color and personality to your path by painting regular stepping stones. It’s a great idea for front yards, side paths, or even kids’ play areas.
Materials Needed:
- Concrete pavers or flat stones
- Outdoor paint or concrete stain
- Paintbrushes or stencils
- Sealer (for protection)
Steps:
- Clean the stones before painting.
- Paint each stone with designs, patterns, or solid colors.
- Let them dry fully.
- Apply an outdoor sealer to keep them weatherproof.
- Place them along your path area and level them in the soil.
Extra Tips:
- Let kids help with painting for a fun weekend project.
- Match the colors to your flowers or garden style.
Why it Works: This idea turns plain stones into eye-catching path features with just paint. It’s creative, affordable, and one of the most fun DIY garden path ideas.
Final Tips to Save Money
Even small garden projects can add up. Before you buy anything, check out these simple ways to cut costs and make the most of what you already have.
- Use free or leftover materials, such as bricks, wood, or gravel from past projects.
- Check local listings (like Facebook Marketplace or Craigslist) for free pavers, pallets, or stone.
- Keep the path simple, using straight lines or basic shapes to reduce material use.
- Start small and build more later if needed.
- Work with what’s available in your area; some materials cost more depending on location.
- Borrow tools instead of buying if you only need them for one project.
To Conclude
You don’t need to spend a lot to build a useful garden path. With simple tools and low-cost materials, you can build a walkway that fits your yard and works well year-round.
Many of these ideas can be done over the weekend using things you already have. From gravel and mulch to painted stones or pallet wood, there’s a style for every yard.
Planning your path before you begin will help you save time and money. Pick the idea that fits your space and get started step by step.
Ready to build your path? Choose your favorite idea from the list and start today.