
Installing a shower pan is one of the most important steps in building or remodeling a shower. A properly installed pan creates a solid base and helps prevent water damage over time.
If it is set incorrectly, leaks, mold, and structural issues can follow. That is why careful planning and correct installation matter.
Many homeowners choose to handle this project themselves to save money and gain hands-on experience. With the right preparation and clear guidance, the process can feel manageable.
This step-by-step guide explains how to properly install a shower pan, ensuring a stable, long-lasting foundation for the shower space.
How Proper Installation Protects Your Bathroom
A shower pan serves as the waterproof base for a shower. It directs water toward the drain while protecting the subfloor and framing below.
When installed correctly, it prevents leaks, reduces the risk of mold growth, and supports the weight of tile and glass panels, as well as daily use. When installed poorly, even small gaps or uneven spots can lead to serious water damage.
Understanding how to install a shower pan the right way is not just about setting it in place. It involves careful preparation, proper alignment of the drain, proper support, and secure sealing.
Each step builds on the one before it. Omitting details can lead to long-term problems that are expensive to fix.
Types of Shower Pans

Before starting, it is important to know the type of shower pan being installed. The method can vary depending on the material and design.
- Acrylic or Fiberglass Shower Pans: These are lightweight, pre-formed units. They are common in residential bathrooms and are often used in remodel projects. They are designed for easier installation and usually require a mortar base for support.
- Tiled Shower Pans: These are built on site using a sloped mortar bed and a waterproof liner or membrane. They offer more design flexibility but require more skill and time.
- Solid Surface Shower Bases: These are heavy, durable pans made from engineered stone or composite materials. They often require strong subfloor support and precise leveling.
Tools and Materials Needed
| Category | Item |
|---|---|
| Measuring Tools | Tape Measure |
| Measuring Tools | 4-Foot Level |
| Cutting Tools | Utility Knife |
| Cutting Tools | Circular Saw or Jigsaw |
| Fastening Tools | Drill and Drill Bits |
| Fastening Tools | Screwdriver |
| Application Tools | Caulking Gun |
| Mixing Tools | Bucket and Mixing Paddle |
| Application Tools | Notched Trowel |
| Core Material | Shower Pan/Base |
| Plumbing Material | Drain Assembly |
| Base Support | Mortar Mix or Sand Mix |
| Sealing Material | 100% Silicone Sealant |
| Sealing Material | Plumber’s Putty |
| Fasteners | Corrosion-Resistant Screws |
| Waterproofing | Waterproof Membrane |
Step-by-Step: How to Install a Shower Pan
Installing a shower pan requires careful planning, accurate measurements, and attention to detail at every stage.
Step 1: Measure the Shower Space and Remove the Old Pan
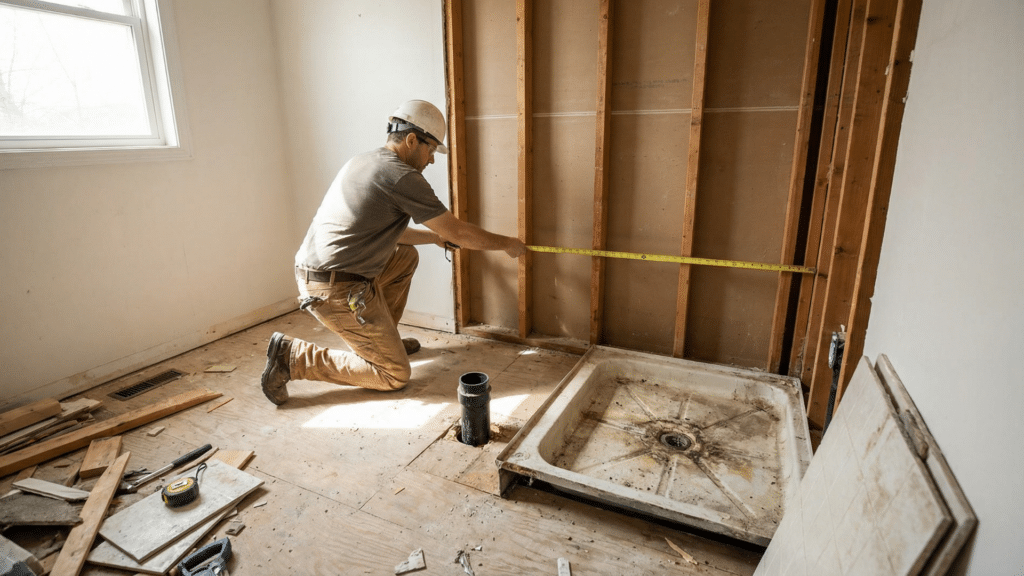
Measure the width and depth of the shower opening. Measure the distance from the walls to the drain location.
Confirm the height and condition of the surrounding studs. Compare all dimensions to the shower pan manufacturer’s specifications.
If replacing an old unit, remove it carefully. Remove the drain cover and, if accessible, disconnect the drain assembly. Cut through old caulk lines and gently pry the pan away from the walls and floor.
After removal, inspect the exposed area closely. Check for water damage, mold, or soft subfloor sections. Replace any damaged materials before moving forward.
Step 2: Inspect, Level, and Reinforce the Subfloor
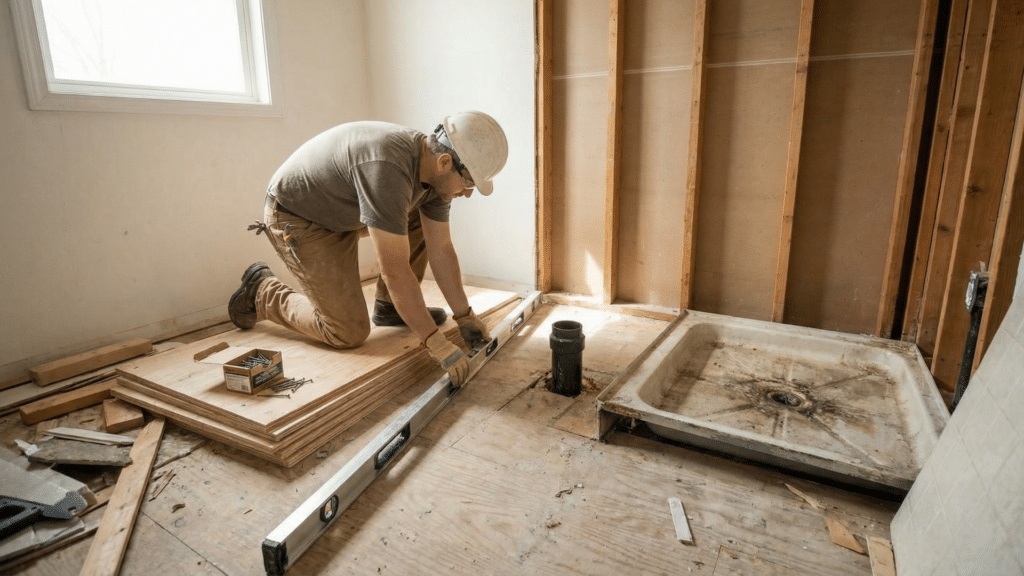
Use a long level to check the surface in multiple directions. The floor must be flat and stable. If you find dips or slopes, correct them with floor leveling compound or sand high spots.
An uneven base can cause the shower pan to flex, potentially cracking the surface or breaking the drain seal over time.
If the floor feels weak or flexible, reinforce it. Add screws to secure loose boards. Install an additional layer of plywood if necessary. Most manufacturers recommend at least ¾-inch plywood for adequate support. A stable subfloor ensures the pan will not shift after installation.
Step 3: Dry Fit the Shower Pan and Prepare the Drain
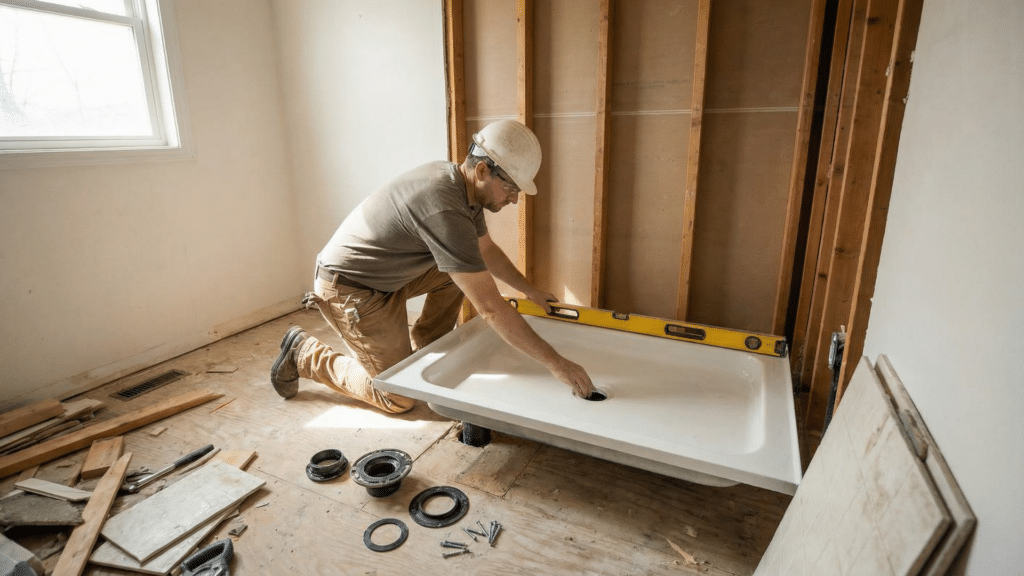
Before applying mortar, place the shower pan in position to confirm proper fit.
Check that it sits flat on the subfloor. Confirm that the drain hole aligns exactly with the drain pipe. Make sure the edges sit flush against wall studs. Use a level to verify it is even from front to back and side to side.
If needed, make minor plumbing adjustments. The drain pipe must extend to the correct height. Trim or extend it before final installation if required.
Attach the drain assembly to the shower pan according to the manufacturer’s instructions. Insert the drain body into the opening, apply plumber’s putty or gasket as directed, and tighten the locking ring carefully. Avoid over-tightening, as that can crack the base.
Once everything aligns correctly, remove the pan to prepare for mortar installation.
Step 4: Prepare and Apply the Mortar Base
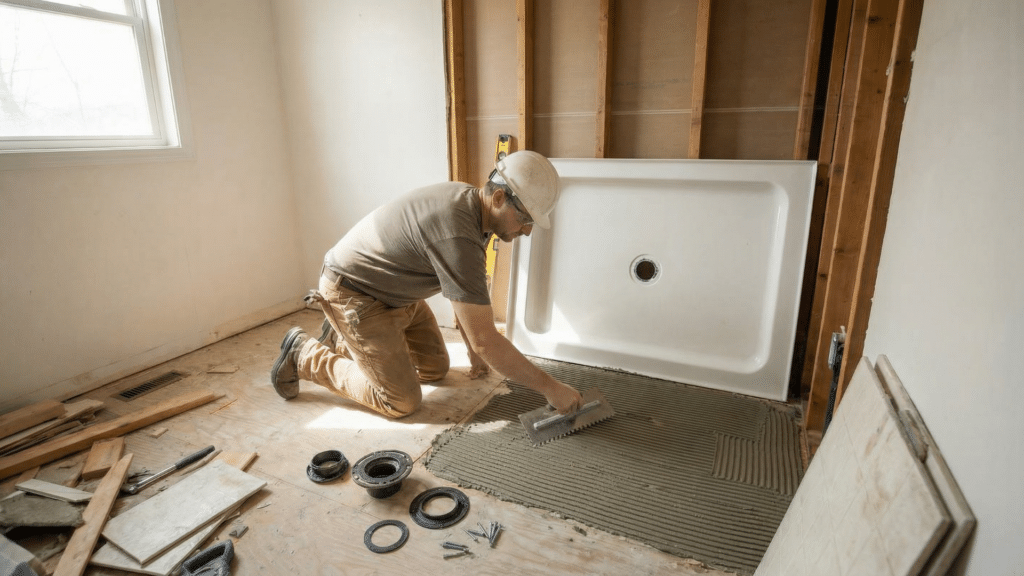
Most pre-formed shower pans must be installed over a mortar bed to prevent movement and provide full support.
Mix the mortar according to package directions until it reaches a thick, workable consistency. It should hold its shape without being overly wet.
Spread the mortar evenly over the subfloor where the pan will sit. Focus on the central support area and avoid blocking the drain opening. Do not apply mortar to areas the manufacturer advises against.
The mortar bed should provide uniform support across the entire underside of the shower pan. This prevents flexing, cracking, and long-term structural problems.
Step 5: Set, Level, and Secure the Shower Pan
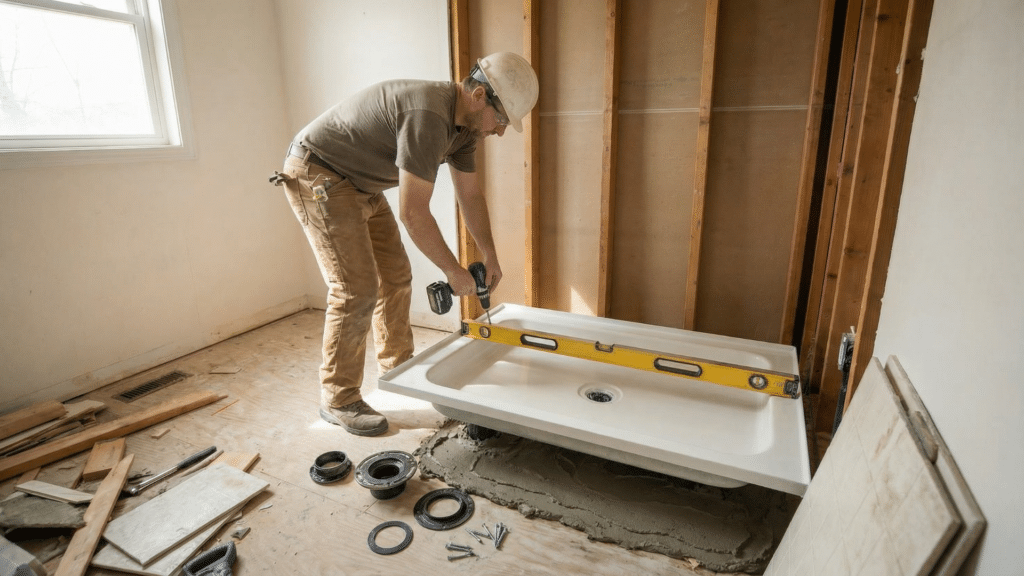
Carefully lower the shower pan into the mortar bed. Press it down evenly across the surface. Avoid stepping heavily in one spot. Apply consistent pressure to ensure full contact with the mortar.
Immediately check for level in multiple directions. Make adjustments while the mortar is still workable. Do not lift the pan once it is seated, as this can create air pockets beneath it.
Connect the drain pipe if required during this stage.
Allow the mortar to cure completely according to the manufacturer’s instructions, which typically takes about 24 hours.
Once cured, secure the shower pan flanges to the wall studs using corrosion-resistant screws. Follow the recommended spacing, usually every 8 to 12 inches. Do not drive screws through the base of the pan. Only fasten through the designated flange areas.
Step 6: Waterproof and Seal the Installation
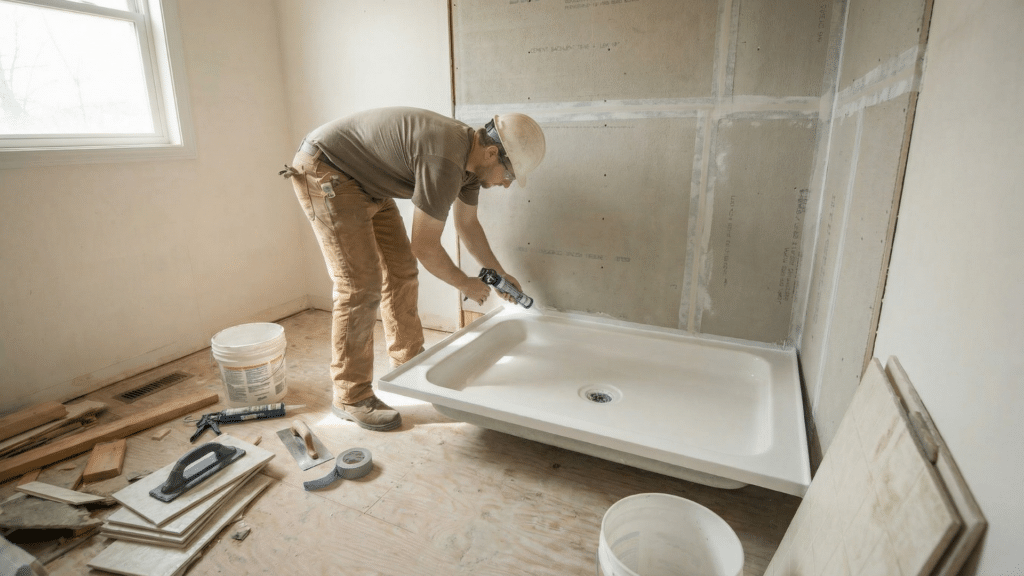
Install cement board or waterproof backer board on the walls above the shower pan. Leave a small gap between the bottom of the board and the flange.
Apply a waterproof membrane over seams, corners, and fasteners. Seal all transitions carefully to create a continuous moisture barrier.
Finally, apply 100% silicone sealant along the joint where the shower pan meets the wall. Smooth the bead evenly to prevent gaps. Allow the sealant to cure fully before using the shower.
As a final check, test the installation by running water and inspecting for leaks. Confirm proper drainage and ensure the base feels stable underfoot.
Maintenance Tips for Long-Term Performance
Even after learning how to properly install a shower pan, ongoing care is still important.
- Avoid dropping heavy objects on the base.
- Keep drain covers clean to prevent clogs.
- Reapply silicone sealant if it shows signs of wear.
- Inspect for cracks or movement annually.
Routine checks help extend the life of the installation.
Common Mistakes to Avoid
Small installation errors can lead to leaks, cracks, and costly repairs. Knowing what to avoid helps ensure a stable and watertight shower base.
- Skipping the mortar bed: This can cause the pan to flex, shift, or crack over time.
- Failing to level the subfloor: An uneven surface can lead to poor drainage and structural stress.
- Misaligning the drain connection: Even a slight misalignment can cause leaks.
- Over-tightening the drain assembly: Excess pressure may crack the shower base.
- Using incorrect fasteners: Standard screws may rust and weaken the installation.
- Fastening through the base rather than the flange can compromise the waterproof seal.
- Not allowing proper curing time: Mortar and sealant need full curing before use.
- Using regular caulk instead of silicone: Only 100% silicone provides proper waterproofing.
- Skipping wall waterproofing: Moisture can seep behind walls, causing hidden damage.
- Failing to perform a leak test: Undetected leaks can lead to costly repairs later.
Final Thoughts
Installing a shower pan requires patience, accuracy, and close attention to detail. Each stage, from measuring and preparing the subfloor to leveling and sealing, plays a critical role in creating a stable and watertight foundation.
Rushing the process or skipping key steps can lead to leaks, cracks, and costly repairs later.
When installed correctly, a shower pan provides strong support and long-term performance for the entire shower system.
Take time to follow each step carefully and review the manufacturer’s instructions before starting. If this guide helped, consider bookmarking it or sharing it with others planning a bathroom project.