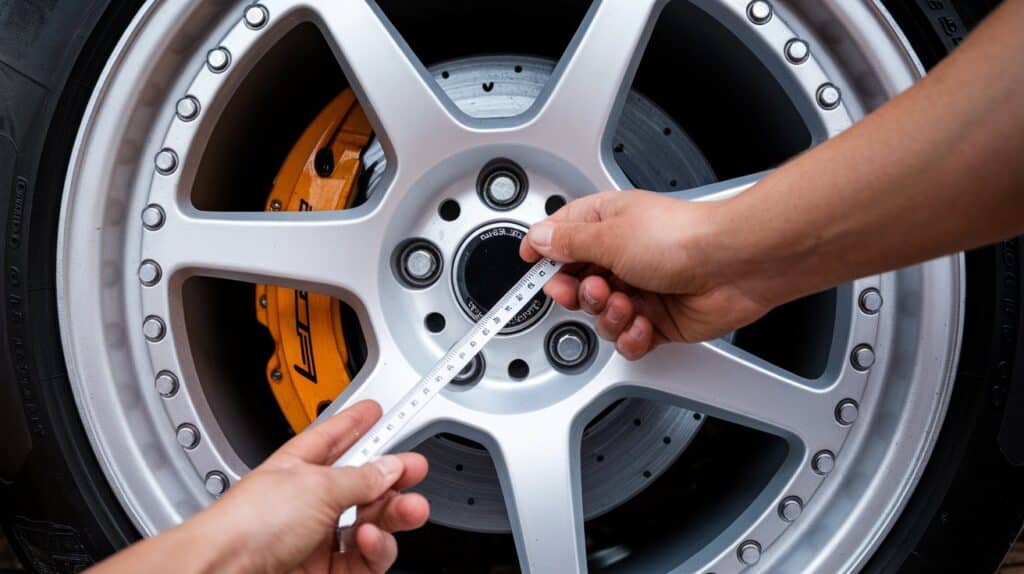
Have you ever felt confused when shopping for new wheels? You’re not alone.
Many car owners struggle to find their vehicle’s bolt pattern, a key detail for proper wheel fitment.
Don’t worry–we’re here to help. This guide will simplify finding your bolt pattern, focusing on the common 5×100 configuration.
You’ll learn to measure accurately, understand what the numbers mean, and confidently choose the right wheels.
Whether you’re a car enthusiast or need a replacement wheel, you’ll soon be an expert in bolt patterns.
Ready to unlock the secrets hidden in your wheel hubs?
We’ll walk you through each step, making it easy for you to find the perfect fit for your vehicle. Let’s get started!
Step-by-Step Instructions: Finding Your Bolt Pattern
Determining your vehicle’s bolt pattern is critical in selecting the right wheels.
This comprehensive guide will walk you through the process, focusing on the common 5×100 configuration.
Following these detailed instructions will help you accurately identify your bolt pattern, whether you’re new to wheel shopping or an experienced car enthusiast.
1. Gathering Your Tools

Before you begin the measurement process, it’s essential to have the right tools at hand.
This preparation will ensure accurate measurements and a smoother overall experience.
Step 1: Collect a Tape Measure
- Choose a tape measure that displays both inches and millimeters.
- Ensure the tape measure is in good condition with clear markings.
Step 2: Obtain a Ruler with 32nd-Inch Markings
- This will help with precise measurements of smaller distances.
- A metal ruler is preferable for durability and accuracy.
Step 3: Prepare a Pen and Paper
- You’ll need these to record your measurements.
- Consider creating a simple table to organize your findings.
Step 4: Acquire a Bolt Pattern Gauge (optional)
- While unnecessary, this tool can simplify the measurement process, especially for 5-lug patterns like the 5×100.
- This investment can save time and increase accuracy if you plan to work on multiple vehicles.
Step 5: Gather any Vehicle-Specific Tools
- Depending on your vehicle, you might need a lug wrench or jack to access the wheel hub.
- Consult your vehicle’s manual if you’re unsure about any specific requirements.
2. Counting the Lugs

The first step in identifying your bolt pattern is accurately counting the number of lugs on your wheel.
For the 5×100 pattern we’re focusing on, you’ll be looking for five lugs, but it’s important to know that vehicles can have different lug counts.
Step 1: Prepare your Vehicle
- Park your vehicle on a level surface and engage the parking brake.
- If necessary, loosen the lug nuts slightly before lifting the vehicle.
Step 2: Access the Wheel Hub
- If possible, count the lugs without removing the wheel.
- If the wheel design obscures the lugs, you may need to remove the wheel for a clear view.
Step 3: Count the Lug Holes or Studs
- Start at any point and count each lug hole or stud.
- For a 5×100 pattern, you should count exactly five lugs.
Step 4: Verify Your Count
- Double-check your count to ensure accuracy.
- If you’re unsure, ask someone else to count and compare results.
Step 5: Record the Lug Count
- Write down the number of lugs on your prepared paper.
- This number will be the first part of your bolt pattern designation.
3. Measuring the Bolt Circle

Once you’ve confirmed the lug count, it’s time to measure the bolt circle.
This process differs slightly depending on the number of lugs, but we’ll focus on the 5-lug pattern like the 5×100.
Step 1: Position Your Wheel for Measurement
- If the wheel is still on the vehicle, ensure it’s clean, and you have clear access to the lug holes.
- If you’ve removed the wheel, place it on a flat surface with the back facing up.
Step 2: Locate the Correct Measurement Points
- For a 5-lug pattern, you’ll measure from the outside edge of one lug hole to the center of the lug hole across from it (skipping two holes).
- This can be tricky, so take your time to identify the correct points.
Step 3: Take the Measurement
- Use your tape measure to determine the distance between these points.
- For a 5×100 pattern, this measurement should be close to 100mm or about 3.94 inches.
Step 4: Repeat the Measurement
- Take the same measurement starting from a different lug hole.
- This helps verify your initial measurement and account for any manufacturing variations.
Step 5: Record Your Measurements
- Write down both measurements on your paper.
- If they differ slightly, calculate the average for more accuracy.
4. Cross-Referencing Your Measurements

After taking your measurements, it’s crucial to cross-reference them with standard bolt pattern sizes to ensure accuracy.
Step 1: Consult a Bolt Pattern Chart
- Look for a comprehensive chart that includes both metric and imperial measurements.
- Many online resources provide these charts, which can also be found in automotive reference books.
Step 2: Locate your Lug Count
- Find the chart section corresponding to your lug count (in this case, five lugs).
Step 3: Find the Closest Match to Your Measurement
- Look for the measurement closest to what you recorded.
- For a 5×100 pattern, your measurement should align closely with the 100mm or 3.94-inch listing.
Step 4: Consider Measurement Tolerances
- If your measurement is slightly off, it could be due to manufacturing tolerances or measurement errors.
- Generally, it’s likely the correct pattern if you’re within 1-2mm of a standard size.
Step 5: Verify with Multiple Sources
- Cross-check your findings with vehicle-specific databases or manufacturer specifications.
- This extra step can help confirm your bolt pattern, especially if your measurements were close to multiple standard sizes.
Understanding the 5×100 Bolt Pattern

The 5×100 bolt pattern is a common configuration in the automotive world.
Let’s explore what it means, how to measure it, and why it’s important for your vehicle.
The 5×100 bolt pattern refers to a specific wheel mounting configuration. Here’s what the numbers mean:
- The “5” indicates that the wheel has five lug holes.
- The “100” represents the circle’s diameter formed by the center of these lug holes, measured in millimeters.
This pattern creates a precise arrangement that ensures proper fitment and safety when mounting wheels to your vehicle.
Common Vehicles
Many popular car models use the 5×100 bolt pattern. You’ll find this configuration on vehicles from several manufacturers, including:
- Volkswagen: Golf (1998-2014), Jetta (1998-2014), Beetle (1998-2010)
- Subaru: Impreza (1993-present), Forester (1998-2013), Legacy (1990-2004)
- Toyota: Corolla (2003-2018), Matrix (2003-2013), Prius (2004-2015)
This list isn’t exhaustive, but it shows how widespread this pattern is across different car brands and models.
Importance
Recognizing and correctly identifying the 5×100 bolt pattern is crucial for several reasons:
- Proper wheel fitment: Using wheels with the correct bolt pattern ensures they attach securely to your vehicle.
- Safety: Mismatched bolt patterns can lead to improper wheel installation, potentially causing accidents.
- Performance: The right bolt pattern allows for optimal weight distribution and balance, affecting your vehicle’s handling and ride quality.
How to Measure a 5×100 Bolt Pattern
Preparation
Before measuring, ensure you have the right tools and setup:
- Clean the wheel or hub area to remove any dirt or debris.
- If possible, remove the wheel for easier access to the bolt holes.
- Gather a measuring tape, preferably one that shows millimeters.
Measuring Steps
To accurately measure a 5×100 bolt pattern:
- Locate any lug hole as your starting point.
- Measure from the outer edge of this hole to the center of the lug hole that’s two spaces over (skipping one hole).
- This measurement should be very close to 100mm (about 3.94 inches).
Using a bolt pattern gauge can simplify this process:
- Place the gauge over the lug holes.
- Rotate the gauge until all five holes align perfectly.
- Read the measurement indicated on the gauge.
Precision Tips
Accuracy is key when measuring bolt patterns. Keep these points in mind:
- Double-check your measurements to ensure consistency.
- Be aware of similar patterns like 5x98mm or 5x108mm, which can be easily confused with 5x100mm.
- If your measurement is slightly off (within 1-2mm), it’s likely due to manufacturing tolerances or measurement error. In this case, 5×100 is probably correct.
Why the 5×100 Bolt Pattern Matters
Aftermarket Relevance
The 5×100 bolt pattern plays a significant role in the aftermarket wheel industry:
- Wheel options: Knowing your bolt pattern opens up a wide range of wheel choices from various manufacturers.
- Fitment guarantees: Many wheel retailers use bolt patterns to ensure the wheels you’re buying will fit your vehicle.
- Cross-compatibility: Some wheels are designed to fit multiple bolt patterns, including 5×100, increasing your options.
Customization Impact
Understanding your vehicle’s bolt pattern is crucial for customization:
- Styling choices: The 5×100 pattern allows for a variety of wheel styles, from classic to modern designs.
- Performance upgrades: Knowing your bolt pattern ensures compatibility with high-performance wheels when upgrading for better handling or racing.
- Restoration projects: For vintage vehicles with the 5×100 pattern, this knowledge helps find period-correct or modern wheels that fit.
Fitment Risks
Misidentifying the 5×100 bolt pattern can lead to several issues:
- Incorrect purchases: Buying wheels with the wrong bolt pattern wastes time and money.
- Installation problems: Attempting to install wheels with an incorrect pattern can damage the wheels, lug studs, or hub.
- Safety hazards: Improperly fitted wheels, due to a bolt pattern mismatch, can come loose while driving, potentially causing accidents.
- Performance issues: Even if forced to fit, wheels with the wrong bolt pattern can cause vibrations, uneven tire wear, and poor handling.
Additional Considerations and Tips
As we wrap up our guide on bolt patterns, focusing on the 5×100 configuration, let’s explore some additional considerations and tips to ensure the most accurate results.
1. Importance of Accuracy
When it comes to bolt pattern identification, precision is key.
This is especially true for 5-lug patterns like the 5×100, which can be trickier to measure than four or 6-lug configurations.
- Always measure at least twice: This simple step can save you from costly mistakes when purchasing wheels.
- Use the right technique: For 5-lug patterns, measure from the outer edge of one lug hole to the center of the third hole (skipping one).
- Be aware of similar patterns: The 5×100 pattern can be easily confused with 5×98 or 5×10⁸. A small measurement error can lead to identifying the wrong pattern.
2. Consistency Check
It’s not enough to measure just one wheel. For the most accurate results:
- Measure both front and rear wheels: In most cases, they should have the same bolt pattern.
- Be aware of exceptions: Some vehicles, especially older models or those that have been modified, might have different patterns for front and rear wheels.
- If you find a discrepancy: Double-check your measurements and consult your vehicle’s manual or a professional to confirm.
2. Common Mistakes to Avoid
Identification of Errors
Being aware of common mistakes can help you avoid them:
- Incorrect measuring points: Many people mistakenly measure from center-to-center of lug holes instead of edge-to-center for 5-lug patterns.
- Using worn or imprecise tools: Old tape measures or rulers with worn markings can lead to inaccurate readings.
- Rounding measurements: Precise measurements are crucial. Don’t round to the nearest whole number.
Prevention Tips
Here are some practical tips to ensure accurate measurements:
- Use a ruler marked in 32nds of an inch: This level of precision can make a significant difference in identifying the correct pattern.
- Take measurements in both inches and millimeters: This helps avoid conversion errors and provides a useful cross-reference.
- Mark your starting point: To avoid confusion during measurement, use a piece of tape or a marker to indicate your starting lug hole.
- Clean the wheel hub: Dirt or debris can interfere with accurate measurements, so ensure the area is clean before you start.
Final Thoughts
You’ve now mastered the art of finding your vehicle’s bolt pattern, with a special focus on the 5×100 configuration.
By following our step-by-step guide, you can accurately measure and choose the right wheels for your ride.
Remember, precision is key – always double-check your measurements, and don’t hesitate to seek professional help if you’re unsure.
This knowledge is invaluable whether you’re looking to upgrade your wheels, replace a damaged one, or simply understand your vehicle better.
The world of wheel fitment doesn’t have to be confusing or intimidating.
With the tools and techniques we’ve covered, you’re well-prepared to make informed decisions about your vehicle’s wheels.
So go ahead, apply what you’ve learned, and enjoy the confidence that comes with knowing your bolt pattern inside out!

